Supergatewayでstdio MCPサーバーをHTTP/SSEに変換する
本記事では、stdioベースのMCPサーバーを、Supergatewayを用いてHTTP(SSE)通信に対応させる手法を紹介します。MCPサーバーをGCPやCloud Run上にデプロイすることを想定した構成例を示しながら、Supergateway導入のメリット・具体的なDocker構成・クライアント接続方法まで一通りカバーします。
モチベーション
MCPサーバーはトランスポート層としてstdio transportとStreamable HTTP transportがサポートされています。[1]
MCPサーバーをコンテナ等にデプロイして一般公開したい場合や、認証機能を追加してセキュリティを担保したい場合など、stdio では対応しきれず Streamable HTTP に切り替えたくなるケースがあります。
しかし、stdioのみをサポートしているMCPサーバーも多く、既にstdioで作成されたMCPサーバーをStreamable HTTPに対応させるには手間がかかります。
そこで、便利なのがSupergatewayです。
詳細は次章で述べますが、Supergatewayを使用するとMCPサーバーの実装を一切変えずstdio → HTTPへの変換が可能になります。
Supergatewayとは
Supergatewayは、MCP対応のstdioベースサーバーをSSEやWebSocketに変換する軽量ブリッジツールです。Supergatewayを使用することでローカルやリモートでstdio経由しか対応していないMCPサーバーに、Webやネットワーク経由でクライアントアクセスできます。
また、本文書ではstdio→SSEへの変換を取り扱いますが、これ以外にもSSE → stdioやstdio → WS等の変換にも対応しています。
HTTPで公開する場合、Supergatewayのオプションでヘッダーの追加ができ、認証やセキュリティ設定が実現できます。
構成
以下の構成図は、Supergatewayを各MCPサーバーの前段に配置し、MCPクライアントがHTTP(SSE)通信でSupergateway経由でMCPサーバーと通信している様子を表しています。
MCPクライアントと、MCPサーバーをそれぞれ独立したコンテナに配置しています。
SSE(HTTP通信)で疎通することによりMCPサーバーに認証認可を用意することができるほか、アプリケーションと独立した環境でMCPサーバーを用意することで安全性も担保できます。
MCPサーバーの作成
検証環境
以下の端末環境で検証しています。
- macOS Sequoia 15.5
- Docker version 24.0.2, build cb74dfc
Supergateway+MCPサーバーをDockerコンテナで起動
はじめに、dockerコンテナ上にMCPサーバーとSupergatewayを用意して起動します。
MCPサーバーは@modelcontextprotocol/server-filesystemを使用します。
FROM node:20

WORKDIR /app

# Supergatewayをインストール
RUN npm install -g supergateway @modelcontextprotocol/server-filesystem

# SupergatewayのSSE通信で使用するポート(8002)を公開
EXPOSE 8002

CMD ["npx", "-y", "supergateway", \
    "--stdio", "npx -y @modelcontextprotocol/server-filesystem .", \
    "--port", "8002", "--baseUrl", "http://localhost:8002", \
    "--logLevel", "debug"]
コンテナをビルド&起動
docker build -t my-supergateway .
docker run -p 8002:8002 my-supergateway
起動成功時に確認できるログ例を以下に示します。
[supergateway] Starting...
[supergateway] Supergateway is supported by Supermachine (hosted MCPs) - https://supermachine.ai
[supergateway]   - outputTransport: sse
[supergateway]   - Headers: (none)
[supergateway]   - port: 8002
[supergateway]   - stdio: npx -y @modelcontextprotocol/server-filesystem .
[supergateway]   - ssePath: /sse
[supergateway]   - messagePath: /message
[supergateway]   - CORS: disabled
[supergateway]   - Health endpoints: (none)
[supergateway] Listening on port 8002
[supergateway] SSE endpoint: http://localhost:8002/sse
[supergateway] POST messages: http://localhost:8002/message
[supergateway] Child stderr: Secure MCP Filesystem Server running on stdio

[supergateway] Child stderr: Allowed directories: [ '/app' ]
接続確認
MCPサーバーの動作確認として@modelcontextprotocol/inspectorを使用して先ほど起動したMCPサーバーとの接続確認をします。
npx @modelcontextprotocol/inspector
起動に成功すると以下のようなログが流れ自動で画面が開きます
Starting MCP inspector...
⚙️ Proxy server listening on localhost:6277
🔑 Session token: **********************
   Use this token to authenticate requests or set DANGEROUSLY_OMIT_AUTH=true to disable auth

🚀 MCP Inspector is up and running at:
   http://localhost:6274/?MCP_PROXY_AUTH_TOKEN=**********************

🌐 Opening browser...
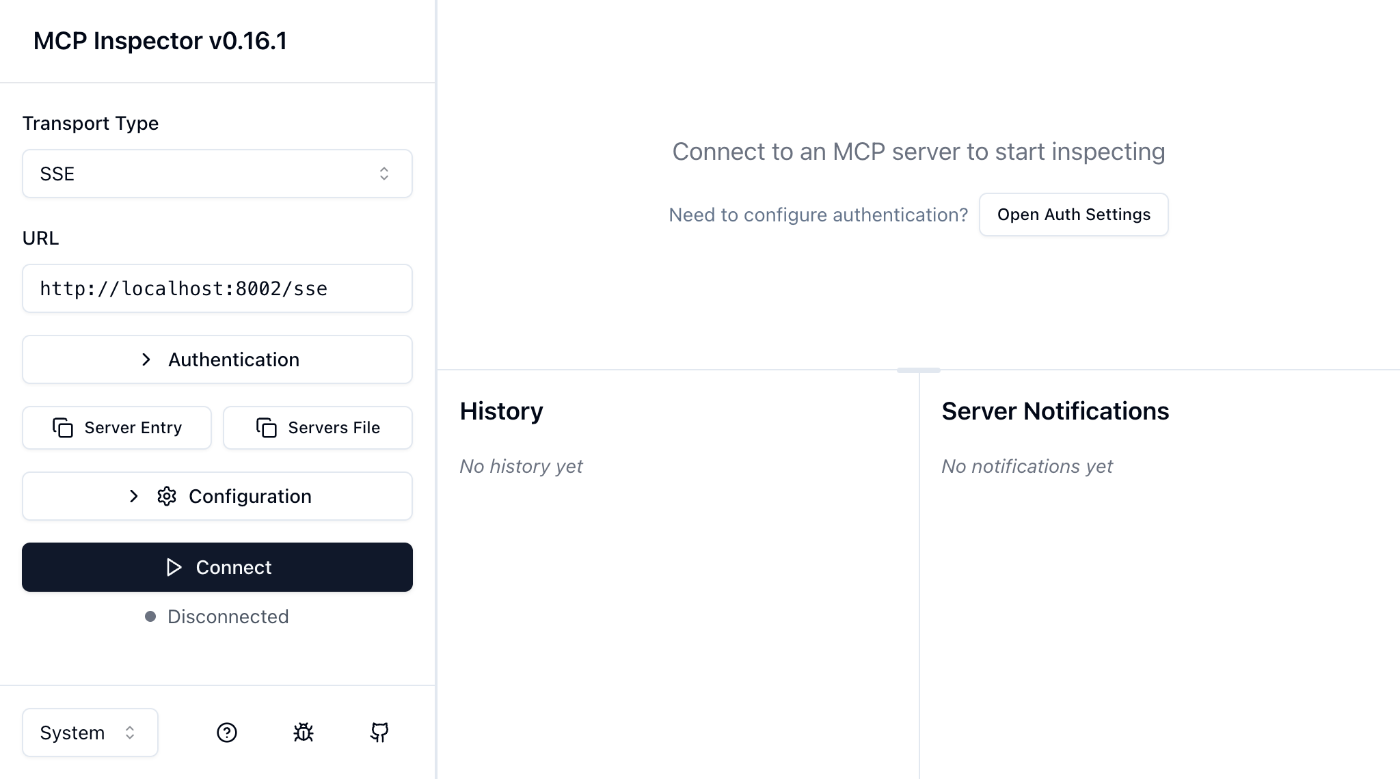
Transport TypeがSSE、URLがhttp://localhost:8002になっていることを確認し、UIからConnectボタン押下します。
接続成功後、「List Tools」と書かれたボタンを押下すると先ほど起動したMCPサーバーで使用可能なToolの一覧がレスポンスとして返ってきます。
レスポンス
{
  "tools": [
    {
      "name": "read_file",
      "description": "Read the complete contents of a file from the file system. Handles various text encodings and provides detailed error messages if the file cannot be read. Use this tool when you need to examine the contents of a single file. Use the 'head' parameter to read only the first N lines of a file, or the 'tail' parameter to read only the last N lines of a file. Only works within allowed directories.",
      "inputSchema": {
        "type": "object",
        "properties": {
          "path": {
            "type": "string"
          },
          "tail": {
            "type": "number",
            "description": "If provided, returns only the last N lines of the file"
          },
          "head": {
            "type": "number",
            "description": "If provided, returns only the first N lines of the file"
          }
        },
        "required": [
          "path"
        ],
        "additionalProperties": false,
        "$schema": "http://json-schema.org/draft-07/schema#"
      }
    },
    {
      "name": "read_multiple_files",
      "description": "Read the contents of multiple files simultaneously. This is more efficient than reading files one by one when you need to analyze or compare multiple files. Each file's content is returned with its path as a reference. Failed reads for individual files won't stop the entire operation. Only works within allowed directories.",
      "inputSchema": {
        "type": "object",
        "properties": {
          "paths": {
            "type": "array",
            "items": {
              "type": "string"
            }
          }
        },
        "required": [
          "paths"
        ],
        "additionalProperties": false,
        "$schema": "http://json-schema.org/draft-07/schema#"
      }
    },
    {
      "name": "write_file",
      "description": "Create a new file or completely overwrite an existing file with new content. Use with caution as it will overwrite existing files without warning. Handles text content with proper encoding. Only works within allowed directories.",
      "inputSchema": {
        "type": "object",
        "properties": {
          "path": {
            "type": "string"
          },
          "content": {
            "type": "string"
          }
        },
        "required": [
          "path",
          "content"
        ],
        "additionalProperties": false,
        "$schema": "http://json-schema.org/draft-07/schema#"
      }
    },
    {
      "name": "edit_file",
      "description": "Make line-based edits to a text file. Each edit replaces exact line sequences with new content. Returns a git-style diff showing the changes made. Only works within allowed directories.",
      "inputSchema": {
        "type": "object",
        "properties": {
          "path": {
            "type": "string"
          },
          "edits": {
            "type": "array",
            "items": {
              "type": "object",
              "properties": {
                "oldText": {
                  "type": "string",
                  "description": "Text to search for - must match exactly"
                },
                "newText": {
                  "type": "string",
                  "description": "Text to replace with"
                }
              },
              "required": [
                "oldText",
                "newText"
              ],
              "additionalProperties": false
            }
          },
          "dryRun": {
            "type": "boolean",
            "default": false,
            "description": "Preview changes using git-style diff format"
          }
        },
        "required": [
          "path",
          "edits"
        ],
        "additionalProperties": false,
        "$schema": "http://json-schema.org/draft-07/schema#"
      }
    },
    {
      "name": "create_directory",
      "description": "Create a new directory or ensure a directory exists. Can create multiple nested directories in one operation. If the directory already exists, this operation will succeed silently. Perfect for setting up directory structures for projects or ensuring required paths exist. Only works within allowed directories.",
      "inputSchema": {
        "type": "object",
        "properties": {
          "path": {
            "type": "string"
          }
        },
        "required": [
          "path"
        ],
        "additionalProperties": false,
        "$schema": "http://json-schema.org/draft-07/schema#"
      }
    },
    {
      "name": "list_directory",
      "description": "Get a detailed listing of all files and directories in a specified path. Results clearly distinguish between files and directories with [FILE] and [DIR] prefixes. This tool is essential for understanding directory structure and finding specific files within a directory. Only works within allowed directories.",
      "inputSchema": {
        "type": "object",
        "properties": {
          "path": {
            "type": "string"
          }
        },
        "required": [
          "path"
        ],
        "additionalProperties": false,
        "$schema": "http://json-schema.org/draft-07/schema#"
      }
    },
    {
      "name": "list_directory_with_sizes",
      "description": "Get a detailed listing of all files and directories in a specified path, including sizes. Results clearly distinguish between files and directories with [FILE] and [DIR] prefixes. This tool is useful for understanding directory structure and finding specific files within a directory. Only works within allowed directories.",
      "inputSchema": {
        "type": "object",
        "properties": {
          "path": {
            "type": "string"
          },
          "sortBy": {
            "type": "string",
            "enum": [
              "name",
              "size"
            ],
            "default": "name",
            "description": "Sort entries by name or size"
          }
        },
        "required": [
          "path"
        ],
        "additionalProperties": false,
        "$schema": "http://json-schema.org/draft-07/schema#"
      }
    },
    {
      "name": "directory_tree",
      "description": "Get a recursive tree view of files and directories as a JSON structure. Each entry includes 'name', 'type' (file/directory), and 'children' for directories. Files have no children array, while directories always have a children array (which may be empty). The output is formatted with 2-space indentation for readability. Only works within allowed directories.",
      "inputSchema": {
        "type": "object",
        "properties": {
          "path": {
            "type": "string"
          }
        },
        "required": [
          "path"
        ],
        "additionalProperties": false,
        "$schema": "http://json-schema.org/draft-07/schema#"
      }
    },
    {
      "name": "move_file",
      "description": "Move or rename files and directories. Can move files between directories and rename them in a single operation. If the destination exists, the operation will fail. Works across different directories and can be used for simple renaming within the same directory. Both source and destination must be within allowed directories.",
      "inputSchema": {
        "type": "object",
        "properties": {
          "source": {
            "type": "string"
          },
          "destination": {
            "type": "string"
          }
        },
        "required": [
          "source",
          "destination"
        ],
        "additionalProperties": false,
        "$schema": "http://json-schema.org/draft-07/schema#"
      }
    },
    {
      "name": "search_files",
      "description": "Recursively search for files and directories matching a pattern. Searches through all subdirectories from the starting path. The search is case-insensitive and matches partial names. Returns full paths to all matching items. Great for finding files when you don't know their exact location. Only searches within allowed directories.",
      "inputSchema": {
        "type": "object",
        "properties": {
          "path": {
            "type": "string"
          },
          "pattern": {
            "type": "string"
          },
          "excludePatterns": {
            "type": "array",
            "items": {
              "type": "string"
            },
            "default": []
          }
        },
        "required": [
          "path",
          "pattern"
        ],
        "additionalProperties": false,
        "$schema": "http://json-schema.org/draft-07/schema#"
      }
    },
    {
      "name": "get_file_info",
      "description": "Retrieve detailed metadata about a file or directory. Returns comprehensive information including size, creation time, last modified time, permissions, and type. This tool is perfect for understanding file characteristics without reading the actual content. Only works within allowed directories.",
      "inputSchema": {
        "type": "object",
        "properties": {
          "path": {
            "type": "string"
          }
        },
        "required": [
          "path"
        ],
        "additionalProperties": false,
        "$schema": "http://json-schema.org/draft-07/schema#"
      }
    },
    {
      "name": "list_allowed_directories",
      "description": "Returns the list of directories that this server is allowed to access. Use this to understand which directories are available before trying to access files.",
      "inputSchema": {
        "type": "object",
        "properties": {},
        "required": []
      }
    }
  ]
}
上記のようなツール一覧のレスポンスが返ってくればMCPサーバーのセットアップは完了です。
MCPクライアントの作成
Claude DesktopやCursorなど様々なMCPクライアント[2]が用意されているのでどれを使用しても良いのですが、Dockerコンテナ上で動かすということでNext.jsで作成したアプリケーション上でMCPクライアントを呼び出してMCPサーバーとの疎通を図ります。
Next.jsでのアプリケーション作成手順は溢れかえっているので、MCPクライアントを作成する部分のみをピックアップして記載します。
今回はmodelcontextprotocol/typescript-sdkを使用してMCPクライアントを作成します。
- sdkをインストール
npm install @modelcontextprotocol/sdk
- MCPクライアントを作成
SupergatewayでSSEで起動したのでSSEClientTransportを使用します。
Streamable HTTPであればStreamableHTTPClientTransportになります。
import { Client } from '@modelcontextprotocol/sdk/client/index.js';
import { SSEClientTransport } from '@modelcontextprotocol/sdk/client/sse.js'

export class McpClient {
  protected client: Client;
  protected httpTransport: SSEClientTransport;
  private clientConnectionStatus: boolean = false;

  constructor() {
    this.client = new Client(
      {
        name: 'clientName',
        version: '1.0.0',
      },
      {
        capabilities: {
          tools: {},
        },
      },
    );
  }

  /**
   * SSEを使用してMCPサーバーに接続する
   * MCPサーバーコンテナの起動時間節約のためオンデマンドで接続する
   */
  async connectSseMcpServer(url: string = 'http://localhost:3000') {
    if(this.clientConnectionStatus) {
      return
    }
    try {
      this.httpTransport = new SSEClientTransport(new URL(url + "/sse"));
      console.log("set transport")
      await this.client.connect(this.httpTransport);
      console.log("connected")
      this.clientConnectionStatus = true;
    } catch (error) {
      console.error(`Failed to connect to MCP server via SSE:`, error);
      throw error;
    }
  }

  /**
   * MCPサーバーとの接続を閉じる
   */
  async closeConnection() {
    if (this.clientConnectionStatus) {
      await this.client.close();
      this.clientConnectionStatus = false;
      console.log('MCP server connection closed.');
    } else {
      console.log('No active MCP server connection to close.');
    }
  }

  /**
   * 使用可能なツールの一覧を取得する
   * @returns
   */
  async listTools(): Promise<any[]> {
    if (!this.clientConnectionStatus) {
      console.error('MCP server is not connected. Please connect first.');
      return [];
    }
    const tools = await this.client.listTools();
    return tools.tools;
  }

  /**
   * ツールを呼び出す
   * @param toolName
   * @param toolArgs
   * @returns
   */
  async callTool(toolName: string, toolArgs: Record<string, any>) {
    if (!this.clientConnectionStatus) {
      console.error('MCP server is not connected. Please connect first.');
      return;
    }
    const result = await this.client.callTool({
      name: toolName,
      arguments: toolArgs,
    });
    return result;
  }
}
作成したMCPクライアントを以下のように呼び出してMCPサーバーと疎通します。
const mcpClient = new McpClient();
# MCPサーバーとのコネクションを確立する
await mcpClient.connectSseMcpServer('http://localhost:8002');
# MCPサーバーからツールの一覧を取得する
const tools = await mcpClient.listTools();

# MCPサーバーとのコネクションを切断する
await mcpClient.closeConnection()
最後に
MCPクライアントとMCPサーバー+SupergatewayをそれぞれDockerコンテナで起動し、HTTP通信での呼び出しを検証してみました。
身近なところでMCPサーバーを一般公開する際の認証をどうするかといった話題が出ていたり、趣味で作成しているAIエージェントのアプリケーションをGCPのCloud runにデプロイする想定でエージェントとMCPサーバーをどう分離するか思案していたのですが、Supergatewayを使用することで簡単に課題を解決できました。
実務で導入する場合は、ヘッダーを追加して認証をつけた接続の方法、Supergatewayをかますことによるパフォーマンスの影響、Supergateway自体がセキュリティ要件を満たすか(ライセンスはMITなので商用利用自体は可能)あたりを追加で検証する必要がありそうです。
※本文書は一通り手書きした後、以下のプロンプトを使ってAIにレビューさせて一部文章を修正しています→何回かラリーして仕上げています。
プロンプト
あなたはベテランのソフトウェアエンジニアで私の直属の上司に当たります。今から公開前の技術文書を渡すので厳しい目でレビューをして下さい。この文書は社名を背負って公開されるため、一般の目に晒されて評判を落とすような表現や誤りがないかチェックして下さい。レビューによる指摘事項は箇条書きで修正しやすいように教えて下さい
{この記事全文}
参考文献
- https://zenn.dev/ncdc/articles/abac82858b2b01
- https://github.com/supercorp-ai/supergateway
- https://modelcontextprotocol.io/docs/concepts/architecture
- https://github.com/modelcontextprotocol/typescript-sdk/tree/main/src/client
Discussion