GoogleのAgentDvelopmentKitを試してみた
はじめに
ADKの理解を深めるためにやってみたことの記録です。
AgentDvelopmentKit(ADK)とは
Google Cloud Next 2025で発表されたマルチエージェント開発のフレームワークです。
同時に発表された、Agent2Agent (A2A) プロトコルと密接に関係しています。
公式ドキュメント
ドキュメントの内容はとても詳しく書いてあり、フレームワークの概念がよくわかります。
ドキュメントを一通り読み終えたので、クイックスタートをやってみようと思います。
環境
- Mac
- Python 3.10.14
1. 環境設定とADKのインストール
まずは仮想環境作成
$ python -m venv .venv
$ source .venv/bin/activate
(.venv) $
adk インストール
(.venv) $ pip install google-adk
2. エージェントプロジェクトを作成する
プロジェクトルート直下にmulti_tool_agentディレクトリを作成。(名前はなんでも良い)
$ mkdir multi_tool_agent
初期ファイルを作成
(.venv) $ echo "from . import agent" > multi_tool_agent/__init__.py
同じディレクトリにagentファイルを作成。
(.venv) $ touch multi_tool_agent/agent.py
以下の内容を記述
import datetime
from zoneinfo import ZoneInfo
from google.adk.agents import Agent

def get_weather(city: str) -> dict:
    """Retrieves the current weather report for a specified city.

    Args:
        city (str): The name of the city for which to retrieve the weather report.

    Returns:
        dict: status and result or error msg.
    """
    if city.lower() == "new york":
        return {
            "status": "success",
            "report": (
                "The weather in New York is sunny with a temperature of 25 degrees"
                " Celsius (41 degrees Fahrenheit)."
            ),
        }
    else:
        return {
            "status": "error",
            "error_message": f"Weather information for '{city}' is not available.",
        }


def get_current_time(city: str) -> dict:
    """Returns the current time in a specified city.

    Args:
        city (str): The name of the city for which to retrieve the current time.

    Returns:
        dict: status and result or error msg.
    """

    if city.lower() == "new york":
        tz_identifier = "America/New_York"
    else:
        return {
            "status": "error",
            "error_message": (
                f"Sorry, I don't have timezone information for {city}."
            ),
        }

    tz = ZoneInfo(tz_identifier)
    now = datetime.datetime.now(tz)
    report = (
        f'The current time in {city} is {now.strftime("%Y-%m-%d %H:%M:%S %Z%z")}'
    )
    return {"status": "success", "report": report}


root_agent = Agent(
    name="weather_time_agent",
    model="gemini-2.0-flash",
    description=(
        "Agent to answer questions about the time and weather in a city."
    ),
    instruction=(
        "You are a helpful agent who can answer user questions about the time and weather in a city."
    ),
    tools=[get_weather, get_current_time],
)
手順に従って.envを作る
(.venv) $ touch multi_tool_agent/.env
手順にはないけど、忘れないうちに.gitignoreも作っておく
(.venv) $ echo -e ".env\n.venv" > .gitignore
ディレクトリはこんな感じ
$ tree -L 2
.
└── multi_tool_agent
    ├── __init__.py
    └── agent.py
3. モデルを設定する
APIキーを利用する方法と、GCPプロジェクトでVertex AIを利用する方法がある。
今回は実務を想定して、Vertex AIを利用する方法を選択。
(.venv) $ gcloud auth login
新しいプロジェクトを作成しprojectをセット
(.venv) $ gcloud projects create <PROJECT_ID>
(.venv) $ gcloud config set project <PROJECT_ID>
Vertex AI APIを有効化
(.venv) $ gcloud services enable aiplatform.googleapis.com
請求先アカウントの登録も忘れずに。
環境変数を設定
+ GOOGLE_GENAI_USE_VERTEXAI=TRUE
+ GOOGLE_CLOUD_PROJECT=<PROJECT_ID>
+ GOOGLE_CLOUD_LOCATION=us-central1
4. エージェントを実行する
実行パターンは3種類ある。
UI、CLI、ローカルサーバーが用意されている。すごく良い。
一つずつ試してみる。
1. CLIとして実行
(.venv) $ adk run multi_tool_agent
Log setup complete: /var/folders/_k/cs5_3l113x7d9w36jwgsgr9w0000gn/T/agents_log/agent.20250417_030606.log
To access latest log: tail -F /var/folders/_k/cs5_3l113x7d9w36jwgsgr9w0000gn/T/agents_log/agent.latest.log
Running agent weather_time_agent, type exit to exit.
user:
user: の後にプロンプトを書けば良いらしい。
書いてみた。Enterを押す。
user: What is the weather in New York?
[weather_time_agent]: The weather in New York is sunny with a temperature of 25 degrees Celsius (41 degrees Fahrenheit).
user: ニューヨークの天気はどうですか?
[weather_time_agent]: ニューヨークの天気情報は入手できません。
LLMから返事が来ると、またuser:が表示され、入力待ち状態になるので会話が可能。
"new york"というワードで判定するプロンプトなので、日本語だとだめだったが、エラーメッセージはちゃんと日本語で返ってきた。
2. APIサーバーとして実行
(.venv) $ adk api_server
INFO:     Started server process [82287]
INFO:     Waiting for application startup.
INFO:     Application startup complete.
INFO:     Uvicorn running on http://0.0.0.0:8000 (Press CTRL+C to quit)
別のターミナルを立ち上げてcurlでリクエストを送ってみる。
ドキュメントによると、最初に新しいsessionを作成し、そのsessionに対してRequestを送ればいいらしい。
まずはsession作成リクエストを送る。(レスポンスが見やすいようにjqを付加)
(.venv) $ curl -X POST http://0.0.0.0:8000/apps/multi_tool_agent/users/u_123/sessions/s_123 \
  -H "Content-Type: application/json" \
  -d '{"state": {"key1": "value1", "key2": 42}}' | jq .
{
  "id": "s_123",
  "app_name": "multi_tool_agent",
  "user_id": "u_123",
  "state": {
    "state": {
      "key1": "value1",
      "key2": 42
    }
  },
  "events": [],
  "last_update_time": 1744909220.8479528
}
以下のパラメータは今回はなんでも良い。
| param | value |
|---|---|
| user_id | u_123 |
| session_id | s_123 |
重要なのはmulti_tool_agentの部分。agentのディレクトリ名を指定してあげる必要がある。
$ tree -L 2
.
└── multi_tool_agent #これ
    ├── __init__.py
    ├── __pycache__
    └── agent.py
sessionが作成されたので、次にこのsessionにrunをリクエストしてみる。
$ curl -X POST http://0.0.0.0:8000/run \
-H "Content-Type: application/json" \
-d '{
"app_name": "multi_tool_agent",
"user_id": "u_123",
"session_id": "s_123",
"new_message": {
    "role": "user",
    "parts": [{
    "text": "Hey whats the weather in new york today"
    }]
}
}' | jq .
[
  {
    "content": {
      "parts": [
        {
          "functionCall": {
            "id": "adk-1b5c5e9d-f619-47d2-a94d-e4a336bb150a",
            "args": {
              "city": "new york"
            },
            "name": "get_weather"
          }
        }
      ],
      "role": "model"
    },
    "invocation_id": "e-e9b55c95-2413-44ff-8c3b-e172b455d914",
    "author": "weather_time_agent",
    "actions": {
      "state_delta": {},
      "artifact_delta": {},
      "requested_auth_configs": {}
    },
    "long_running_tool_ids": [],
    "id": "tp3TxR50",
    "timestamp": 1744908833.553174
  },
  {
    "content": {
      "parts": [
        {
          "functionResponse": {
            "id": "adk-1b5c5e9d-f619-47d2-a94d-e4a336bb150a",
            "name": "get_weather",
            "response": {
              "status": "success",
              "report": "The weather in New York is sunny with a temperature of 25 degrees Celsius (41 degrees Fahrenheit)."
            }
          }
        }
      ],
      "role": "user"
    },
    "invocation_id": "e-e9b55c95-2413-44ff-8c3b-e172b455d914",
    "author": "weather_time_agent",
    "actions": {
      "state_delta": {},
      "artifact_delta": {},
      "requested_auth_configs": {}
    },
    "id": "6Wlq1PQ3",
    "timestamp": 1744908835.656347
  },
  {
    "content": {
      "parts": [
        {
          "text": "OK. The weather in New York is sunny with a temperature of 25 degrees Celsius (41 degrees Fahrenheit).\n"
        }
      ],
      "role": "model"
    },
    "invocation_id": "e-e9b55c95-2413-44ff-8c3b-e172b455d914",
    "author": "weather_time_agent",
    "actions": {
      "state_delta": {},
      "artifact_delta": {},
      "requested_auth_configs": {}
    },
    "id": "dVCVE5lS",
    "timestamp": 1744908835.659254
  }
]
レスポンスでかい...。
3つのオブジェクトが返ってきている。
このオブジェクトはSessionServiceに積み上げられていくEventだと思われる。
コードも確認してみる
Event Class
Session Class がlist[Event]を持つ
そして内容としては、おそらく上から以下の通り。
- リクエストを受けたweather_time_agentの応答
- ツール
get_weaterの応答 (roleがuserになっている...) - weather_time_agentの応答
今回はツールもLLMだったので、会話している感じになっている。
最後に、レスポンスがチャンクに分割されるrun_seeというのもあるみたいなのでリクエストしてみる。
(.venv) $ curl -X POST http://0.0.0.0:8000/run_sse \-H "Content-Type: application/json" \
-d '{
"app_name": "multi_tool_agent",
"user_id": "u_123",
"session_id": "s_123",
"new_message": {
    "role": "user",
    "parts": [{
    "text": "Hey whats the weather in new york today"
    }]
},
"streaming": false
}'
data: {"content":{"parts":[{"functionCall":{"id":"adk-887ab70d-ebff-4be2-aeb3-4f62e0ac1c9a","args":{"city":"new york"},"name":"get_weather"}}],"role":"model"},"invocation_id":"e-9e86e580-2997-4cfe-a9cb-bdb28647580f","author":"weather_time_agent","actions":{"state_delta":{},"artifact_delta":{},"requested_auth_configs":{}},"long_running_tool_ids":[],"id":"yR1kNP56","timestamp":1744910881.916652}

data: {"content":{"parts":[{"functionResponse":{"id":"adk-887ab70d-ebff-4be2-aeb3-4f62e0ac1c9a","name":"get_weather","response":{"status":"success","report":"The weather in New York is sunny with a temperature of 25 degrees Celsius (41 degrees Fahrenheit)."}}}],"role":"user"},"invocation_id":"e-9e86e580-2997-4cfe-a9cb-bdb28647580f","author":"weather_time_agent","actions":{"state_delta":{},"artifact_delta":{},"requested_auth_configs":{}},"id":"BGhHUwvq","timestamp":1744910884.727735}

data: {"content":{"parts":[{"text":"The weather in New York is sunny with a temperature of 25 degrees Celsius (41 degrees Fahrenheit).\n"}],"role":"model"},"invocation_id":"e-9e86e580-2997-4cfe-a9cb-bdb28647580f","author":"weather_time_agent","actions":{"state_delta":{},"artifact_delta":{},"requested_auth_configs":{}},"id":"y23e50uM","timestamp":1744910884.73176}
dataが3つ断続的に返ってきた。
見づらいが、Event毎に分割されているよう。
実行時間が長いタスクを実行する際には、Eventを随時確認できるので良さそう。
3. Web UI として実行
(.venv) $ adk web
INFO:     Started server process [85327]
INFO:     Waiting for application startup.
+-----------------------------------------------------------------------------+
| ADK Web Server started                                                      |
|                                                                             |
| For local testing, access at http://localhost:8000.                         |
+-----------------------------------------------------------------------------+

INFO:     Application startup complete.
INFO:     Uvicorn running on http://0.0.0.0:8000 (Press CTRL+C to quit)
ブラウザでhttp://localhost:8000にアクセスしてみる。
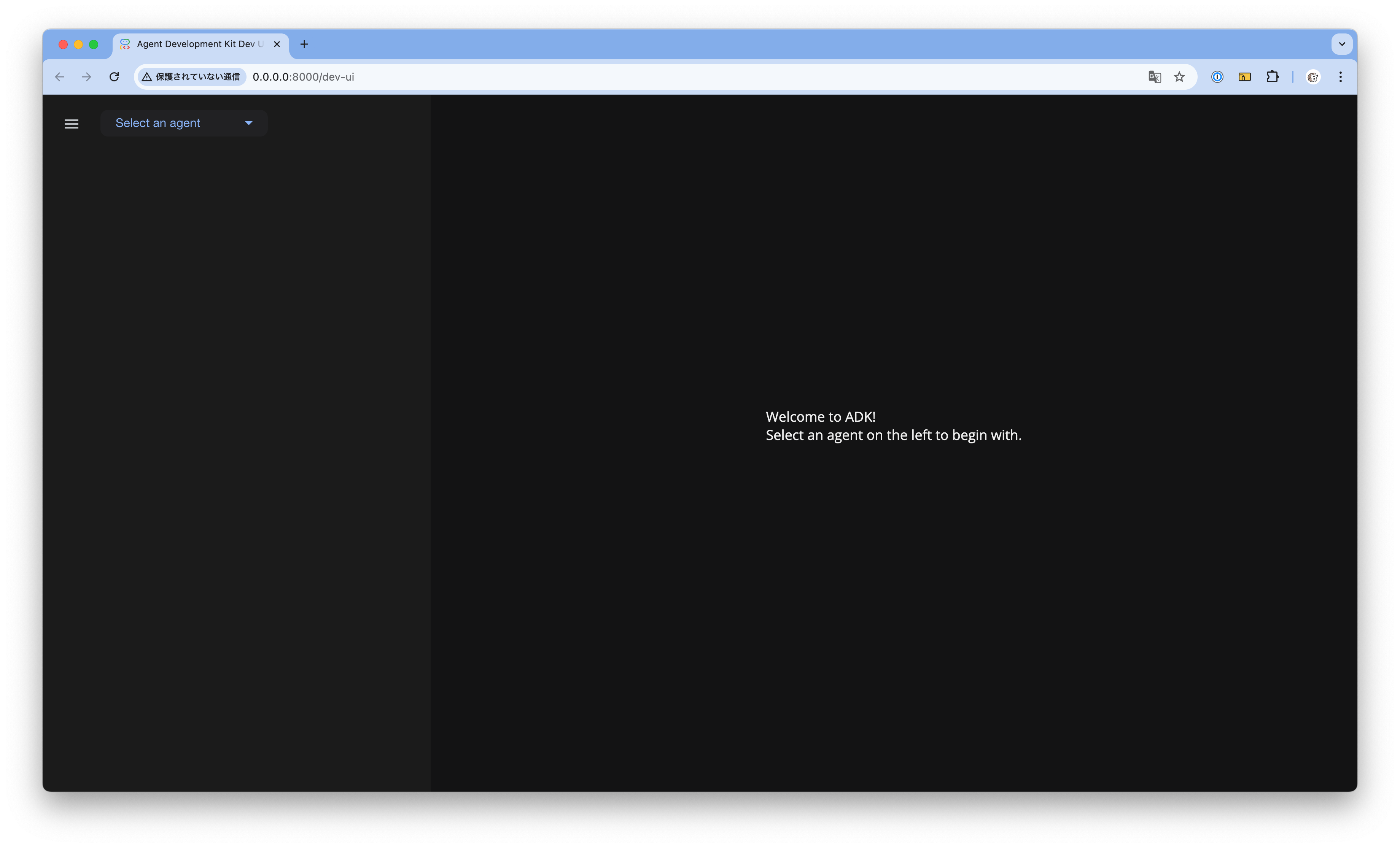
左上のセレクトボックスでエージェントを選択。
SessionIDが表示されたので、選択と同時にSessionが作成された様子。

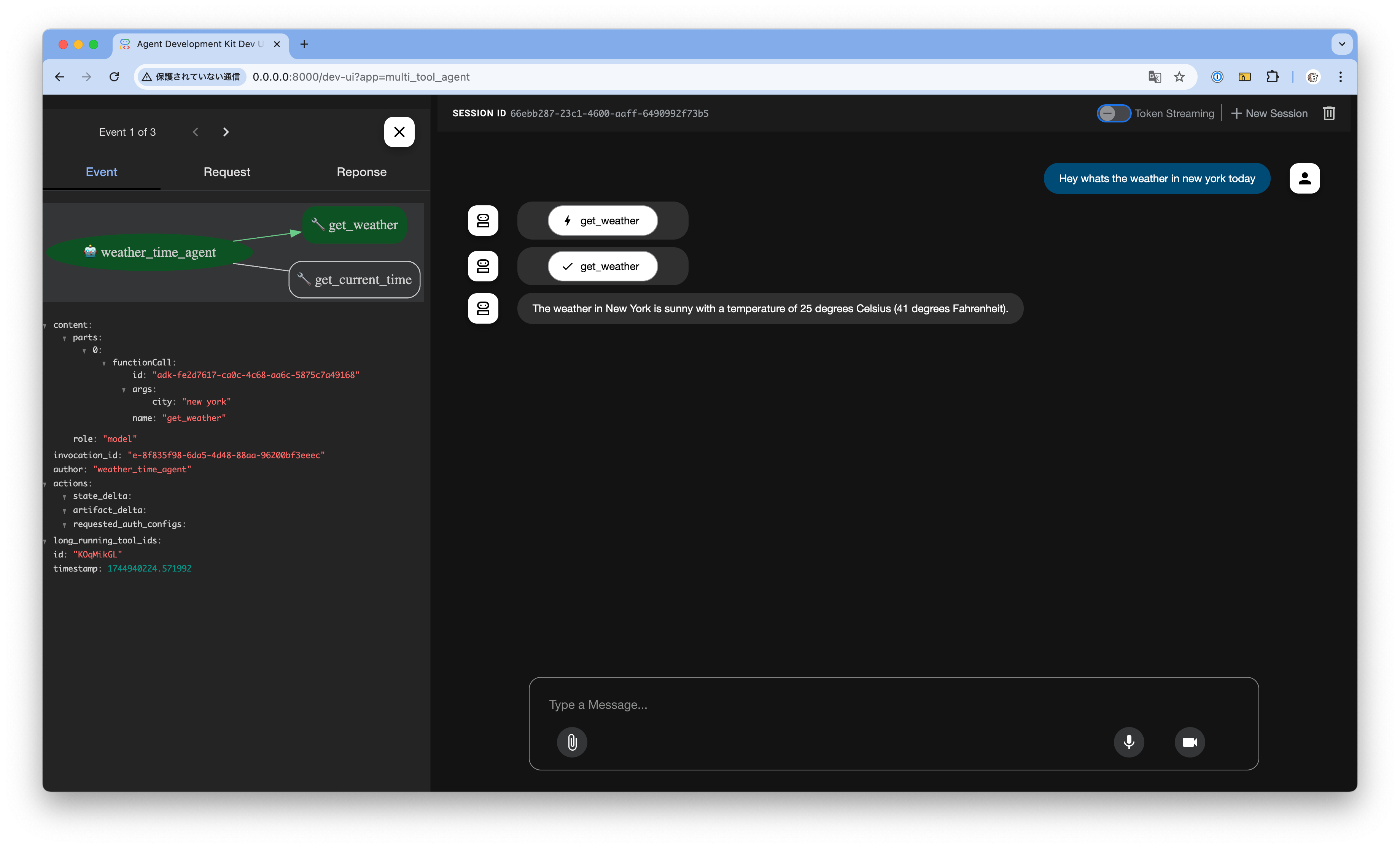
プロンプトを送ってみた。
返事が来た。そして左のエリアでEventsが表示された。
トーク画面にツール名も出てきたがなんだろう。

Eventをクリックしてみると図が出た! わかりやすい!
トーク画面のツール名をクリックしても同じ挙動だった。
うまく動作しなかったけど、音声会話もできるよう。ファイル添付も可能。

UIが用意されているのはとても見やすくて良い!
まとめ
- 公式ドキュメントが詳細でわかりやすい。
- GCPサービスとの統合が想定された作りになっており、クラウド環境へのスケールが容易。
- 新しいエージェントを追加するには、ディレクトリを新しく作成しコードを書けば良いだけというわかりやすさ。
- デフォルトでCLI, APIサーバー, WebUIの3種類で使うことができ、いろんな使い方に対応できる柔軟さがある。
- Memory(短期記憶、長期記憶), ContextなどのAgentが備える基本概念もしっかり組み込まれている。
ここから色々試してみようと思います。
Discussion