ComposeをiOSで動かしてみるまで

はじめに
こんにちは、マヤミト(@yt8492)です。
さて、JetBrainsのcompose-jbにはCompose Multiplatformの様々なサンプルなどが置いてあり、その中でも experimental/examples 以下にはCompose MultiplatformをDesktop(JVM), MacOS(native), iOS, Webで動かすサンプルがあります。今回の記事では、そのサンプルを参考に、targetをiOSに絞って簡単なアプリを実装してみます。
今回の実装は、https://github.com/yt8492/ComposeNative にあげています。気になる方はそちらも見てください。
プロジェクトのセットアップ
まず全体の build.gradle.kts と gradle.properties を載せます。
import org.jetbrains.kotlin.gradle.tasks.KotlinCompile
import org.jetbrains.kotlin.gradle.plugin.mpp.KotlinNativeTarget
import org.jetbrains.compose.experimental.dsl.IOSDevices

plugins {
   kotlin("multiplatform") version "1.6.21"
   id("org.jetbrains.compose") version "1.2.0-alpha01-dev716"
}

group = "com.yt8492"
version = "1.0-SNAPSHOT"

repositories {
   mavenLocal()
   mavenCentral()
   gradlePluginPortal()
   maven("https://maven.pkg.jetbrains.space/public/p/compose/dev")
   google()
}

kotlin {
   iosX64("uikitX64") {
       binaries {
           executable {
               entryPoint = "main"
               freeCompilerArgs += listOf(
                   "-linker-option", "-framework", "-linker-option", "Metal",
                   "-linker-option", "-framework", "-linker-option", "CoreText",
                   "-linker-option", "-framework", "-linker-option", "CoreGraphics"
               )
           }
       }
   }
   iosArm64("uikitArm64") {
       binaries {
           executable() {
               entryPoint = "main"
               freeCompilerArgs += listOf(
                   "-linker-option", "-framework", "-linker-option", "Metal",
                   "-linker-option", "-framework", "-linker-option", "CoreText",
                   "-linker-option", "-framework", "-linker-option", "CoreGraphics"
               )
               freeCompilerArgs += "-Xdisable-phases=VerifyBitcode"
           }
       }
   }

   sourceSets {
       val uikitMain by creating {
           dependencies {
               implementation(kotlin("stdlib-common"))
               implementation(compose.ui)
               implementation(compose.foundation)
               implementation(compose.material)
               implementation(compose.runtime)
           }
       }
       val uikitX64Main by getting {
           dependsOn(uikitMain)
       }
       val uikitArm64Main by getting {
           dependsOn(uikitMain)
       }
   }

   targets.withType<KotlinNativeTarget> {
       binaries.all {
           freeCompilerArgs += "-Xdisable-phases=VerifyBitcode"
       }
   }
}

tasks.withType<KotlinCompile> {
   kotlinOptions.jvmTarget = "11"
}

compose.experimental {
   uikit.application {
       bundleIdPrefix = "com.yt8492"
       projectName = "Counter"
       deployConfigurations {
           simulator("IPhone13") {
               device = IOSDevices.IPHONE_13
           }
       }
   }
}
kotlin.code.style=official
kotlin.native.cacheKind=none
kotlin.native.useEmbeddableCompilerJar=true
kotlin.native.binary.memoryModel=experimental
build.gradle.kts
まずは plugins ブロックを見ていきましょう。
plugins {
    kotlin("multiplatform") version "1.6.21"
    id("org.jetbrains.compose") version "1.2.0-alpha01-dev716"
}
今回使うcomposeプラグインに対応するKotlinのバージョンは1.6.21です。
iOS向けのComposeはまだ正式にリリースされていないため、今回使う org.jetbrains.compose pluginのバージョンは 1.2.0-alpha01-dev716 です。このバージョンを使うため、 build.gradle.kts の repositories ブロックに
maven("https://maven.pkg.jetbrains.space/public/p/compose/dev")
を追加する必要があります。
次に、 kotlin ブロックを見ていきましょう。
kotlin {
    iosX64("uikitX64") {
        binaries {
            executable {
                entryPoint = "main"
                freeCompilerArgs += listOf(
                    "-linker-option", "-framework", "-linker-option", "Metal",
                    "-linker-option", "-framework", "-linker-option", "CoreText",
                    "-linker-option", "-framework", "-linker-option", "CoreGraphics"
                )
            }
        }
    }
    iosArm64("uikitArm64") {
        binaries {
            executable() {
                entryPoint = "main"
                freeCompilerArgs += listOf(
                    "-linker-option", "-framework", "-linker-option", "Metal",
                    "-linker-option", "-framework", "-linker-option", "CoreText",
                    "-linker-option", "-framework", "-linker-option", "CoreGraphics"
                )
                freeCompilerArgs += "-Xdisable-phases=VerifyBitcode"
            }
        }
    }

    sourceSets {
        val uikitMain by creating {
            dependencies {
                implementation(kotlin("stdlib-common"))
                implementation(compose.ui)
                implementation(compose.foundation)
                implementation(compose.material)
                implementation(compose.runtime)
            }
        }
        val uikitX64Main by getting {
            dependsOn(uikitMain)
        }
        val uikitArm64Main by getting {
            dependsOn(uikitMain)
        }
    }

    targets.withType<KotlinNativeTarget> {
        binaries.all {
            freeCompilerArgs += "-Xdisable-phases=VerifyBitcode"
        }
    }
}
Intel MacとARM Macのどちらでも動かすため、 uikitMain というsourceSetを作って uikitX64 と uikitArm64 の2つから依存させるようにしています
iosX64 と iosArm64 のtargetのnameにそれぞれ uikitX64, uikitArm64 を指定しているのがポイントで、これを指定しないとビルドができません。
これを指定せずにビルドすると、gradleのログには具体的なエラーメッセージが出ないのですが、 build ディレクトリに吐き出される標準出力のログに
FAILURE: Build failed with an exception.

* What went wrong:
A problem occurred configuring root project 'ComposeNative'.
> Could not create task ':packComposeUikitApplicationForXCode'.
   > KotlinTarget with name 'uikitX64' not found.
のようなエラーが出力されます(気づくのに30分くらいかかった)。恐らく内部的に uikitX64 (ARM Macの場合は uikitArm64 )というtarget名が固定で指定されているものだと思われます。
sourceSets の dependencies ブロックでimplementationしている各種composeの依存は、Desktop(JVM), JS, Native共通で使えるものになっています。そのため、Kotlin/MPPのプロジェクトでcommonモジュールに共通部品としてComposable関数を実装して各targetで使い回すことも可能になっています。実際に参考にしたcompose-jbのexampleではそのようになっています。
最後に compose.experimental ブロックです。
compose.experimental {
    uikit.application {
        bundleIdPrefix = "com.yt8492"
        projectName = "Counter"
        deployConfigurations {
            simulator("IPhone13") {
                device = IOSDevices.IPHONE_13
            }
        }
    }
}
projectName に指定した文字列が実際のアプリ名になります。
deployConfigurations ブロックで実行するシミュレータの設定ができます。 simulator の引数に指定する文字列でシミュレータのデバイス名を指定し、 simulator ブロックの device にデバイスを指定します。
simulator の引数に指定したデバイス名が、 iOSシミュレータで実行させる際のGradleタスク名に使われます。今回の例だと IPhone13 をデバイス名に指定しているため、Gradleで実行するコマンドは ./gradlew iosDeployIPhone13Debug となります。
gradle.properties
こちらはほぼ参考元のリポジトリそのままです。
kotlin.native.cacheKind=none
こちらのプロパティが必須となっていそうで、これを外すとビルドが通りませんでした。
簡単なカウンターアプリの実装
importは省略します。
fun main(args: Array<String>) {
    memScoped {
        val argc = args.size + 1
        val argv = (arrayOf("skikoApp") + args).map { it.cstr.ptr }.toCValues()
        autoreleasepool {
            UIApplicationMain(argc, argv, null, NSStringFromClass(SkikoAppDelegate))
        }
    }
}

class SkikoAppDelegate : UIResponder, UIApplicationDelegateProtocol {
    companion object : UIResponderMeta(), UIApplicationDelegateProtocolMeta

    @ObjCObjectBase.OverrideInit
    constructor() : super()

    private var _window: UIWindow? = null
    override fun window() = _window
    override fun setWindow(window: UIWindow?) {
        _window = window
    }

    override fun application(application: UIApplication, didFinishLaunchingWithOptions: Map<Any?, *>?): Boolean {
        window = UIWindow(frame = UIScreen.mainScreen.applicationFrame).apply {
            rootViewController = Application("Counter") {
                App()
            }
            makeKeyAndVisible()
        }
        return true
    }
}

@Composable
fun App() {
    val (count, setCount) = remember {
        mutableStateOf(0)
    }
    Scaffold(
        topBar = {
            TopAppBar(
                title = {
                    Text("CounterApp")
                }
            )
        }
    ) { paddingValues ->
        Column(
            modifier = Modifier
                .fillMaxSize()
                .padding(paddingValues),
            verticalArrangement = Arrangement.Center,
            horizontalAlignment = Alignment.CenterHorizontally,
        ) {
            Button(
                onClick = {
                    setCount(count + 1)
                }
            ) {
                Text("+")
            }
            Text(count.toString())
            Button(
                onClick = {
                    setCount(count - 1)
                }
            ) {
                Text("-")
            }
        }
    }
}
ボイラープレート的な部分が多いので、ポイントだけ解説します。
SkikoAppDelegate クラスの application メソッドで、iOSの画面にComposeを描画するための設定をしています。
window = UIWindow(frame = UIScreen.mainScreen.applicationFrame).apply {
    rootViewController = Application("Counter") {
        App()
    }
    makeKeyAndVisible()
}
ここで UIWindow の frame に指定した値が描画範囲になります。
UIScreen.mainScreen.applicationFrame を指定すると、画面からノッチを除いた範囲が描画されます。

UIScreen.mainScreen.bounds を指定すると、描画範囲にノッチが含まれます。
rootViewController にComposeを描画するためのUIViewControllerを渡しています。 Application 関数の引数の content がComposable関数になっているため、この中にComposeのコードを実装することができます。
今回はごく単純なカウンターアプリを実装しました。AndroidのJetpack Composeで使い慣れた Scaffold や Column、 Button や Text などの各種Composable関数や、 fillMaxSize や padding などの各種Modifierが普通に使えているのが驚きです。
@Composable
fun App() {
    val (count, setCount) = remember {
        mutableStateOf(0)
    }
    Scaffold(
        topBar = {
            TopAppBar(
                title = {
                    Text("CounterApp")
                }
            )
        }
    ) { paddingValues ->
        Column(
            modifier = Modifier
                .fillMaxSize()
                .padding(paddingValues),
            verticalArrangement = Arrangement.Center,
            horizontalAlignment = Alignment.CenterHorizontally,
        ) {
            Button(
                onClick = {
                    setCount(count + 1)
                }
            ) {
                Text("+")
            }
            Text(count.toString())
            Button(
                onClick = {
                    setCount(count - 1)
                }
            ) {
                Text("-")
            }
        }
    }
}
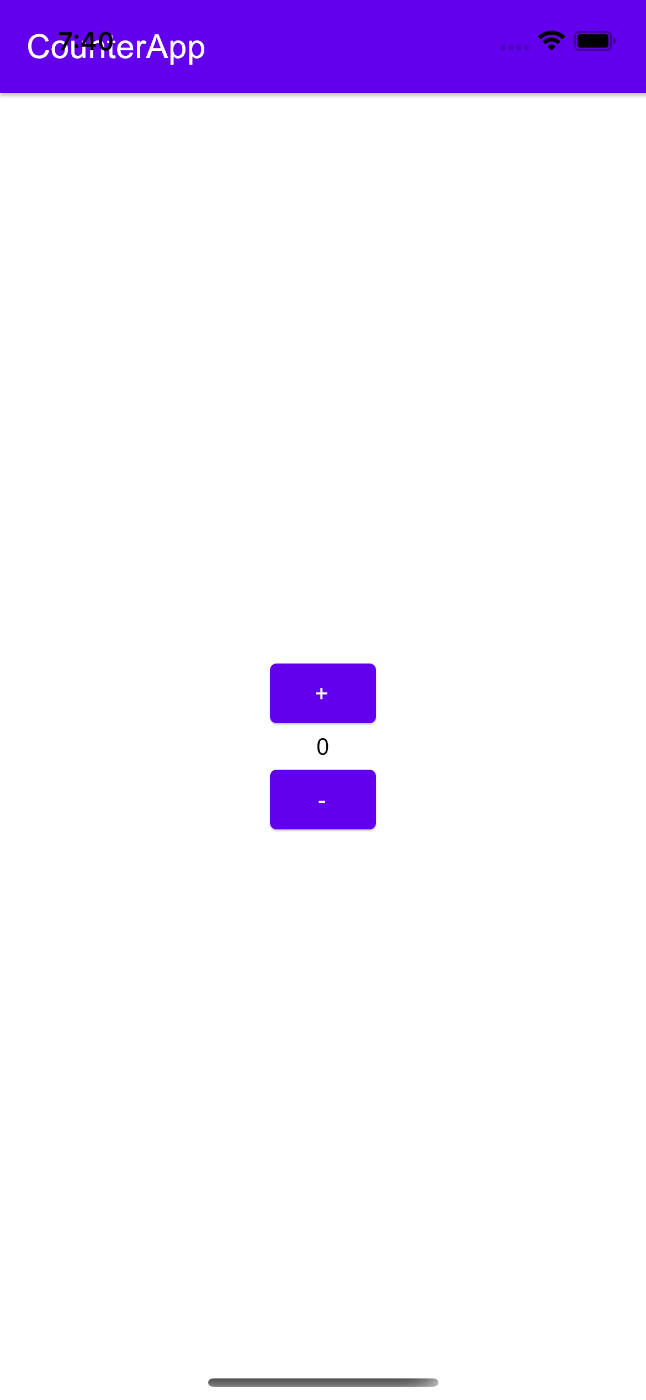
動作例
./gradlew iosDeployIPhone13Debug
を実行すると、エミュレータが起動します。
普通にカウンターとして動作しているのがわかると思います
最後に
まだドキュメントはまともにありませんが、公式リポジトリのサンプル実装から読み取れたことを書いてみました。自分でも完全に理解できているわけではないので、間違っているところなどあれば遠慮なくご指摘ください。サンプル修正のプルリクエストも大歓迎です。
Discussion