Contentlayer で記事を markdown 管理する
はじめに
- 2023 年 5 月 4 日時点の情報で執筆しています。
- 例によってやってみた記事です。公式ドキュメント通りで動かない部分があったので記事を書きましたが、基本公式で事足りるので触る場合はそちらを参照ください。
Contentlayer について
Markdown 形式のデータを型の付いた JSON として扱うためのツールです。
マークダウン部分の HTML への変形は remark、HTML の加工装飾は rehype がそれぞれ担っていて、合わせて frontmatter のパースもしてくれます。
具体的には、以下のようなファイルを
---
title: My First Post
slug: my-first-post
publishedAt: 2023-05-04
tags: [tech]
---

# Hello World
TypeScript で以下のように扱うことができます。
import { allPosts } from 'contentlayer/generated';

console.log(allPosts[0]);
{
  title: 'My First Post',
  slug: 'my-first-post',
  publishedAt: '2023-05-03T00:00:00.000Z',
  body: {
    raw: '\n' + '# Hello World\n',
    code: 'var Component=(()=>{var ln=Object.cre ...',
  },
  _id: 'posts/my-first-post.mdx',
  _raw: {
    sourceFilePath: 'posts/my-first-post.mdx',
    sourceFileName: 'my-first-post.mdx',
    sourceFileDir: 'posts',
    contentType: 'mdx',
    flattenedPath: 'posts/my-first-post',
  },
};
現状は、外部の CMS 等を使わずに Markdown を直接 git 管理する前提なので、個人ブログ向きかと思います。
導入でやること
Contentlayer の設定
contentlayer をインストールします。
pnpm add contentlayer
設定ファイルを作成します。
import { defineDocumentType, makeSource } from 'contentlayer/source-files';

export const Post = defineDocumentType(() => ({
  name: 'Post',
  filePathPattern: 'posts/*.mdx',
  contentType: 'mdx',
  fields: {
    title: {
      type: 'string',
      description: 'タイトル',
      required: true,
    },
    slug: {
      type: 'string',
      description: 'slug',
      required: true,
    },
    publishedAt: {
      type: 'date',
      description: '公開日',
      required: true,
    },
    tags: {
      type: 'list',
      of: {
        type: 'string',
      },
      description: 'タグ',
      required: true,
    },
  },
}));

export default makeSource({
  contentDirPath: 'data',
  documentTypes: [Post],
});
Markdown ファイルを作成します。
---
title: My First Post
slug: my-first-post
publishedAt: 2023-05-04
tags: [tech]
---

# Hello World
pnpm contentlayer build
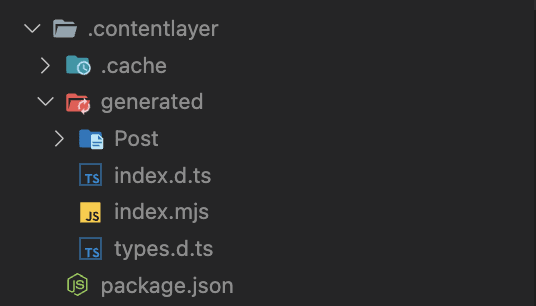
以下のような .contentlayer ディレクトリが作成されていれば OK です。
CLI には build dev が用意されています。
-
build: Markdown から JSON、TypeScript 型定義を生成 -
dev: watch モードでbuildを行う
remark と rehype の設定
remark は Markdown から HTML の変形、rehype は HTML の加工装飾を行うツールで、それぞれプラグインエコシステムがあり、contentlayer.config.ts でそれらのプラグインを刺すことで様々な機能が利用できます。
説明は割愛しますが、僕のブログの場合は以下のプラグインを入れています。
pnpm add -D remark-gfm rehype-slug rehype-code-titles \
  rehype-prism-plus rehype-autolink-headings rehype-external-links \
  rehype-shift-heading rehype-accessible-emojis
+ import remarkGfm from 'remark-gfm';
+ import rehypeSlug from 'rehype-slug';
+ import rehypeCodeTitles from 'rehype-code-titles';
+ import rehypePrism from 'rehype-prism-plus';
+ import rehypeAutolinkHeadings from 'rehype-autolink-headings';
+ import rehypeExternalLink from 'rehype-external-links';
+ import rehypeShiftHeading from 'rehype-shift-heading';
+ import { rehypeAccessibleEmojis } from 'rehype-accessible-emojis';

~~~

export default makeSource({
  contentDirPath: 'data',
  documentTypes: [Post],
+  mdx: {
+    remarkPlugins: [remarkGfm],
+    rehypePlugins: [
+      rehypeSlug,
+      rehypeCodeTitles,
+      rehypePrism,
+      rehypeAccessibleEmojis,
+      () =>
+        rehypeShiftHeading({
+          shift: 1,
+        }),
+      (option) =>
+        rehypeAutolinkHeadings({
+          ...option,
+          behavior: 'wrap',
+        }),
+      (option) =>
+        rehypeExternalLink({
+          ...option,
+          target: '_blank',
+        }),
+    ],
+  },
});
これによって、吐かれる HTML の形式がよりリッチになったりします。
スタイルは自分で当てましょう。
Next.js と連携する
基本的には生成ファイルは単純な json なので特に連携は無いと思っていましたが、Next.js の場合 next-contentlayer というパッケージが用意されています。
pnpm add next-contentlayer
const withContentLayer = require('next-contentlayer');

module.exports = withContentLayer({
 ...nextConfig
});
dev の時に contentlayer dev、build の時に contentlayer build を Webpack バンドル前に行う、以外に何をしているかは正直読んでいませんが、敢えて使わずにハマるのもいやなので使っています 🙃
React で表示する
基本的に JSON なのでタイトルなどはそのまま使用すればいいですが、本文は HTML 形式なので dangerouslySetInnerHTML または next-contentlayer/hooks の useMDXComponent で表示します。
通常、dangerouslySetInnerHTML でいいはず(多分)ですが、useMDXComponent にはグローバル変数や MDX 内で利用できるコンポーネントの注入などのインターフェースがあるので、一応これを使っておくのがよさそうです。
'use client';

import { useMDXComponent } from 'next-contentlayer/hooks';

export const MdxBody = ({ code }: { code: string }) => {
  const MDXComponent = useMDXComponent(code);
  return <MDXComponent />;
};
注意点として、useMDXComponent は内部で useMemo を使う React の hook なので、クライアントコンポーネントである必要があります。
まとめ
ブログを作るだけならこれでほぼ完了で、後はシンタックスハイライトですね、、
Contentlayer のやってみた記事なので紹介しませんが、rehype-prism-plus によってコードブロックに必要なクラスは付与されているので、後は prism でハイライトすれば良いかと思います!
Discussion