Qdrantのローカル環境構築
先にまとめ
このスクラップに出てくる環境構築手順・コードは以下リポジトリにまとめた。
成果物だけ見たい場合はこのreleaseをダウンロードしてして使うことができる。
発端
以前 Pinecone を使った RAG アプリを作った。
Pinecone は検索は早いことを謳っている上に API も使いやすくていい感じなのだが、クラウドサービスであるため、ローカルで使えるVectorDBも欲しくなった。
引っかかるポイントとしては、クラウドのDBを使っているとデータのオーナーシップが失われる点と、サービス自体のEOSや価格改定に振り回されてしまうんじゃないかという点。
そういう一抹の不安があって、クラウドサービスだけでなく、ローカルでコントロールできるようなVectorDBを一つ使えるようにしておく選択肢があると精神衛生にいいのではないかと思った。
また、副次的な利点としてローカルの環境構築ができれば開発環境の構築が楽になったり、VectorDB自体の検証がさっさとできるようにもなったりすると思う。
なので、とにかくローカル環境にVectorDBを作ってみる。
今回はQdrantを試す。
Qdrant
Qdrant は VectorDB。公式Docs によると Qdrant は以下のような特徴を持つ。
Qdrant “is a vector similarity search engine that provides a production-ready service with a convenient API to store, search, and manage points (i.e. vectors) with an additional payload.” You can think of the payloads as additional pieces of information that can help you hone in on your search and also receive useful information that you can give to your users.
日本語訳:
Qdrant は、追加のペイロードでポイント (つまりベクトル) を保存、検索、管理するための便利な API を備えた実稼働対応のサービスを提供するベクトル類似性検索エンジンです。ペイロードは、検索を絞り込むのに役立ち、ユーザーに提供できる有用な情報を受け取る追加情報と考えることができます。
ポイントは、
- 高次元ベクトルを保存/類似性検索することに特化しているDBである
- ベクトル埋め込みを使った検索に使うことを色して作られている
というあたりだろうか。
Community 版が Apache-2.0 license で公開されており、Self-Hosted で使っている限りは無償で使える。
Qdrant のセットアップ
公式ドキュメントに従ってセットアップする。
環境は以下。
- Python: 3.11.2
- pip: 22.3.1
- Docker Desktop: 4.25.2
- M1 Macbook Air Sonoma 14.4
以下のようにセットアップを進める。事前にDockerの起動が必要。
% docker pull qdrant/qdrant
% docker run -p 6333:6333 -p 6334:6334 \
    -v $(pwd)/qdrant_storage:/qdrant/storage:z \
    qdrant/qdrant

           _                 _
  __ _  __| |_ __ __ _ _ __ | |_
 / _` |/ _` | '__/ _` | '_ \| __|
| (_| | (_| | | | (_| | | | | |_
 \__, |\__,_|_|  \__,_|_| |_|\__|
    |_|

Version: 1.8.1, build: 3fbe1cae
Access web UI at http://localhost:6333/dashboard

2024-03-09T14:40:02.392165Z  INFO storage::content_manager::consensus::persistent: Loading raft state from ./storage/raft_state.json
2024-03-09T14:40:02.425156Z  INFO qdrant: Distributed mode disabled
2024-03-09T14:40:02.425237Z  INFO qdrant: Telemetry reporting enabled, id: 9af274e2-2a1d-4fec-a6af-c484060d2d01
2024-03-09T14:40:02.434823Z  INFO qdrant::actix: TLS disabled for REST API
2024-03-09T14:40:02.436285Z  INFO qdrant::actix: Qdrant HTTP listening on 6333
2024-03-09T14:40:02.436327Z  INFO actix_server::builder: Starting 7 workers
2024-03-09T14:40:02.436522Z  INFO actix_server::server: Actix runtime found; starting in Actix runtime
2024-03-09T14:40:02.436524Z  INFO qdrant::tonic: Qdrant gRPC listening on 6334
2024-03-09T14:40:02.436532Z  INFO qdrant::tonic: TLS disabled for gRPC API
正常に立ち上がった。
Web UI
http://localhost:6333/dashboard へアクセスすると WebUI が立ち上がっている。

コレクションの作成〜ベクトルの追加
Python クライアントを用いる。まずクライアントをインストール。
pip install qdrant-client
続いて quick start に従い Python クライアントでコレクションの作成〜ベクトルの追加までを行う。
追加できるデータはベクトルとメタデータ。
以下の seed.py を実行するとすべて追加される。
from qdrant_client import QdrantClient
from qdrant_client.http.models import Distance, VectorParams
from qdrant_client.http.models import PointStruct

def seed():
    # クライアントを初期化する
    client = QdrantClient("localhost", port=6333)

    # コレクションを作成する
    client.create_collection(
        collection_name="test_collection",
        vectors_config=VectorParams(size=4, distance=Distance.DOT),
    )

    # ベクトルを追加する
    operation_info = client.upsert(
        collection_name="test_collection",
        wait=True,
        points=[
            PointStruct(
                id=1, vector=[0.05, 0.61, 0.76, 0.74], payload={"city": "Berlin"}
            ),
            PointStruct(
                id=2, vector=[0.19, 0.81, 0.75, 0.11], payload={"city": "London"}
            ),
            PointStruct(
                id=3, vector=[0.36, 0.55, 0.47, 0.94], payload={"city": "Moscow"}
            ),
            PointStruct(
                id=4, vector=[0.18, 0.01, 0.85, 0.80], payload={"city": "New York"}
            ),
            PointStruct(
                id=5, vector=[0.24, 0.18, 0.22, 0.44], payload={"city": "Beijing"}
            ),
            PointStruct(
                id=6, vector=[0.35, 0.08, 0.11, 0.44], payload={"city": "Mumbai"}
            ),
        ],
    )

    print(operation_info)


seed()
上記を実行した後のターミナルのログは次。正しく実行されたことを示している。
operation_id=0 status=<UpdateStatus.COMPLETED: 'completed'>
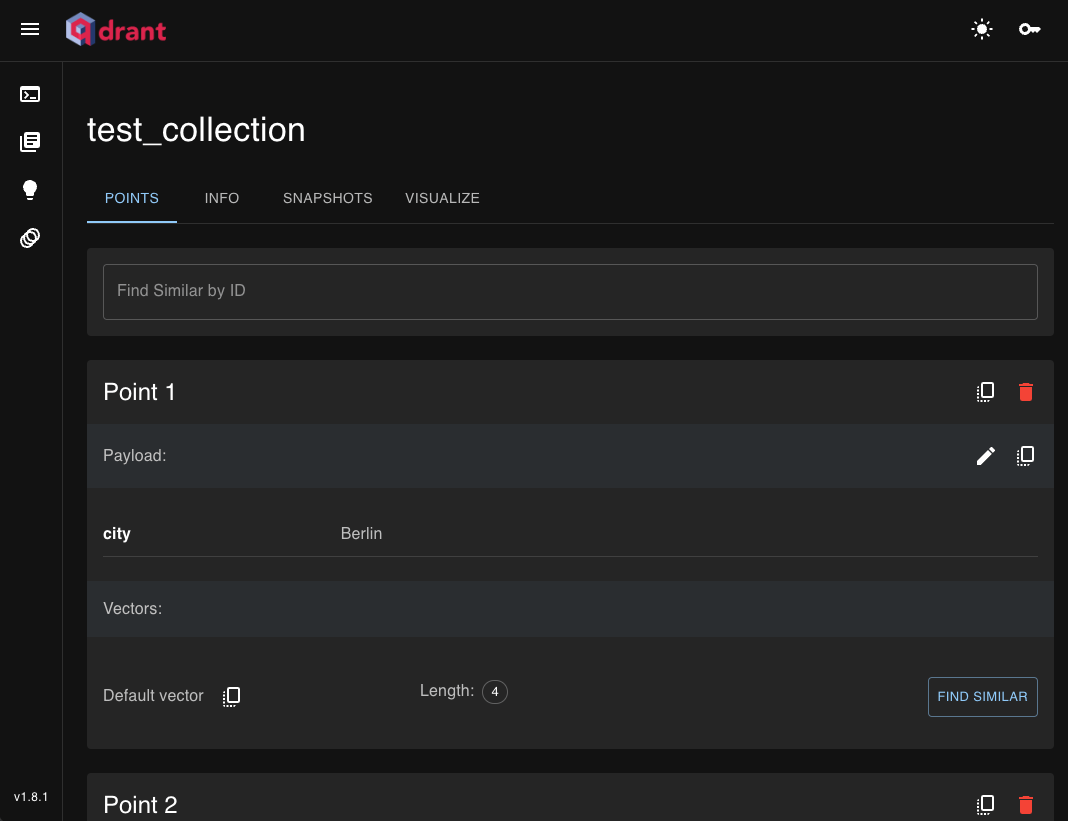
WebUI 上では次のように Collections, Points (=登録したVectorデータ) が表示される。
Collections

Points

クエリを実行する
[0.2, 0.1, 0.9, 0.7] に近いベクトルを3つ検索する。
search_result = client.search(
    collection_name="test_collection", query_vector=[0.2, 0.1, 0.9, 0.7], limit=3
)

print(search_result)
これを実行した後のコンソールログは以下。ちゃんと検索できている。
公式Docsによると類似度が高い順に降順で表示される。
[
    ScoredPoint(
        id=4,
        version=0,
        score=1.362,
        payload={"city": "New York"},
        vector=None,
        shard_key=None,
    ),
    ScoredPoint(
        id=1,
        version=0,
        score=1.273,
        payload={"city": "Berlin"},
        vector=None,
        shard_key=None,
    ),
    ScoredPoint(
        id=3,
        version=0,
        score=1.208,
        payload={"city": "Moscow"},
        vector=None,
        shard_key=None,
    ),
]
これで一通り試せた。
次の展望
OpenAI Embedding API を使えば Semantic Search を実装することができる。
これを今度試す。