【Rails】Twitter API v2でアカウント名からツイートを取得する


Ruby on Railsの学習のため、Twitterのリプライを取得してリプ返を自動生成するお遊びアプリ「リプ返つらい」を作成しました。
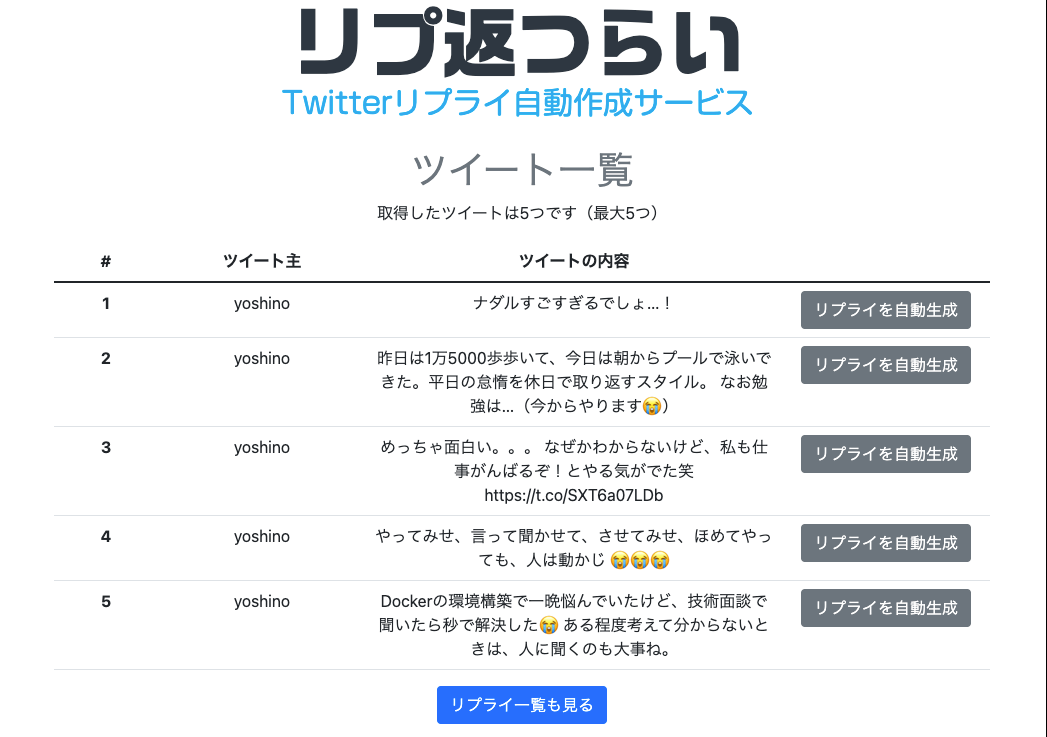
このアプリでは、「Twitter API v2」を使って、指定したアカウント名のツイート最新5件と、そのアカウントに寄せられたリプライ最新5件を表示するようにしました(公開アカウントのみ)。今回は、ツイート最新5件を取得する方法についてまとめます。
Twitter API v2とは
Twitter APIとは、ツイート、ダイレクトメッセージ、スペース、リスト、ユーザーなどのTwitter要素にプログラムからアクセスできるAPIです。
現在のTwitter APIの標準バージョンはv2。従前のv1.1もまだ使えますが、今後のサポートは重要な不具合の対処のみとなります。今から新しくTwitter関連のアプリを実装したい場合は、v2を使うほうがよいでしょう。
Twitter APIの公式ドキュメントは基本的に英語なので一瞬ウッとなりますが、要点が整理されており非常に分かりやすいです。上記の公式ドキュメントと、下記のサンプルコードをベースに、目的のプログラムを組み立てていきます。
Twitter Developer Platformへ登録してbearer tokenを入手する
まず、Twitter Developer Platformでアカウント・アプリを登録し、APIのアクセスに必要なbearer tokenを入手します。手順はこちらの記事が詳しいです。
Keys and tokensのタブにはAPI Key and Secret、Access Token and Secretというものもあります。
違いが気になったので調べたところ、API Key and SecretはWebアプリに固有のもので、Twitter APIがWebアプリを認証するために使われ、一方のAccess Token and SecretはWebアプリのユーザー側のTwitterアカウント毎に固有のもので、WebアプリにTwitterアカウントの操作を許可するために使われることがわかりました。
なお、Twitter Developer Platformに表示されているAccess Token and Secretは開発者のアカウントのもので、例えば開発者アカウントをbot化したい、というようなケースで使います。が、今回はそのようなケースではないのでスルーします。
そして問題のbearer tokenですが、これはAPI Key and Secretの代わりに使われているトークンで、API Key and Secretから生成されているそうです(参考)。つまり、bearer tokenを使った認証はAPI Key and Secretを使った認証と同じであり、bearer tokenがあればTwitter API v2は利用できる、と理解しました(もし違っていたら教えてください!)。
指定したアカウント名のツイートを取得する
さて、ようやくコーディングの時間です。アカウント名からツイート最新5件を取得してWebアプリ上に表示させるために使うエンドポイントはふたつ。まず、ユーザーのタイムラインを取得するエンドポイントです。
Rubyのサンプルコードはこちら。めちゃわかりやすい。
このGET /2/users/:id/tweetsでユーザー識別に使われているのは、user IDです。
user IDとは、アカウントに固有のもので、「@yoiyoicho」のようないわゆるアカウント名とは違います。なお、user IDはTwitterのプロフィールページで確認できます(参考)。
ユーザーに自分のUser IDを調べさせて入力させるのは現実的ではないので、ユーザーにはアカウント名を入力してもらい、アプリ側でアカウント名をuser IDに変換することにします。この変換には、アカウント名(user name)からユーザー情報を取得する、GET /2/users/by/username/:usernameのエンドポイントを使います。
上記のリファレンスとサンプルコードを参考に、Twitter APIの挙動をテストするrubyファイルを作成しました。
require 'json'
require 'typhoeus'

bearer_token = 'bearer tokenをここに入力'
username = 'yoiyoicho'

query_params = {
  "max_results" => 5,
  "expansions" => "author_id",
  "tweet.fields" => "attachments,author_id,conversation_id,created_at,entities,id,lang",
}

def get_user_info(url, bearer_token)
  options = {
    method: 'get',
    headers: {
      "User-Agent" => "v2RubyExampleCode",
      "Authorization" => "Bearer #{bearer_token}"
    },
  }
  request = Typhoeus::Request.new(url, options)
  response = request.run
  return response
end

def get_user_tweets(url, bearer_token, query_params)
  options = {
    method: 'get',
    headers: {
      "User-Agent" => "v2RubyExampleCode",
      "Authorization" => "Bearer #{bearer_token}"
    },
    params: query_params
  }
  request = Typhoeus::Request.new(url, options)
  response = request.run
  return response
end

#ユーザー情報の取得
endpoint_url_user_info = "https://api.twitter.com/2/users/by/username/:username".gsub(':username', username)
response_user_info = get_user_info(endpoint_url_user_info, bearer_token)
puts 'ユーザー情報の取得結果'
puts response_user_info.code, JSON.pretty_generate(JSON.parse(response_user_info.body))

# ユーザーのツイートの取得
id = JSON.parse(response_user_info.body)['data']['id']
endpoint_url_user_tweets = "https://api.twitter.com/2/users/:id/tweets".gsub(':id', id)
response_user_tweets = get_user_tweets(endpoint_url_user_tweets, bearer_token, query_params)
puts 'ユーザーのツイートの取得結果'
puts response_user_tweets.code, JSON.pretty_generate(JSON.parse(response_user_tweets.body))
ユーザー情報の取得結果
200
{
  "data": {
    "id": "1284868062944956416",
    "name": "yoshino",
    "username": "yoiyoicho"
  }
}
ユーザーのツイートの取得結果
200
{
  "data": [
    {
      "lang": "ja",
      "created_at": "2022-06-05T23:11:24.000Z",
      "entities": {
        "annotations": [
          {
            "start": 0,
            "end": 2,
            "probability": 0.8333,
            "type": "Person",
            "normalized_text": "ナダル"
          }
        ]
      },
      "conversation_id": "1533587318996467713",
      "text": "ナダルすごすぎるでしょ…!",
      "author_id": "1284868062944956416",
      "id": "1533587318996467713"
    }
    〜略〜
  ]
  "includes": {
    "users": [
      {
        "id": "1284868062944956416",
        "name": "yoshino",
        "username": "yoiyoicho"
      }
    ]
  },
  "meta": {
    "next_token": "7140dibdnow9c7btw421t4ktr7il6yqn848xijv1cmwxc",
    "result_count": 5,
    "newest_id": "1533587318996467713",
    "oldest_id": "1532566179440537600"
  }
}
bearer tokenと、どのようなデータが欲しいか指定するquery_paramsをあわせてTwitter APIにリクエストを投げることで、指定したアカウント名のuser idやそのアカウントの最新ツイートなど、求めるデータを取得することができました。
Railsで実装する
上記の内容をRailsで実装した例は以下の通りです。(Twitterに関する部分のみ抜粋)
Rails.application.routes.draw do
  get 'twitter/search', to: 'twitter#search'
  get 'twitter/show', to: 'twitter#show'
  root to: 'home#index'
end
class TwitterController < ApplicationController
  require 'json'
  require 'typhoeus'

  def search
    username = params[:username]
    userid = get_userid(username)
    if userid != 0
      redirect_to "/twitter/show?userid=#{userid}"
    else
      redirect_to root_path
    end
  end

  def show
    @userid = params[:userid]
    @result = get_tweet(@userid)
  end

  private

  def get_userid(username)
    url = "https://api.twitter.com/2/users/by/username/:username".gsub(':username', username)
    options = {
      method: 'get',
      headers: {
        "User-Agent" => "v2RubyExampleCode",
        "Authorization" => "Bearer #{ENV['BEARER_TOKEN']}"
      },
    }
    request = Typhoeus::Request.new(url, options)
    response = request.run
    if response.code == 200 && JSON.parse(response.body)['data'].present?
      JSON.parse(response.body)['data']['id']
    else
      0
    end
  end

  def get_tweet(userid)
    url = "https://api.twitter.com/2/users/:id/tweets".gsub(':id', userid)
    query_params = {
      "max_results" => 5,
      "expansions" => "author_id",
      "tweet.fields" => "attachments,author_id,conversation_id,created_at,entities,id,lang",
    }
    options = {
      method: 'get',
      headers: {
        "User-Agent" => "v2RubyExampleCode",
        "Authorization" => "Bearer #{ENV['BEARER_TOKEN']}"
      },
      params: query_params
    }
    request = Typhoeus::Request.new(url, options)
    response = request.run
    if response.code == 200
      JSON.parse(response.body)
    else
      0
    end
  end
end
<%= form_with url: '/twitter/search', method: :get, local: true do |f| %>
   <%= f.text_field :username, placeholder: 'TwitterIDを入力(例:yoiyoicho)' %>
   <%= f.submit 'リプライを取得する' %>
<% end %>
<h1>ツイート一覧</h1>
  <p>取得したツイートは<%= @result['data'].length %>つです(最大5つ)</p>
    <table class="table">
      <thead>
        <tr>
          <th>#</th>
          <th>ツイート主</th>
          <th>ツイートの内容</th>
        </tr>
      </thead>
      <tbody>
        <% @result['data'].length.times do |i| %>
          <tr>
            <th><%= i + 1 %></th>
            <td><%= @result['includes']['users'][0]['username'] %></td>
            <td><%= @result['data'][i]['text'] %></td>
          </tr>
        <% end %>
      </tbody>
    </table>
ビューファイルにもロジックが書いてあったりとお恥ずかしいコードですが、目的の機能を達成することができました。
感想
Twitter APIは公式リファレンスはもちろんのこと、GitHubに載っているサンプルコードが豊富なので、とりあえずサンプルコードを動かすだけで挙動を掴みやすかったです。英語ドキュメントを読むのは大変ですが、初学者がAPIを使ったアプリを練習するのにはうってつけの教材だと思います。
Discussion