Amazon Q Developer for CLIをLinux上のVS Codeで使ったら捗る
はじめに
こんにちは、AWSでデベロッパーアドボケイトをしているものです。昨日Amazon Q for command lineにエージェント機能がついて便利って話を書いてたら、CDKスペシャリストの高野さんから「VS Codeのターミナルに常駐してもらえると便利だよね!」とコメントをいただきました。
どうせならリモートで使っている開発環境で設定するほうが良いなと思い、Remote development over SSHで使っているVS Codeの環境にもAmazon Q for command lineを入れてみようと思います。
AWS Builder IDの取得
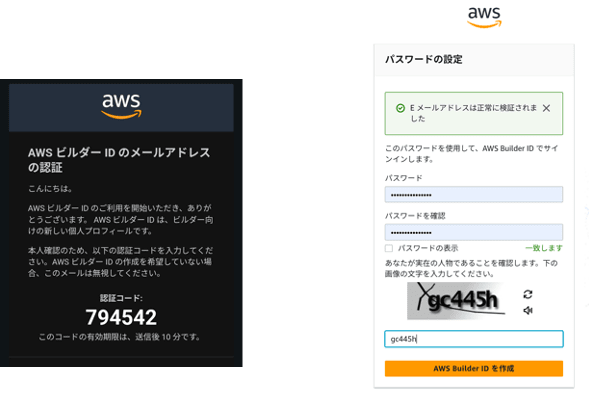
まずは前回と同様、Builder IDの取得です。普段AWSを使っている方で、自由に使えるAWSアカウントを持っている人はそちらを使ってもかまいません。とりあえず試すだけであればBuilder IDで十分ですし、無料枠分でしか使えないようになっているので、いざというときに使いすぎない分こういう用途のときに便利です。
このページでのBuilder ID取得の流れは、まず "Sign up with Builder ID" を押します。


Amazon Q for command lineをインストールする
VS Codeの接続先はLinux(Ubuntu)なので上記のページを参考にインストールします。普通にVS Codeでリモート接続した状態でターミナルを開いて、上のページの手順を進めていきます。
$ curl --proto '=https' --tlsv1.2 -sSf https://desktop-release.q.us-east-1.amazonaws.com/latest/amazon-q.deb -o amazon-q.deb

$ sudo apt install -y ./amazon-q.deb
実行すると依存パッケージをインストールしてくれます。その後 q コマンドが使えるようになったか確認してみましょう。
$ q

q (Amazon Q CLI)

Popular Subcommands              Usage: q [subcommand]
╭────────────────────────────────────────────────────╮
│ chat         Chat with Amazon Q                    │
│ translate    Natural Language to Shell translation │
│ doctor       Debug installation issues             │
│ settings     Customize appearance & behavior       │
│ quit         Quit the app                          │
╰────────────────────────────────────────────────────╯

To see all subcommands, use:
 ❯ q --help-all
できました。接続先はUbuntu Serverで設定しているので、コンソールだけでAmazon Qの設定(ログインなど)がしたいですね。上のページではデスクトップ環境がある前提でのインストール手順を書いているので、ひとまず q doctor でどうすればいいか見てみます。
$ q doctor

✘ Auth: Not authenticated. Please run q login

error: Not authenticated. Please run q login
便利。q login でログインできそうです。
$ q login
? Select login method ›
❯ Use for Free with Builder ID
  Use with Pro license
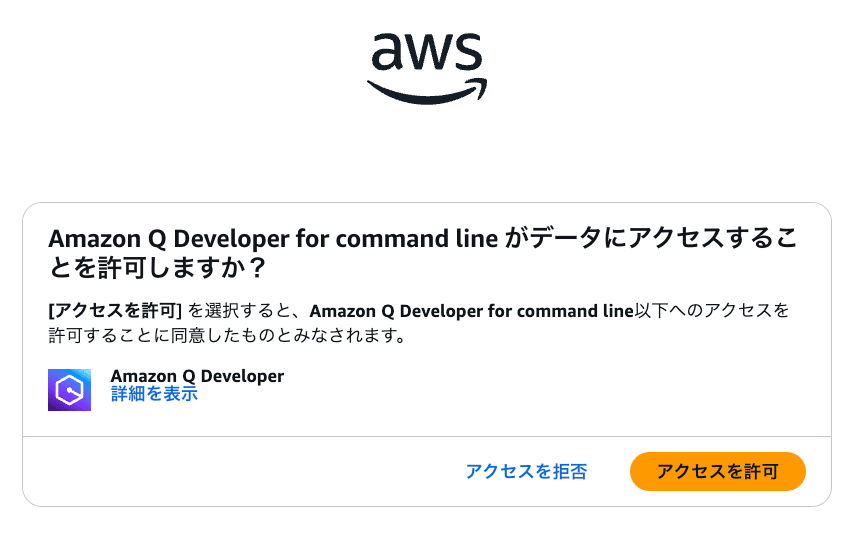
TUIでのログインプロセスが始まりました。今回はBuilder IDを使ってログインするので、ここでEnterを押します。
$ q login
✔ Select login method · Use for Free with Builder ID
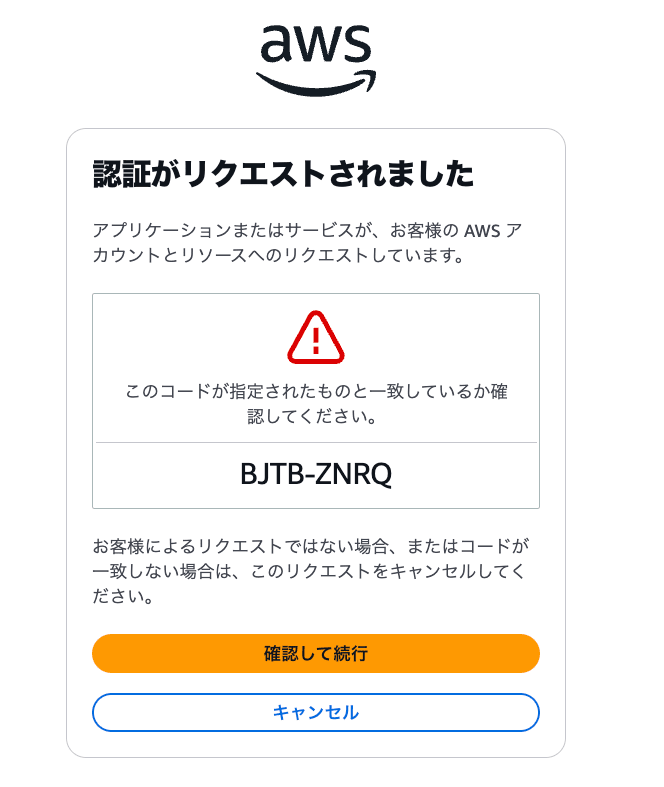
Confirm the following code in the browser
Code: BJTB-ZNRQ
Open this URL: https://view.awsapps.com/start/#/device?user_code=BJTB-ZNRQ
▰▰▱▱▱▱▱ Logging in...
このURLをクリックするとこの画面に飛びます
$ q login
✔ Select login method · Use for Free with Builder ID

Confirm the following code in the browser
Code: BJTB-ZNRQ

Open this URL: https://view.awsapps.com/start/#/device?user_code=BJTB-ZNRQ
Logged in successfully
さあ、これで準備は出来たでしょうか。ふたたび q doctor を実施してみます。
$ q doctor

● /home/yoshiyyy/.bashrc does not source pre integration
● /home/yoshiyyy/.profile does not source pre integration
✘ zsh ~/.zshrc integration check: /home/yoshiyyy/.zshrc does not source pre integration

  Run q integrations install dotfiles to reinstall shell integrations for zsh
Attempting to fix automatically...
Re-running check...

✔ zsh ~/.zshrc integration check
✘ zsh ~/.zprofile integration check: File does not exist: /home/yoshiyyy/.zprofile

  Run q integrations install dotfiles to reinstall shell integrations for zsh
Attempting to fix automatically...
Re-running check...

✔ zsh ~/.zprofile integration check
✘ PATH contains ~/.local/bin: Path does not contain ~/.local/bin

✘ Doctor found errors. Please fix them and try again.

If you are not sure how to fix it, please open an issue with q issue to let us know!
ちゃんと設定漏れを確認してくれるのは便利ですね。そして、前回macOSのローカル環境で実施したのと同様に q integration install コマンドで必要な設定を追加してもらいます。
$ q integrations install dotfiles
Installed!
なにがされたか確認してみます。
$ cat ~/.zshrc
# Amazon Q pre block. Keep at the top of this file.
[[ -f "${HOME}/.local/share/amazon-q/shell/zshrc.pre.zsh" ]] && builtin source "${HOME}/.local/share/amazon-q/shell/zshrc.pre.zsh"
...(略)...
# Amazon Q post block. Keep at the bottom of this file.
[[ -f "${HOME}/.local/share/amazon-q/shell/zshrc.post.zsh" ]] && builtin source "${HOME}/.local/share/amazon-q/shell/zshrc.post.zsh"

$ cat ~/.zprofile
# Amazon Q pre block. Keep at the top of this file.
[[ -f "${HOME}/.local/share/amazon-q/shell/zprofile.pre.zsh" ]] && builtin source "${HOME}/.local/share/amazon-q/shell/zprofile.pre.zsh"

# Amazon Q post block. Keep at the bottom of this file.
[[ -f "${HOME}/.local/share/amazon-q/shell/zprofile.post.zsh" ]] && builtin source "${HOME}/.local/share/amazon-q/shell/zprofile.post.zsh"
.zshrc と .zprofile の上下にAmazon Qが用意しているzshのスクリプトを読み込むような設定をしています。( .zshenv にはとくに修正されていませんでした)
これらのスクリプトが何をしてるかは補足に書いておきます。この状態で新規にターミナルを立ち上げると次のような表示になりました。
Amazon Q now supports AI-powered inline completions!

To disable run: q inline disable

$
これでセットアップは完了したでしょうか。この状態で試しに q doctor をもう一度確認してみましょう。
$ q doctor

✘ sshd config: SSHD config is not set up correctly

  The /etc/ssh/sshd_config file needs to have the following line:
    AcceptEnv Q_SET_PARENT
    AllowStreamLocalForwarding yes

  If your sshd_config is already configured correctly then:
    1. Restart sshd, if using systemd: sudo systemctl restart sshd
    2. Disconnect from the remote host
    3. Run q integrations install ssh on the local machine
    4. Reconnect to the remote host and run q doctor again

  See https://docs.aws.amazon.com/amazonq/latest/qdeveloper-ug/command-line-autocomplete-ssh.html for more info

✘ Doctor found errors. Please fix them and try again.

If you are not sure how to fix it, please open an issue with q issue to let us know!
SSHまわりの設定までちゃんと確認してくれるとは、気が利いています。これはSSH越しの環境で補完を使いたい場合の設定が必要という部分です。
自分でも確認したところ sshd_config に設定がされていなかったので、この2行を追加して、sshdを再起動してからつなぎ直してみます。
AcceptEnv Q_SET_PARENT
AllowStreamLocalForwarding yes
使ってみる
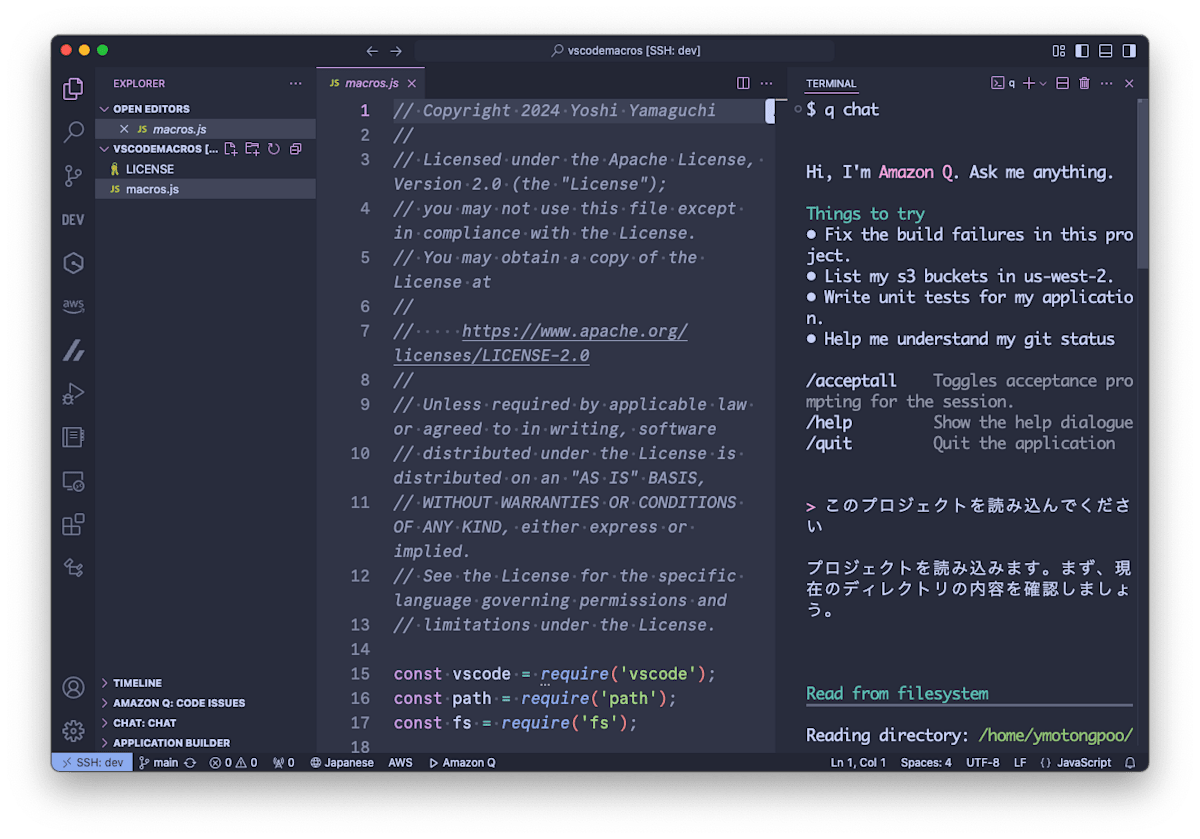
まずは当初の目的の通りVS Codeのターミナルで起動してみます。ターミナルをSecondary Side Barに移したら、さながら普通にコーディングエージェントが常駐してるみたいにできて便利!
あと当然ではあるんですが、コンソール型のエージェントなので、VimやEmacsのなかでも普通に起動できるのが良いですね。Vimだったら縦でターミナルを起動すればやはり見慣れたエージェントに。Emacsもeshellで同様にいい感じになります。

VS Codeで使っている場合は、ファイルが作成されるとウィンドウ左側のファイラーでどんどんファイルが作成されたり編集されたりする様子がみれるので、かなり体験がいいですね...!
まとめ
Q Dev for CLIはAWSのサービス関係なく日常使いに便利なツールになっている上に、まだ非公式ではあるものの日本語での対応もかなり良い感じになっているので、自分もどんどん使っていこうと思います!
補足
q integrations install dotfiles で入れられたコードが何をしているか見てみましょう。
$ cat ${HOME}/.local/share/amazon-q/shell/zshrc.pre.zsh
_Q_LOCAL_BIN="$HOME/.local/bin"
[[ ":$PATH:" != *":$_Q_LOCAL_BIN:"* ]] && PATH="${PATH:+"$PATH:"}$_Q_LOCAL_BIN"
unset _Q_LOCAL_BIN

command -v q >/dev/null 2>&1 && eval "$(q init zsh pre --rcfile zshrc)"

$ cat ${HOME}/.local/share/amazon-q/shell/zshrc.post.zsh
_Q_LOCAL_BIN="$HOME/.local/bin"
[[ ":$PATH:" != *":$_Q_LOCAL_BIN:"* ]] && PATH="${PATH:+"$PATH:"}$_Q_LOCAL_BIN"
unset _Q_LOCAL_BIN

command -v q >/dev/null 2>&1 && eval "$(q init zsh post --rcfile zshrc)"
.zshrc でも .zprofile でも、環境変数PATHに /$HOME/.local/bin が含まれていなかった場合に PATH に追加しています。そして q コマンドがあることを確認してから次のコマンドを実行しています。
q init zsh pre/post --rcfile zshrc
全部表示すると多すぎるので(特に post の方は1000行超える)書かないのですが、preとpostのほうではおおよそこういうことをしています。
pre
デフォルトシェルを zsh にして、PATHに /$HOME/.local/bin があるように再度確認。そして現在実行しているシェルがインタラクティブシェルであることを確認してから、現在のプロセスを qterm に差し替えるように実行します。
qterm は元々Amazon CodeWhispererとして使われていた figterm がその実体になっているようです。
post
qterm が起動されている前提で次を行います。
- 自動補完機能(履歴やインラインシェル補完などから候補を表示するなど)
- ユーザープロンプトの状態管理
- シェルコマンド実行前後の処理などの設定
- 環境変数の設定
Discussion