GitHub Codespaces Semantic Kernel v1.0.1 handson
はじめに
この記事はGitHub CodespacesでSemantic Kernel v1.0.1をハンズオンしてみる記事です。
Semantic Kernelとは
簡単に説明すると
- Microsoft公式が出しているSDK
- OpenAIを操作するSDK
動作確認に利用した環境
ローカルで動かす場合の参考にしてください。
- Macbook Air Apple Sillicon M2
- Sonoma14.0
- VSCode Version
- 1.85.1
- dotNET
- 8.0.100
- mono --version
- Mono JIT compiler version 6.12.0.182 (tarball Mon Jan 16 21:39:07 UTC 2023)
今回はGitHubが提供する環境、GitHub Codespacesで実行します。
- GitHub Codespaces
- apt --version
- apt 2.0.10 (amd64)
- apt --version
事前準備
まずはGitHub Codespacesで環境を作ります。
リポジトリを元に環境を構築します。
※Codespacesのコンフィグを作っても良いですが、今回は学習のためにコマンドをひとつずつ入力してきます。
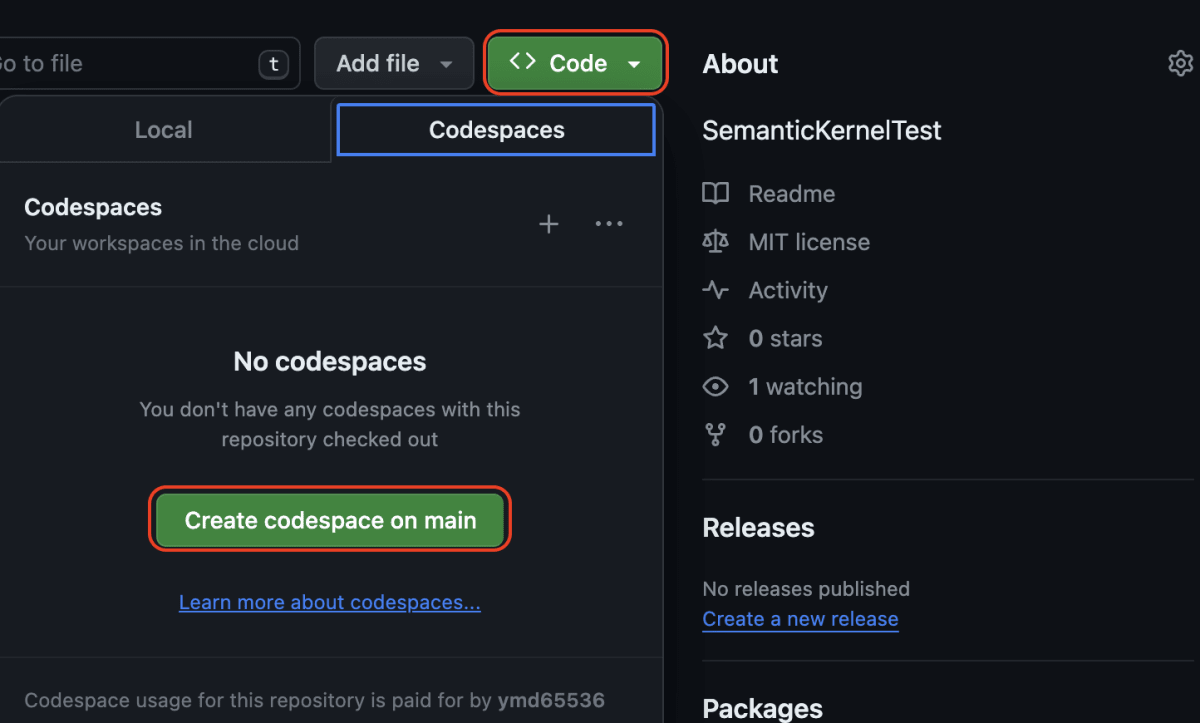
リポジトリを開いて、Codeをクリックします。
Create Codespaces mainをクリックします。
画面が開いたらターミナルでコマンドを実行していきます。
まずは実行環境をチェックします。
uname -a
実行結果
Linux codespaces-858437 6.2.0-1018-azure #18~22.04.1-Ubuntu SMP Tue Nov 21 19:25:02 UTC 2023 x86_64 x86_64 x86_64 GNU/Linux
次に.NET Coreのバージョンを確認します。
dotnet --version
実行結果
8.0.100
上記の環境でAzure CLIとPowershell、nugetをインストールしていきます。
Azure CLIをインストール
リンクを参考にセットアップをします。
Azure CLIをインストールします。
curl -sL https://aka.ms/InstallAzureCLIDeb | sudo bash
バージョンを確認します。
az version
実行結果
{
  "azure-cli": "2.55.0",
  "azure-cli-core": "2.55.0",
  "azure-cli-telemetry": "1.1.0",
  "extensions": {}
}
Powershellのインストール
###################################
# Prerequisites

export VERSION_ID=22.04

# Update the list of packages
sudo apt-get update

# Install pre-requisite packages.
sudo apt-get install -y wget apt-transport-https software-properties-common

# Get the version of Ubuntu
source /etc/os-release

# Download the Microsoft repository keys
wget -q https://packages.microsoft.com/config/ubuntu/$VERSION_ID/packages-microsoft-prod.deb

# Register the Microsoft repository keys
sudo dpkg -i packages-microsoft-prod.deb

# Delete the the Microsoft repository keys file
rm packages-microsoft-prod.deb

# Update the list of packages after we added packages.microsoft.com
sudo apt-get update

###################################
# Install PowerShell
sudo apt-get install -y powershell
バージョンを確認します。
pwsh --version
実行結果
PowerShell 7.4.0
パッケージのインストール
リンクを参考にnugetをインストールします。
下記のコマンドを実行してパッケージをインストールします。
dotnet add package Azure.Identity
dotnet add package Microsoft.SemanticKernel
インストールがうまくいかない場合は一度dotnet runを実行してみてください。
Azure認証
Azureの認証を実行します。
az login --use-device-code
上記のコマンドを実行すると以下のように表示されます。
To sign in, use a web browser to open the page https://microsoft.com/devicelogin and enter the code {code} to authenticate.
※:{code}は実行するたびに変わります。
認証を行うためにブラウザで以下のURLにアクセスします。
出力されるjsonから有効なサブスクリプションのidを取り出します。
  {
    "cloudName": "AzureCloud",
    "homeTenantId": "",
    "id": "",
    "isDefault": true,
    "managedByTenants": [],
    "name": "Pay-As-You-Go",
    "state": "Enabled",
    "tenantId": "",
    "user": {
      "name": "",
      "type": "user"
    }
以下のコマンドを修正して実行します。
az account set --subscription {subscription_id}
Azure AI Studioでモデルのデプロイ
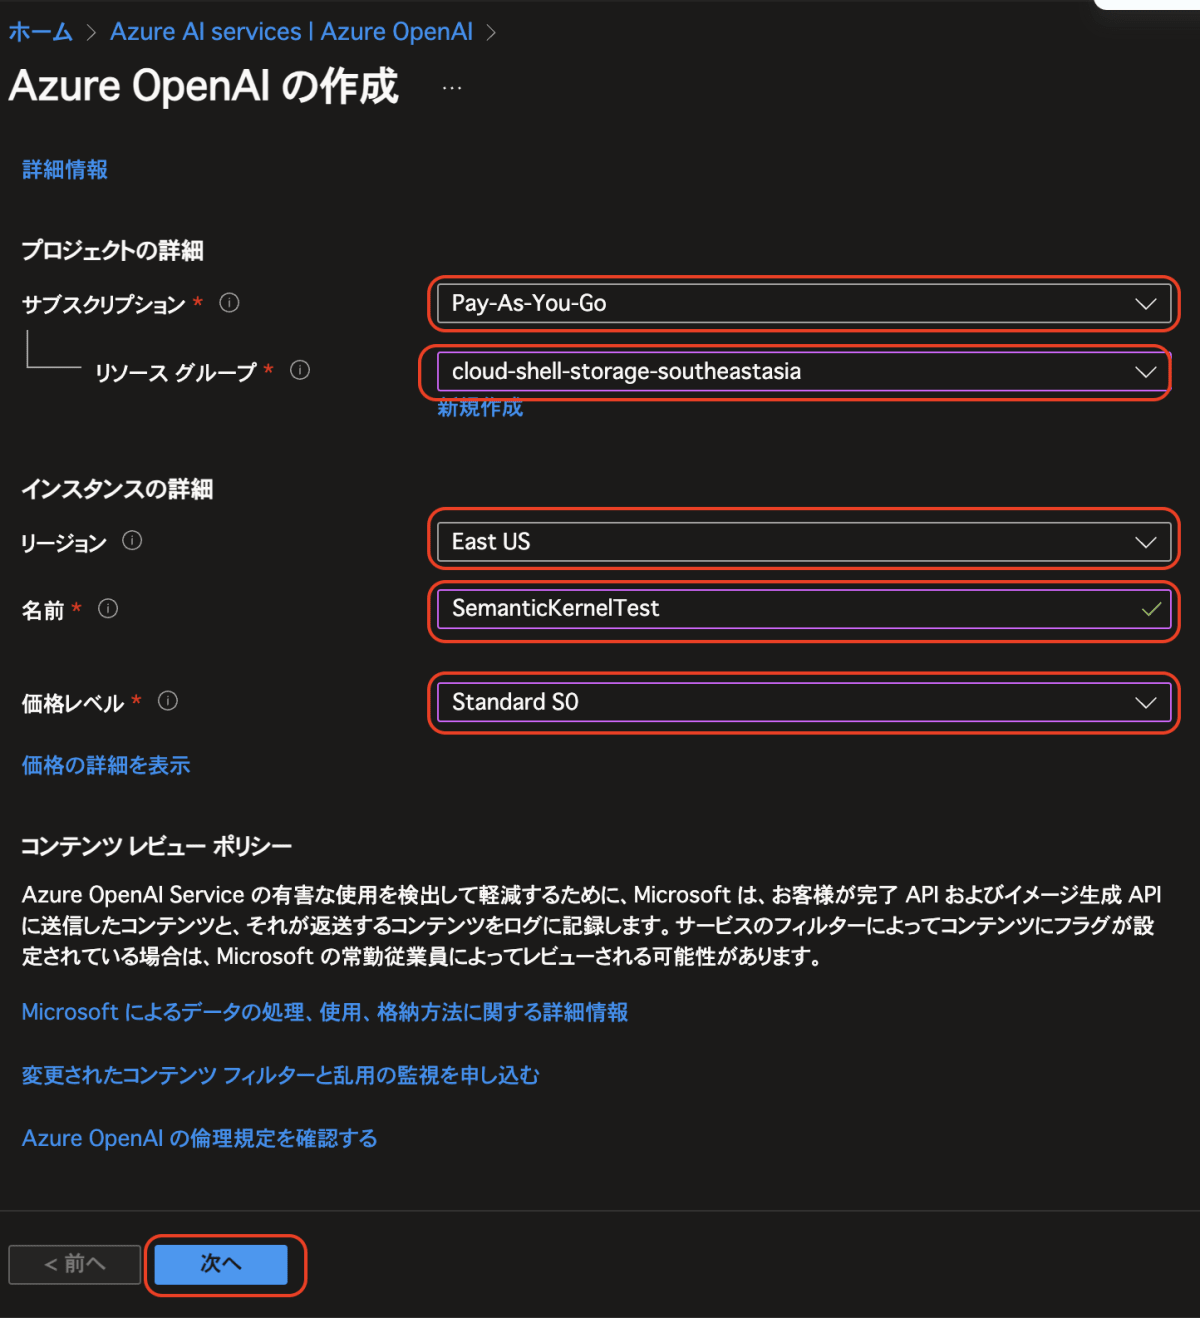
ここでAzure PortalでSemantic Kernelで使うモデルをデプロイします。
開いたらさっそく、作成をクリックします。
画面が表示されましたら、以下のように入力します。
以下のようにチェックします。
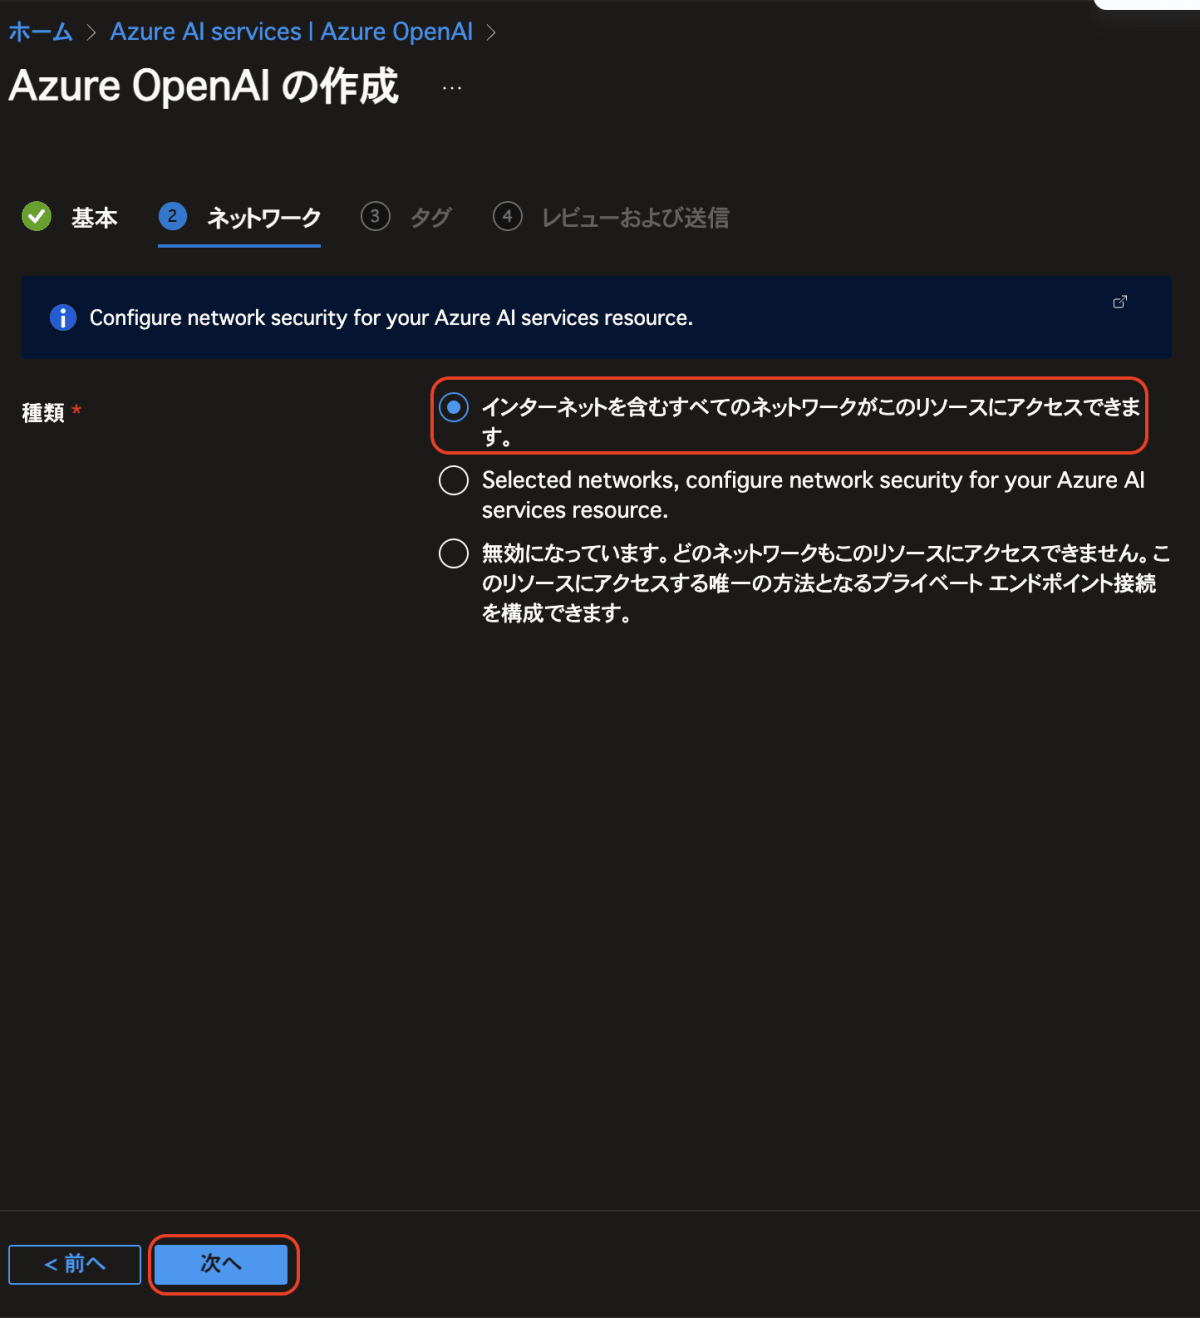
次へをクリックします。

作成をクリックします。

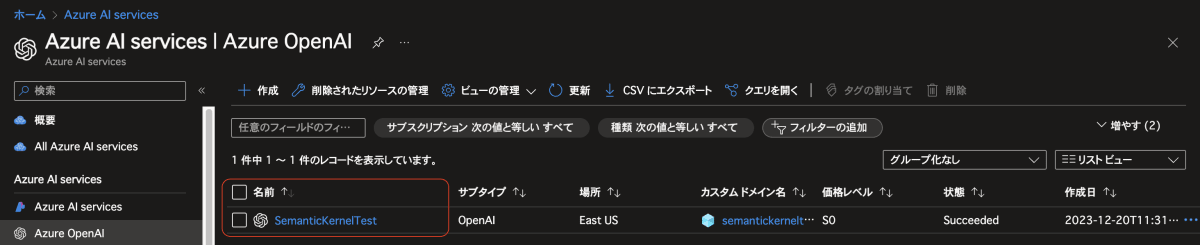
デプロイが完了したら、リソースに移動をクリックします。

ロールの付与
Semantic Kernelを利用するためには以下のロールが必要です。
- Cognitive Services OpenAI User
※なお、Cognitive Servicesは名称変更に伴い、ロール名が変わる可能性があります。
ロールの追加方法は以下の記事を参考にしてください。
Azure OpenAI Studioの操作
モデルを作成するためにAzure OpenAI Studioに移動します。以下、赤枠の表示をクリックします。

モデルの設定
左側のメニューからデプロイをクリックします。

新しいデプロイの作成をクリックします。

以下のように入力して作成をクリックします。
モデル:gpt-35-turbo
デプロイ名:gpt-35-turbo

エンドポイントの確認
Azure OpenAIを開きます。
作成したドメイン名をクリックします。
リンクをクリックします。

エンドポイントが表示されます。
なお、エンドポイントは以下の形式です。
https://{作成したドメイン名}.openai.azure.com/
GitHub CodespacesでSemantic Kernelを動かす
ソースコードを修正する
GitHub Codespacesでソースコードを修正します。
10行目にある{test_endpoint}を先ほど確認したエンドポイントに変更します。
builder.AddAzureOpenAIChatCompletion(
        deploymentName: "gpt-35-turbo",
        modelId: "gpt-35-turbo",
        endpoint: "https://{作成したドメイン名}.openai.azure.com/",
        credentials: new DefaultAzureCredential()
);
実行する
以下のコマンドを実行します。
dotnet run
実行結果

片付け
- デプロイされたモデルを削除
- ドメインを削除
- GitHub Codespacesの環境を削除
デプロイされたモデルを削除
Azure AI Studioに移動します。
デプロイをクリックします。
削除するモデルを選択します。

デプロイの削除をクリックします。
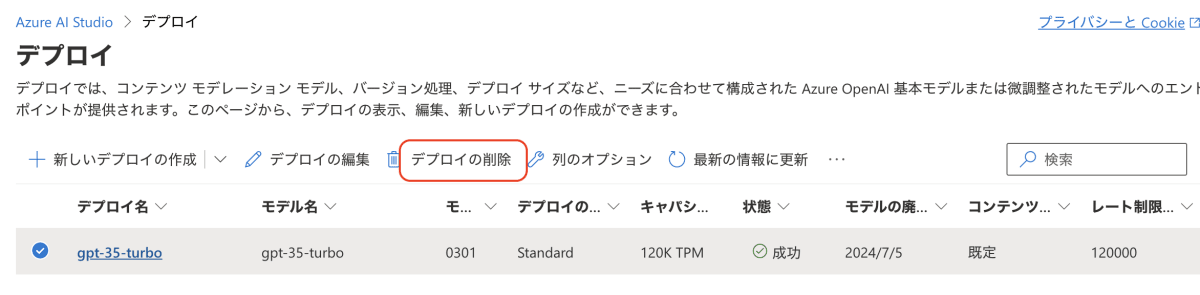
確認ダイアログが表示されるのではいをクリックします。
ドメインを削除
作成したドメイン名を選択します。

削除をクリックします。案内に従って削除します。
GitHub Codespacesの環境を削除
作成したGitHub Codespacesのリストを開きます。
3点リーダーをクリックします。

DELETEをクリックします。

確認画面を表示されるのでDELETEをクリックします。
以下のページに戻ってスペースがないことを確認します。
GitHub Codespaces
これでハンズオンは終了です。
まとめ
最初は難しく感じましたが、Azure OpenAI StudioがわかりやすいUIなので、簡単にモデルを作成することができました。
また、GitHubCodespacesを使うことで端末に依存することなく環境構築が完了し、簡単にSemantic Kernelを利用できました。
Discussion