🐵
Open3D 0.17.0 build (Windows11 + CUDA 11.8 + Visual Studio 2022)
Introduction
Notes on building Open3D 0.17.0 with CUDA
Reference
Envirionment
Hardware
- CPU : Intel(R) Core(TM) i7-8750H CPU @ 2.20GHz 2.21 GHz
- GPU : NVIDIA GeForce GTX 1060 with Max-Q Design
Software
- OS : Windows 11 (Version 23H2, OS Build 22635.2771)
- Driver : NVIDIA Graphics Driver 522.06
- CUDA : 11.8
- cuDNN : 8.9.6.50
- Python : 3.10.11
- CMake : 3.27.8
- Visual Studio 2022 17.8.1
Instructions
1. Install CUDA
Download the installer from the following site and run it.
2. Install cuDNN
Download the ZIP file from the following site and extract it to the directory where you installed CUDA.
3. Install Python
Download the installer from the following site and run it.
4. Clone and Checkout
git clone https://github.com/isl-org/Open3D.git
cd Open3D
git checkout v0.17.0
5. Disable NVCC Warning 186
In Open3D 0.17.0, building fmt 9.0.0 results in an error. This can be circumvented by disabling NVCC's Warning 186.
Modify Open3D/cmake/Open3DShowAndAbortOnWarning.cmake as follows.
        set(DISABLE_NVCC_WARNINGS
            2809           # ignoring return value from routine declared with "nodiscard" attribute (cub)
            186            # Add
        )
6. Configure
mkdir build
cd build
cmake .. -G "Visual Studio 17 2022" -A x64 -DBUILD_CUDA_MODULE=ON -DBUILD_COMMON_CUDA_ARCHS=ON -DBUILD_SHARED_LIBS=ON -DBUILD_WEBRTC=OFF -DCMAKE_INSTALL_PREFIX="<open3d_install_directory>"
7. Build and Install
cmake --build . --config Release --target INSTALL
After the installation is complete, the directory will be arranged as follows.
Install Directory
<open3d_install_directory>
├───bin
│   ├───Open3D
│   │   └───resources
|   |   └───Open3D.exe
│   └───resources
|   └───Open3D.dll
├───CMake
├───include
│   └───open3d
└───lib
    └───Open3D.lib
Example Program
<open3d_build_directory>
└── bin
    └── examples
         └── Release
             ├── CameraPoseTrajectory.exe
             ├── ColorMapOptimization.exe
             ├── :
             ├── OnlineSLAMRGBD.exe
             ├── :
             ├── Visualizer.exe
             └── Voxelization.exe
8. Set Environment Valiables
| item | value |
|---|---|
| Open3D_DIR | <open3d_install_directory> |
| Path | Add %Open3D_DIR%\bin |
9. Run the example program
Open3D.exe
- Downdload 3D model file
- Run the program and open the 3D model file

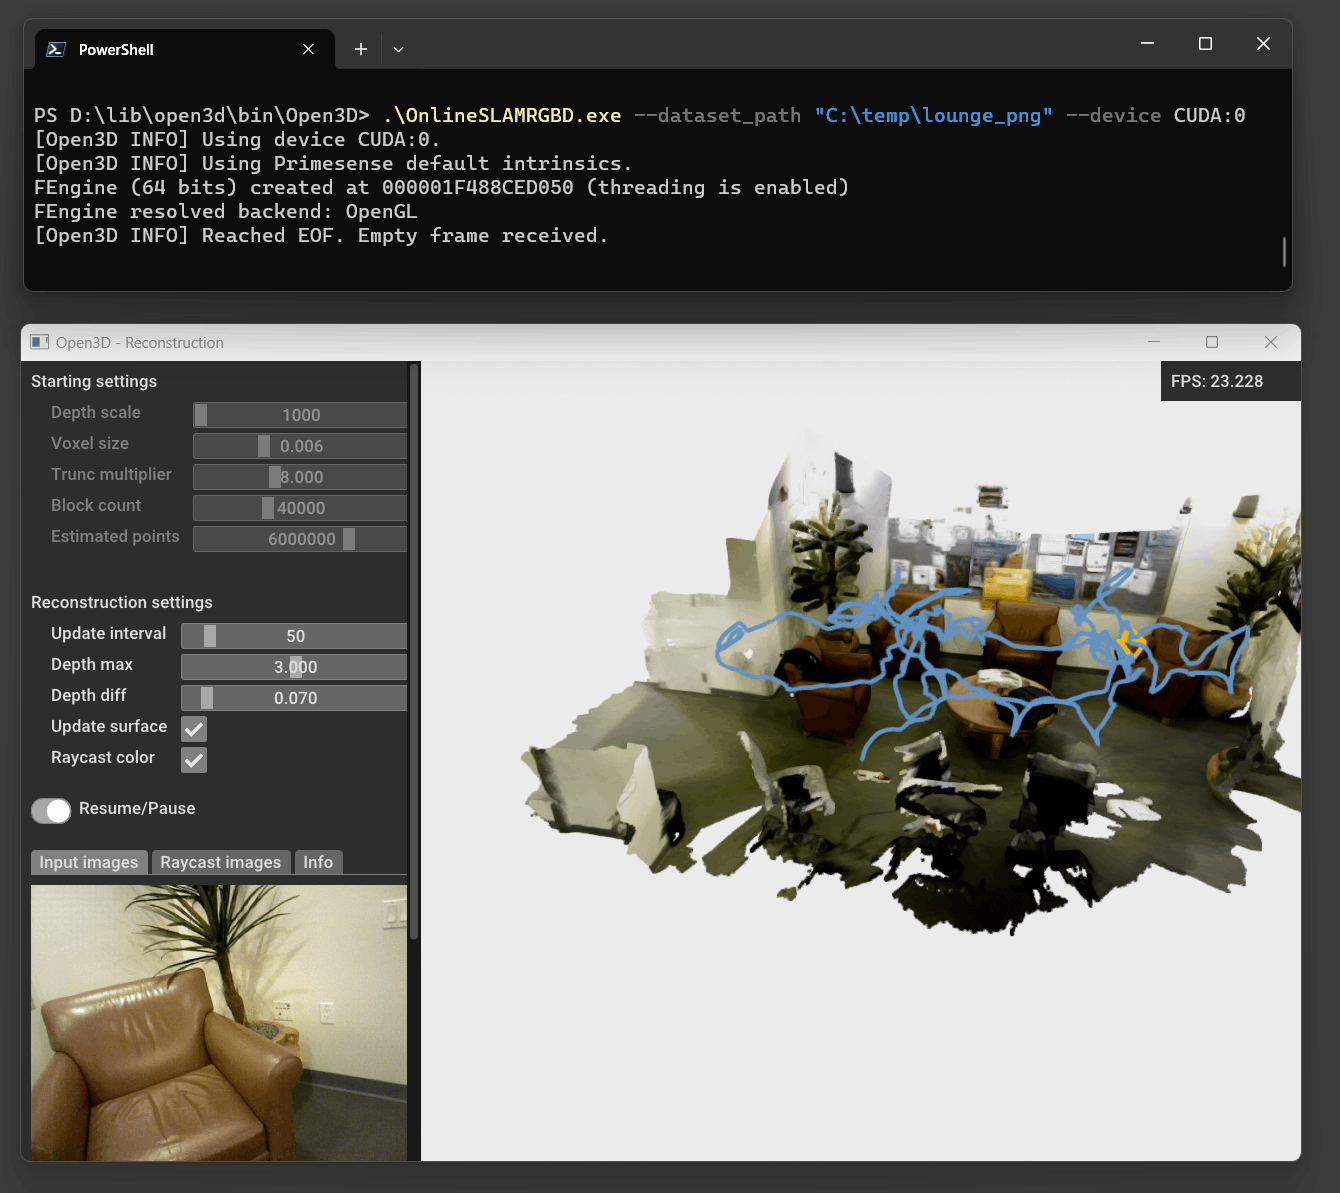
OnlineSLAMRGBD.exe
- Copy OnlineSLAMRGBD.exe to open3d_install_directory/bin.
<open3d_install_directory>
├───bin
│   ├───Open3D
│   │   └───resources
|   |   └───OnlineSLAMRGBD.exe
- Download dataset (lounge_png.zip) and extract it.
lounge_png
└── color
└── depth
- Run the program
.\OnlineSLAMRGBD.exe --dataset_path <dataset path> --device CUDA:0
Discussion