WSL2 + Ubuntu20.04 + CUDA 11.4 で TensorFlow 環境構築 (2021.08)
はじめに
WSL2 + Ubuntu20.04 + CUDA 11.4 で TensorFlow 環境構築したときのメモです。
下記の記事を参考にさせていただきました。自分の環境では何故か TensorFlow のところで少し躓いたので、そこだけ詳しくメモしてます。
-
待ってました CUDA on WSL 2
-
WSL 2 で GPU を使う(WSL 2 の Ubuntu で,CUDA や PyTorch や TensorFlow 2.2 GPU 版を動かす.Docker は使わない,Windows 10 Insider Program,WSL 2 上 の Ubuntu を使用)
お試しした環境
- Host OS : Windows 11 Insider Preview (Version 21H2, OS Build 22000.120)
- WSL2 : 5.10.43.3-microsoft-standard-WSL2
- Gest OS : Ubuntu 20.04 LTS
- CPU : Intel(R) Core(TM) i7-8750H CPU @ 2.20GHz 2.21 GHz
- GPU : NVIDIA GeForce GTX 1060 with Max-Q Design
- Driver : NVIDIA Drivers for CUDA on WSL 471.21 (471.21_gameready_win10-dch_64bit_international.exe)
- CUDA : 11.4.1-1 (cuda-repo-wsl-ubuntu-11-4-local_11.4.1-1_amd64.deb)
- cuDNN : 8.2.2.26-1 (libcudnn8_8.2.2.26-1+cuda11.4_amd64.deb)
- Python : 3.8.10
- TensorFlow : 2.4.2
手順
1. Windows側での作業
1-1. Windows 11 Insider Preview のインストール
現時点(2021.08)だとWindows Insider Preview じゃないとダメ(?)とのことなのでWindows 11を入れます。
1-2. NVIDIA Drivers for CUDA on WSL のインストール
下記からダウンロードしてインストール
1-3. WSL2 のインストール
公式ページを参考に。
実は Insider Preview をインストールする前にWSL2は入れていたので の手動インストール手順を参考にインストールしたのですが、 Insider Preview だとコマンド一発でいけるみたいです。(試してないです)
wsl --install -d Ubuntu-20.04
2. Ubuntu側での作業
2-1. Update & Upgrade
とりあえず儀式として。
sudo apt -y update
sudo apt -yV upgrade
2-2. CUDA Toolkitのインストール
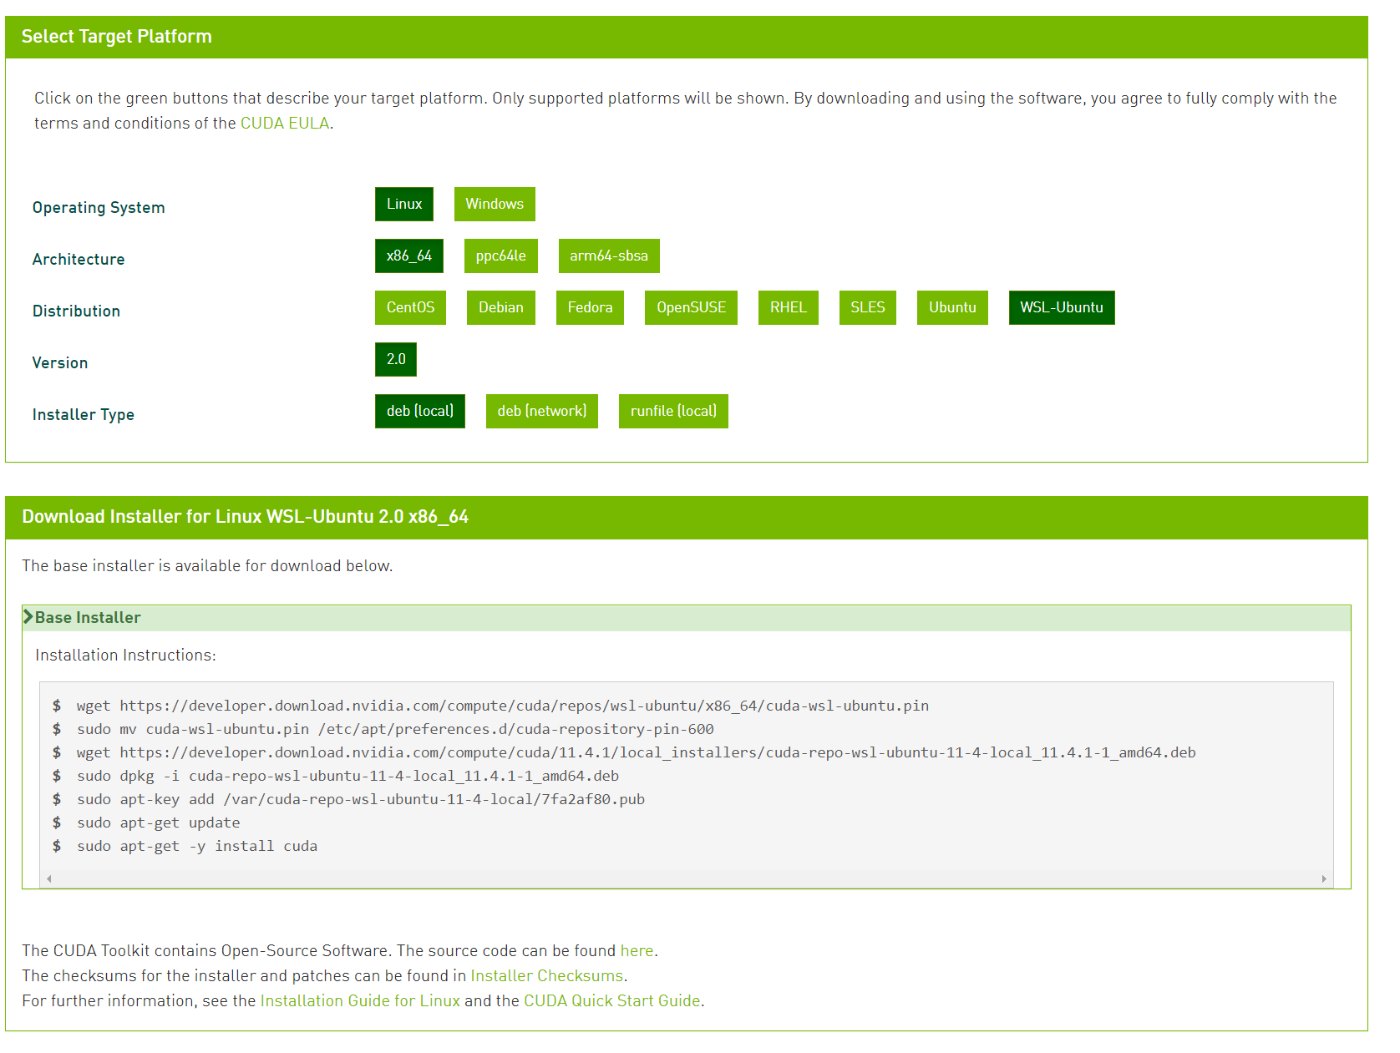
wget https://developer.download.nvidia.com/compute/cuda/repos/wsl-ubuntu/x86_64/cuda-wsl-ubuntu.pin
sudo mv cuda-wsl-ubuntu.pin /etc/apt/preferences.d/cuda-repository-pin-600
wget https://developer.download.nvidia.com/compute/cuda/11.4.1/local_installers/cuda-repo-wsl-ubuntu-11-4-local_11.4.1-1_amd64.deb
sudo dpkg -i cuda-repo-wsl-ubuntu-11-4-local_11.4.1-1_amd64.deb
sudo apt-key add /var/cuda-repo-wsl-ubuntu-11-4-local/7fa2af80.pub
sudo apt-get update
sudo apt-get -y install cuda
nvdia-smiを実行すると下記のような感じになりました。

2-3. cuDNNのインストール
cuDNNのdebを下記のサイトからダウンロードしてインストールします。

cuDNNのダウンロードはNVIDIAアカウントで認証が必要なのでブラウザで落とすしかない(?)。
WSLでGUIインストール済みであれば、そちらでブラウザ開いてダウンロード、GUI入れてなければWindows側でダウンロードして適当なところに置きます。
例えば c:\temp の下に置いた場合、Ubuntu側からは /mnt/c/temp で参照できるので、下記のような感じでインストール出来ます。
dpkg -i /mnt/c/temp/libcudnn8_8.2.2.26-1+cuda11.4_amd64.deb
2-4. 環境変数設定
cuda-11にパスが通るように下記の設定を行います。
LD_LIBRARY_PATH="$LD_LIBRARY_PATH":/usr/local/cuda-11/lib64
PATH="$PATH":/usr/local/cuda/bin
上の2行を ~/.bashrc に追加し、
source ~/.bashrc
を実行しました。
2-4. Python まわりの設定
Ubuntu 20.04 には Python 3.8 がインストール済みのようでした。
この辺は好みですが、python3 って打つのがめんどいんで下記のコマンドを打って、python = python3.8 な感じにします。
sudo update-alternatives --install /usr/bin/python python /usr/bin/python3.8 1
また仮想環境で pipenv を使いたいのでインストールします。
sudo apt install pipenv
2-5. TensorFlow 環境構築
pipenv で Tensforflowの環境を構築します。
pipenv install --python 3.8
pipenv install tensorflow==2.4.2
最初は TensorFlow のバージョンは指定せずにインストールしようとしたのですが、下記のような warning が出て上手くインストール出来ませんでした。
Warning: Your dependencies could not be resolved. You likely have a mismatch in your sub-dependencies.
You can use $ pipenv install --skip-lock to bypass this mechanism, then run $ pipenv graph to inspect the situation.
Could not find a version that matches keras-nightly~=2.5.0.dev
...
下記を参考に2.4系をインストールすることにしました。
2-6. GPU認識確認
TensorFlow が GPU 認識出来ているかを確認します。
pythonを起動し下記を実行します。
from tensorflow.python.client import device_lib
device_lib.list_local_devices()
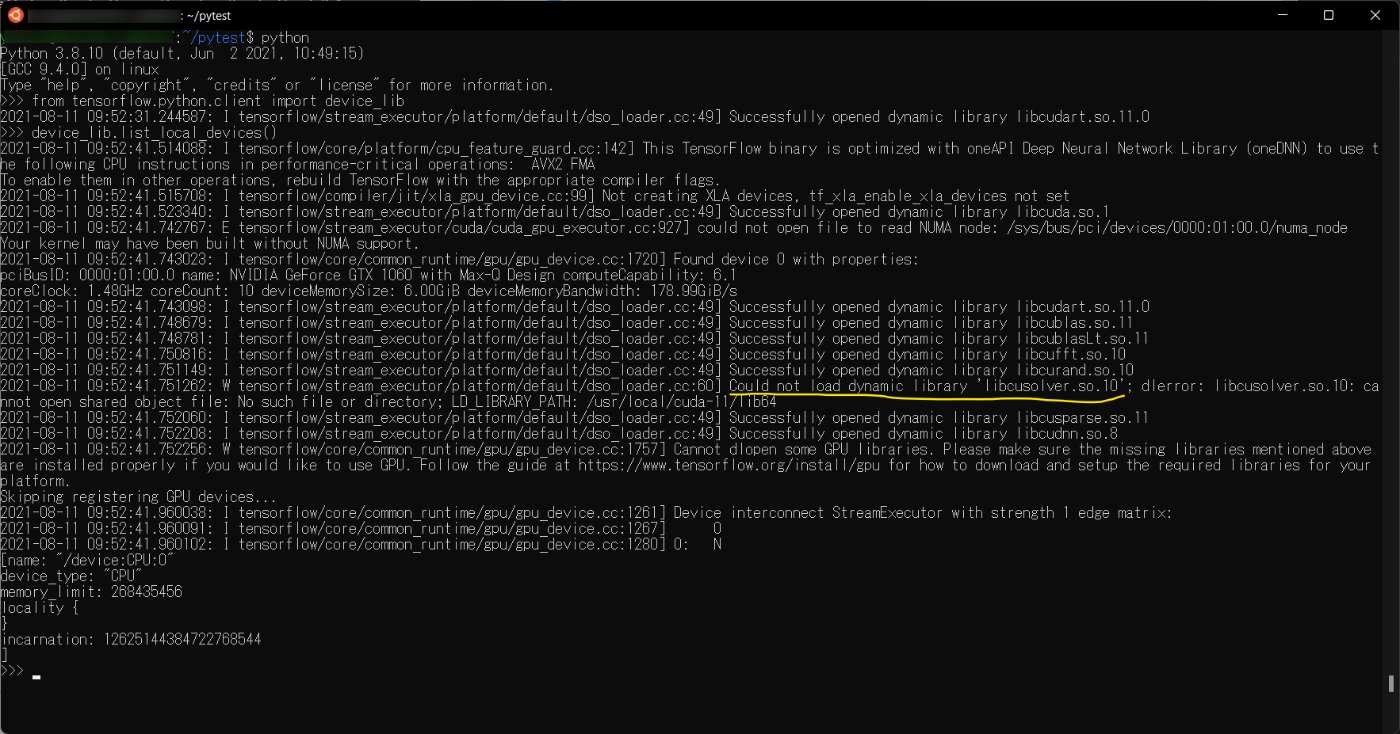
すると…
といった感じで
Could not load dynamic library 'libcusolver.so.10'; dlerror: libcusolver.so.10: cannot open shared object file: No such file or directory; LD_LIBRARY_PATH: /usr/local/cuda-11/lib64
というエラーが出ました。libcusolver.so.10 が見つからないと言っています。
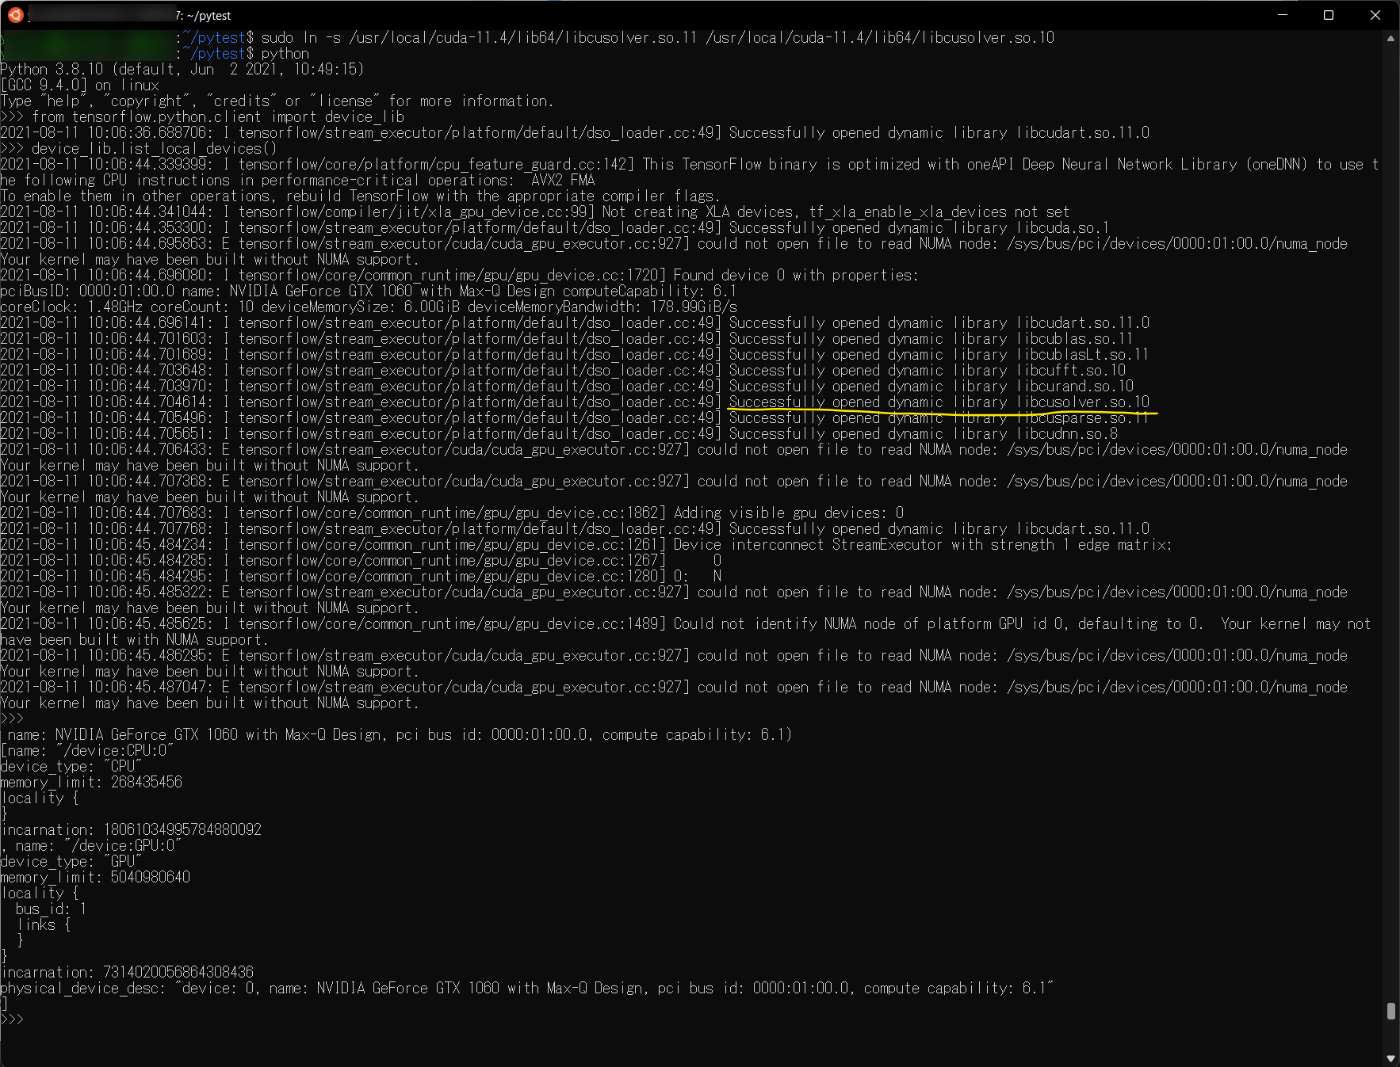
libcusolver.so.11 はあるようなので、こいつにシンボリックリンクを貼ります。
(これでいいのかは?ですが)
sudo ln -s /usr/local/cuda-11.4/lib64/libcusolver.so.11 /usr/local/cuda-11.4/lib64/libcusolver.so.10
上記シンボリックリンク生成後、再確認すると認識しました。
(参考記事)
2-6. MNISTサンプル実行
動作確認のために TensorFlow Tutorial のサンプルを動かしてみます。
を元に下記のようなコードを作成して実行します。
import tensorflow as tf

mnist = tf.keras.datasets.mnist
(x_train, y_train), (x_test, y_test) = mnist.load_data()
x_train, x_test = x_train / 255.0, x_test / 255.0

model = tf.keras.models.Sequential([
  tf.keras.layers.Flatten(input_shape=(28, 28)),
  tf.keras.layers.Dense(128, activation='relu'),
  tf.keras.layers.Dropout(0.2),
  tf.keras.layers.Dense(10)
])

predictions = model(x_train[:1]).numpy()
tf.nn.softmax(predictions).numpy()
loss_fn = tf.keras.losses.SparseCategoricalCrossentropy(from_logits=True)
loss_fn(y_train[:1], predictions).numpy()

model.compile(optimizer='adam',
              loss=loss_fn,
              metrics=['accuracy'])

model.fit(x_train, y_train, epochs=5)
model.evaluate(x_test,  y_test, verbose=2)
無事実行出来ました。

以上。
Discussion