MCPサーバーをリモートで動かすには?
はじめに
MCPサーバーはローカルで実行してMCPクライント(Clineなど)から使うのが一般的?だと思いますが、リモートサーバーで動かせないのかな?と思って調べたら、Cloudflareがそれっぽいの作ってるみたいなのでBuild a Remote MCP serverを見ながら動かしてみました。
動かしてみる
とりあえずサンプルリポジトリを作成します。(この方法でダウンロードするのはうまくいきませんでした。うまくいく方法は少し下に書いてます)
npm create -y cloudflare@latest -- my-mcp-server --template=cloudflare/ai/demos/remote-mcp-server
すべてdefaultで良いなら -y をつけると楽。
以下は実行したときに出力されたログ。
──────────────────────────────────────────────────────────────────────────────────────────────────────────
👋 Welcome to create-cloudflare v2.44.1!
🧡 Let's get started.
📊 Cloudflare collects telemetry about your usage of Create-Cloudflare.

Learn more at: https://github.com/cloudflare/workers-sdk/blob/main/packages/create-cloudflare/telemetry.md
──────────────────────────────────────────────────────────────────────────────────────────────────────────

╭ Create an application with Cloudflare Step 1 of 3
│
├ In which directory do you want to create your application?
│ dir ./my-mcp-server
│
├ What would you like to start with?
│ category Hello World example
│
├ Which template would you like to use?
│ type SSR / full-stack app
│
├ Which language do you want to use?
│ lang TypeScript
│
├ Copying template files
│ files copied to project directory
│
├ Updating name in `package.json`
│ updated `package.json`
│
├ Installing dependencies
│ installed via `npm install`
│
╰ Application created

╭ Configuring your application for Cloudflare Step 2 of 3
│
├ Installing wrangler A command line tool for building Cloudflare Workers
│ installed via `npm install wrangler --save-dev`
│
├ Installing @cloudflare/workers-types
│ installed via npm
│
├ Adding latest types to `tsconfig.json`
│ added @cloudflare/workers-types/2023-07-01
│
├ Retrieving current workerd compatibility date
│ compatibility date 2025-04-19
│
╰ Application configured

╭ Deploy with Cloudflare Step 3 of 3
│
├ Do you want to deploy your application?
│ no deploy via `npm run deploy`
│
╰ Done

────────────────────────────────────────────────────────────
🎉  SUCCESS  Application created successfully!

💻 Continue Developing
Change directories: cd my-mcp-server
Start dev server: npm run start
Deploy: npm run deploy

📖 Explore Documentation
https://developers.cloudflare.com/workers

🐛 Report an Issue
https://github.com/cloudflare/workers-sdk/issues/new/choose

💬 Join our Community
https://discord.cloudflare.com
────────────────────────────────────────────────────────────
作ったディレクトリに移動
cd my-mcp-server
Local development
ローカルサーバー起動
npm start
新しいターミナルでMCP Inspectorを起動する。
MCP Inspectorは、MCPサーバーをテストしたりデバッグしたりする開発ツールです。
╰─ npx -y @modelcontextprotocol/inspector@latest                                                          ─╯
Starting MCP inspector...
⚙️ Proxy server listening on port 6277
🔍 MCP Inspector is up and running at http://127.0.0.1:6274 🚀
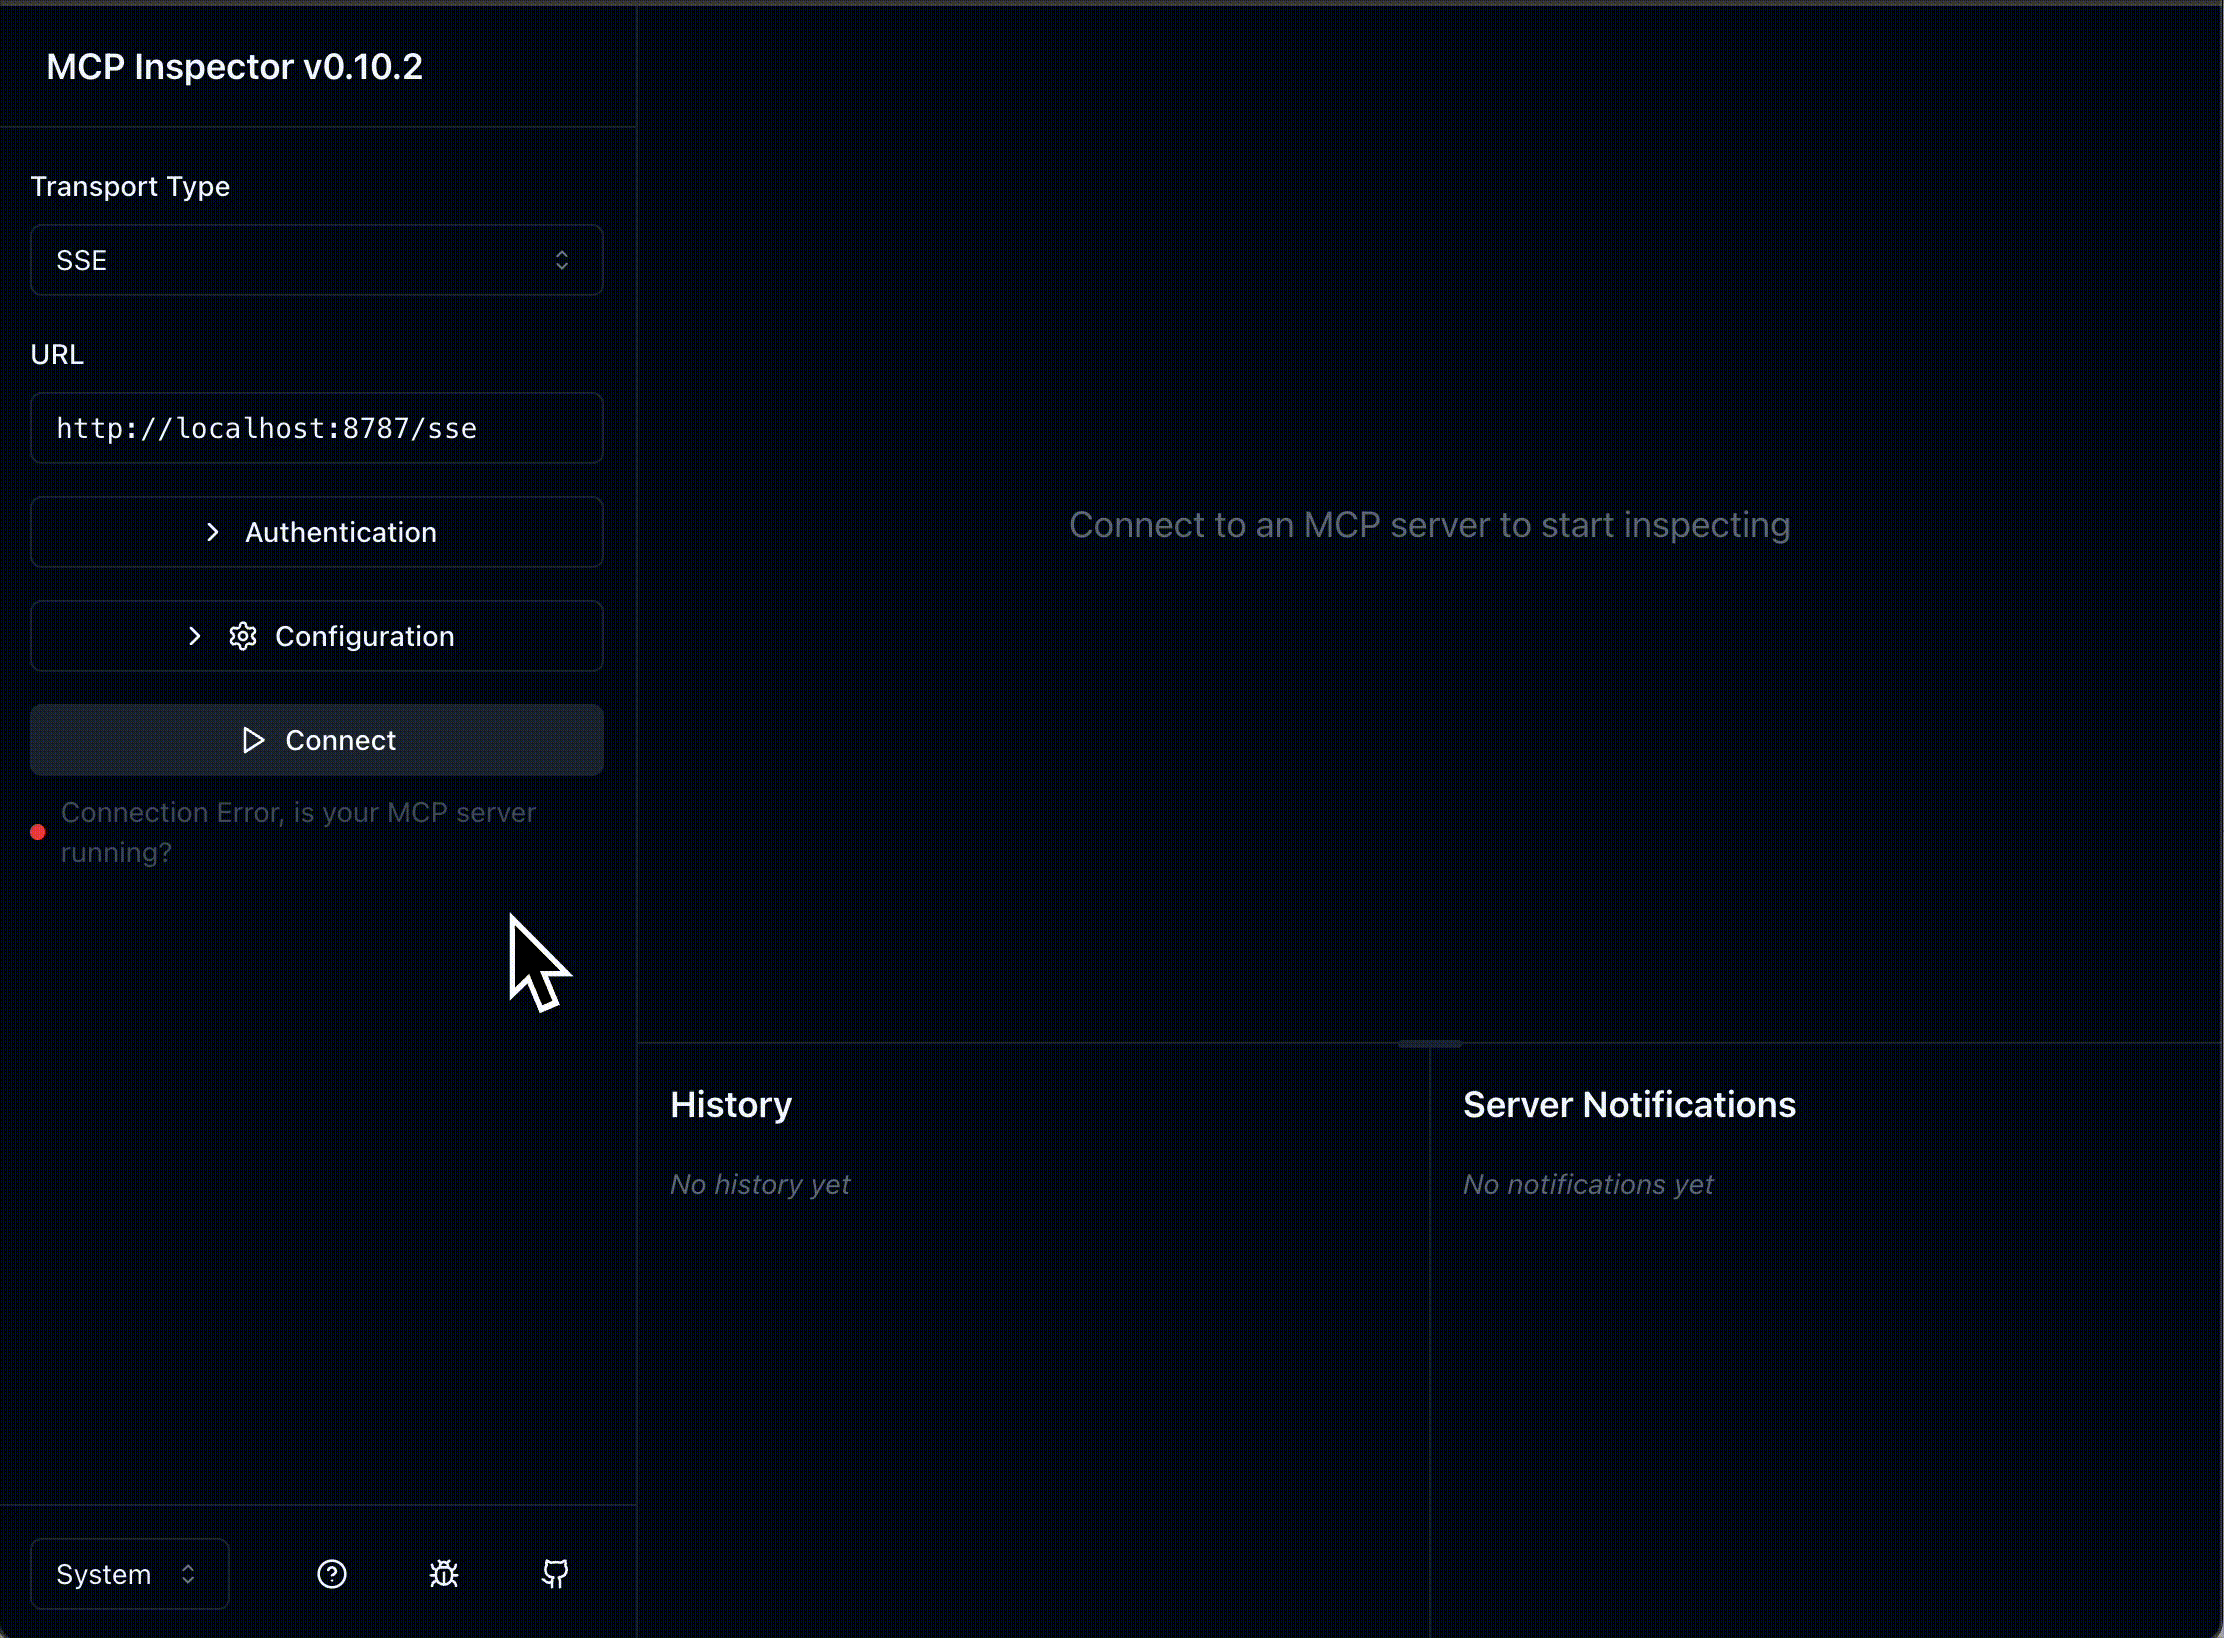
MCP Inspectorが http://127.0.0.1:6274 で動いてるので、アクセスしてみると以下のような画面が表示されました。

左側にあるTransport TypeをSSE に変更し、

URLに最初に起動した
http://localhost:8787/sse を設定して Connectをクリック。
するとError...

コード見ると、 sseがルーティングされてない...!?
export default {
	async fetch(request, env, ctx): Promise<Response> {
		const url = new URL(request.url);
		switch (url.pathname) {
			case '/message':
				return new Response('Hello, World!');
			case '/random':
				return new Response(crypto.randomUUID());
			default:
				return new Response('Not Found', { status: 404 });
		}
	},
} satisfies ExportedHandler<Env>;
ChatGPTに聞くと
Cloudflare のテンプレートが最新でない理由は、たいてい:
- キャッシュの影響
- CLIがGitHubの「サブディレクトリ」を直接扱えない制約
- テンプレートがGitHub上では更新されているがCLIに反映されていない
なんらかの影響で最新のコードが取得できないことがあるっぽいので、以下の方法でダウンロードしたほうがよさそうです。
改めてリポジトリをクローンします
git clone https://github.com/cloudflare/ai.git
cd ai/demos/remote-mcp-server
npm install
改めてlocal serverを起動
╰─ npm run start                                                                                          ─╯

> remote-mcp-server@0.0.0 start
> wrangler dev


 ⛅️ wrangler 4.11.1 (update available 4.12.0)
-------------------------------------------------------

Your Worker and resources are simulated locally via Miniflare. For more information, see: https://developers.cloudflare.com/workers/testing/local-development.

Your worker has access to the following bindings:
- Durable Objects:
  - MCP_OBJECT: MyMCP
- KV Namespaces:
  - OAUTH_KV: <ADD YOUR KV NAMESPACEID HERE> [simulated locally]
- Assets:
  - Binding: ASSETS
❓ Your types might be out of date. Re-run `wrangler types` to ensure your types are correct.
⎔ Starting local server...
[wrangler:inf] Ready on http://localhost:8787
╭──────────────────────────────────────────────────────────────────────────────────────────────────╮
│  [b] open a browser, [d] open devtools, [l] turn off local mode, [c] clear console, [x] to exit  │
╰──────────────────────────────────────────────────────────────────────────────────────────────────╯
MCP Inspectorに戻り、URLを確認後、Connectを押すと...
今度はうまくいったようです!
ログイン後MCP Inpsectorに戻ると、List Tools というボタンが押せるので、これを押すと、MCP サーバーが公開しているツール一覧が表示されるようです。

MCPクライントとの接続
MCPサーバーがOAuth認証で動作しているので、mcp-remoteローカル・プロキシを使ってClaude Desktopや他のMCPクライアントを接続することができます。これによって、OAuth対応のMCPサーバーと実際のMCPクライアントとのやりとりがどのようになるかをテストすることができます。
今回はClineで試してみます。 cline_mcp_setttings.jsonファイルに以下のように追加します。
{
  "mcpServers": {
    "math": {
      "command": "npx",
      "args": [
        "mcp-remote",
        "http://localhost:8787/sse"
      ]
    }
  }
}
追加するとログイン画面が出ますのでログインしてください。
以下のように緑になっていたらOKです

ためしにmath toolを使って投げてみます。

うまくいっているようです。
Deploy to Cloudflare
Cloudflareにデプロイしてみます。
npm run deployしたいところですが準備が必要みたいです。
npx wrangler kv namespace create OAUTH_KV
を実行してOAUTH_KVのidを作ります。
╰─ npx wrangler kv namespace create OAUTH_KV                                                              ─╯

 ⛅️ wrangler 4.11.1 (update available 4.12.0)
-------------------------------------------------------

Resource location: remote
🌀 Creating namespace with title "OAUTH_KV"
✨ Success!
Add the following to your configuration file in your kv_namespaces array:
{
  "kv_namespaces": [
    {
      "binding": "OAUTH_KV",
      "id": "xxxxxxxx"
    }
  ]
}
作ったidをwrangler.jsonc ファイルの <ADD YOUR KV NAMESPACEID HERE> と書かれてる箇所と置き換えます。
wrangler.jsoncについてはこちら https://developers.cloudflare.com/workers/wrangler/configuration/
その後
npm run deploy
としてください。
─ npm run deploy                                                                                         ─╯

> remote-mcp-server@0.0.0 deploy
> wrangler deploy


 ⛅️ wrangler 4.11.1 (update available 4.12.0)
-------------------------------------------------------

▲ [WARNING] You are about to publish a Workers Service that was last updated via the script API.

  Edits that have been made via the script API will be overridden by your local code and config.


✔ Would you like to continue? … yes
🌀 Building list of assets...
✨ Read 8 files from the assets directory <path>
🌀 Starting asset upload...
No updated asset files to upload. Proceeding with deployment...
Total Upload: 489.16 KiB / gzip: 98.21 KiB
Worker Startup Time: 15 ms
Your worker has access to the following bindings:
- Durable Objects:
  - MCP_OBJECT: MyMCP
- KV Namespaces:
  - OAUTH_KV: <createしたid>
- Assets:
  - Binding: ASSETS
Uploaded remote-mcp-server (7.22 sec)
Deployed remote-mcp-server triggers (0.69 sec)
  https://remote-mcp-server.<name>.workers.dev
Current Version ID: 4f90ea89-9ecc-47b2-8946-5a1de5746e5a
無事、deployされたようです。
MCPクライントとの接続をDeploy先のに変えれば、やりたかったことができました。
おわりに
これでremote mcp server側でいろいろなMCP実装すれば、クライアントでは設定をいじらなくてよくなるので楽になりそうかなと思います。
ただ、たくさんMCPサーバーが出てますが、それらをremote mcp server側でつなげる方法が知りたいので、別途調べる予定です。
Discussion