React Nativeのアニメーションを理解する(react-native-reanimated編)
この記事はReact Native 全部俺 Advent Calendar 9日目の記事です。
このアドベントカレンダーについて
このアドベントカレンダーは @itome が全て書いています。
基本的にReact NativeおよびExpoの公式ドキュメントとソースコードを参照しながら書いていきます。誤植や編集依頼はXにお願いします。
React Nativeのアニメーションを理解する(react-native-reanimated編)
前回はReact NativeのAnimated APIについて解説しましたが、今回はreact-native-reanimatedを使ったアニメーションの実装方法について解説します。
react-native-reanimatedとは
react-native-reanimatedは、React Nativeで柔軟なアニメーションを実現するためのライブラリです。以下のような特徴があります。
- 宣言的なAPI
- ジェスチャーとの統合
- 高いパフォーマンス
- New Architecture対応
React NativeのAnimated APIと比較して、より直感的なアニメーションの実装が可能です。
基本的な使い方
インストール
まずはプロジェクトにreact-native-reanimatedをインストールします。
npm install react-native-reanimated
babel.config.jsにプラグインを追加します。expoを使っている場合この設定は不要です。
module.exports = {
  presets: ['module:@metro-react-native-babel-preset'],
  plugins: ['react-native-reanimated/plugin'],
};
基本的なアニメーション
単純なフェードインアニメーションを例に、実装方法を見ていきましょう:
import React from 'react';
import { StyleSheet } from 'react-native';
import Animated, {
  useAnimatedStyle,
  withTiming,
  useSharedValue,
} from 'react-native-reanimated';

const FadeInView = () => {
  // アニメーション対象の値を定義
  const opacity = useSharedValue(0);

  // アニメーションスタイルを定義
  const animatedStyle = useAnimatedStyle(() => {
    return {
      opacity: opacity.value,
    };
  });

  React.useEffect(() => {
    // アニメーションの開始
    opacity.value = withTiming(1, { duration: 1000 });
  }, []);

  return (
    <Animated.View style={[styles.box, animatedStyle]}>
      <Text>Hello</Text>
    </Animated.View>
  );
};
アニメーションの基本概念

JSスレッドとUIスレッド
React Nativeアプリケーションでは、2つの主要なスレッドが存在します:
-
JavaScriptスレッド (JSスレッド)
- Reactコンポーネントのレンダリング
- イベントハンドリング
- ビジネスロジックの実行
- APIコールなどの非同期処理
-
UIスレッド (ネイティブスレッド)
- 画面の描画処理
- アニメーションの実行
- ネイティブの機能へのアクセス
従来のReact Nativeでは、これらのスレッド間の通信にブリッジが使用されていましたが、New Architectureではより効率的な通信が可能になっています。
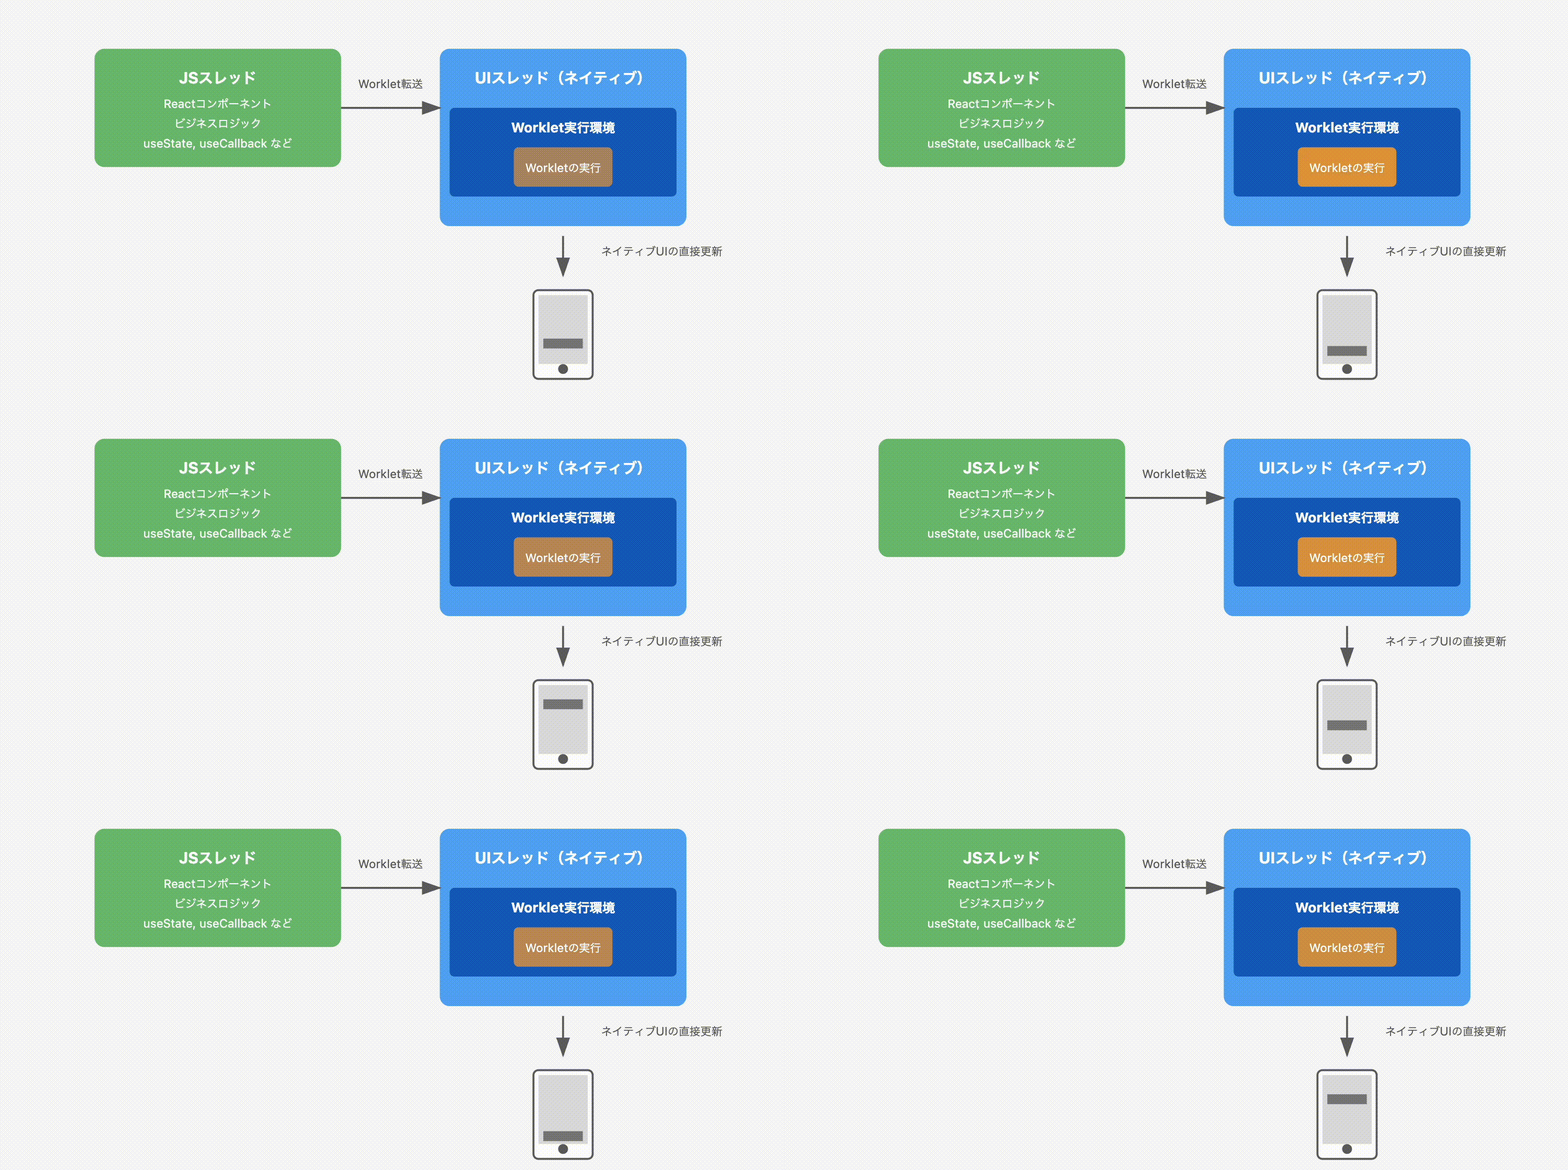
しかし、JSスレッドで重い処理が実行されている場合(例:大量のデータの処理やコンポーネントの再レンダリング)、アニメーションが影響を受ける可能性があります。これを解決するのがワークレットです。
ワークレットとは
ワークレットは、UIスレッドで直接実行される特殊なJavaScript関数です。以下のような特徴があります。
- JSスレッドの状態に依存しない実行
- アニメーションのスムーズな処理
- 同期的な実行
// 基本的なワークレット
const animatedStyle = useAnimatedStyle(() => {
  return {
    opacity: opacity.value,
  };
});

// 明示的なワークレット定義
const myWorklet = () => {
  'worklet';
  // このコードはUIスレッドで実行される
  console.log('This runs on the UI thread');
};
ワークレットの制約
ワークレット内では一部の機能が制限されます。
- 外部変数の参照(クロージャー)はできない
- 一部のJavaScript APIは使用不可
- React HooksやコンポーネントのPropsは直接参照できない
// ❌ 不正なワークレット
const MyComponent = () => {
  const myValue = 100;

  const style = useAnimatedStyle(() => {
    // 外部変数myValueは参照できない
    return {
      width: myValue
    };
  });
};

// ✅ 正しいワークレット
const MyComponent = () => {
  const myValue = useSharedValue(100);

  const style = useAnimatedStyle(() => {
    // SharedValueは参照可能
    return {
      width: myValue.value
    };
  });
};
ワークレットの使用場面
ワークレットは主に以下のような場面で使用します:
- アニメーションスタイルの定義
const animatedStyle = useAnimatedStyle(() => {
  return {
    transform: [
      { scale: withSpring(scale.value) }
    ]
  };
});
- ジェスチャーハンドラ
const panGesture = Gesture.Pan()
  .onUpdate((event) => {
    'worklet';
    position.value = {
      x: event.translationX,
      y: event.translationY
    };
  });
- スクロールハンドラ
const scrollHandler = useAnimatedScrollHandler({
  onScroll: (event) => {
    'worklet';
    scrollY.value = event.contentOffset.y;
  },
});
- アニメーション関数
const runAnimation = () => {
  'worklet';
  position.value = withSequence(
    withSpring(100),
    withSpring(0)
  );
};
ワークレット間の通信
ワークレット同士はrunOnJSを使って通信することができます:
const onGesture = useCallback(() => {
  console.log('Gesture completed!');
}, []);

const gesture = Gesture.Tap()
  .onEnd(() => {
    'worklet';
    // JSスレッドの関数を呼び出す
    runOnJS(onGesture)();
  });
JSスレッドとUIスレッドの連携
実際のアプリケーションでは、JSスレッドとUIスレッドを適切に連携させる必要があります:
const AnimatedComponent = () => {
  // JSスレッドで管理する状態
  const [isEnabled, setIsEnabled] = useState(true);

  // UIスレッドで管理する状態
  const scale = useSharedValue(1);

  // JSスレッドからUIスレッドの値を更新
  const toggleScale = useCallback(() => {
    // SharedValueの更新はUIスレッドで実行される
    scale.value = withSpring(scale.value === 1 ? 1.5 : 1);
  }, []);

  // UIスレッドからJSスレッドの値を更新
  const gesture = Gesture.Tap()
    .onEnd(() => {
      'worklet';
      // JSスレッドの関数を呼び出す
      runOnJS(setIsEnabled)(!isEnabled);
    });

  const animatedStyle = useAnimatedStyle(() => ({
    transform: [{ scale: scale.value }],
    opacity: isEnabled ? 1 : 0.5,
  }));

  return (
    <GestureDetector gesture={gesture}>
      <Animated.View style={animatedStyle}>
        <Button onPress={toggleScale} title="Toggle Scale" />
      </Animated.View>
    </GestureDetector>
  );
};
このように、JSスレッドとUIスレッドを適切に使い分けることで、パフォーマンスとユーザー体験を最適化することができます。
SharedValueによる状態管理
SharedValueは、アニメーションで使用する値を管理するための仕組みです:
// 数値のSharedValue
const opacity = useSharedValue(0);

// オブジェクトのSharedValue
const position = useSharedValue({ x: 0, y: 0 });

// 値の更新
opacity.value = 1;
position.value = { x: 100, y: 200 };
ワークレットによるアニメーション制御
ワークレットは、アニメーション中の値の変化を定義する関数です:
// スタイルの定義
const animatedStyle = useAnimatedStyle(() => {
  return {
    transform: [
      { scale: scale.value },
      { translateX: position.value.x },
    ],
  };
});

// ジェスチャーハンドラ
const gestureHandler = useAnimatedGestureHandler({
  onStart: (_, context) => {
    context.startX = position.value.x;
  },
  onActive: (event, context) => {
    position.value = {
      x: context.startX + event.translationX,
      y: 0,
    };
  },
});
実践的なアニメーション実装
インタラクティブなカード
スワイプで削除できるカードの実装例です:
import { Gesture, GestureDetector } from 'react-native-reanimated';

const SwipeableCard = () => {
  const translateX = useSharedValue(0);

  const gesture = Gesture.Pan()
    .onUpdate((event) => {
      translateX.value = event.translationX;
    })
    .onEnd(() => {
      // スワイプ距離が閾値を超えたら削除
      const shouldDismiss = Math.abs(translateX.value) > 100;
      if (shouldDismiss) {
        translateX.value = withSpring(
          translateX.value > 0 ? 500 : -500
        );
      } else {
        translateX.value = withSpring(0);
      }
    });

  const animatedStyle = useAnimatedStyle(() => ({
    transform: [{ translateX: translateX.value }],
  }));

  return (
    <GestureDetector gesture={gesture}>
      <Animated.View style={[styles.card, animatedStyle]}>
        <Text>Swipe me</Text>
      </Animated.View>
    </GestureDetector>
  );
};
スクロール連動アニメーション
スクロール位置に応じて要素をアニメーションさせる例です:
import { useAnimatedScrollHandler } from 'react-native-reanimated';

const ScrollAnimatedView = () => {
  const scrollY = useSharedValue(0);
  const headerHeight = useSharedValue(100);

  const scrollHandler = useAnimatedScrollHandler({
    onScroll: (event) => {
      scrollY.value = event.contentOffset.y;
      // スクロール位置に応じてヘッダーの高さを変更
      headerHeight.value = Math.max(
        50,
        100 - scrollY.value
      );
    },
  });

  const headerStyle = useAnimatedStyle(() => ({
    height: headerHeight.value,
  }));

  return (
    <>
      <Animated.View style={[styles.header, headerStyle]}>
        <Text>Header</Text>
      </Animated.View>
      <Animated.ScrollView
        onScroll={scrollHandler}
        scrollEventThrottle={16}
      >
        {/* コンテンツ */}
      </Animated.ScrollView>
    </>
  );
};
複雑なアニメーションの組み合わせ
複数のアニメーションを組み合わせて、より豊かな表現を実現できます:
const ComplexAnimation = () => {
  const scale = useSharedValue(1);
  const rotation = useSharedValue(0);

  const startAnimation = () => {
    // 同時アニメーション
    scale.value = withSpring(1.2);
    rotation.value = withRepeat(
      withTiming(2 * Math.PI, { duration: 1000 }),
      3, // 3回繰り返し
      true // 逆方向にも回転
    );
  };

  const animatedStyle = useAnimatedStyle(() => ({
    transform: [
      { scale: scale.value },
      { rotate: `${rotation.value}rad` },
    ],
  }));

  return (
    <Pressable onPress={startAnimation}>
      <Animated.View style={[styles.box, animatedStyle]}>
        <Text>Tap me</Text>
      </Animated.View>
    </Pressable>
  );
};
まとめ
react-native-reanimatedは、宣言的でパワフルなアニメーションAPIを提供します。
特に
- SharedValueによる直感的な状態管理
- ジェスチャーとの簡単な連携
- 複雑なアニメーションの実装が容易
- 高いパフォーマンス
のなど特徴があり、モダンなReact Nativeアプリケーションに最適なアニメーションライブラリとなっています。
Discussion