【Nginx】Let’sEncryptからのSSL証明書がcertbot-autoで取得できない際の対処
背景
下記環境でWEBシステムを構築し、HTTPS化するためにSSL証明書を取得するため、certbot-autoを利用したら権限エラーとなり取得できませんでした。
その対処を以下に記します。
先人たちの知恵をお借りするなどして解決できたことを、この場をお借りして感謝するとともに、大変恐縮ですが 自分のメモ としても、こちらへまとめておきます。
環境
- AWS EC2 (Amazon Linux 2)
- Python 3.7.9 ※2020/11/29時点のAmazon Linux2でのデフォルト
- Django 3.1.3
- PostgreSQL 11.5 ※同上
- Nginx 1.12 ※同上
- Gunicorn
- Putty 0.74
1.現象
1) 以下の手順で、nginx.confを修正
$ git clone https://github.bom/certbot/certbot
(...略...)
$ sudo yum -y install python-virtualenv
(...略...)
$ sudo vi /etc/nginx/nginx.conf
下記内容を追加。
server {
(...略...)

    location /.well-known/acme-challenge {
        root /usr/share/nginx/html;

    }
(...略...)
}
2) SSL証明書を取得するためのコマンドを実行
$ sudo ~/certbot/certbot-auto --no-bootstrap certonly --webroot -w /usr/share/nginx/html -d <独自ドメイン名> -m <メールアドレス> --agree-tos -n
Skipping bootstrap because certbot-auto is deprecated on this system.
/home/app_admin/certbot/certbot-auto has insecure permissions!
To learn how to fix them, visit https://community.letsencrypt.org/t/certbot-auto-deployment-best-practices/91979/
Your system is not supported by certbot-auto anymore.
Certbot cannot be installed.
Please visit https://certbot.eff.org/ to check for other alternatives.
上記のエラーメッセージが発生。
certbot-autoの権限が安全じゃないと言われている模様です。
2.原因
上述の通り、certbot-autoファイルや、その周辺のフォルダの権限が緩いため。
公式サイトの英文を読むと、
権限をrootのみにするなどの対処で解消できる
という説明でしたが、このときは権限を変えても上手くいきませんでした。
このため、別の方法を探していたところ、末尾の参考に掲載したサイトの情報を得まして、下記の方法を実行しました。
3.対処
(nginxは既に起動している前提です。)
下記コマンドを、順に実行。
$ sudo wget -r --no-parent -A 'epel-release-*.rpm'  http://dl.fedoraproject.org/pub/epel/7/x86_64/Packages/e/
(...略...)
$ sudo rpm -Uvh dl.fedoraproject.org/pub/epel/7/x86_64/Packages/e/epel-release-*.rpm
(...略...)
$ sudo yum install certbot python2-certbot-nginx
(...略...)
$ sudo certbot --nginx
   *対話形式で、メールアドレスや同意文の承諾やドメイン名を聞かれるため、都度入力
4.結果
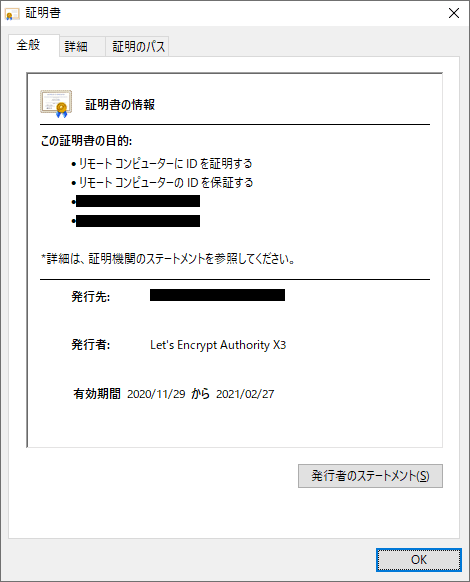
SSL証明書が取得できました。
 - Congratulations! Your certificate and chain have been saved at:
   /etc/letsencrypt/live/<独自ドメイン>/fullchain.pem
   Your key file has been saved at:
   /etc/letsencrypt/live/<独自ドメイン>/privkey.pem
   Your cert will expire on 2021-02-27. To obtain a new or tweaked
   version of this certificate in the future, simply run certbot again
   with the "certonly" option. To non-interactively renew *all* of
   your certificates, run "certbot renew"
 - Your account credentials have been saved in your Certbot
   configuration directory at /etc/letsencrypt. You should make a
   secure backup of this folder now. This configuration directory will
   also contain certificates and private keys obtained by Certbot so
   making regular backups of this folder is ideal.
5.後処理
nginx.confをHTTPS化に対応するため再度修正します。
server {
    listen      443 ssl;
    server_name <独自ドメイン名>     # Elastic IP のままではダメでした
    root        /usr/share/nginx/html;

    ssl_certificate "/etc/letsencrypt/live/<独自ドメイン名>/fullchain.pem";
    ssl_certificate_key "/etc/letsencrypt/live/<独自ドメイン名>/privkey.pem";

(...略...)
}
nginxをリロードします。
$ sudo systemctl reload nginx.service
https://<独自ドメイン名> でHTTPS化ができました。
↓赤丸で囲んだ箇所に「鍵」マークが付いています。


おまけ
Let's EncryptのSSL証明書の有効期限は90日間であるため、証明書を定期的に更新することが必要です。
cronにコマンドを登録して自動化します。
$ sudo crontab -e
cronの基本書式
<分> <時> <日> <月> <曜日> <コマンド>
下記は、毎月1日の午前3時00分(UTC)にコマンドを実行する例です。
cron形式での指定はタイムゾーンがUTCのみで変更できません。
日本標準時(JST)での設定とするには、UTCに対して 「-9時間」(9時間を引いた)の値 を指定します。
従いまして、上記例は毎月1日の正午(12時)(JST)にコマンドを実行する例です。
0 3 1 * * /home/<ユーザー名>/certbot/certbot-auto renew -q --renew-hook "/usr/bin/systemctl reload nginx.service"
編集時に「i」キー押下、編集後「esc」押下し:wq!と入力して保存。
(保存せずに抜けたい場合は:q!を入力。)
コマンドプロンプトに戻ります。
参考
-
Amazon Linux 2 AMIになってからletsencryptがスムーズにいかない
末尾のほうに、上記3.対処の手順が記載されています。
(編集後記)
この件では、nginx.conf内のserver_nameの指定を"Elastic IP"としていたのですが上手くいかず、某所にて"独自ドメイン名"にしてみると良いと回答を得たという経緯もあります。
Discussion