GitHub 基本的な使い方とSSH認証
GitHubアカウントの作成済みを前提に書いています。
GitHub新しい認証方法(SSH)
廃止された認証方法だとエラー
最初は、GitHubへの認証が必要です。しかし、ユーザー名とパスワードでの認証方法が廃止されたため、下記のようなエラーが出ると思います。
Username for 'https://github.com': watakarinto
Password for 'https://watakarinto@github.com':
remote: Support for password authentication was removed on August 13, 2021.
remote: Please see https://docs.github.com/en/get-started/getting-started-with-git/about-remote-repositories#cloning-with-https-urls for information on currently recommended modes of authentication.
fatal: Authentication failed for 'https://github.com/watakarinto/test.git/'
なので、新しく変更された認証方法を使う必要があります。
公開鍵と秘密鍵を作成
# 鍵を入れるディレクトリに移動
cd ~/.ssh
# .sshディレクトリがなければ作成
mkdir ~/.ssh
次に下記のコマンドを実行し、鍵を作ります。
# 鍵の生成
$ ssh-keygen -t rsa
Generating public/private rsa key pair.
Enter file in which to save the key (/Users/wataree/.ssh/id_rsa): id_git_rsa
Enter passphrase (empty for no passphrase):
Enter same passphrase again:
オプション-tでrsaを選択(デフォルト)
コマンドを実行後、最初は鍵の名前を指定(今回は「id_git_rsa」)
その後、2回エンターを押して飛ばす。慣れてきたら設定していく感じで行きます。
公開鍵をGitHubに登録
右上のアイコンをクリック>Settings>SSH and GPG keys>New SSH keyをクリック
TitleにはどのPCに秘密鍵を保存しているか分かる名前にするとよさそうです。
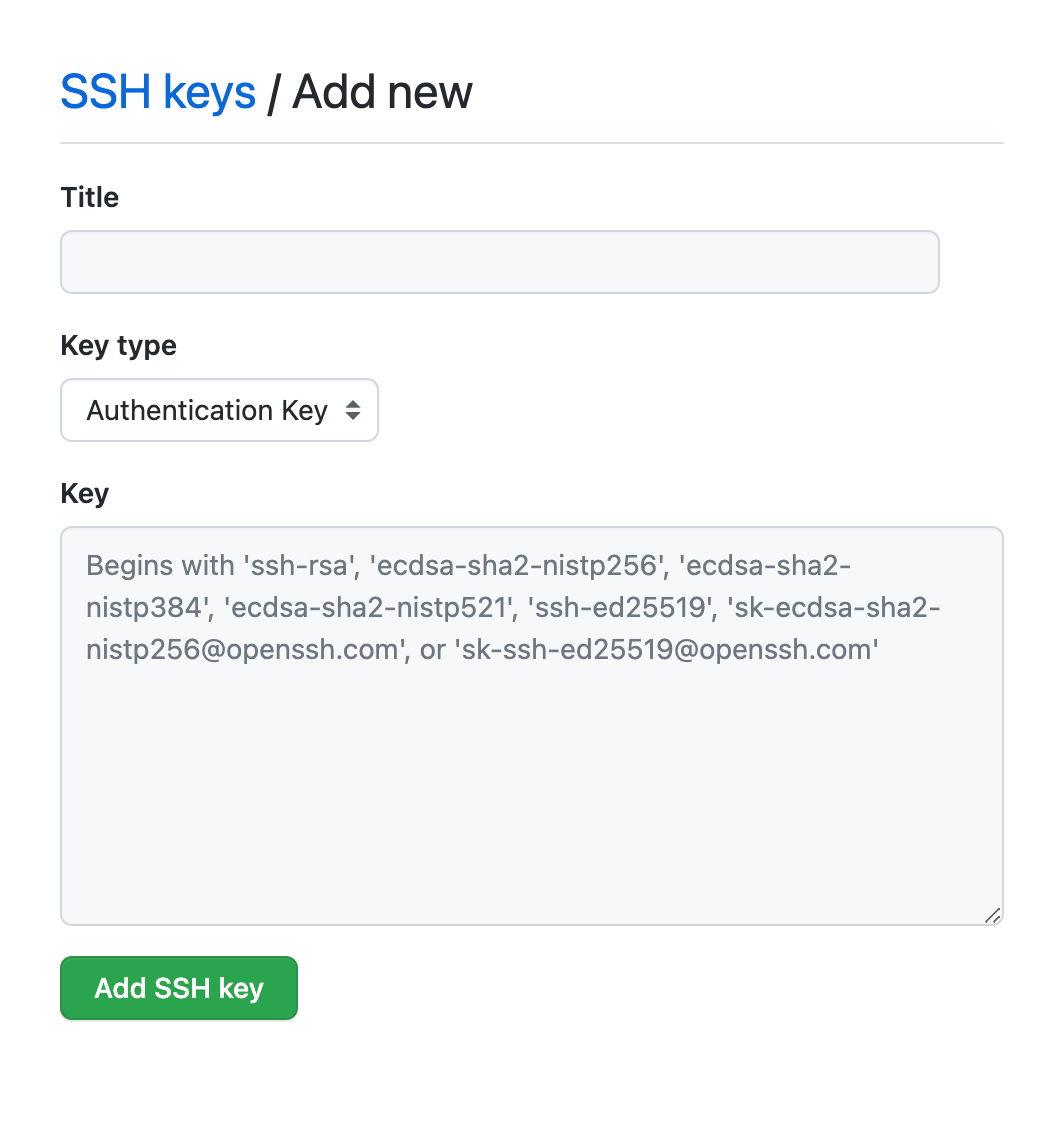
Keyには鍵の中身を記載します。
# 鍵の中身をクリップボードへコピー(Mac)
pbcopy < ~/.ssh/id_git_rsa.pub
# 鍵の中身をクリップボードへコピー(Windows)
clip < ~/.ssh/id_rsa.pub
最後に「Add SSH key」をクリックして完了。
追加の設定(公開鍵の名前を指定した人)
公開鍵に名前を指定したため、~/.ssh/の下にconfigファイルを作成し、設定を反映します。
# viでファイルの作成と編集を同時に行う
vi ~/.ssh/config
- キーボードの「i」キーを押して、編集モードにする
- 下記の内容をコピーして貼り付け
Host github github.com
  HostName github.com
  IdentityFile ~/.ssh/id_git_rsa #ここに自分の鍵のファイル名
  User git
- 「esc」キーを押す
-
:wqを入力しEnterを押して抜け出す(終了し保存されます。)
接続確認
# Hi User名! You've successfully~が表示されれば成功
$ ssh -T git@github.com
Hi watakarinto! You've successfully authenticated, but GitHub does not provide shell access.
基本操作と流れ
- リモートリポジトリの作成
- ローカルリポジトリの作成、初期化
git init - リモートリポジトリの情報を追加と更新
git remote add origin git@github.com:○○
git pull origin main - インデックスに登録
git add . - コミット
git commit -m "add new file" - プッシュ
git push origin master
※ 1~3は一番初めのみ行う。あとは、ファイルの編集・追加を行うたび4~6を繰り返す。
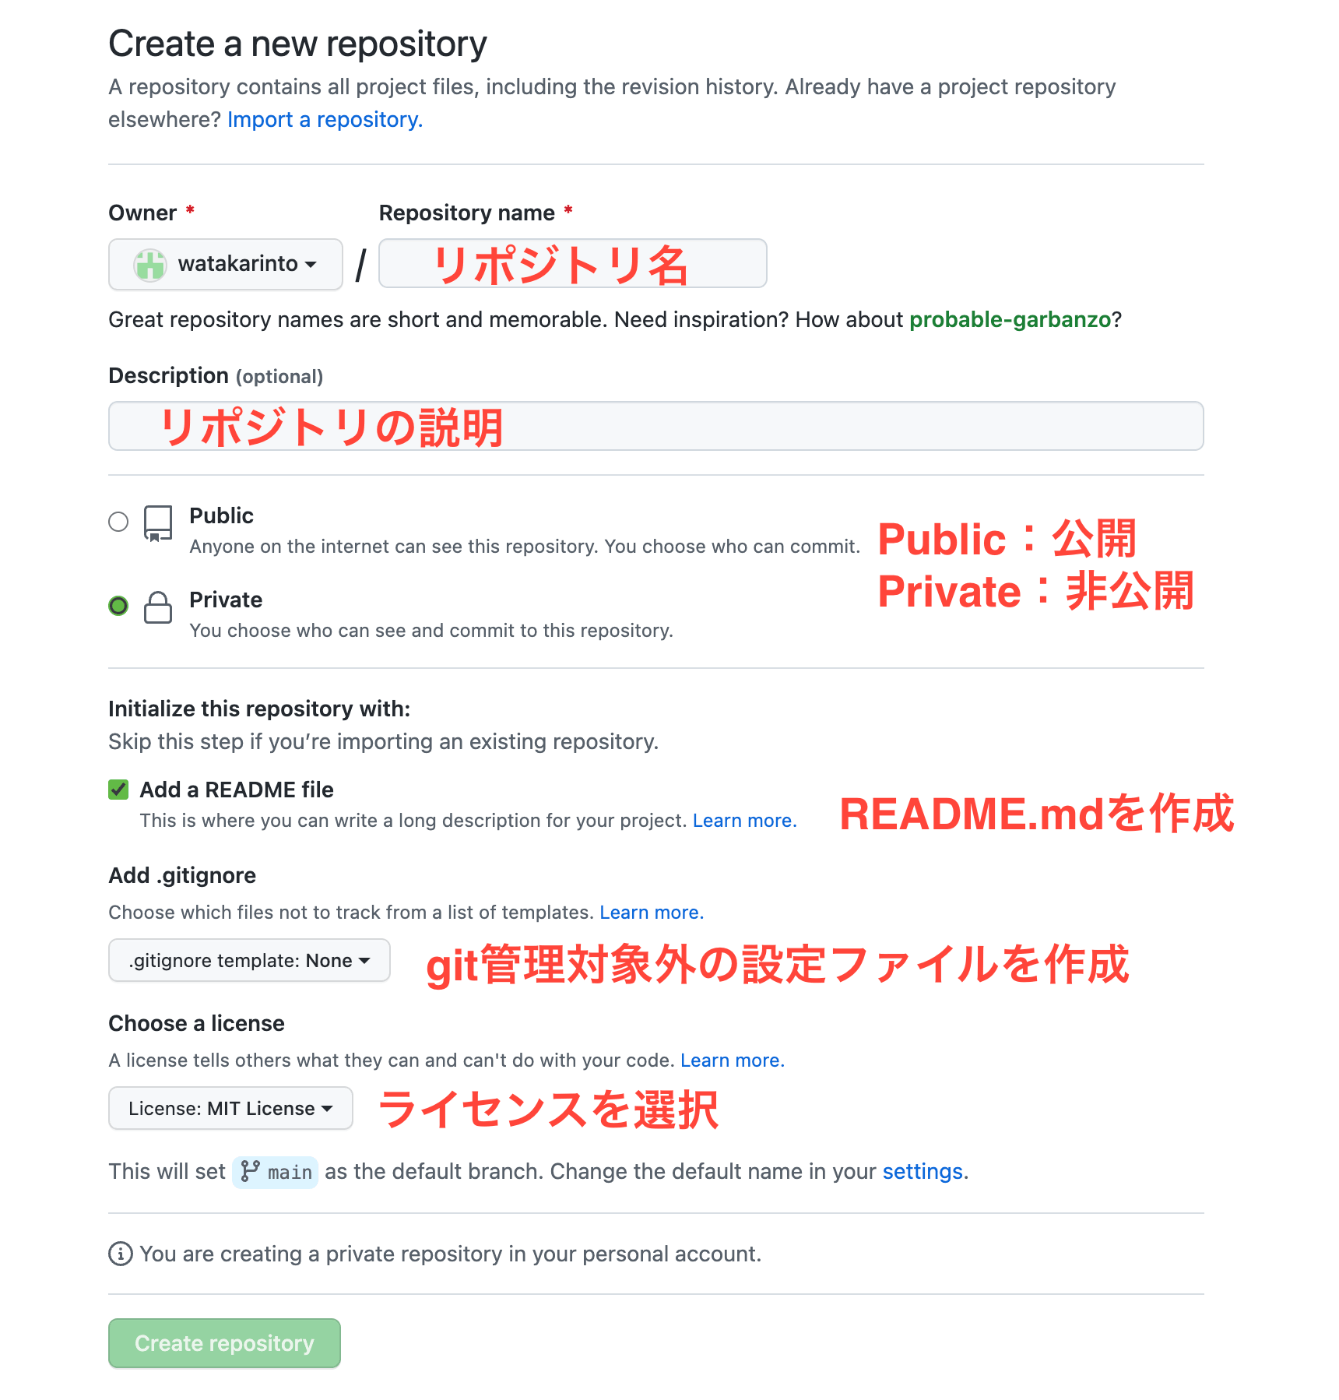
1. リモートリポジトリの作成
GitHubにログインしたら、右上の+からNew repositoryを押す。
2. ローカルリポジトリの作成
# 作業ディレクトリを作成(今回はドキュメントの中に作りました。)
mkdir ~/Documents/test
# 作業ディレクトリに移動
cd ~/Documents/test
# testフォルダーをローカルリポジトリとして初期化
# testフォルダー内のデータがgitで管理される
$ git init
Initialized empty Git repository in /Users/wataree/Documents/test/.git/
3. リモートリポジトリの情報を追加と更新
作成したおいたリポジトリのリンクを取得します

# origin以降はコピーしてきたリポジトリを指定する
git remote add origin git@github.com:ユーザー名/リポジトリ名.git
# リモートリポジトリをローカルリポジトリに反映する
git pull origin main
ここまでの作業が終わったら、あとは自分の作ったファイルなどを追加・編集を行い、4~6の手順を繰り返していくことでGitHubを更新していけます。
Pullした時にエラーが出る場合
一番初めはPullした時に下記のようなhintがでます。その場合、設定をする必要があります。
hint: You have divergent branches and need to specify how to reconcile them.
hint: You can do so by running one of the following commands sometime before
hint: your next pull:
hint:
hint:   git config pull.rebase false  # merge
hint:   git config pull.rebase true   # rebase
hint:   git config pull.ff only       # fast-forward only
hint:
hint: You can replace "git config" with "git config --global" to set a default
hint: preference for all repositories. You can also pass --rebase, --no-rebase,
hint: or --ff-only on the command line to override the configured default per
hint: invocation.
3つの中から好みの設定を一つ選び実行します。
git config pull.rebase false  # merge
git config pull.rebase true   # rebase
git config pull.ff only       # fast-forward only
git config pull.rebase false
これはデフォルトの挙動で、これまでの挙動と同じになります。
rebaseせずにfast-forward可能な場合はfast-forwardし、そうでない場合はmerge commitします。git config pull.rebase true
git pull --rebaseを行った場合と同じになり、merge commitが作成されずに、コミット履歴が一直線になります。git config pull.ff only
--ff-only optionをつけた場合と同じ挙動になります。
fast-forward可能な場合はfast-forwardし、そうでない場合はmerge,rebaseせずにエラー終了します。
git pullに関しての参考になるサイトです。
4. インデックスに登録
git add ファイルパスでインデクスに登録できます。.でカレントディレクトリ内の全てのファイルを指定しています。
git add .
オプション
オプションで-pをつけると、確認しながらインデックスに登録できます。ファイルパスは省略可能です。その場合は変更があったファイル全てを順に見ていきます。
git add -p ファイルパス
5. コミット
-mのオプションを使いコミットメッセージを書きます。
git commit -m "first commit"
6. プッシュ
ローカルリポジトリの内容をリモートリポジトリへ反映させます。
git push origin main
その他のコマンドメモ
# 現在の状態の確認
git status
# ブランチの一覧を表示
git branch
# リモートリポジトリの詳細一覧を表示
git remote -v
# 強制プッシュ
git push origin main -f
Discussion