🦝
Next.jsのApp Routerで部品管理をして真ん中にMDXをはめる。
Next.jsのApp Routerでコンポーネント管理する。で、CMSチックに部品管理ことができるとメインコンテンツを何でどう書くかという話ですが、ひとつはMarkdown(mdx)でフラットファイルをサイトにおいて管理していく方法がありますね。今回は、Main部分をMarkdownで
表示したいと思います。
まずは、毎度おなじみ、ひな型作成機create-next-appです。
npx create-next-app --typescript
設問設定は以下となります。
| 質問 | 入力内容 |
|---|---|
| √ What is your project named? | mdx-main |
| √ Would you like to use ESLint? | Yes |
| √ Would you like to use Tailwind CSS? | Yes |
√ Would you like to use src/ directory? |
Yes |
| √ Would you like to use App Router? (recommended) | Yes |
| √ Would you like to customize the default import alias? | No |
cd mdx-main
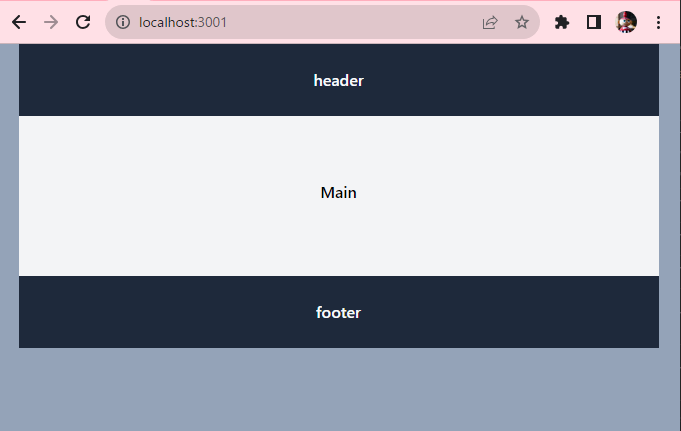
カレントディレクトリに移動したら、Next.jsのApp Routerでコンポーネント管理する。と同じように部品入れフォルダを作り、ファイルをheader.tsxとfooter.tsxを作成します。
md src/app/components
touch src/app/components/header.tsx
touch src/app/components/footer.tsx
src/app/components/header.tsx
export default function Header() {
  return (
    <header className='flex justify-center bg-slate-300 p-6 text-3xl'>
     header
    </header>
  )
}
src/app/components/footer.tsx
export default function Footer() {
  return (
<footer className='flex justify-center bg-slate-300 p-6 text-3xl'>
 footer
</footer>
  )
}
mdxをインストールします。
npm install @next/mdx @mdx-js/loader @mdx-js/react @types/mdx
次にMarkdwonのサンプルをおきます。ファイル構成はNextjsMDXの公式サンプルと同じにしましょう。
 md src/app/blog/hello-world
 touch src/app/blog/hello-world/page.mdx
markdownファイルサンプルを作成します。
src/app/blog/hello-world/page.mdx
import Header from '../../components/header'
import Footer from '../../components/footer'
<Header/>
# Hello World
This is an example blog page with MDX support.
<Footer/>
mdx表示用コンポーネントを設定します。
touch src/mdx-components.tsx
src/mdx-components.tsx
import type { MDXComponents } from 'mdx/types'

// This file allows you to provide custom React components
// to be used in MDX files. You can import and use any
// React component you want, including components from
// other libraries.

// This file is required to use MDX in `app` directory.
export function useMDXComponents(components: MDXComponents): MDXComponents {
  return {
    // Allows customizing built-in components, e.g. to add styling.
     h1: ({ children }) => <h1 style={{ fontSize: "100px" }}>{children}</h1>,
    ...components,
  }
}
MDX を利用できるように next.config.js を修正します。
next.config.js
// next.config.js

const withMDX = require('@next/mdx')({
  extension: /\.mdx?$/,
  options: {
    // If you use remark-gfm, you'll need to use next.config.mjs
    // as the package is ESM only
    // https://github.com/remarkjs/remark-gfm#install
    remarkPlugins: [],
    rehypePlugins: [],
    // If you use `MDXProvider`, uncomment the following line.
    // providerImportSource: "@mdx-js/react",
  },
})

/** @type {import('next').NextConfig} */
const nextConfig = {
  // Configure pageExtensions to include md and mdx
  pageExtensions: ['ts', 'tsx', 'js', 'jsx', 'md', 'mdx'],
  // Optionally, add any other Next.js config below
  reactStrictMode: true,
}

// Merge MDX config with Next.js config
module.exports = withMDX(nextConfig)
いらない部分を捨てて最小にした globals.css です。
app/globals.css
@tailwind base;
@tailwind components;
@tailwind utilities;
今回は、src/appルートにある、layout.tsxとpage.tsxをテンプレートのままアクセスしないので修正しません。
今までTreeは以下のようになります。
src/
next.config.js(修正)
tailwind.config.tsx
	│  mdx-components.tsx(新規)
	│
	└─app
	    │  favicon.ico
	    │  globals.css(修正)
	    │  layout.tsx(使用せず)
	    │  page.tsx(使用せず)
	    │
	    ├─blog
	    │  │  layout.tsx(新規)
	    │  │
	    │  └─hello-world(新規)
	    │          page.mdx(新規)
	    │
	    └─components(新規)
		    footer.tsx(新規)
		    header.tsx(新規)
httpサーバー起動させ確認をさせます。
npm run dev
ブラウザーに以下を打ちます。
http://localhost:3000/blog/hello-world
以下のようなブラウザ表示となります。
Discussion