【Flutter】Material Design3のNavigationBarを本気で学ぶ
この記事について
本気で学ぶシリーズ第3弾です。公式ドキュメントを参考に、初学者から中級者に向けてわかりやすく解説出来ればと思います。指摘事項や助言などは歓迎です。もしございましたら、Twitterもしくは記事コメントまでお願い致します。
NavigationBarの基礎
※この記事はBottomNavigationBarの知識を前提にしています。詳しくはまずはこちらをご覧ください。
NavigationBarはMaterial Design3に対応したBottomNavigationBarです。
NavigationBarクラスはBottomNavigationBarと同様に、ScaffoldのbottomNavigationBarプロパティに配置します。
NavigationBarはBottomNavigationBarとほとんど同じですが、以下の大きな違いがあります。
・NavigationBarはMaterial Design3にdefaultで対応している。(それに応じてかなりの数の見た目変更プロパティや要素が消えた)
・BottomNavigationBarはStatefulWidgetを継承しているが、NavigationBarはStatelessWidgetを継承している。
・BottomNavigationBarのtypeプロパティが無いので、items(destinations)を4個以上設定しても自動でshiftingする事は無い。
NavigationBarのプロパティ
NavigationBarウィジェットのプロパティはBottomNavigationBarと、多少の相違点があります。
・itemsという概念ではなく、destinationsという概念の導入
・見た目を手動で変えるプロパティの大幅減少(Material Design3の考えに基づいて)
相違点を中心とし、これに関連するプロパティを解説していきます。
| prop名 | 説明 |
|---|---|
| animationDuration | 画面遷移時のアニメーション持続時間です。 |
| backgroundColor | NavigationBarの背景色を決定します。 |
| destinations | itemsという概念から置き換わった物です。itemsとは違いbackgroundColorプロパティはありません。 |
| selectedIndex | 現在地のページのインデックス番号を(指定)表しています。 |
| labelBehavior | ラベルを①常に表示②常に非表示③選択されているラベルだけ表示という3つのふるまいを定義出来ます。NavigationDestinationLabelBehaviorというEnumを置いて指定します。指定しない場合はNavigationBarThemeDataが参照され、それもnullの場合はalwaysShowが適用されます。 |
| onDestinationSelected | destinationsが選択された時(変化した時)に呼び出されます。ほぼ間違いなくselectedIndexに関連した処理が書かれる事で、ページ遷移する事になるかと思います。型はValueChangedなので、結果的にはBottomNavBarで言うonTapと同じ処理になるかと思います。 |
個人的な感想ですが、BottomNavigationBarよりもプロパティは少なくて、覚える事が少なくシンプルです。BottomNavigationBarから新しい機能が追加されたというよりは、名称が変わり、色々なプロパティが減った。と考える方が適切でしょう。
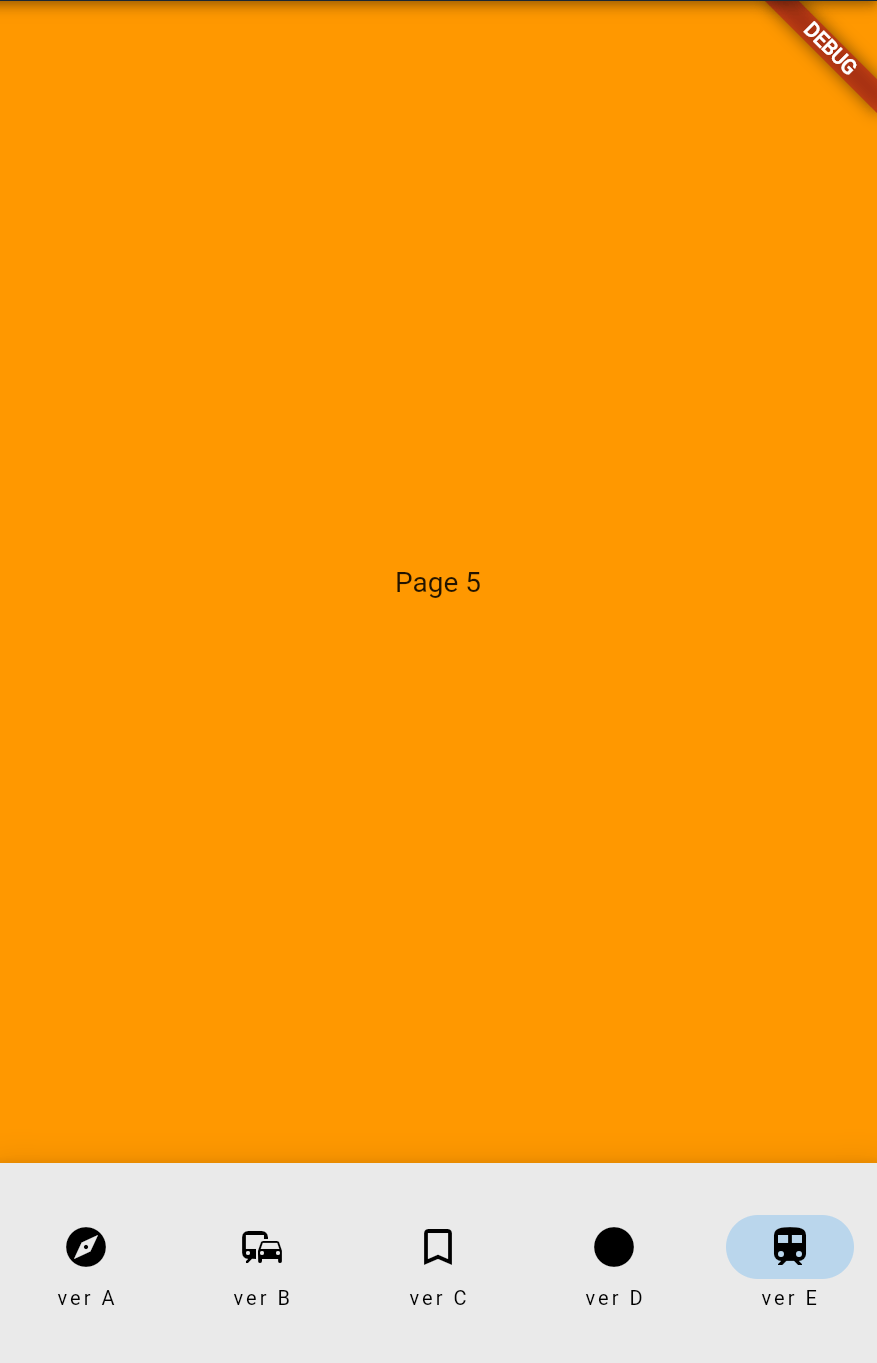
全部盛りサンプル
デザインはともかくとして、上記に述べたプロパティを出来る限り全て使ったNavigationBarです。
import 'package:flutter/material.dart';
void main() {
runApp(const MyApp());
}
class MyApp extends StatelessWidget {
const MyApp({Key? key}) : super(key: key);
Widget build(BuildContext context) {
return const MaterialApp(home: NavigationExample());
}
}
class NavigationExample extends StatefulWidget {
const NavigationExample({Key? key}) : super(key: key);
State<NavigationExample> createState() => _NavigationExampleState();
}
class _NavigationExampleState extends State<NavigationExample> {
var _currentPageIndex = 0;
final _pages = <Widget>[
Container(
color: Colors.red,
alignment: Alignment.center,
child: const Text('Page 1'),
),
Container(
color: Colors.green,
alignment: Alignment.center,
child: const Text('Page 2'),
),
Container(
color: Colors.blue,
alignment: Alignment.center,
child: const Text('Page 3'),
),
Container(
color: Colors.yellow,
alignment: Alignment.center,
child: const Text('Page 4'),
),
Container(
color: Colors.orange,
alignment: Alignment.center,
child: const Text('Page 5'),
),
];
Widget build(BuildContext context) {
return Scaffold(
bottomNavigationBar: NavigationBar(
onDestinationSelected: (int index) {
setState(() {
_currentPageIndex = index;
});
},
selectedIndex: _currentPageIndex,
// 下のプロパティで背景色を設定できます。
// backgroundColor: Colors.black,
animationDuration: const Duration(seconds: 10),
elevation: 10,
height: 100,
labelBehavior: NavigationDestinationLabelBehavior.alwaysShow,
destinations: const <Widget>[
NavigationDestination(
icon: Icon(Icons.explore), label: 'ver A', tooltip: "tooltip1"),
NavigationDestination(
icon: Icon(Icons.commute), label: 'ver B', tooltip: "tooltip2"),
NavigationDestination(
icon: Icon(Icons.bookmark_border),
label: 'ver C',
tooltip: "tooltip3",
selectedIcon: Icon(Icons.bookmark),
),
NavigationDestination(
icon: Icon(Icons.circle), label: 'ver D', tooltip: "tooltip4"),
NavigationDestination(
icon: Icon(Icons.train), label: 'ver E', tooltip: "tooltip5"),
],
),
body: _pages[_currentPageIndex],
);
}
}
Tips
よくある質問としてまとめます。要望やアイデアなどがあれば、ぜひご連絡ください。
NavigationBarウィジェットを使わずに、Material design3っぽい見た目にしたいけど出来る?⇒
できます。具体的には、ScaffordのbottomNavigationBarプロパティに、NavigationBarThemeクラスを配置して、見た目をカスタマイズすることで可能です。具体的な方法は以下の動画を参考にすることをお勧めします。非常にわかりやすいです。
ただし、Material design3の大きな特徴は、「2と見た目が変わった事」に加えて「テーマの統一とその容易さ」です。MaterialコンポーネントがThemeに合わせてくれるという利点とその思想が3の特徴なので、見た目だけ作ることを良いか悪いかは...何とも言えません。
引用:Johannes Milke channel: Flutter Tutorial - NEW Material You Navigation Bar | The New Way [2021] Flutter Navigation Bar
スワイプジェスチャー(横スクロール)で遷移したい。⇒
ScaffoldのbodyにPageViewを指定し、プロパティにコントローラーを登録、そのコントローラーを利用しこの機能を実装出来ます。BottomNavigationBarの記事とほとんど同じです。
import 'package:flutter/material.dart';
void main() {
runApp(const MyApp());
}
class MyApp extends StatelessWidget {
const MyApp({Key? key}) : super(key: key);
Widget build(BuildContext context) {
return const MaterialApp(home: NavigationExample());
}
}
class NavigationExample extends StatefulWidget {
const NavigationExample({Key? key}) : super(key: key);
State<NavigationExample> createState() => _NavigationExampleState();
}
class _NavigationExampleState extends State<NavigationExample> {
var _currentPageIndex = 0;
final _pageViewController = PageController();
final _pages = <Widget>[
Container(
color: Colors.red,
alignment: Alignment.center,
child: const Text('Page 1'),
),
Container(
color: Colors.green,
alignment: Alignment.center,
child: const Text('Page 2'),
),
Container(
color: Colors.blue,
alignment: Alignment.center,
child: const Text('Page 3'),
),
Container(
color: Colors.yellow,
alignment: Alignment.center,
child: const Text('Page 4'),
),
Container(
color: Colors.orange,
alignment: Alignment.center,
child: const Text('Page 5'),
),
];
Widget build(BuildContext context) {
return Scaffold(
bottomNavigationBar: NavigationBar(
onDestinationSelected: (int index) {
setState(() {
_pageViewController.animateToPage(index,
duration: const Duration(milliseconds: 200),
curve: Curves.easeOut);
});
},
selectedIndex: _currentPageIndex,
// 下のプロパティで背景色を設定できます。
// backgroundColor: Colors.black,
animationDuration: const Duration(seconds: 10),
elevation: 10,
height: 100,
labelBehavior: NavigationDestinationLabelBehavior.alwaysShow,
destinations: const <Widget>[
NavigationDestination(
icon: Icon(Icons.explore), label: 'ver A', tooltip: "tooltip1"),
NavigationDestination(
icon: Icon(Icons.commute), label: 'ver B', tooltip: "tooltip2"),
NavigationDestination(
icon: Icon(Icons.bookmark_border),
label: 'ver C',
tooltip: "tooltip3",
selectedIcon: Icon(Icons.bookmark),
),
NavigationDestination(
icon: Icon(Icons.circle), label: 'ver D', tooltip: "tooltip4"),
NavigationDestination(
icon: Icon(Icons.train), label: 'ver E', tooltip: "tooltip5"),
],
),
body: PageView(
controller: _pageViewController,
children: _pages,
onPageChanged: (index) {
setState(() {
_currentPageIndex = index;
});
},
),
);
}
}
BottomNavigationBarとNavigationBarどっちがいいですか?⇒
上記に述べているように、基本的な違いは、①StatelessかStatefulか②Material Design3に対応しているか。です。これらに応じて選択するのが良いでしょう。
ただ、悩んでいるという事は、①と②についてまだ上手く認識出来ていないという事だと思いますので、個人的にはBottomNavigationBarを使う事をお勧めします。
理由は、ネットで検索した時に拾える情報が多いからです。
最後に
ありがとうございました。
感想やご要望などはTwitterまで連絡いただければ幸いです。
Discussion