OHIFとOrthancでDICOM Viewerを作る
OHIF
Open Health Imaging FoundationがWebのDICOM Viewerを作成している。
ViewerはOSSで公開されている。
Dockerfileが用意されているので起動してみる。
環境は以下です。
- Viewer: v3.8.2
- node: 18.16.1
- yarn: 1.22.22
- yarn v1(classic)じゃないとビルドできない
以下の記事を参考にやってみる。この記事では、Viewerが v2-legacy で行っているが、自分は最新の v3.8.2 でやる。
クローンしてきてから、Dockerイメージをビルドする。
当初 yarn set version 4.3.0 をしていたのでビルドが失敗した。
yarnはclassicバージョンで行う必要がある。
docker image build -t ohif-viewer .
そして、起動
docker run -p 3000:80/tcp --name ohif_viewer ohif-viewer:latest
http://localhost:3000/ にアクセスすると動作することが確認できる。

Orthanc
続いてOrthancを動かしてみる。こちらもDockerイメージが用意されている。
2つあるみたいですが、公式のチームでメンテされている orthancteam/orthanc を使用して構築してみる
Basic
こちらは docker-compose でサンプルファイルが用意されている。
全体像を理解しきれていないので、とりあえず基本やつをビルドしてみる。
git clone git@github.com:orthanc-server/orthanc-setup-samples.git
cd orthanc-setup-samples/docker/basic
docker compose up -d
起動が確認できたので、localhost にアクセスすると以下のページが表示される
Username, Passwordはどちらも demo

ログインするとOrthanc's DICOM serverにアクセスできる。

DICOM Serverを使ったことないので、色々いじってみる。
右上のUploadボタンから、DICOMファイルをアップロードしてみた。

簡単に見えるようにvolumeのマウント先を相対パスで指定した。
version: "2"
services:
  orthanc:
    image: orthancteam/orthanc
    restart: unless-stopped
    ports: ["104:4242", "80:8042"]
-      volumes: ["orthanc-storage:/var/lib/orthanc/db:Z"]
+      volumes: ["./orthanc-storage:/var/lib/orthanc/db:Z"]
    environment:
      ORTHANC__NAME: "My Orthanc"
      ORTHANC__REGISTERED_USERS: |
        {"demo": "demo"}

volumes:
  orthanc-storage:
以下のようなフォルダができて中身はバイナリーが保存されていた。

PostgreSQL連携
続いて以下のサンプルをもとにPostgreSQLに繋いでみる
READMEの通り以下を実行するとエラーが発生した。
docker compose up --build
MAIN SharedLibrary.cpp:99] dlopen(/usr/share/orthanc/plugins/libOsimisWebViewer.so) failed: Error /usr/share/orthanc/plugins/libOsimisWebViewer.so: cannot open shared object file: No such file or directory
このライブラリはWeb Viewerでこちらからライブラリをインストールして、orthanc.json のプラグインにパスを追加する必要がある。
{
  "Name": "PostgreSQL DEMO",
  "DicomAet": "PG_DEMO",
  "RemoteAccessAllowed": true,
  "AuthenticationEnabled": false,
  "PostgreSQL": {
    "EnableIndex": true,
    "EnableStorage": false, // DICOM files are stored in the Orthanc container in /var/lib/orthanc/db/
    "Host": "orthanc-index", // the name of the PostgreSQL container
    "Database": "postgres", // default database name in PostgreSQL container (no need to create it)
    "Username": "postgres", // default user name in PostgreSQL container (no need to create it)
    "Password": "postgres",
    "EnableVerboseLogs": false
  },
+  "Plugins" : [
+    "~/xxx/orthanc-setup-samples/docker/postgresql/libOsimisWebViewer.so"
+  ]
}
起動できたら http://localhost:8042 にアクセスできる。
$ docker ps

CONTAINER ID   IMAGE                COMMAND                  CREATED          STATUS         PORTS                                            NAMES
9361dc9c9d52   postgresql-orthanc   "/docker-entrypoint.…"   7 minutes ago    Up 7 minutes   0.0.0.0:4242->4242/tcp, 0.0.0.0:8042->8042/tcp   postgresql-orthanc-1
8a50e14d0335   postgres:15          "docker-entrypoint.s…"   17 minutes ago   Up 7 minutes   0.0.0.0:5432->5432/tcp                           postgresql-orthanc-index-1
683e6d21f37a   ohif-viewer:latest   "/usr/src/entrypoint…"   19 hours ago     Up 19 hours    8080/tcp, 0.0.0.0:3000->80/tcp                   ohif_viewer

$ docker exec -it 8a50e14d0335 psql -U postgres

psql (15.7 (Debian 15.7-1.pgdg120+1))
Type "help" for help.

postgres-# \dt
Did not find any relations.
postgres-# \l
postgres-# \c
You are now connected to database "postgres" as user "postgres".
postgres-# \dn
      List of schemas
  Name  |       Owner
--------+-------------------
 public | pg_database_owner
(1 row)
何個かデータを入れてみたが、DBにはテーブルが作られてはいなかった。
SQLiteがPostgreSQLに置き換わるので以下のコードのテーブルが作られると思ったが、よくわからない。
The SQLite database schema is kept as simple as possible, and can be found in the following two files of the source code of Orthanc: PrepareDatabase.sql and InstallTrackAttachmentsSize.sql.
OHIF + Orthanc + PostgreSQL
OHIFのサンプルもあったので使ってみる
以下のコマンドで起動すると、エラーが発生したのでDockerfileを少し手直し
docker compose up --build
#18 125.4 verbose 91.679321834 Error: /sources/Viewers/node_modules/@parcel/watcher: Command failed.
#18 125.4 Exit code: 1
#18 125.4 Command: node-gyp-build
#18 125.4 Arguments:
#18 125.4 Directory: /sources/Viewers/node_modules/@parcel/watcher
#18 125.4 Output:
#18 125.4 /sources/Viewers/node_modules/node-gyp-build/node-gyp-build.js:60
#18 125.4 throw new Error('No native build was found for ' + target + '\n loaded from: ' + dir + '\n')
#18 125.4 ^
#18 125.4
#18 125.4 Error: No native build was found for platform=linux arch=arm64 runtime=node abi=108 uv=1 armv=8 libc=glibc node=18.16.1
#18 125.4 loaded from: /sources/Viewers/node_modules/@parcel/watcher
#18 125.4
#18 125.4 at load.resolve.load.path (/sources/Viewers/node_modules/node-gyp-build/node-gyp-build.js:60:9)
#18 125.4 at load (/sources/Viewers/node_modules/node-gyp-build/node-gyp-build.js:22:30)
#18 125.4 at Object.<anonymous> (/sources/Viewers/node_modules/node-gyp-build/build-test.js:19:19)
#18 125.4 at Module._compile (node:internal/modules/cjs/loader:1256:14)
#18 125.4 at Module._extensions..js (node:internal/modules/cjs/loader:1310:10)
#18 125.4 at Module.load (node:internal/modules/cjs/loader:1119:32)
#18 125.4 at Module._load (node:internal/modules/cjs/loader:960:12)
#18 125.4 at Function.executeUserEntryPoint [as runMain] (node:internal/modules/run_main:81:12)
#18 125.4 at node:internal/main/run_main_module:23:47
######################################################

FROM node:18.16.1-slim as builder

- RUN apt-get update && apt-get install -y git
+ RUN apt-get update && apt-get install -y git build-essential python3

WORKDIR /sources
- RUN git clone https://github.com/OHIF/Viewers.git && cd /sources/Viewers && git checkout v3.8.0-beta.36
+ RUN git clone https://github.com/OHIF/Viewers.git && cd /sources/Viewers && git checkout v3.8.2

WORKDIR /sources/Viewers

+ RUN yarn config set workspaces-experimental true
RUN yarn install --frozen-lockfile --verbose

ENV QUICK_BUILD true
# ENV GENERATE_SOURCEMAP=false
# ENV REACT_APP_CONFIG=config/default.js

RUN yarn install
RUN QUICK_BUILD=true PUBLIC_URL=/ohif/ yarn run build

######################################################

FROM nginx:1.23

RUN mkdir /etc/nginx/enabled-sites
RUN mkdir /scripts

COPY ohif-static.conf /etc/nginx/enabled-sites/
ADD ohif-nginx-http.conf /etc/nginx/conf.d/default.conf

COPY --from=builder /sources/Viewers/platform/app/dist /usr/share/nginx/html/
COPY default-app-config.js /usr/share/nginx/html/app-config.js
参考: https://github.com/OHIF/Viewers/blob/v3.8.2/Dockerfile#L41
起動が完了すると http://localhost/orthanc-container/ui/app と http://localhost/orthanc-plugin/ui/app にアクセスできる。
実際にデータを入れてOHIFでも確認できた。PostgreSQLにもテーブルができていた

orthanc-container と orthanc-plugin の関係
docker-compose.yml には、nginx, ohif, orthanc-container, orthanc-plugin, orthanc-index がある。
orthanc-container と orthanc-plugin はどちらもイメージが orthancteam/orthanc と一緒でどういう関係になっているか分からないので調べる。
ただ単に2種類の連携方法を示しているだけでした。
-
orthanc-container: Orthancの外でOHIFを実行して連携 (OHIFのカスタムバージョンを使用できる) -
orthanc-plugin: Pluginを用いてOrthanc内部でOHIFを動作できる
Note that there are 2 ways to integrate with OHIF. If you want to use your custom version of OHIF, we recommend to build a container and run it outside Orthanc. If you want to use the default OHIF viewer, simply use the OHIF plugin that is running inside Orthanc.
Eraser で図を書いてもらった。

Orthanc
S3連携
AWSを使う場合、DICOMの保存はS3にできる。RDSは必要。
構築するのは面倒なので、以下のminioでS3を擬似的に作成して動かしてみる。
エラーが出たので、docker-compose.yml を修正する
docker compose up --build -d

[+] Running 1/1
 ✘ orthanc Error                                                                                                                                       3.0s
Error response from daemon: manifest for osimis/orthanc:latest not found: manifest unknown: manifest unknown
version: "3.3"

services:
    orthanc:
-        image: osimis/orthanc
+        image: orthancteam/orthanc
        ports: [8042:8042]
        environment:
            - ORTHANC__NAME=ORTHANC Minio demo
            - ORTHANC__AWS_S3_STORAGE__BUCKET_NAME=my-sample-bucket
            - ORTHANC__AWS_S3_STORAGE__REGION=eu-west-1
            - ORTHANC__AWS_S3_STORAGE__ACCESS_KEY=minio
            - ORTHANC__AWS_S3_STORAGE__SECRET_KEY=miniopwd
            - ORTHANC__AWS_S3_STORAGE__ENDPOINT=http://minio:9000
            - ORTHANC__AWS_S3_STORAGE__VIRTUAL_ADDRESSING=false
            # - ORTHANC__AWS_S3_STORAGE__HYBRID_MODE=WriteToObjectStorage
            # - ORTHANC__AWS_S3_STORAGE__HYBRID_MODE=WriteToFileSystem
            - ORTHANC__AUTHENTICATION_ENABLED=false
            - ORTHANC__DICOM_SERVER_ENABLED=false
            - VERBOSE_ENABLED=true
            - VERBOSE_STARTUP=true
        volumes:
-            - orthanc-sqlite-storage:/var/lib/orthanc/db
+            - ./orthanc-sqlite-storage:/var/lib/orthanc/db

    minio:
        image: minio/minio:RELEASE.2024-04-06T05-26-02Z
        environment:
            - MINIO_REGION=eu-west-1
            - MINIO_ROOT_USER=minio
            - MINIO_ROOT_PASSWORD=miniopwd
        volumes:
-            - minio-storage:/data
+            - ./minio-storage:/data
        entrypoint: sh
        command: -c 'mkdir -p /data/my-sample-bucket && /usr/bin/docker-entrypoint.sh server /data'

volumes:
    minio-storage:
    orthanc-sqlite-storage:
networks:
    test:
http://localhost:8042/ui/app/#/ にアクセスできるので、データをアップロードしてみる。
すると、minio-storage フォルダにDICOMが保存される

参考
OHIF
S3連携
OHIFにOrthancじゃなくて、S3などで代用できないか調べる。
以下のように、DICOMファイルの場所を記載したJSONをクエリパラメーターで指定することで表示できる。
{
  "studies": [
    {
      "StudyInstanceUID": "1.3.6.1.4.1.14519.5.2.1.6279.6001.298806137288633453246975630178",
      "StudyDate": "20000101",
      "StudyTime": "",
      "PatientName": "Doe^Anonymized",
      "PatientID": "LIDC-IDRI-0001",
      "AccessionNumber": "",
      "PatientAge": "",
      "PatientSex": "",
      "series": [
        {
          "SeriesInstanceUID": "1.3.6.1.4.1.14519.5.2.1.6279.6001.179049373636438705059720603192",
          "SeriesNumber": 3000566,
          "Modality": "CT",
          "SliceThickness": 2.5,
          "instances": [
            {
              "metadata": {
                "Columns": 512,
                "Rows": 512,
                "InstanceNumber": 1,
                "SOPClassUID": "1.2.840.10008.5.1.4.1.1.2",
                "PhotometricInterpretation": "MONOCHROME2",
                "BitsAllocated": 16,
                "BitsStored": 16,
                "PixelRepresentation": 1,
                "SamplesPerPixel": 1,
                "PixelSpacing": [0.703125, 0.703125],
                "HighBit": 15,
                "ImageOrientationPatient": [1, 0, 0, 0, 1, 0],
                "ImagePositionPatient": [-166, -171.699997, -10],
                "FrameOfReferenceUID": "1.3.6.1.4.1.14519.5.2.1.6279.6001.229925374658226729607867499499",
                "ImageType": ["ORIGINAL", "PRIMARY", "AXIAL"],
                "Modality": "CT",
                "SOPInstanceUID": "1.3.6.1.4.1.14519.5.2.1.6279.6001.262721256650280657946440242654",
                "SeriesInstanceUID": "1.3.6.1.4.1.14519.5.2.1.6279.6001.179049373636438705059720603192",
                "StudyInstanceUID": "1.3.6.1.4.1.14519.5.2.1.6279.6001.298806137288633453246975630178",
                "WindowCenter": -600,
                "WindowWidth": 1600,
                "SeriesDate": "20000101"
              },
              "url": "dicomweb:https://ohif-dicom-json-example.s3.amazonaws.com/LIDC-IDRI-0001/01-01-2000-30178/3000566.000000-03192/1-001.dcm"
            },
           ...
Orthanc API
OHIF, Orthanc, S3(minio), PostgreSQLで構成されるdocker composeを準備した。
以下のイメージを用いていくつか確認してみる。
基本GET
IDは以下のコードから生成している。
SHA-1ハッシュを計算し、それを8桁ずつに分割している。
- https://orthanc.uclouvain.be/hg/orthanc/annotate/tip/OrthancFramework/Sources/DicomFormat/DicomInstanceHasher.cpp
- https://orthanc.uclouvain.be/hg/orthanc/file/tip/OrthancFramework/Sources/Toolbox.cpp#l805
Patients
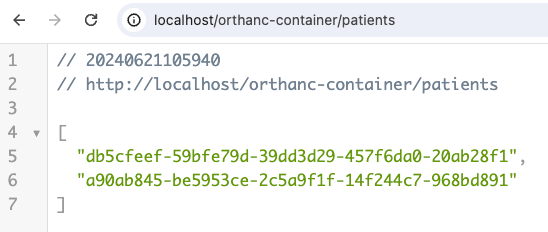
http://localhost/orthanc-container/patients

http://localhost/orthanc-container/patients/db5cfeef-59bfe79d-39dd3d29-457f6da0-20ab28f1

Studies
http://localhost/orthanc-container/studies

Series
http://localhost/orthanc-container/series

Instances
http://localhost/orthanc-container/instances

その他
あとはこちらを参照。色々API叩いて確認して理解が深まった。
画像表示
自分で作っているNext.jsに組み込めないか考えてみる
簡易表示については、以下のプレビューイメージを出力できる。
http://localhost/orthanc-container/instances/15cf6c60-3dddb220-8cc40aab-b5a9688d-6e492c90/preview

ただし、 Orthancは画像ビューアーではないので、CT画像の window center / window width は調整されない。