✍️
Laravel環境構築 (Vagrant + CentOS + Nginx + MySQL + PHP8)
かいてあること
研修中にララベルの開発をするために環境構築をおこなったときのメモ
普通は、直接パソコンに入れますが、私が入社したところはまさかのバーチャルマシンにララベル環境構築でした
覚えておきたいよく使うコマンド
MySQLログイン
mysql -u root -p
vagrant 再起動
vagrant reload
vagrant シャットダウン
vagrant halt
個人的な備忘録
したこと
- vagrantの構築
PHP,MySQL,Nginx - firewallにMySQLサービスの許可
- MySQLに配布データインポート
# vbguestインストール
vagrant plugin install vagrant-vbguest
# winnfsdインストール
vagrant plugin install vagrant-winnfsd
cd [作業用フォルダ]
# vagrant初期化
vagrant init bento/centos-7.9
# windows-vagrant同期フォルダ作成
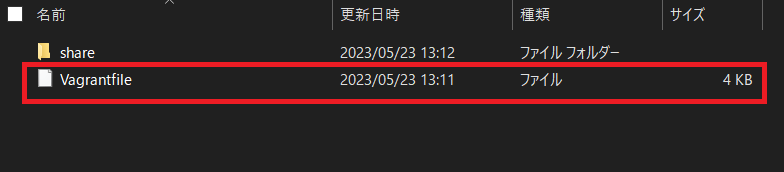
mkdir share
vagrantファイルを開く
メモ帳かなにか編集
35行目と46行目
- # config.vm.network "private_network", ip: "192.168.33.10"
+   config.vm.network "private_network", ip: "192.168.33.10"

# ここではwindowsにshareというフォルダを作ってvagrantと同期させます
- # config.vm.synced_folder "../data", "/vagrant_data"
+   config.vm.synced_folder "./share", "/vagrant/share"
config.vm.synced_folder "ウィンドウズでシェアするフォルダ", "vagrantでシェアするフォルダ"
編集前
# -*- mode: ruby -*-
# vi: set ft=ruby :

# All Vagrant configuration is done below. The "2" in Vagrant.configure
# configures the configuration version (we support older styles for
# backwards compatibility). Please don't change it unless you know what
# you're doing.
Vagrant.configure("2") do |config|
  # The most common configuration options are documented and commented below.
  # For a complete reference, please see the online documentation at
  # https://docs.vagrantup.com.

  # Every Vagrant development environment requires a box. You can search for
  # boxes at https://vagrantcloud.com/search.
  config.vm.box = "bento/centos-7.9"

  # Disable automatic box update checking. If you disable this, then
  # boxes will only be checked for updates when the user runs
  # `vagrant box outdated`. This is not recommended.
  # config.vm.box_check_update = false

  # Create a forwarded port mapping which allows access to a specific port
  # within the machine from a port on the host machine. In the example below,
  # accessing "localhost:8080" will access port 80 on the guest machine.
  # NOTE: This will enable public access to the opened port
  # config.vm.network "forwarded_port", guest: 80, host: 8080

  # Create a forwarded port mapping which allows access to a specific port
  # within the machine from a port on the host machine and only allow access
  # via 127.0.0.1 to disable public access
  # config.vm.network "forwarded_port", guest: 80, host: 8080, host_ip: "127.0.0.1"

  # Create a private network, which allows host-only access to the machine
  # using a specific IP.
  # config.vm.network "private_network", ip: "192.168.33.10"

  # Create a public network, which generally matched to bridged network.
  # Bridged networks make the machine appear as another physical device on
  # your network.
  # config.vm.network "public_network"

  # Share an additional folder to the guest VM. The first argument is
  # the path on the host to the actual folder. The second argument is
  # the path on the guest to mount the folder. And the optional third
  # argument is a set of non-required options.
  # config.vm.synced_folder "../data", "/vagrant_data"

  # Provider-specific configuration so you can fine-tune various
  # backing providers for Vagrant. These expose provider-specific options.
  # Example for VirtualBox:
  #
  # config.vm.provider "virtualbox" do |vb|
  #   # Display the VirtualBox GUI when booting the machine
  #   vb.gui = true
  #
  #   # Customize the amount of memory on the VM:
  #   vb.memory = "1024"
  # end
  #
  # View the documentation for the provider you are using for more
  # information on available options.

  # Enable provisioning with a shell script. Additional provisioners such as
  # Ansible, Chef, Docker, Puppet and Salt are also available. Please see the
  # documentation for more information about their specific syntax and use.
  # config.vm.provision "shell", inline: <<-SHELL
  #   apt-get update
  #   apt-get install -y apache2
  # SHELL
end
編集後
# -*- mode: ruby -*-
# vi: set ft=ruby :

# All Vagrant configuration is done below. The "2" in Vagrant.configure
# configures the configuration version (we support older styles for
# backwards compatibility). Please don't change it unless you know what
# you're doing.
Vagrant.configure("2") do |config|
  # The most common configuration options are documented and commented below.
  # For a complete reference, please see the online documentation at
  # https://docs.vagrantup.com.

  # Every Vagrant development environment requires a box. You can search for
  # boxes at https://vagrantcloud.com/search.
  config.vm.box = "bento/centos-7.9"

  # Disable automatic box update checking. If you disable this, then
  # boxes will only be checked for updates when the user runs
  # `vagrant box outdated`. This is not recommended.
  # config.vm.box_check_update = false

  # Create a forwarded port mapping which allows access to a specific port
  # within the machine from a port on the host machine. In the example below,
  # accessing "localhost:8080" will access port 80 on the guest machine.
  # NOTE: This will enable public access to the opened port
  # config.vm.network "forwarded_port", guest: 80, host: 8080

  # Create a forwarded port mapping which allows access to a specific port
  # within the machine from a port on the host machine and only allow access
  # via 127.0.0.1 to disable public access
  # config.vm.network "forwarded_port", guest: 80, host: 8080, host_ip: "127.0.0.1"

  # Create a private network, which allows host-only access to the machine
  # using a specific IP.
  config.vm.network "private_network", ip: "192.168.33.10"

  # Create a public network, which generally matched to bridged network.
  # Bridged networks make the machine appear as another physical device on
  # your network.
  # config.vm.network "public_network"

  # Share an additional folder to the guest VM. The first argument is
  # the path on the host to the actual folder. The second argument is
  # the path on the guest to mount the folder. And the optional third
  # argument is a set of non-required options.
  config.vm.synced_folder "./share", "/var/www/lesalto"

  # Provider-specific configuration so you can fine-tune various
  # backing providers for Vagrant. These expose provider-specific options.
  # Example for VirtualBox:
  #
  # config.vm.provider "virtualbox" do |vb|
  #   # Display the VirtualBox GUI when booting the machine
  #   vb.gui = true
  #
  #   # Customize the amount of memory on the VM:
  #   vb.memory = "1024"
  # end
  #
  # View the documentation for the provider you are using for more
  # information on available options.

  # Enable provisioning with a shell script. Additional provisioners such as
  # Ansible, Chef, Docker, Puppet and Salt are also available. Please see the
  # documentation for more information about their specific syntax and use.
  # config.vm.provision "shell", inline: <<-SHELL
  #   apt-get update
  #   apt-get install -y apache2
  # SHELL
end
またコマンドプロンプトに戻る
# vagrant 起動
# 地味に時間かかる
vagrant up

# vagrant接続
vagrant ssh
CentOS設定
[vagrant@localhost ~]$ cd /etc/selinux/
[vagrant@localhost selinux]$ sudo cp -p config config.org
[vagrant@localhost selinux]$ sudo vi config
#編集後↓
# 再起動
 [vagrant@localhost selinux]$ sudo reboot
Connection to 127.0.0.1 closed by remote host.
Connection to 127.0.0.1 closed.
#vagrantが再起動&ssh切断されるので再接続
C:\Users\user\Documents\2023LaravelVgrt>vagrant ssh
Last login: Tue May 23 04:31:50 2023 from 10.0.2.2

This system is built by the Bento project by Chef Software
More information can be found at https://github.com/chef/bento
[vagrant@localhost ~]$ getenforce
Disabled
#↑Disabledと出たらOK
selinux編集後
# This file controls the state of SELinux on the system.
# SELINUX= can take one of these three values:
#     enforcing - SELinux security policy is enforced.
#     permissive - SELinux prints warnings instead of enforcing.
#     disabled - No SELinux policy is loaded.
SELINUX=disabled
# SELINUXTYPE= can take one of three values:
#     targeted - Targeted processes are protected,
#     minimum - Modification of targeted policy. Only selected processes are protected.
#     mls - Multi Level Security protection.
SELINUXTYPE=targeted
タイムゾーン・日本語設定
#タイムゾーン設定
[vagrant@localhost ~]$ sudo timedatectl set-timezone Asia/Tokyo
#確認
[vagrant@localhost ~]$ timedatectl
      Local time: Tue 2023-05-23 13:39:29 JST
  Universal time: Tue 2023-05-23 04:39:29 UTC
        RTC time: Tue 2023-05-23 13:39:29
       Time zone: Asia/Tokyo (JST, +0900)
     NTP enabled: yes
NTP synchronized: yes
 RTC in local TZ: yes
      DST active: n/a

Warning: The system is configured to read the RTC time in the local time zone.
         This mode can not be fully supported. It will create various problems
         with time zone changes and daylight saving time adjustments. The RTC
         time is never updated, it relies on external facilities to maintain it.
         If at all possible, use RTC in UTC by calling
         'timedatectl set-local-rtc 0'.
#日本語化
[vagrant@localhost ~]$ sudo localectl set-locale LANG=ja_JP.UTF-8
#反映
[vagrant@localhost ~]$ source /etc/locale.conf
#確認
[vagrant@localhost ~]$ localectl status
   System Locale: LANG=ja_JP.UTF-8
       VC Keymap: us
      X11 Layout: n/a
firewall設定
# firewall起動
[vagrant@localhost ~]$ sudo systemctl start firewalld
# 自動起動設定
[vagrant@localhost ~]$ sudo systemctl enable firewalld
Created symlink from /etc/systemd/system/dbus-org.fedoraproject.FirewallD1.service to /usr/lib/systemd/system/firewalld.service.
Created symlink from /etc/systemd/system/multi-user.target.wants/firewalld.service to /usr/lib/systemd/system/firewalld.service.
# firewall設定(http:80/https:443ポート開放)
[vagrant@localhost ~]$ sudo firewall-cmd --add-service=http --permanent
success
[vagrant@localhost ~]$ sudo firewall-cmd --add-service=https --permanent
success
# MySQL解放
[vagrant@localhost ~]$ sudo firewall-cmd --add-service=mysql --zone=public --permanent
success
# 再読み込み
[vagrant@localhost ~]$ sudo firewall-cmd --reload
success
[vagrant@localhost ~]$ sudo firewall-cmd --list-all-zones
firewallの実行結果
block
  target: %%REJECT%%
  icmp-block-inversion: no
  interfaces:
  sources:
  services:
  ports:
  protocols:
  masquerade: no
  forward-ports:
  source-ports:
  icmp-blocks:
  rich rules:


dmz
  target: default
  icmp-block-inversion: no
  interfaces:
  sources:
  services: ssh
  ports:
  protocols:
  masquerade: no
  forward-ports:
  source-ports:
  icmp-blocks:
  rich rules:


drop
  target: DROP
  icmp-block-inversion: no
  interfaces:
  sources:
  services:
  ports:
  protocols:
  masquerade: no
  forward-ports:
  source-ports:
  icmp-blocks:
  rich rules:


external
  target: default
  icmp-block-inversion: no
  interfaces:
  sources:
  services: ssh
  ports:
  protocols:
  masquerade: yes
  forward-ports:
  source-ports:
  icmp-blocks:
  rich rules:


home
  target: default
  icmp-block-inversion: no
  interfaces:
  sources:
  services: dhcpv6-client mdns samba-client ssh
  ports:
  protocols:
  masquerade: no
  forward-ports:
  source-ports:
  icmp-blocks:
  rich rules:


internal
  target: default
  icmp-block-inversion: no
  interfaces:
  sources:
  services: dhcpv6-client mdns samba-client ssh
  ports:
  protocols:
  masquerade: no
  forward-ports:
  source-ports:
  icmp-blocks:
  rich rules:


public (active)
  target: default
  icmp-block-inversion: no
  interfaces: eth0 eth1
  sources:
  #ここがMySQLになっていたら◎
  services: dhcpv6-client http https mysql ssh
  ports:
  protocols:
  masquerade: no
  forward-ports:
  source-ports:
  icmp-blocks:
  rich rules:


trusted
  target: ACCEPT
  icmp-block-inversion: no
  interfaces:
  sources:
  services:
  ports:
  protocols:
  masquerade: no
  forward-ports:
  source-ports:
  icmp-blocks:
  rich rules:


work
  target: default
  icmp-block-inversion: no
  interfaces:
  sources:
  services: dhcpv6-client ssh
  ports:
  protocols:
  masquerade: no
  forward-ports:
  source-ports:
  icmp-blocks:
  rich rules:
yum
全体的に時間かかる。
それぞれComplete!がでたら◎
# epelリポジトリの追加
[vagrant@localhost ~]$ sudo yum -y install epel-release

# vim / wget インストール
[vagrant@localhost ~]$ sudo yum -y install wget vim

# ホストOSとゲストOSで連携するのに必要なパッケージのインストール
[vagrant@localhost ~]$ sudo yum -y install kernel-devel kernel-headers dkms gcc gcc-c++

#VM抜けて再起動
[vagrant@localhost ~]$ exit
#仮想マシンの終了
vagrant halt
#起動
vagrant up

vagrant ssh
`sudo yum -y install epel-release`
[vagrant@localhost ~]$ sudo yum -y install epel-release
Loaded plugins: fastestmirror
Determining fastest mirrors
 * base: ftp-srv2.kddilabs.jp
 * extras: ftp-srv2.kddilabs.jp
 * updates: ftp-srv2.kddilabs.jp
base                                                                  | 3.6 kB  00:00:00
extras                                                                | 2.9 kB  00:00:00
updates                                                               | 2.9 kB  00:00:00
(1/4): base/7/x86_64/group_gz                                         | 153 kB  00:00:00
(2/4): extras/7/x86_64/primary_db                                     | 249 kB  00:00:00
(3/4): base/7/x86_64/primary_db                                       | 6.1 MB  00:00:09
(4/4): updates/7/x86_64/primary_db                                    |  21 MB  00:00:24
Resolving Dependencies
--> Running transaction check
---> Package epel-release.noarch 0:7-11 will be installed
--> Finished Dependency Resolution

Dependencies Resolved

=============================================================================================
 Package                   Arch                Version             Repository           Size
=============================================================================================
Installing:
 epel-release              noarch              7-11                extras               15 k

Transaction Summary
=============================================================================================
Install  1 Package

Total download size: 15 k
Installed size: 24 k
Downloading packages:
epel-release-7-11.noarch.rpm                                          |  15 kB  00:00:00
Running transaction check
Running transaction test
Transaction test succeeded
Running transaction
  Installing : epel-release-7-11.noarch                                                  1/1
  Verifying  : epel-release-7-11.noarch                                                  1/1

Installed:
  epel-release.noarch 0:7-11

Complete!
Nginx
# Nginxインストール
[vagrant@localhost ~]$ sudo yum -y install nginx

# 設定ファイル作成
[vagrant@localhost ~]$ sudo vim /etc/nginx/conf.d/default.conf
default.conf(新規作成)
default.conf
server {
  listen 80 default_server;
  server_name localhost;
  root /var/www;
  index index.php;

  # アップロードサイズ制限(default 1MB)
  client_max_body_size 20M;

  # wordpress/パーマネントリンク設定
  try_files $uri $uri/ /index.php?$args;

  # アクセス拒否設定
  location ~* /wp-config.php {
    deny all;
  }

  # php-fpm設定
  location ~ \.php$ {
    fastcgi_pass 127.0.0.1:9000;
    fastcgi_param SCRIPT_FILENAME $document_root$fastcgi_script_name;
    fastcgi_param PATH_INFO $fastcgi_script_name;
    include fastcgi_params;
  }

  # キャッシュの設定
  location ~ .*\.(jpg|gif|png|css|js|ico|woff) {
    expires 10d;
    access_log off;
    log_not_found off;
  }
}
vim終了後の作業
# nginx起動
[vagrant@localhost ~]$ sudo systemctl start nginx
# 自動起動設定
[vagrant@localhost ~]$ sudo systemctl enable nginx
Created symlink from /etc/systemd/system/multi-user.target.wants/nginx.service to /usr/lib/systemd/system/nginx.service.
# 状態確認 > Active: active (running) ←になっていればOK
[vagrant@localhost ~]$ systemctl status nginx
● nginx.service - The nginx HTTP and reverse proxy server
   Loaded: loaded (/usr/lib/systemd/system/nginx.service; enabled; vendor preset: disabled)
   Active: active (running) since 火 2023-05-23 14:04:47 JST; 17s ago
 Main PID: 3015 (nginx)
   CGroup: /system.slice/nginx.service
           ├─3015 nginx: master process /usr/sbin/nginx
           ├─3016 nginx: worker process
           └─3017 nginx: worker process
PHP
# 既存phpパッケージの確認(確認して無ければ次はskip)
yum list installed | grep php

# 既存phpパッケージの削除
sudo yum remove php*

# Remiリポジトリの追加
sudo yum -y install https://rpms.remirepo.net/enterprise/remi-release-7.rpm

# yum-utilsパッケージのインストール(yum-config-managerコマンドの追加)
sudo yum -y install yum-utils

# 現在のリポジトリを無効化
sudo yum-config-manager --disable 'remi-php*'

# php8.1パッケージのリポジトリを有効化
sudo yum-config-manager --enable remi-php81

# 有効なリポジトリリストの確認(remi-php81があればOK)
yum repolist
  > remi-php81 ←これがあればOK

# yumのパッケージをアップデート
sudo yum -y update
# php8.1のインストール
sudo yum -y install php81

# php本体のパス確認
[vagrant@localhost ~]$ which php81
/usr/bin/php81

# シンボリックリンクの設定(/usr/bin/php81は上記で出たパスに書き替え)
# lnコマンドでどこでもphpコマンドが使えるようにする
sudo ln -sf /usr/bin/php81 /usr/bin/php

# バージョン確認でどこでもphpが叩けるかの確認
php -v
PHPモジュールの導入
# 現在のモジュール確認
php -m

## 現在のモジュールと推奨されているモジュールを比較して、差分を書けばOK
## 但し、php-fpm と php-mysql は書いてなくても必要です!

# モジュールのインストール
sudo yum -y install php-fpm php-mysql php-dom php-imagick php-mbstring php-openssl php-pcre php-xml php-zip php-pear
PHPの設定
# php.iniの場所確認
[vagrant@localhost ~]$ php -i | grep php.ini
Configuration File (php.ini) Path => /etc
Loaded Configuration File => /etc/php.ini
# バックアップ作成
[vagrant@localhost ~]$ sudo cp -p /etc/php.ini /etc/php.ini_bk
# php.ini編集
[vagrant@localhost ~]$ sudo vim /etc/php.ini
/etc/php.ini
php.ini
#400行あたり
# phpバージョンの非表示
- expose_php = On
+ expose_php = Off

#698行あたり
# POSTできるデータサイズの変更
- post_max_size = 8M
+ post_max_size = 20M

#850行あたり
# アップロードできるファイルサイズの変更
- upload_max_filesize = 2M
+ upload_max_filesize = 20M

#927行あたり
# タイムゾーンの変更
- ;date.timezone =
+  date.timezone = "Asia/Tokyo"

#1508行あたり
# 日本語対応(マルチバイト対応)
- ;mbstring.language = Japanese
+  mbstring.language = Japanese

#1515行あたり
- ;mbstring.internal_encoding =
+  mbstring.internal_encoding = UTF-8

#1523行あたり
- ;mbstring.http_input =
+  mbstring.http_input = auto
php-fpm設定
 [vagrant@localhost ~]$ sudo vim /etc/php-fpm.d/www.conf
 ############################
 # vim作業
 ############################
#24行目あたり
- user = apache
+ user = nginx

#26行目あたり
- group = apache
+ group = nginx
 ############################
 # vim作業終わり
 ############################
[vagrant@localhost ~]$ sudo systemctl start php-fpm
[vagrant@localhost ~]$ sudo systemctl snable php-fpm
Unknown operation 'snable'.
[vagrant@localhost ~]$ sudo systemctl enable php-fpm
Created symlink from /etc/systemd/system/multi-user.target.wants/php-fpm.service to /usr/lib/systemd/system/php-fpm.service.
MySQL
# 既存MariaDB関連確認
yum  list installed | grep maria

# 削除(確認で表示された項目を削除)
sudo yum remove -y mariadb-libs

# リポジトリ追加(先ほどコピーしたリンクを貼り付け)
sudo yum -y install https://dev.mysql.com/get/mysql80-community-release-el7-6.noarch.rpm

# MySQL インストール
sudo yum -y install mysql-community-server
#もしGPGkeysエラーが出たら?↓
# GPG Keysインストール
sudo rpm --import https://repo.mysql.com/RPM-GPG-KEY-mysql-2022
# もう一回MySQL インストール
sudo yum -y install mysql-community-server

[vagrant@localhost ~]$ mysql -V
mysql  Ver 8.0.33 for Linux on x86_64 (MySQL Community Server - GPL)
[vagrant@localhost ~]$ sudo systemctl start mysqld
[vagrant@localhost ~]$ sudo systemctl enable mysqld
[vagrant@localhost ~]$ sudo vim /etc/my.cnf
my.cnf
my.cnf
# For advice on how to change settings please see
# http://dev.mysql.com/doc/refman/8.0/en/server-configuration-defaults.html

[mysqld]
#
# Remove leading # and set to the amount of RAM for the most important data
# cache in MySQL. Start at 70% of total RAM for dedicated server, else 10%.
# innodb_buffer_pool_size = 128M
#
# Remove the leading "# " to disable binary logging
# Binary logging captures changes between backups and is enabled by
# default. It's default setting is log_bin=binlog
# disable_log_bin
#
# Remove leading # to set options mainly useful for reporting servers.
# The server defaults are faster for transactions and fast SELECTs.
# Adjust sizes as needed, experiment to find the optimal values.
# join_buffer_size = 128M
# sort_buffer_size = 2M
# read_rnd_buffer_size = 2M
#
# Remove leading # to revert to previous value for default_authentication_plugin,
# this will increase compatibility with older clients. For background, see:
# https://dev.mysql.com/doc/refman/8.0/en/server-system-variables.html#sysvar_default_authentication_plugin
# default-authentication-plugin=mysql_native_password

datadir=/var/lib/mysql
socket=/var/lib/mysql/mysql.sock

log-error=/var/log/mysqld.log
pid-file=/var/run/mysqld/mysqld.pid

character-set-server = utf8
innodb_buffer_pool_size = 512M
mysqlユーザー確認
sudo vim /var/log/mysqld.log

## TemporalyPasswordをコピー

# パスワード再設定
sudo mysql_secure_installation

Enter password for user root:  ←先ほどコピーしたパスワードを入力(画面表示なし)

New password:  ←新しいパスワードを入力(出来れば大小文字、数字、特殊文字含む8文字以上で)

Re-enter new password: ←再度同じパスワードを入力

The 'validate_password' component is installed on the server.
The subsequent steps will run with the existing configuration
of the component.
Using existing password for root.

Estimated strength of the password: 100
Change the password for root ? ((Press y|Y for Yes, any other key for No) : ←現在のパスワード強度(100)を基に、パスワードを書き換えるか聞かれるので「yキー以外」のどれかキーを押してSkipします

Remove anonymous users? (Press y|Y for Yes, any other key for No) : ←匿名ユーザーを消すが聞かれているので[y]

Disallow root login remotely? (Press y|Y for Yes, any other key for No) : ←rootユーザーのリモートログインを禁止するか[y]

Remove test database and access to it? (Press y|Y for Yes, any other key for No) : ←テスト用のデータベースを削除してアクセスしますか?[y]

Reload privilege tables now? (Press y|Y for Yes, any other key for No) : ←特権テーブルを更新するかなので[y]

All done! ←これが出ればOK
Discussion