😇
初めてRiverPodを使ってアプリの初めの画面を作ってみたよ!
今回はRiverPodを使ってアプリの最初の画面を作っていきます!
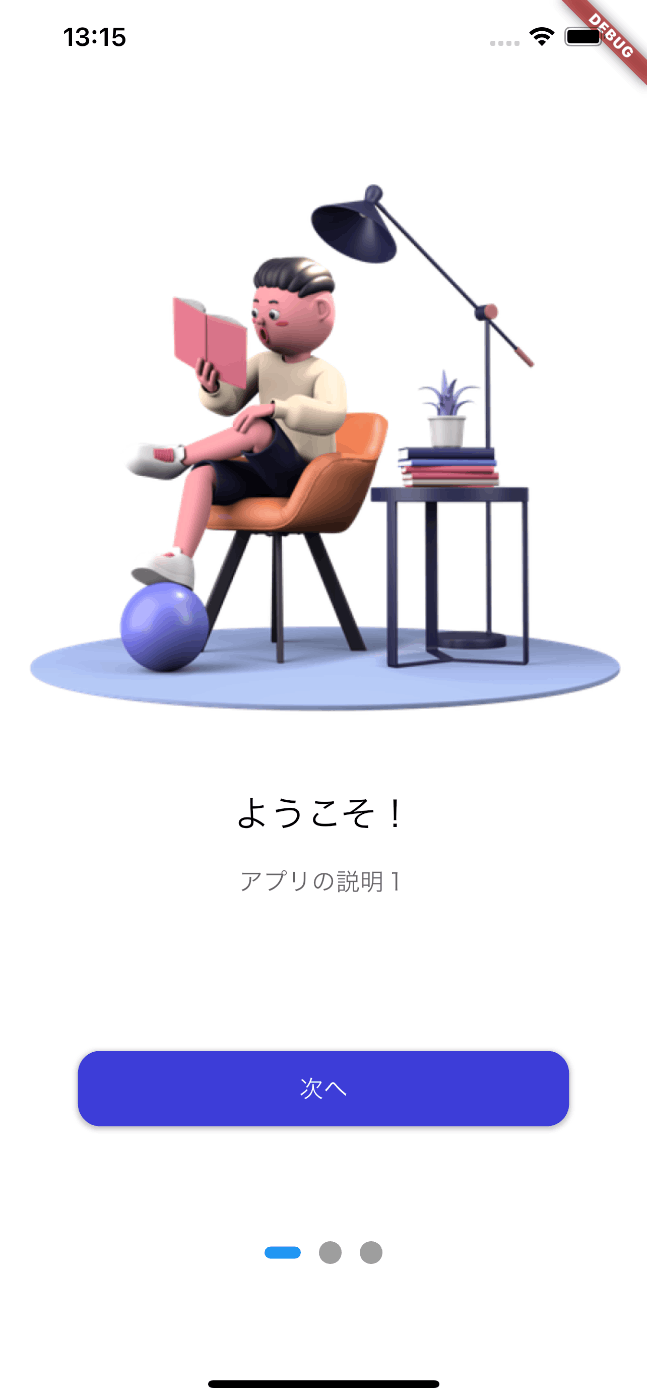
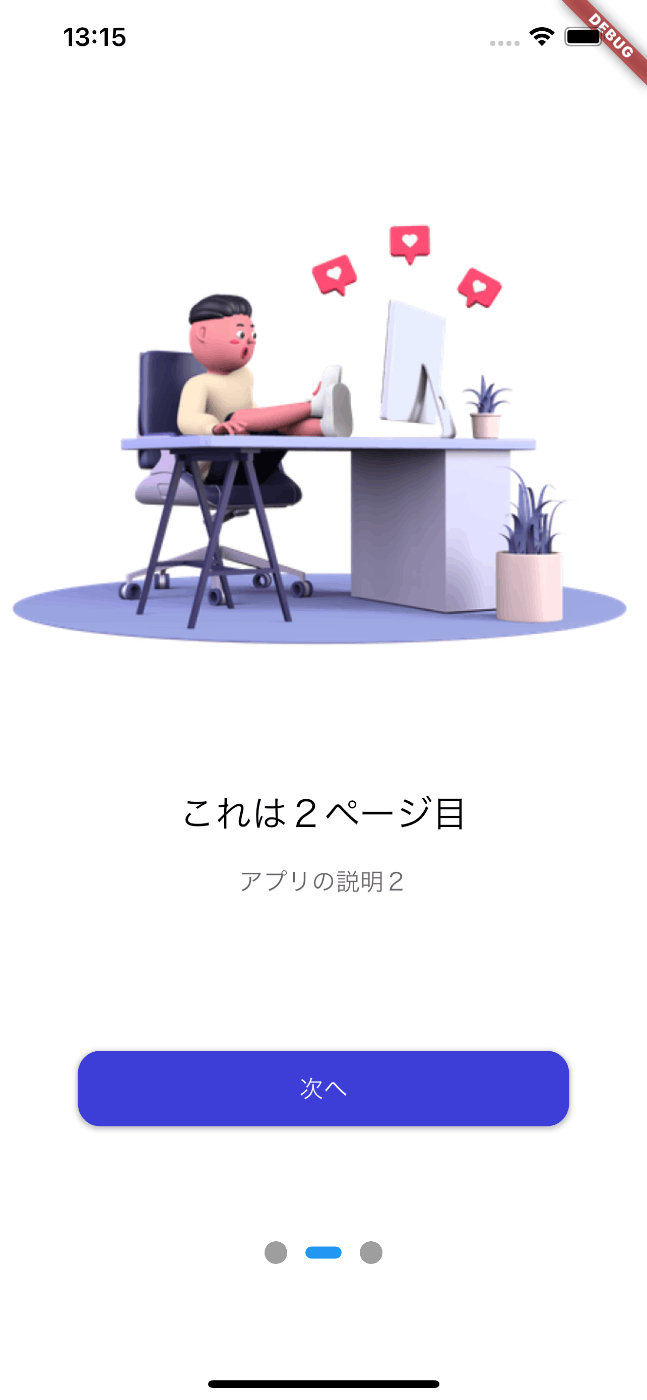
初めに今回作りたいページの完成系はこちら


ステップ1 まずはUIを作ります
PageViewのコードが以下です
Welcome.dart
class Welcome extends StatelessWidget {
Welcome({Key? key});
final PageController _controller = PageController();
Widget build(BuildContext context) {
return Container(
color: Colors.white, //Safeをラップして黒い部分をなくす
child: SafeArea(
child: Scaffold(
backgroundColor: Colors.white,
body: Container(
margin: EdgeInsets.only(top: 30), //stackごトラップして高さをtop30
child: Stack(
alignment: Alignment.topCenter,
children: [
//showing our three welcome pages
PageView(
onPageChanged: (value) {
},
controller: _controller,
scrollDirection: Axis.horizontal, //横にスライド
children: [
//first page
appOnboardingPage(
_controller,
imagePath: 'assets/images/reading.png',
title: 'ようこそ!',
subtitle: 'アプリの説明1',
index: 1,
context: context,
),
//second page
appOnboardingPage(
_controller,
imagePath: 'assets/images/man.png',
title: 'これは2ページ目',
subtitle: 'アプリの説明2',
index: 2,
context: context,
),
appOnboardingPage(
_controller,
imagePath: 'assets/images/boy.png',
title: 'これは3ページ目',
subtitle: 'アプリの説明3',
index: 3,
context: context,
),
],
),
//for showing dots
Positioned(
bottom: 50,
child: DotsIndicator(
position: index,
dotsCount: 3, //ドットの数
mainAxisAlignment: MainAxisAlignment.center,
decorator: DotsDecorator(
size: const Size.square(15.0),
activeSize: const Size(24.0, 8.0), //アクティブなドットのサイズ
activeShape: RoundedRectangleBorder(
// アクティブなドットのデフォルトの形状(ShapeBorder)
borderRadius: BorderRadius.circular(5),
),
),
),
),
],
),
),
),
),
);
}
}
appOnboardingPageのコード
widgets.dart
//PageViewのページ
Widget appOnboardingPage(PageController controller,
    {required String imagePath,
    required String title,
    required String subtitle,
    required int index,
    required BuildContext context}) {
  return Column(
    children: [
      Image.asset(
        imagePath,
        fit: BoxFit.fitWidth,
      ),
      Container(
        margin: EdgeInsets.only(top: 15),
        child: text24Normal(text: title),
      ),
      Container(
        margin: EdgeInsets.only(top: 15),
        padding: EdgeInsets.only(left: 30, right: 30),
        child: text16Normal(text: subtitle),
      ),
      _nextButton(index, controller, context),
    ],
  );
}

//次へボタン
Widget _nextButton(int index, PageController controller, BuildContext context) {
  return GestureDetector(
    onTap: () async {
      if (index < 3) {
      } else {
        Navigator.pushNamed(
          context,
          "/signIn",
        );
      }
    },
    child: Container(
      width: 325,
      height: 50,
      margin: EdgeInsets.only(top: 100, left: 25, right: 25),
      decoration: appBoxShadow(),
      child: Center(
        child: text16Normal(
	//indexが3になったらtextをGet startedにする
          text: index < 3 ? "次へ" : "Get started",
          color: Colors.white,
        ),
      ),
    ),
  );
}
ステップ2 ここで遂にRiverpodの導入です
まずはpubspec.yaml
pubspec.yaml
  cupertino_icons: ^1.0.2
  flutter_riverpod: ^2.4.4
  dots_indicator: ^3.0.0
  riverpod_generator: ^2.3.5
  build_runner: ^2.4.6
インストールします!
flutter pub get
Riverpodを使用して初めのページを実行する
ProviderScopeでMyAppを囲む
main.dart
void main() {
runApp(const ProviderScope(child: MyApp()));
}
class MyApp extends StatelessWidget {
const MyApp({super.key});
Widget build(BuildContext context) {
return MaterialApp(
initialRoute: "/",
routes: {
"/": (context) => Welcome(),
"/signIn": (context) => SignIn(),
},
// home: Welcome(),
);
}
}
初期値を設定
changeIndex メソッドを使用して state を変更することで、Riverpodのプロバイダに新しい値が提供され、これにより状態変更をトリガーします。したがって、state を使用することは、アプリの状態管理に一貫性と効率性をもたらし、UIのリアクティビティを実現する
import 'package:riverpod_annotation/riverpod_annotation.dart';
part 'welcome_notifier.g.dart';
class IndexDot extends _$IndexDot {
int build() {
//初期値を設定
return 0;
}
void changeIndex(int value) {
////state にvalueを格納
state = value;
}
}
Riverpodのコード生成
そしてコマンドでコード生成します!
flutter pub run build_runner watch --delete-conflicting-outputs
すると,,,
// GENERATED CODE - DO NOT MODIFY BY HAND
part of 'welcome_notifier.dart';
// **************************************************************************
// RiverpodGenerator
// **************************************************************************
String _$indexDotHash() => r'e407c19e35a91274d4ef23f17c8ec0cedde72385';
/// See also [IndexDot].
(IndexDot)
final indexDotProvider = AutoDisposeNotifierProvider<IndexDot, int>.internal(
IndexDot.new,
name: r'indexDotProvider',
debugGetCreateSourceHash:
const bool.fromEnvironment('dart.vm.product') ? null : _$indexDotHash,
dependencies: null,
allTransitiveDependencies: null,
);
typedef _$IndexDot = AutoDisposeNotifier<int>;
// ignore_for_file: type=lint
// ignore_for_file: subtype_of_sealed_class, invalid_use_of_internal_member, invalid_use_of_visible_for_testing_member
簡単解説
IndexDotクラスを基にして生成されたindexDotProvider は 、特定の型(今回はint)の状態を提供するプロバイダです。このプロバイダはRiverpodの状態管理を支援するために使用され、アプリケーション内での状態の管理に役立ちます。コード生成によって、状態の作成と管理が簡素化され、コードが簡潔になります。
コード生成が完了したら
ステップ3 適切な箇所にコードを追加する!
- StatelessWidget
+ ConsumerWidgetに変更する
class Welcome extends ConsumerWidget {
Welcome({Key? key});
final PageController _controller = PageController();
+ WidgetRef ref
Widget build(BuildContext context, WidgetRef ref) {
//indexDotProvider を監視して、その現在の状態を index 変数に割り当てています。
// index は、indexDotProvider の現在の値を示すために使用されます。
+ final index = ref.watch(indexDotProvider);//indexDotProviderの状態をwatch
return Container(
color: Colors.white, //Safeをラップして黒い部分をなくす
child: SafeArea(
child: Scaffold(
backgroundColor: Colors.white,
body: Container(
margin: EdgeInsets.only(top: 30), //stackごトラップして高さをtop30
child: Stack(
alignment: Alignment.topCenter,
children: [
//showing our three welcome pages
PageView(
onPageChanged: (value) {
//changeIndexが呼ばれる
+ ref.read(indexDotProvider.notifier).changeIndex(value);//notifierをread
},
controller: _controller,
scrollDirection: Axis.horizontal, //横にスライド
children: [
//first page
appOnboardingPage(
_controller,
imagePath: 'assets/images/reading.png',
title: 'ようこそ!',
subtitle: 'アプリの説明1',
index: 1,
context: context,
),
//second page
appOnboardingPage(
_controller,
imagePath: 'assets/images/man.png',
title: 'これは2ページ目',
subtitle: 'アプリの説明2',
index: 2,
context: context,
),
appOnboardingPage(
_controller,
imagePath: 'assets/images/boy.png',
title: 'これは3ページ目',
subtitle: 'アプリの説明3',
index: 3,
context: context,
),
],
),
//for showing dots
Positioned(
bottom: 50,
child: DotsIndicator(
position: index,
dotsCount: 3, //ドットの数
mainAxisAlignment: MainAxisAlignment.center,
decorator: DotsDecorator(
size: const Size.square(15.0),
activeSize: const Size(24.0, 8.0), //アクティブなドットのサイズ
activeShape: RoundedRectangleBorder(
// アクティブなドットのデフォルトの形状(ShapeBorder)
borderRadius: BorderRadius.circular(5),
),
),
),
),
],
),
),
),
),
);
}
}
Widget appOnboardingPage(PageController controller,
    {required String imagePath,
    required String title,
    required String subtitle,
    required int index,
    required BuildContext context}) {
  return Column(
    children: [
      Image.asset(
        imagePath,
        fit: BoxFit.fitWidth,
      ),
      Container(
        margin: EdgeInsets.only(top: 15),
        child: text24Normal(text: title),
      ),
      Container(
        margin: EdgeInsets.only(top: 15),
        padding: EdgeInsets.only(left: 30, right: 30),
        child: text16Normal(text: subtitle),
      ),
      _nextButton(index, controller, context),
    ],
  );
}

Widget _nextButton(int index, PageController controller, BuildContext context) {
  return GestureDetector(
    onTap: () async {
      if (index < 3) {
+ await controller.animateToPage(index,duration: const Duration(milliseconds: 300), curve: Curves.linear);
      } else {
        Navigator.pushNamed(
          context,
          "/signIn",
        );
      }
    },
    child: Container(
      width: 325,
      height: 50,
      margin: EdgeInsets.only(top: 100, left: 25, right: 25),
      decoration: appBoxShadow(),
      child: Center(
        child: text16Normal(
          text: index < 3 ? "次へ" : "Get started",
          color: Colors.white,
        ),
      ),
    ),
  );
}
動きをステップバイステップで解説します
まず最初は次へボタンが押された時の動き
- indexは1が入ってくる。if (index < 3) の条件をチェックします。indexが3未満であれば、animateToPageを使って次のページに移動します。
- その次にPageViewのonPageChangedのvlueに1が入ってくる、 ref.read(indexDotProvider.notifier).changeIndex(value);
が呼ばれてstateにvalueの1が入ります!
3.そして3ページ目まで移動した時にonTapが呼ばれるとindexには3が入るので、条件チェックでログインページに画面遷移します
感想
これが噂のRiverpodか!!!
コードもシンプルに書けていいと思いました。
なのでもっと使って知識をつけていきたいと思います!
最後まで読んでいただきありがとうございました!!!
Discussion