概要
Next.js への Material UI の組み込みを行い、簡単に使ってみます。
前提
Next.js の動作する環境は構築できているものとします。
また、Next.js は TypeScript が導入されていることを前提に記載します。
これから環境を作られる方(Windows の方)は以下参考にしてください。
手順
Material UI とスタイリングエンジンのインストール
プロジェクトフォルダ上で npm か yarn コマンドを実行することで導入できます。
MaterialUI では、スタイリングエンジンとして、デフォルトがEmotionとなっていますが、styled-componentsも選択できるようになっています。
yarn add @mui/material @emotion/react @emotion/styled
yarn add @mui/material @mui/styled-engine-sc styled-components
ここでは、デフォルトの Emotion で導入します。
docker-compose run -w /usr/app --rm app yarn add @mui/material @emotion/react @emotion/styled
SVG マテリアルアイコンのインストール
SVG マテリアルアイコンもインストールする場合は以下のようになります。
yarn add @mui/icons-material
docker-compose run -w /usr/app --rm app yarn add @mui/icons-material
emotion/server のインストール
後述の SSR 構成での表示制御で使用するため emotion/server もインストールします。
yarn add @emotion/server
docker-compose run -w /usr/app --rm app yarn add @emotion/server
補足:まとめてインストールするコマンド
上記 1 つずつインストールしましたが、まとめてインストールするコマンドも書いておきます。
yarn add @mui/material @emotion/react @emotion/styled @mui/icons-material @emotion/server
docker-compose run -w /usr/app --rm app yarn add @mui/material @emotion/react @emotion/styled @mui/icons-material @emotion/server
Next.js で Material UI を使用するための処理を入れる
Next.js に単純に Material UI を導入するだけだと、SSR する関係で、表示制御のタイミングのずれが生じます。
そのため、いくつかのファイルを追加・変更する必要があります。
-
createEmotionCache.ts:キャッシュ関連の共通処理を記載する -
theme.ts:サイト全体に適用するテーマを設定する -
pages/_app.tsx:クライアントサイドで必ず読みこまれるファイルを編集する -
pages/_document.tsx:サーバサイドで必ず読みこまれるファイルを追加して設定する
ほぼ、公式サンプル通りに設定する形で問題ないかと思います。
ただし、いくつか、最新の Nex.t.js だと不要な記述や汎用的ではない記述があるので、そのあたりを修正しています。
createEmotionCache.ts ファイルの追加
srcフォルダを追加し、以下の内容のファイルを追加します。このファイルは、_app.tsxと_document.tsxから呼ばれることになります。
import createCache from '@emotion/cache';

export default function createEmotionCache() {
    return createCache({ key: 'css', prepend: true });
}
theme.ts ファイルの追加
以下の内容のファイルを追加します。ここではまだ具体的な theme 内容は設定していませんが、サイト全体の theme を編集する場合はこのファイルを編集します。
import { createTheme } from '@mui/material/styles';

const theme = createTheme({
    // TODO:テーマ設定を行います
});

export default theme;
pages/_app.tsx の編集
以下のように編集します。デフォルトで呼ばれているstyles/*.css系は使わなくなります。
また、サイト全体にキャッシュ制御と theme 設定が適切に反映されるようにしています。
import Head from 'next/head';
import type { AppProps } from 'next/app'
import { ThemeProvider } from '@mui/material/styles';
import CssBaseline from '@mui/material/CssBaseline';
import { CacheProvider, EmotionCache } from '@emotion/react';
import theme from '../theme';
import createEmotionCache from '../createEmotionCache';

const clientSideEmotionCache = createEmotionCache();
interface MyAppProps extends AppProps {
  emotionCache?: EmotionCache;
}

function MyApp(props: MyAppProps) {
  const { Component, emotionCache = clientSideEmotionCache, pageProps } = props;
  return (
    <CacheProvider value={emotionCache}>
      <Head>
        <meta name="viewport" content="initial-scale=1, width=device-width" />
      </Head>
      <ThemeProvider theme={theme}>
        <CssBaseline />
        <Component {...pageProps} />
      </ThemeProvider>
    </CacheProvider>
  )
}

export default MyApp
pages/_document.tsx の編集
以下のような内容でファイルを追加します。サイト全体の HTML 出力関する設定(lang 属性や theme の設定)および、表示タイミングの制御を行う際のサーバサイド側の処理getInitialPropsの定義を行っています。
また、MaterialUI は Roboto という WebFont をベースに作られているため、WebFont の CSS も合わせて読み込みます。MaterialIcon についても合わせて読み込んでいます。(MaterialIcon を使用する場合)
import Document, { Html, Head, Main, NextScript } from 'next/document';
import createEmotionServer from '@emotion/server/create-instance';
import theme from '../theme';
import createEmotionCache from '../createEmotionCache';

export default class MyDocument extends Document {
    render() {
        return (
            <Html lang="ja">
                <Head>
                    <meta name="theme-color" content={theme.palette.primary.main} />
                    <link rel="stylesheet" href="https://fonts.googleapis.com/css?family=Roboto:300,400,500,700&display=swap" />
                    <link rel="stylesheet" href="https://fonts.googleapis.com/icon?family=Material+Icons" />
                    {(this.props as any).emotionStyleTags}
                </Head>
                <body>
                    <Main />
                    <NextScript />
                </body>
            </Html>
        );
    }
}

MyDocument.getInitialProps = async (ctx) => {
    const originalRenderPage = ctx.renderPage;
    const cache = createEmotionCache();
    const { extractCriticalToChunks } = createEmotionServer(cache);

    ctx.renderPage = () =>
        originalRenderPage({
            enhanceApp: (App: any) =>
                function EnhanceApp(props) {
                    return <App emotionCache={cache} {...props} />;
                },
        });

    const initialProps = await Document.getInitialProps(ctx)
    const emotionStyles = extractCriticalToChunks(initialProps.html);
    const emotionStyleTags = emotionStyles.styles.map((style) => (
        <style
            data-emotion={`${style.key} ${style.ids.join(' ')}`}
            key={style.key}
            // eslint-disable-next-line react/no-danger
            dangerouslySetInnerHTML={{ __html: style.css }}
        />
    ));

    return {
        ...initialProps,
        emotionStyleTags,
    };
};
実際に使ってみる
pages/index.tsxファイルを以下のように書き換えます。
import type { NextPage } from 'next'
import { Button } from '@mui/material';

const Home: NextPage = () => {
  return (
    <>
      <Button variant="contained">Hello World</Button>
    </>
  )
}

export default Home
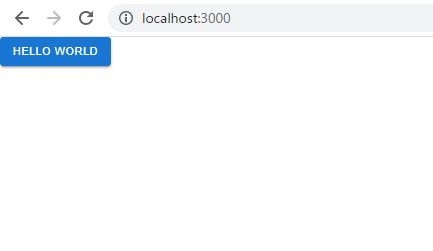
次のようにスタイルが適用されたボタンが表示されれば成功です。
なお、ここでは Button のみ読み込んでいますが、複数種類のコンポーネントを一度 import する場合は以下のようになります。
import { Typography, AppBar, Button } from "@mui/material";
所感
1-2 年前の情報でも、パッケージ名や設定内容が変わっていて、速いスピードで変化していっていることがうかがえます。React や Next.js 側も進化しているので、常にキャッチアップして行く必要がありそうですね。

トッカシステムズは、受託開発や自社製品・サービス開発を行うエンジニアリング企業です。Webサービスやアプリ、電子マネー、認証機能などの開発や、CMSによるWebサイト構築などを行っています。 Java,PHP,React,Nextでの開発や、AWSを用いた基盤構築・運用等を行っています。
Discussion