【Swift】Flutterお馴染みのカウンターアプリをSwiftで作ってみた
「SwiftでのiOSアプリ開発の流れや基礎をとりあえず知っておきたい。Viewの実装方法の違いをざっくり知りたい。」
ということでSwiftでFlutterお馴染みのカウンターアプリと同等のアプリを作成し、それぞれの実装方法の違いを確認してみる。
はじめに
StoryboardやUIKit、SwiftUIなど、「どれがどれ?違いは?」と理解できていなかったので調べていると、以下の記事がわかりやすくまとめてくださっていました。
こちらの内容に軽く目を通すと、かなり理解が進みました。
環境
Xcode 15.0
※ XcodeのバージョンによってXcodeのUIが微妙に変わるので注意。
Flutter
Flutterお馴染みのカウンターアプリ。
flutter create <app_name>を実行するだけで、カウンターアプリが作成される。
シミュレーターを選択してflutter run を実行。
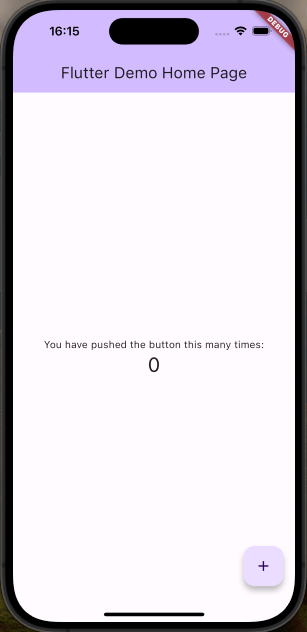
createされたコードは以下。(お馴染みすぎるが比較のため記載)
main.dart
import 'package:flutter/material.dart';
void main() {
runApp(const MyApp());
}
class MyApp extends StatelessWidget {
const MyApp({super.key});
Widget build(BuildContext context) {
return MaterialApp(
title: 'Flutter Demo',
theme: ThemeData(
colorScheme: ColorScheme.fromSeed(seedColor: Colors.deepPurple),
useMaterial3: true,
),
home: const MyHomePage(title: 'Flutter Demo Home Page'),
);
}
}
class MyHomePage extends StatefulWidget {
const MyHomePage({super.key, required this.title});
final String title;
State<MyHomePage> createState() => _MyHomePageState();
}
class _MyHomePageState extends State<MyHomePage> {
int _counter = 0;
void _incrementCounter() {
setState(() {
_counter++;
});
}
Widget build(BuildContext context) {
return Scaffold(
appBar: AppBar(
backgroundColor: Theme.of(context).colorScheme.inversePrimary,
title: Text(widget.title),
),
body: Center(
child: Column(
mainAxisAlignment: MainAxisAlignment.center,
children: <Widget>[
const Text(
'You have pushed the button this many times:',
),
Text(
'$_counter',
style: Theme.of(context).textTheme.headlineMedium,
),
],
),
),
floatingActionButton: FloatingActionButton(
onPressed: _incrementCounter,
tooltip: 'Increment',
child: const Icon(Icons.add),
),
);
}
}
swift: Storyboard
UIをStoryboard(GUI操作)で作成してみる。
ざっくりと作成手順を記載。
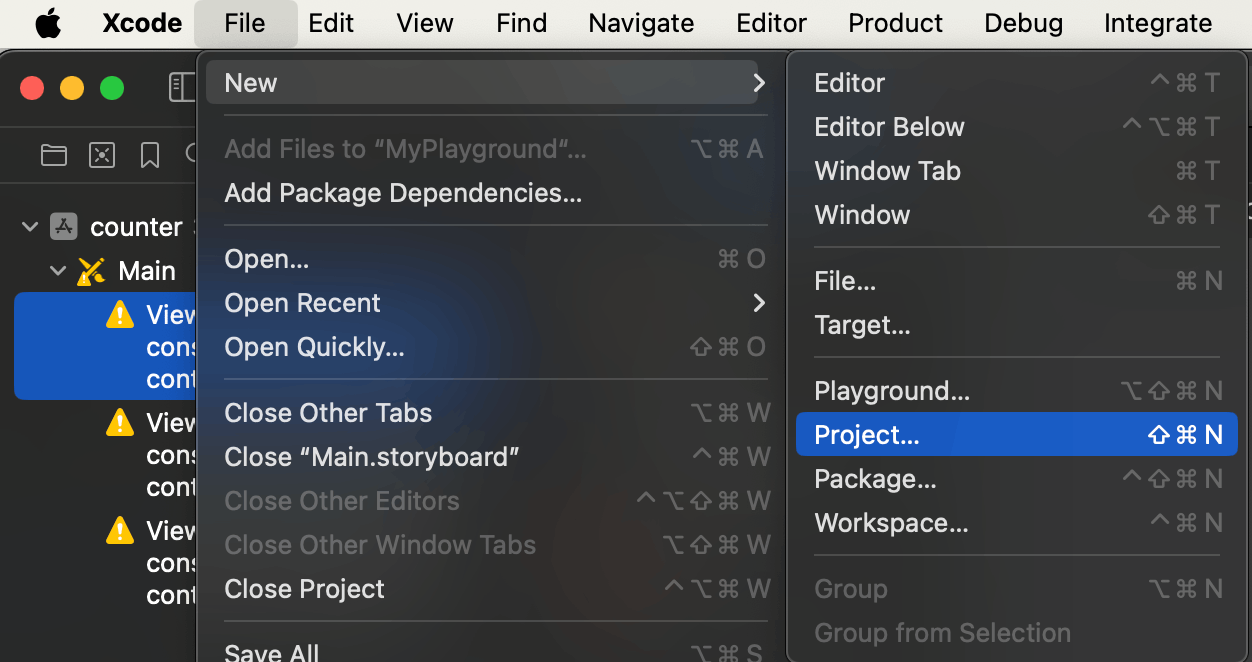
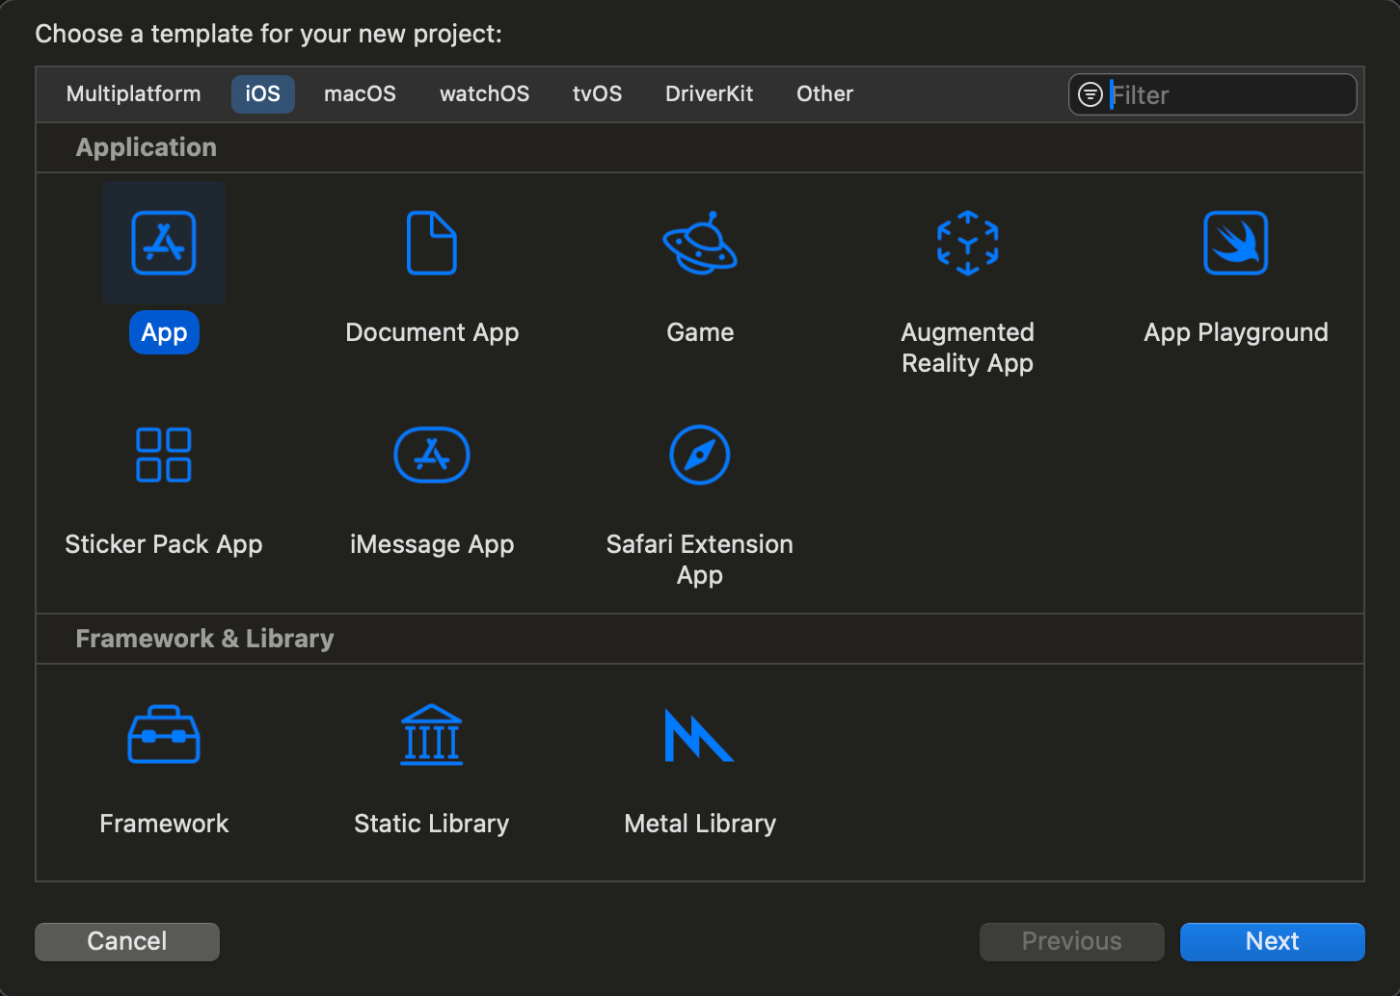
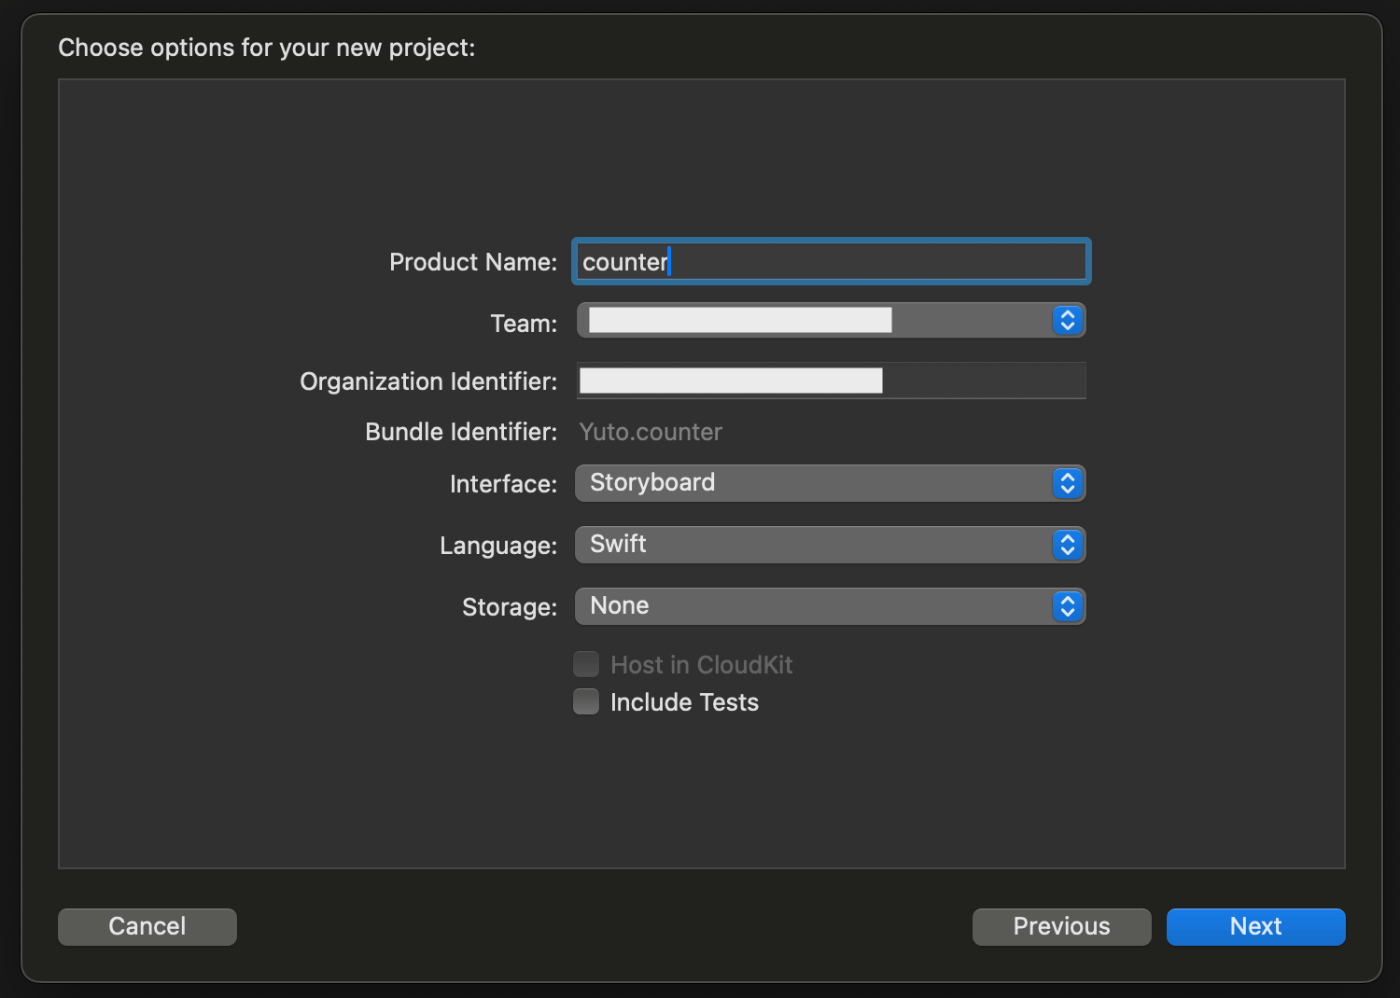
- Xcodeを開いて、新規プロジェクトを作成。
| a. Xcode/File/New/Project | b. iOS/App/Next | c. choose options |
|---|---|---|
 |
 |
 |
-
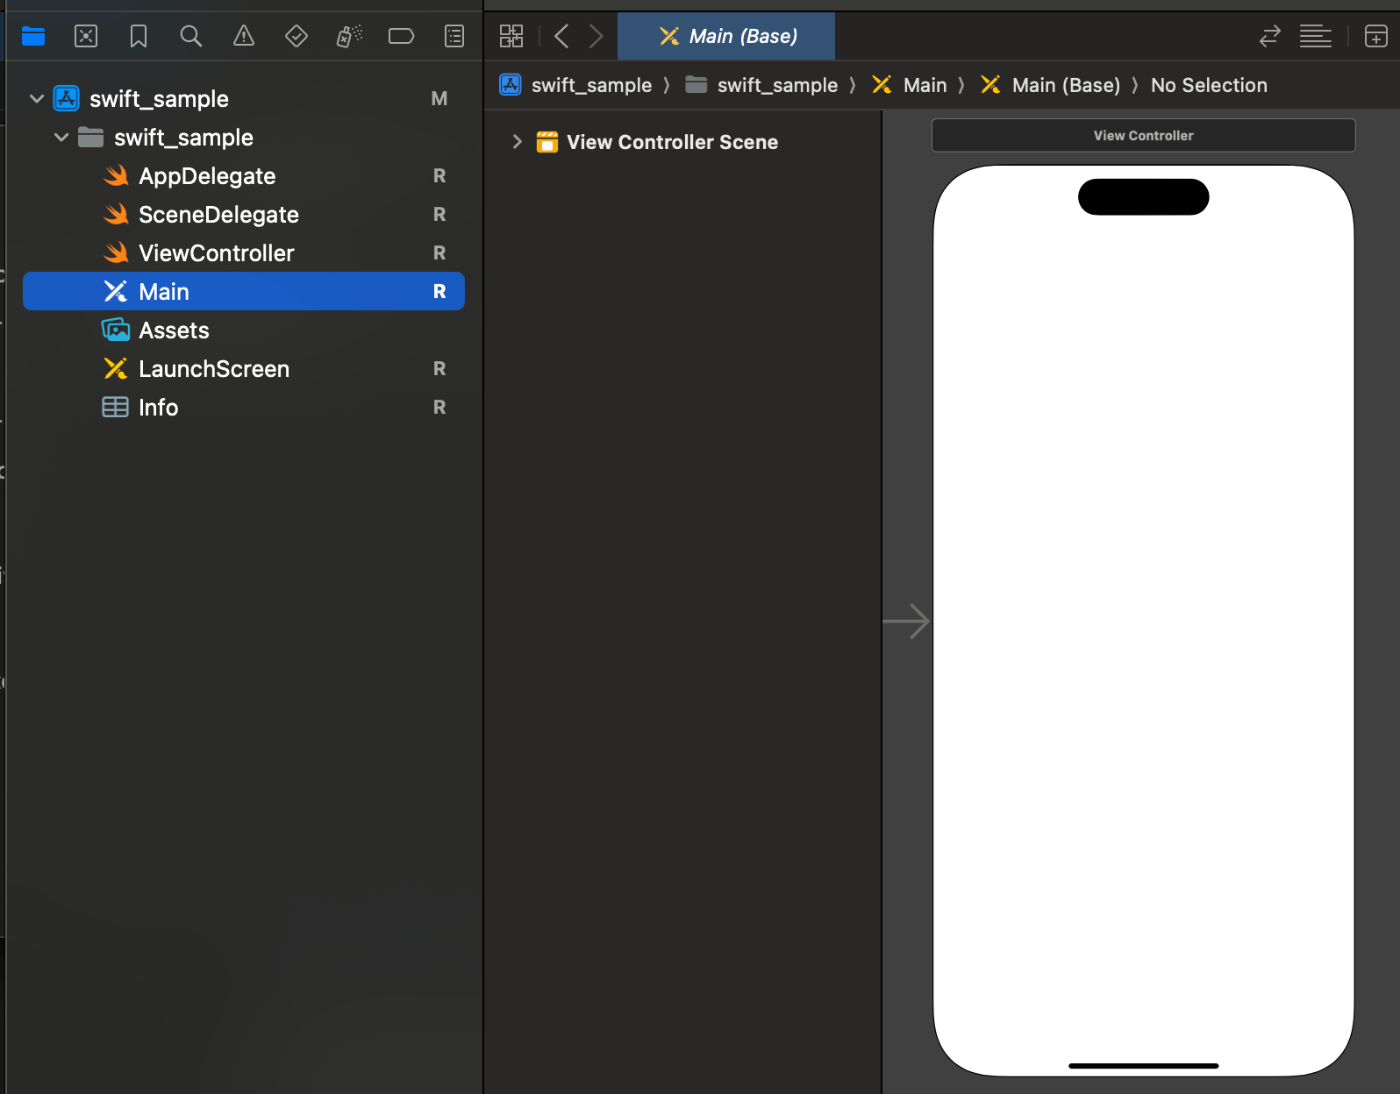
新規プロジェクト作成後、左側のナビゲーターから
Main(Main.storyboard)を選択。選択すると画面プレビューが表示される。
-
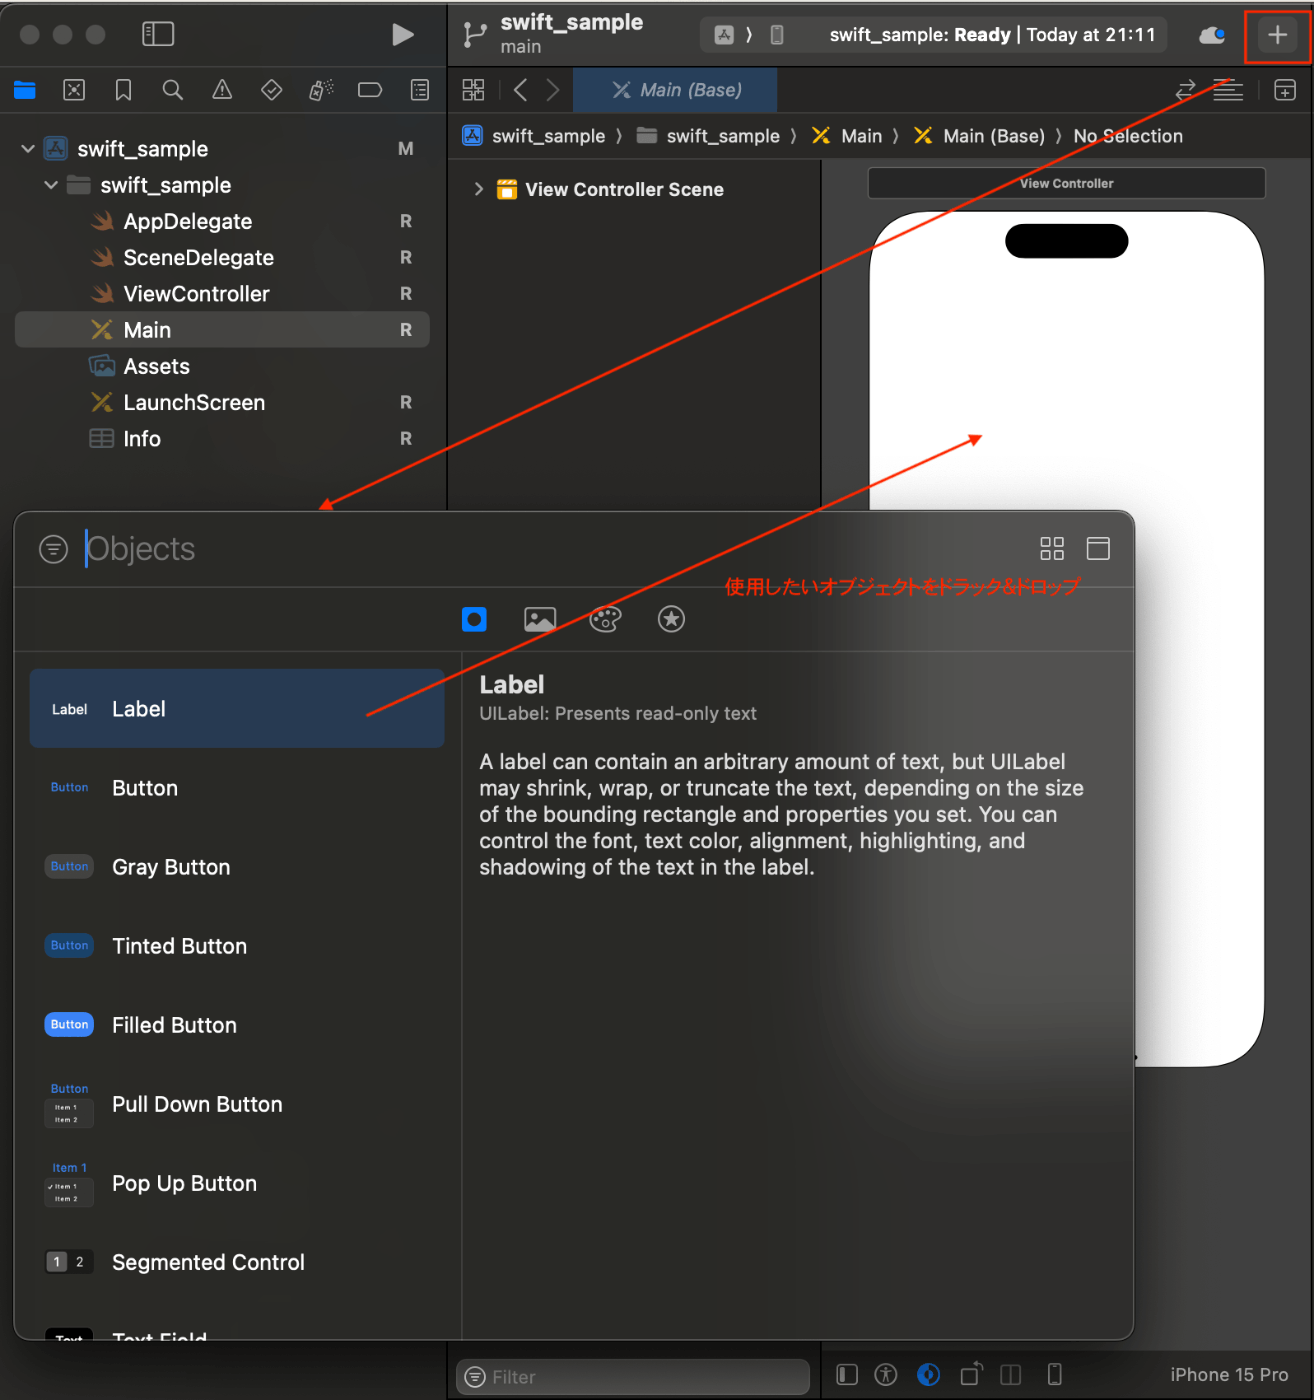
オブジェクトライブラリから使用したいオブジェクト(≒ UI部品、コンポーネント)を選択して、ドラッグ&ドロップで配置していく。
オブジェクトライブラリは右上の+マーク押下(cnt + command + L)で表示される。
-
オブジェクトを任意の位置に配置したら、オブジェクトの各種プロパティ(Style)を設定する。

※ Buttonの角丸や影などのStyle設定は、プレビューには表示されないものもある。。。
反映を確認するには毎度ビルドしてシミュレーターで確認する。
→ 反映されない。という記事はいくつか見かけるが、なぜなのか。まで記載されている記事はざっとみただけだと見つけられなかった。。。プレビュー - ButtonにStyle反映無し シミュレーター - ButtonにStyle反映有り 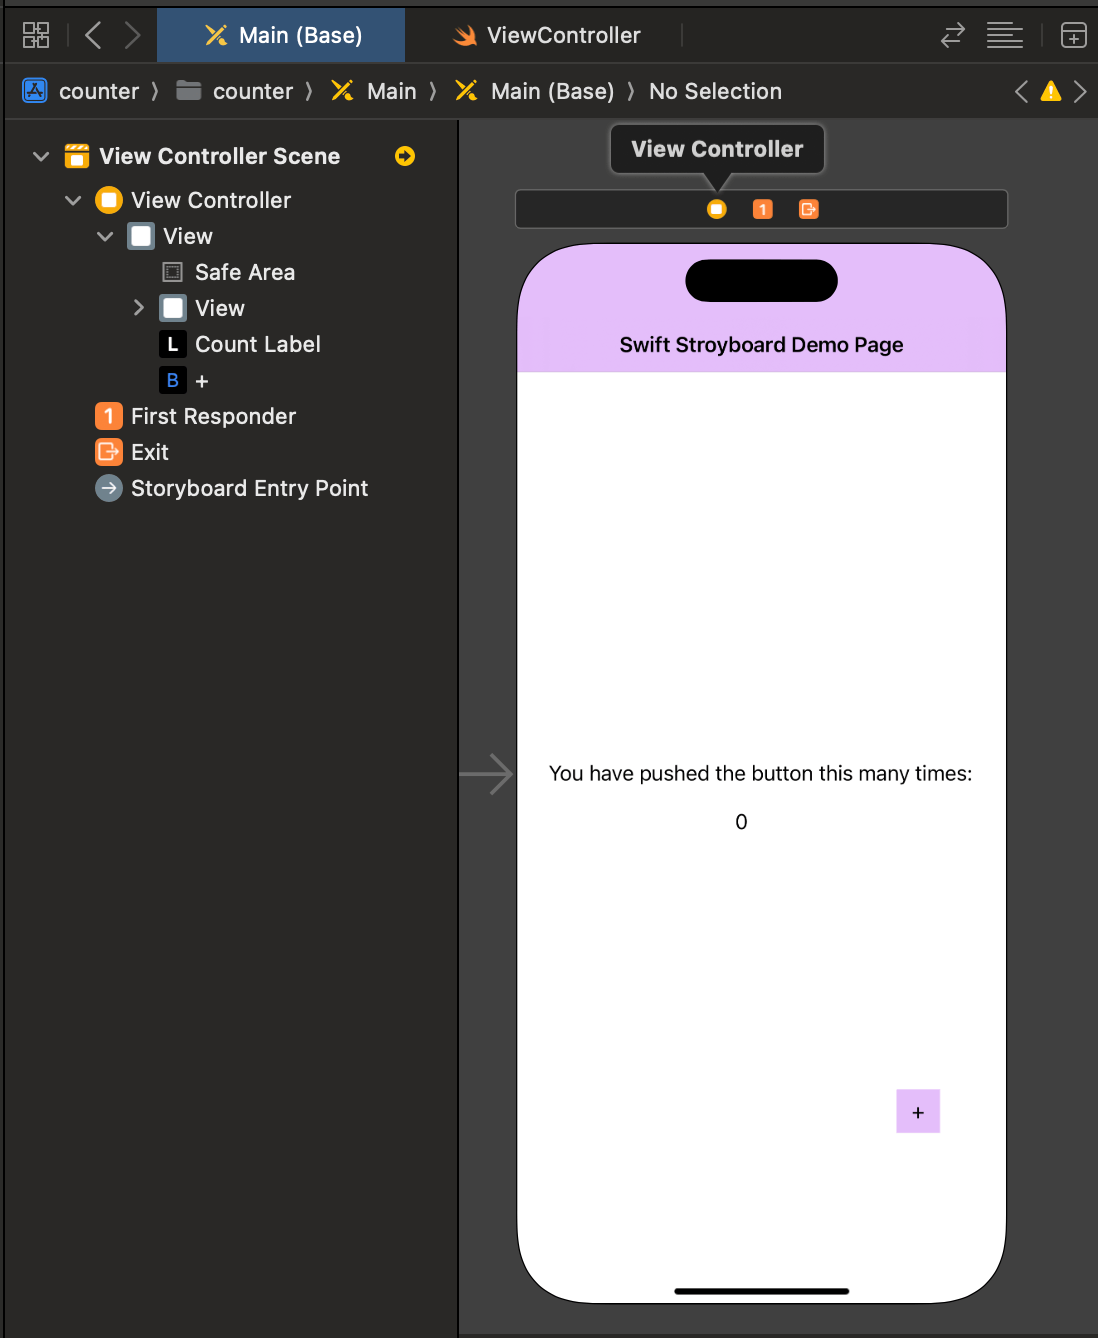

-
ViewController.swiftに配置したオブジェクトの関数処理や変数設定などを記述する。

-
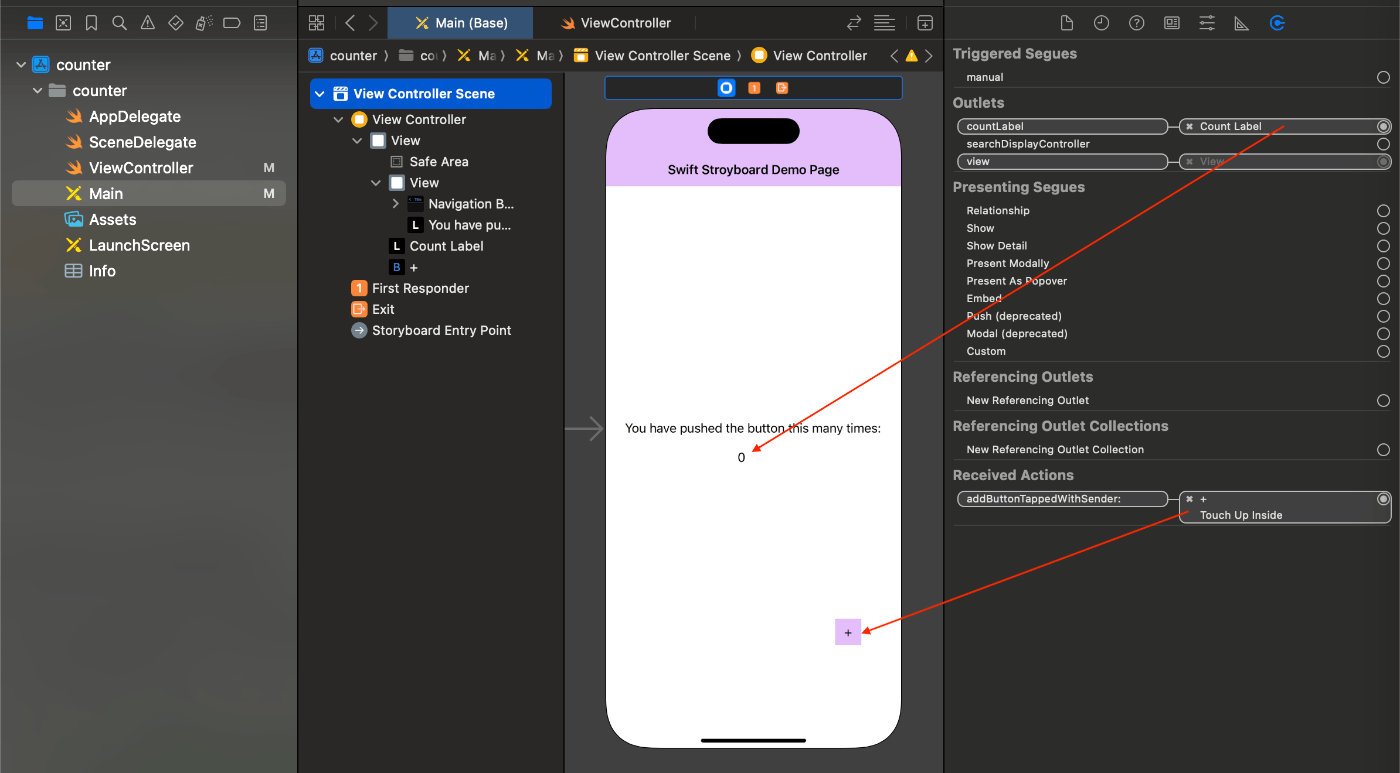
swiftファイルで定義した関数や変数を、Maii.storyboardのオブジェクトにドラッグ&ドロップで紐付ける。
-
カウンターアプリが完成。(添付画像だとオブジェクトのStyleが多少違うが、調整すればほぼ同じに。)
GUI操作で直感的にUIの作成ができるが、細かい設定やStyleの設定がややこしい印象。
どのプロパティがどの項目か、どこにあるのか、などがわかりにくく設定しづらい。(慣れの問題説はあるが)
swift: UIKit
UIをUIKit(ソースコード)で作成してみる。
-
storyboardの時と同様に、新規プロジェクトを作成。
-
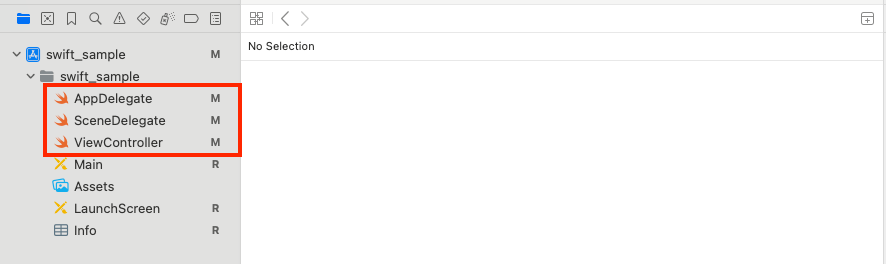
Main.storyboardは使用せずに、赤線内の
.swiftファイルだけでUIを作成していく。
-
ViewController.swiftにオブジェクトの配置設定を書く。1画面だけのアプリだと基本はこのファイルだけで完結。ViewController.swift
import UIKit class ViewController: UIViewController { var count = 0 let countLabel = UILabel() let discription = UILabel() let addButton = UIButton() override func viewDidLoad() { super.viewDidLoad() setupCounterLabel() setupDiscriptionLabel() setupIncrementButton() setupNavigationBar() } // UILabelのセットアップ func setupCounterLabel() { countLabel.text = "\(count)" countLabel.textAlignment = .center view.addSubview(countLabel) // Auto Layoutを有効化 countLabel.translatesAutoresizingMaskIntoConstraints = false // Layout Anchorsを使用した配置設定 NSLayoutConstraint.activate([ countLabel.centerXAnchor.constraint(equalTo: view.centerXAnchor), countLabel.centerYAnchor.constraint(equalTo: view.centerYAnchor, constant: 30), countLabel.widthAnchor.constraint(equalToConstant: 200), countLabel.heightAnchor.constraint(equalToConstant: 20) ]) } // UILabelのセットアップ func setupDiscriptionLabel() { discription.text = "You have pushed the button this many times:" discription.textAlignment = .center view.addSubview(discription) // Auto Layoutを有効化 discription.translatesAutoresizingMaskIntoConstraints = false // Layout Anchorsを使用した配置設定 NSLayoutConstraint.activate([ discription.centerXAnchor.constraint(equalTo: view.centerXAnchor), discription.centerYAnchor.constraint(equalTo: view.centerYAnchor), ]) } // UIButtonのセットアップ func setupIncrementButton() { addButton.setTitle("+", for: .normal) // Button Style設定 addButton.setTitleColor(UIColor.black, for: .normal) addButton.backgroundColor = UIColor.systemPurple addButton.layer.cornerRadius = 10 addButton.layer.shadowColor = UIColor.black.cgColor addButton.layer.shadowOffset = CGSize(width: 0, height: 4) addButton.layer.shadowOpacity = 0.5 addButton.layer.shadowRadius = 4 view.addSubview(addButton) addButton.addTarget(self, action: #selector(addButtonTapped), for: .touchUpInside) // Auto Layoutを有効化 addButton.translatesAutoresizingMaskIntoConstraints = false // Layout Anchorsを使用した配置設定 NSLayoutConstraint.activate([ addButton.trailingAnchor.constraint(equalTo: view.trailingAnchor, constant: -50), addButton.bottomAnchor.constraint(equalTo: view.safeAreaLayoutGuide.bottomAnchor, constant: -50), addButton.widthAnchor.constraint(equalToConstant: 60), addButton.heightAnchor.constraint(equalToConstant: 60) ]) } // ナビゲーションBarのセットアップ private func setupNavigationBar() { navigationItem.title = "Swift UIKit Demo Page" } @objc func addButtonTapped() { count += 1 countLabel.text = "\(count)" } } -
AppDelegate.swiftとSceneDelegate.swiftにNavigationBarの設定の記述する。
NavigationBarの設定は、ViewController.swiftの記述だけでは反映されなかっため、それぞれのファイル少し設定を追加。AppDelegate.swift
import UIKit

@main
class AppDelegate: UIResponder, UIApplicationDelegate {

    var window: UIWindow?

    func application(_ application: UIApplication, didFinishLaunchingWithOptions launchOptions: [UIApplication.LaunchOptionsKey: Any]?) -> Bool {
        //iOS 15でNavigationBarがデフォルトで透過されるためのios14までと同じように表示する設定
        if #available(iOS 15.0, *) {
            //ナビゲーションバーの外観設定を宣言
            let navigationBarAppearance = UINavigationBarAppearance()
            //デフォルトの背景色を設定
            navigationBarAppearance.configureWithDefaultBackground()
            //各モードに代入
            UINavigationBar.appearance().standardAppearance = navigationBarAppearance
            UINavigationBar.appearance().compactAppearance = navigationBarAppearance
            UINavigationBar.appearance().scrollEdgeAppearance = navigationBarAppearance

            //ナビゲーションバーのタイトル文字の色変更
            navigationBarAppearance.titleTextAttributes = [.foregroundColor: UIColor.black]
            //ナビゲーションバーの背景色変更
            navigationBarAppearance.backgroundColor = UIColor.systemPurple
        }
        return true
    }
    // 以下割愛
}
SceneDelegate.swift
import UIKit class SceneDelegate: UIResponder, UIWindowSceneDelegate { var window: UIWindow? func scene(_ scene: UIScene, willConnectTo session: UISceneSession, options connectionOptions: UIScene.ConnectionOptions) { guard let windowScene = (scene as? UIWindowScene) else { return } // 以下の設定を加えないとNavigationBarが表示されない。 // UIWindowを生成し、ウィンドウシーンを設定します。 let window = UIWindow(windowScene: windowScene) // 新しいウィンドウをSceneDelegateのプロパティとして保持します。 self.window = window // ルートビューコントローラとしてUINavigationControllerを設定します。 window.rootViewController = UINavigationController(rootViewController: ViewController()) // ウィンドウをキーウィンドウとして表示し、ユーザーとのインタラクションを開始します。 window.makeKeyAndVisible() // ウィンドウの背景色を白に設定します。 window.backgroundColor = .white } // 以下割愛 } -
buildすると、カウンターアプリが完成。(色味はStyleやや違うが、機能は同じカウンターアプリ)
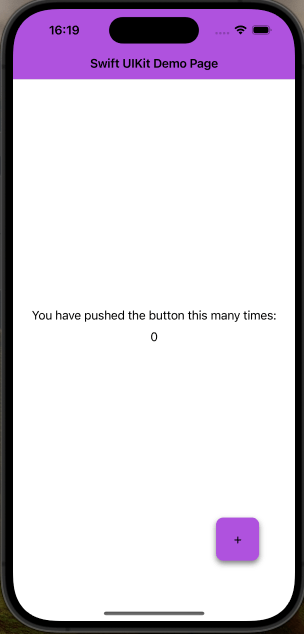
※ Main.storyboardは使用していないので、ファイルを開いても真っ白。
コードベースで全て設定できるが、swift固有の記述が多い?見慣れない書き方が多くて手間取った。特にNavigationBarの設定が無駄にややこしかった。
→ 表示するだけでこんなに記述量がいるので、画面遷移とか設定しだすともっとややこしくなる?
SwiftUI
SwiftUIでカウンターアプリを作成してみる。
イメージとしては、storyboardのようなGUI操作もできる、UIKitの強化版みたいなイメージ。
-
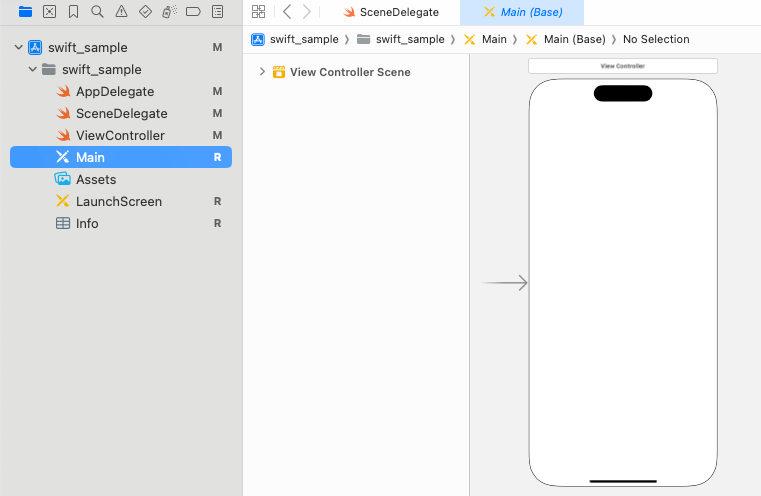
storyboardの時と同様に、新規プロジェクトを作成。
Interface項目にてSwiftUIを選択。 -
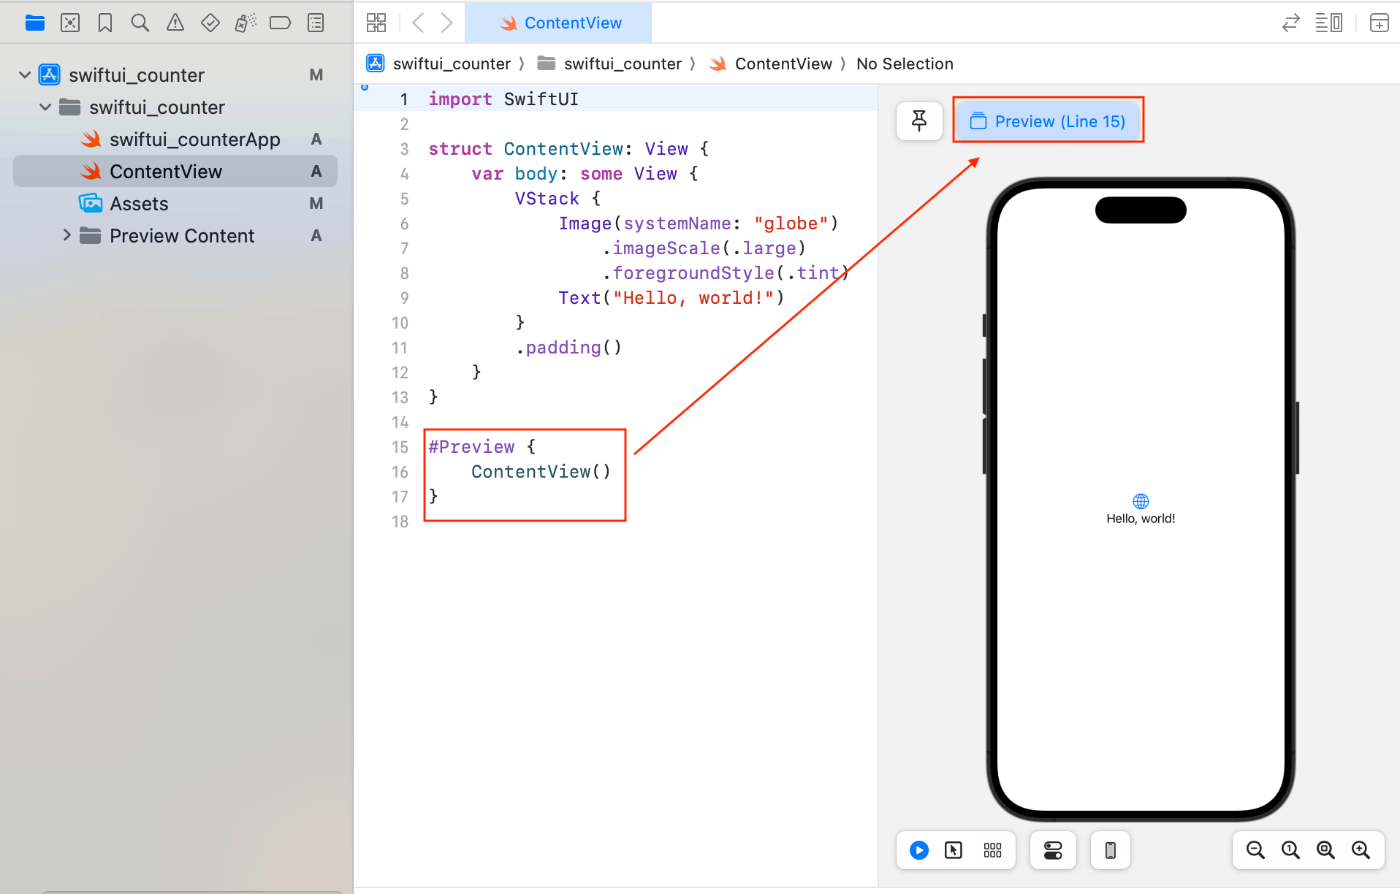
作成すると以下のような構成となる。
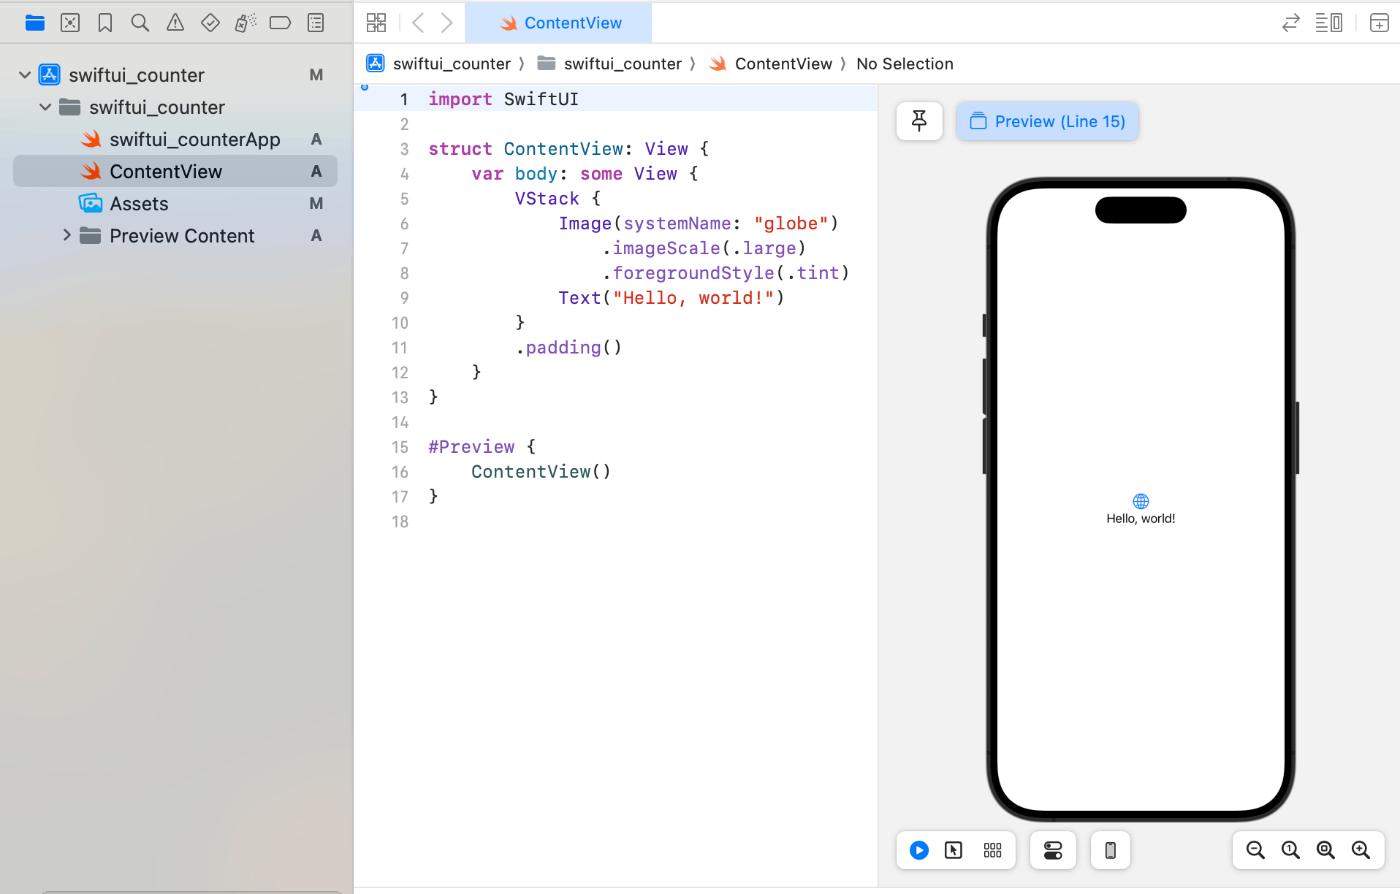
-
#Previewで囲まれた部分がプレビュー画面に表示される。
-
storyboardのように
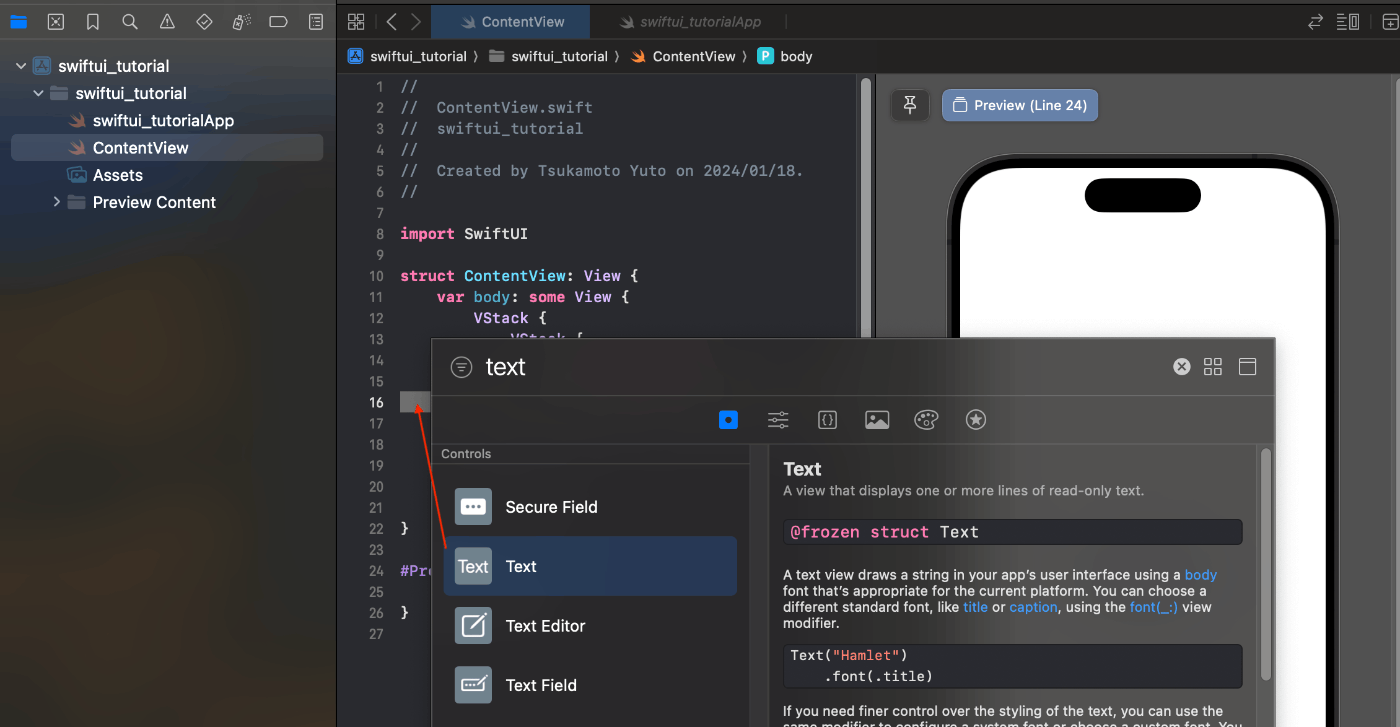
Inspectorでオブジェクトのプロパティを設定することも可能。
また、UIライブラリからオブジェクトをドラッグ操作でコード部分に配置することも可能。UIライブラリを開くには、右上の+アイコンか、Shift + command + L。xcode xcode 
-
以下のように
ContentView.swiftのコードを変更。ContentView.swift
import SwiftUI struct ContentView: View { @State private var counter = 0 var body: some View { NavigationStack{ VStack() { Spacer() Text("You have pushed the button this many times:") Text("\(counter)") .padding(.top, 16) .font(.title) Spacer() HStack(){ Spacer() Button(action: { counter += 1 }) { Image(systemName: "plus") .foregroundColor(.black) .padding() .background(Color.purple) .cornerRadius(10) .shadow(radius: 4) } .padding(.trailing, 40.0) } } .toolbar { ToolbarItem(placement: .principal) { Text("SwiftUI Demo Page") .font(.title) .foregroundColor(.white) } } .navigationBarTitle("", displayMode: .inline) .toolbarBackground(Color.purple,for: .navigationBar) .toolbarBackground(.visible, for: .navigationBar) .toolbarColorScheme(.dark) } } } #Preview { ContentView() } -
完成。
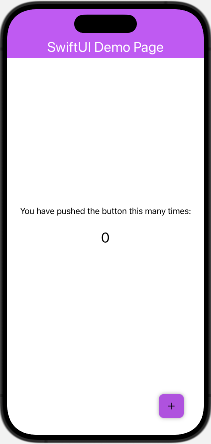
UIKitよりかなりコードはスッキリして、navigationBarがUIKitに比べて簡単に設定できる印象。
(個人的には公式ドキュメントがやや見にくい。。apple特有のあの小洒落た感じ。。慣れるとすんなり読めるようになるのだろうが。)
おわり
今回は1画面だけのシンプルなカウンターアプリの作成だったため、細かいところまでは比較できていないが、それでもSwiftUIの開発体験はStoryboardやUIKitに比べると良さそうだということは感じることができた。
ただ、1画面だけのアプリだとSwiftUIの良さを十分に感じることはできないので、公式チュートリアルを実施しながら色々と触っていきたい。
Discussion