🐯
FlutterでLottieアニメーション触ってみた!
はじめに
Webアニメーションでよく見るLottieですが、Flutterでも使えるということなので、
この記事では、Lottieのアニメーションを表示する方法を実例を用いて紹介します🙌
Lottieを利用するメリット
- (ほとんど)コードを書かずにアニメーションを実装できる
- svgファイルなので解像度を気にせずに拡大縮小が可能
- jsonファイルが使用されるため、動画ファイルに比べて軽量
環境
筆者の環境は以下のとおりです。
事前準備
- 以下のサイト(lottiefiles)から使用したいものを
Lottie JSONとしてダウンロード - pubspec.yamlのdependenciesに
lottieを追記し、flutter pub get
因みに
VsCodeをお使いの方は拡張機能のPubspec Assistをインストールしていれば以下の手順でもパッケージをインストールできます!
-
shift + command + pでコマンドパレットを呼び出す -
Pubspec Assist:add dependenciesを指定 - 必要なパッケージを入力(スペルが曖昧でも補完機能があるので助かっています。)
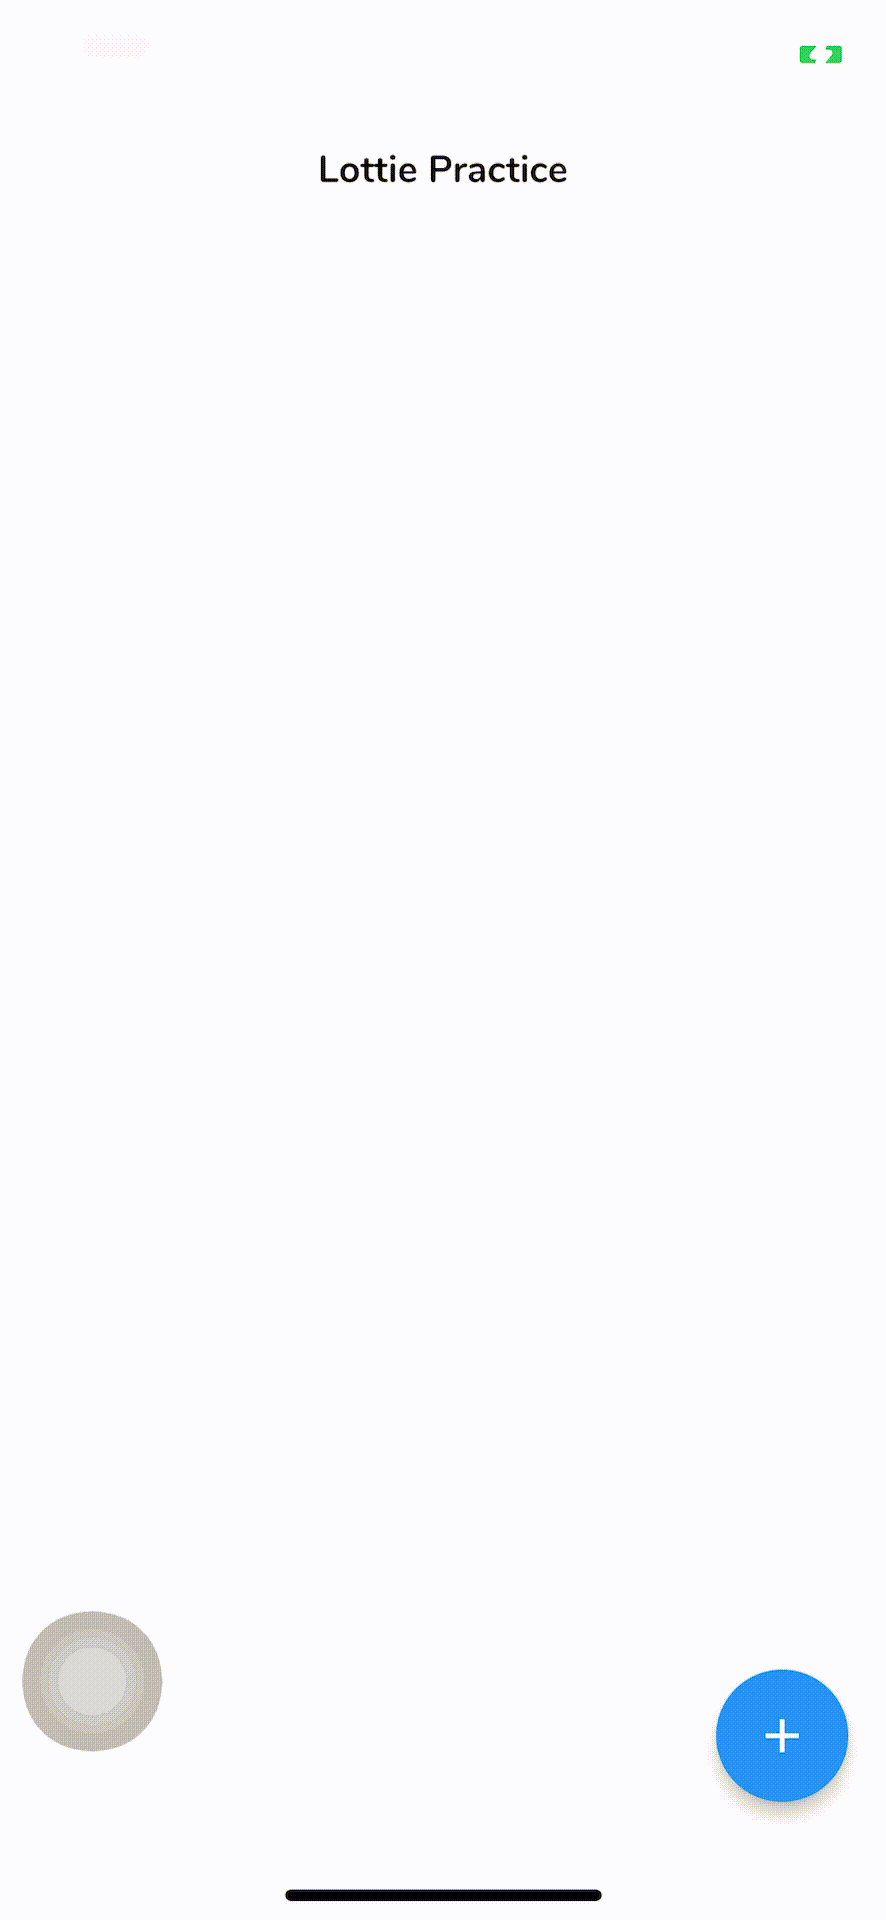
実例①
まずは簡単にページ単位でLottieのアニメーションを表示させます。
(ローディング画面やオンボーディング画面などに実用できそう)
floatingActionButton(+ボタン)がアニメーションのトリガーです。
コード
githubにて管理しておりますので、詳細はそちらを御覧ください🙇
実際にアニメーションが起きる画面はFlyingPlanePageです。このクラスをappPageで呼び出すといった具合です。
FlyingPlanePage
import 'package:flutter/material.dart';
import 'package:lottie/lottie.dart';
import 'package:lottie_practice/src/core/constants/lotties.dart';
class FlyingPlanePage extends StatefulWidget {
const FlyingPlanePage({
Key? key,
this.customPaintSize = 200.0,
}) : super(key: key);
final double customPaintSize;
State<FlyingPlanePage> createState() => _FlyingPlanePageState();
}
class _FlyingPlanePageState extends State<FlyingPlanePage>
with SingleTickerProviderStateMixin {
late AnimationController _controller;
void initState() {
_controller = AnimationController(vsync: this);
super.initState();
}
Widget build(BuildContext context) {
return Scaffold(
body: Center(
child: Lottie.asset(
flyingPlane,
width: 250,
height: 250,
frameRate: FrameRate(60),
repeat: false,
controller: _controller,
onLoaded: (composition) {
_controller
..duration = composition.duration
..forward().whenComplete(() => Navigator.pop(context));
},
),
),
);
}
}
ポイント
- animationControllerが一つなので、
SingleTickerProviderStateMixinでOK -
Lottie.assetの引数にダウンロードしたjsonファイルを付与 -
Lottie.assetのonLoadedメソッドにはアニメーションが終了した後の処理を書く -
..はDartのカスケード記法
//カスケード記法について

animation = Tween<double>(begin: 0, end: 300).animate(controller)
  ..addListener(() {
    // ···
  });
//This code is equivalent to:
animation = Tween<double>(begin: 0, end: 300).animate(controller);
animation.addListener(() {
    // ···
  });
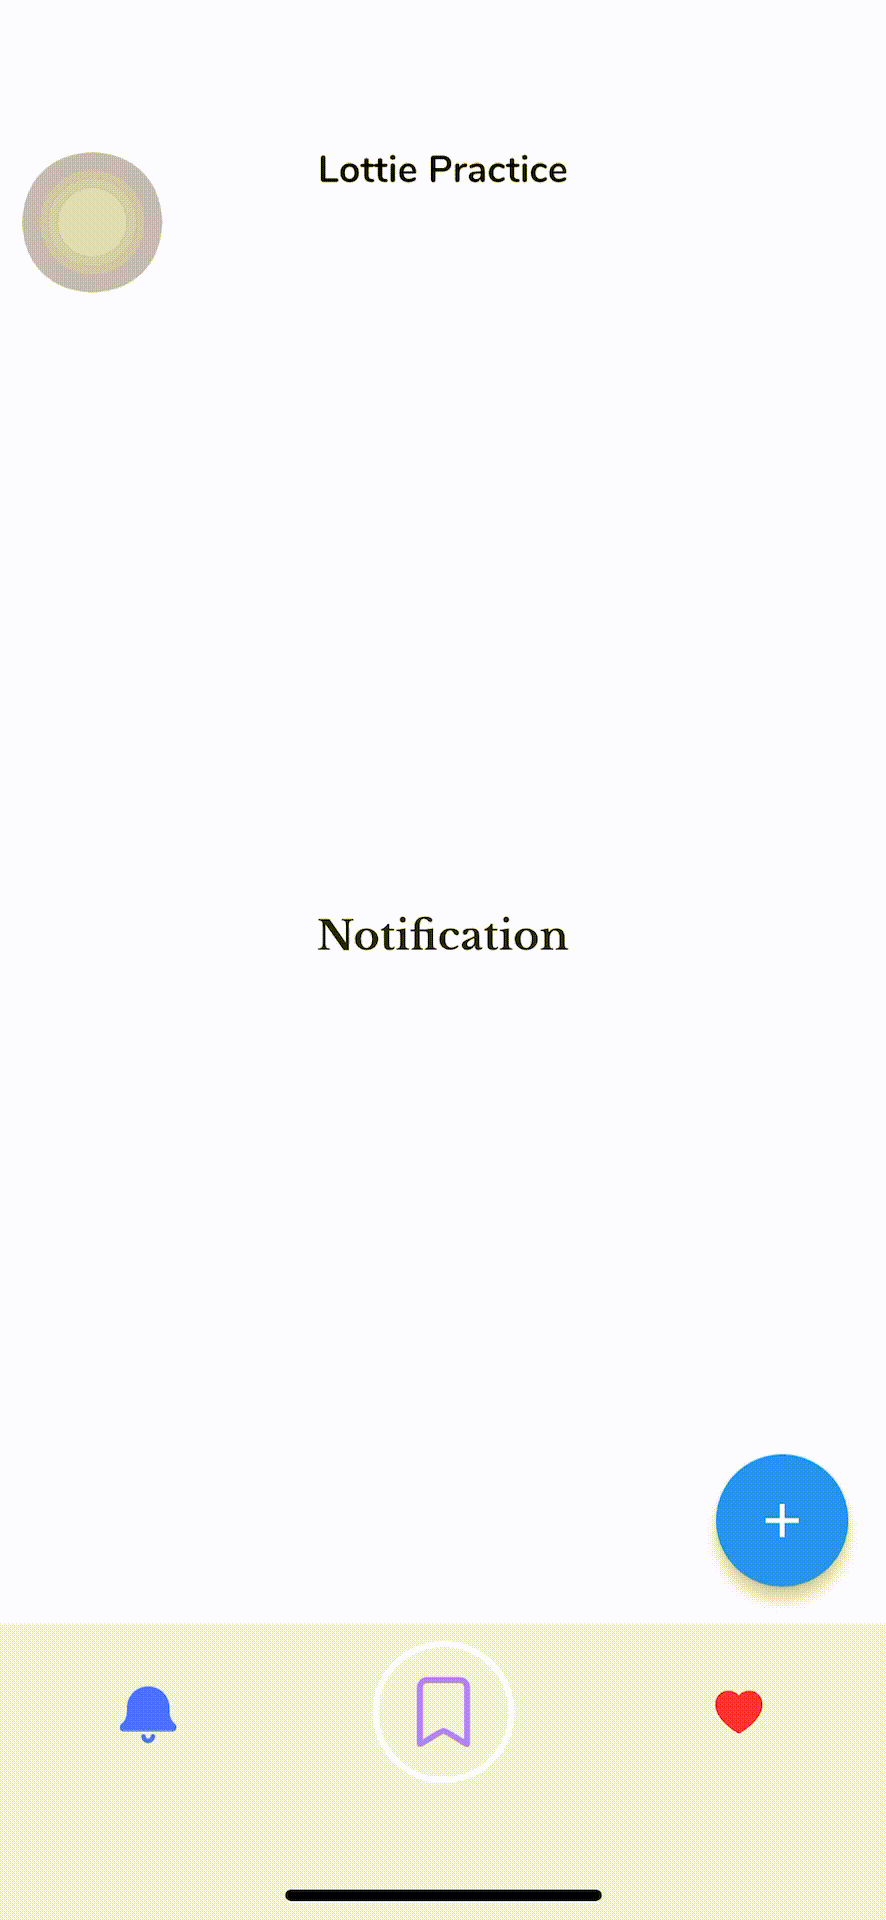
実例②
2つ目はボトムナビにLottieのアニメーションするアイコンを配置させます。
タップがトリガーです。
コード
AppクラスにStateful Widget継承させるよう変更することで、ボトムナビの設定を行います。
Appクラス
import 'package:flutter/material.dart';
import 'package:lottie/lottie.dart';
import 'package:lottie_practice/src/core/constants/app_theme.dart';
import 'package:lottie_practice/src/core/constants/lotties.dart';
import 'package:lottie_practice/src/core/theme/theme.dart';
import 'package:lottie_practice/src/pages/widgets/biometrics_page.dart';
class App extends StatelessWidget {
const App({Key? key}) : super(key: key);
Widget build(BuildContext context) {
return MaterialApp(
debugShowCheckedModeBanner: false,
title: "Lottie Practice",
theme: AppTheme.light,
home: const AppPage(),
);
}
}
class AppPage extends StatefulWidget {
const AppPage({Key? key}) : super(key: key);
State<AppPage> createState() => _AppPageState();
}
class _AppPageState extends State<AppPage> with TickerProviderStateMixin {
int _selectedIndex = 0;
int previousIndex = 0;
late AnimationController idleAnimation;
late AnimationController onSelectedAnimation;
late AnimationController onChangedAnimation;
String _label = 'Notification';
final _titles = ['Notification', 'BookMark', 'Like'];
void _onItemTapped(int index) {
setState(() {
_selectedIndex = index;
onSelectedAnimation.reset();
onSelectedAnimation.forward();
onChangedAnimation.value = 1;
onChangedAnimation.reverse();
setState(() {
previousIndex = _selectedIndex;
_selectedIndex = index;
_label = _titles[index];
});
});
}
Duration animationDuration = const Duration(seconds: 2);
void initState() {
super.initState();
idleAnimation = AnimationController(vsync: this);
onSelectedAnimation =
AnimationController(vsync: this, duration: animationDuration);
onChangedAnimation =
AnimationController(vsync: this, duration: animationDuration);
}
void dispose() {
super.dispose();
idleAnimation.dispose();
onSelectedAnimation.dispose();
onChangedAnimation.dispose();
}
Widget build(BuildContext context) {
return Scaffold(
appBar: AppBar(
title: Text(
'Lottie Practice',
style: filterByTitleStyle,
),
),
floatingActionButton: FloatingActionButton(
onPressed: () {
const transitionDuration = Duration(milliseconds: 400);
Navigator.of(context).push(
PageRouteBuilder(
transitionDuration: transitionDuration,
reverseTransitionDuration: transitionDuration,
pageBuilder: (_, animation, ___) {
return FadeTransition(
opacity: animation,
child: const FlyingPlanePage(),
);
},
),
);
},
tooltip: 'Increment',
child: const Icon(Icons.add),
),
body: Center(child: Text(_label, style: productNameStyle)),
bottomNavigationBar: BottomNavigationBar(
backgroundColor: Colors.grey[200],
selectedItemColor: Colors.white,
currentIndex: _selectedIndex,
onTap: _onItemTapped,
items: <BottomNavigationBarItem>[
BottomNavigationBarItem(
icon: Lottie.asset(bellNotification,
width: 60,
height: 60,
frameRate: FrameRate(60),
repeat: false,
controller: _selectedIndex == 0
? onSelectedAnimation
: previousIndex == 0
? onChangedAnimation
: idleAnimation),
label: '',
),
BottomNavigationBarItem(
icon: Lottie.asset(bookmark,
width: 60,
height: 60,
frameRate: FrameRate(60),
repeat: false,
controller: _selectedIndex == 1
? onSelectedAnimation
: previousIndex == 1
? onChangedAnimation
: idleAnimation),
label: '',
),
BottomNavigationBarItem(
icon: Lottie.asset(likeNoBackground,
width: 60,
height: 60,
frameRate: FrameRate(60),
repeat: false,
controller: _selectedIndex == 2
? onSelectedAnimation
: previousIndex == 2
? onChangedAnimation
: idleAnimation),
label: '',
),
],
),
);
}
}
ポイント
- animationControllerが3つ必要なので
TickerProviderStateMixinを付与 -
onSelectedAnimation:異なるアイコンをタップした際のタップされた側のアニメーションを管理 -
onChangedAnimation:同じアイコンを再度タップした際のアニメーションを管理 -
idleAnimation:異なるアイコンをタップした際のタップされなかった側のアニメーションを管理(アニメーションを止める役割)
参考にしたもの
Discussion