簡易ブログ作ってみた!パート2(Nuxt.js & Firebase & Tailwind CSS)
はじめに
今回の記事は、前回の続きとなります🙇
この記事ではブログの編集機能(update) & 削除機能(delete)
この2点の達成を目指します!
今回の実例はgithubにて管理しております。こちらも、是非御覧になってください🙌
ブログの編集機能
下準備として、
Headerにadminというナビゲーションを用意して、こちらで編集機能を実装します。
TheHeader.vue
<template lang="">
  <div class="h-16">
    <header class="the-header">
      <TheSideNavToggle @toggle="$emit('sidenavToggle')" />
      <div class="ml-10 font-mono text-2xl font-bold text-white">
        <nuxt-link to="/">Nuxt BLOG</nuxt-link>
      </div>
      <div class="spacer"></div>
      <div class="navigation-items">
+       <ul class="nav-list">
+         <li class="nav-item"><nuxt-link to="/admin">Admin</nuxt-link></li>
+       </ul>
      </div>
      <CustomButton
        @click="$router.push('/admin/new-post')"
        class="mr-10 font-mono font-bold text-white"
        >New Blog</CustomButton
      >
    </header>
  </div>
</template>

<script lang="ts">
import TheSideNavToggle from '@/components/Navigation/TheSideNavToggle.vue'
import CustomButton from '@/components/UI/CustomButton.vue'
import Vue from 'vue'

export default Vue.extend({
  name: 'TheHeader',
  components: {
    TheSideNavToggle,
    CustomButton,
  },
})
</script>

<style scoped>
.header-container {
  height: 60px;
}

.the-header {
  width: 100%;
  position: fixed;
  height: 60px;
  display: flex;
  justify-content: space-around;
  align-items: center;
  background-color: black;
  z-index: 100;
  box-sizing: border-box;
  padding: 0 20px;
}

.logo {
  margin: 0 10px;
  font-size: 1.3rem;
}

.logo a {
  text-decoration: none;
  color: white;
}

.spacer {
  flex: 1;
}

.navigation-items {
  display: none;
}

@media (min-width: 768px) {
  .navigation-items {
    display: block;
  }
}

.nav-list {
  list-style: none;
  padding: 0;
  margin: 0;
  display: flex;
}

.nav-item {
  margin: 0 10px;
}

.nav-item a {
  text-decoration: none;
  color: white;
  margin-right: 20px;
}

.nav-item a:hover,
.nav-item a:active,
.nav-item a.nuxt-link-active {
  color: red;
}
</style>
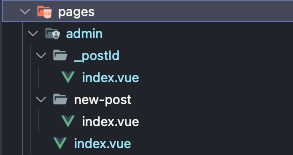
adminのファイル構成は次の通りです。
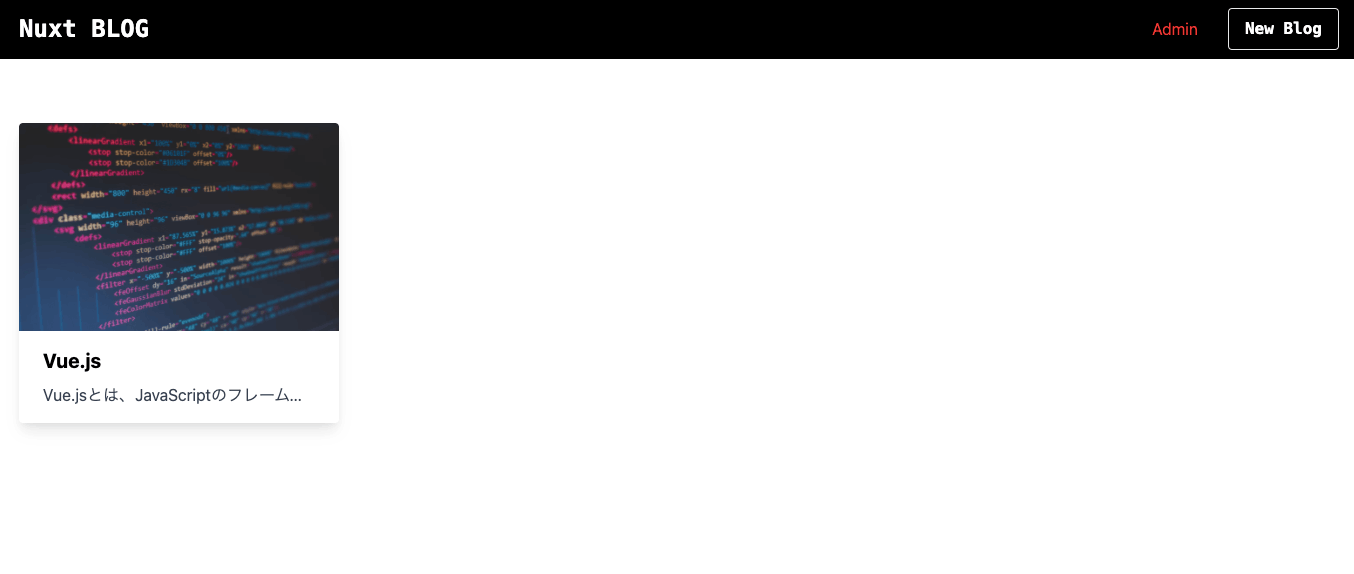
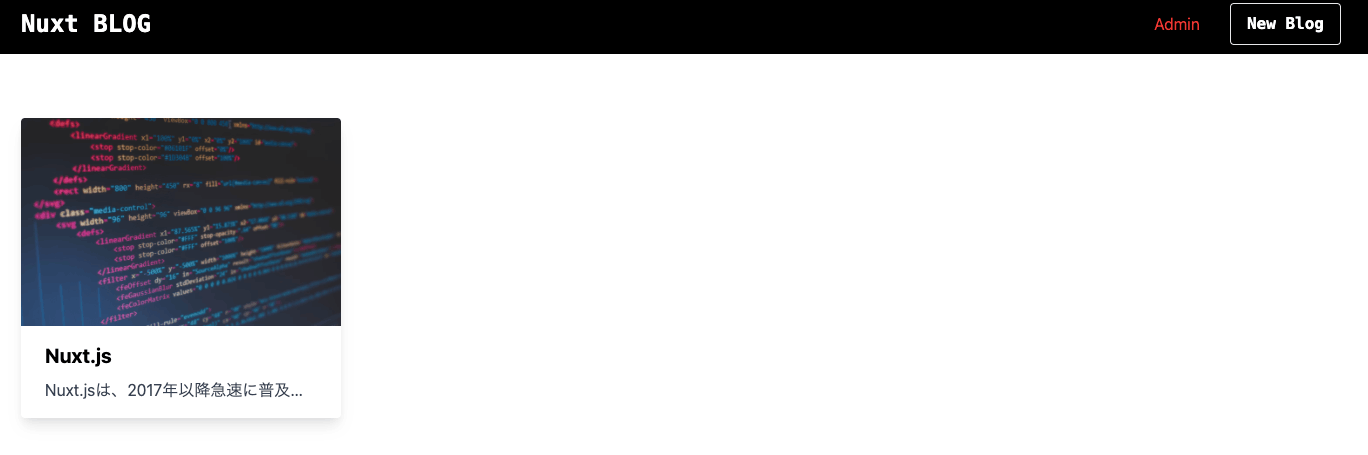
pages/admin/index.vueは各ブログをカードとして一覧で表示させる(前回記事)といった、pages/index.vueと同じなので説明を省きます。
pages/admin/index.vue
<template lang="">
  <div class="admin-page">
    <section class="existing-posts">
      <PostList isAdmin :posts="loadedPosts" />
    </section>
  </div>
</template>

<script lang="ts">
import PostList from '@/components/Posts/PostList.vue'
import Vue from 'vue'

export default Vue.extend({
  layout: 'admin',
  components: {
    PostList,
  },
  computed: {
    loadedPosts() {
      return this.$store.getters.loadedPosts //store(vuex)からブログを引っ張ってくる
    },
  },
})
</script>

<style scoped>
.admin-page {
  padding: 20px;
}

.new-post {
  text-align: center;
  border-bottom: 2px solid #ccc;
  padding-bottom: 10px;
}

.existing-posts h1 {
  text-align: center;
}
</style>
編集機能を実装
下準備はこの程度に留め、Edit機能を実装していきます!
フローチャート図で確認すると次のとおりです。
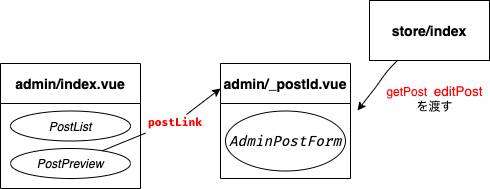
postLinkによって、/adminか/postsどちらに遷移するかを決めます。
PostPreviewのpistLinkメソッド
  computed: {
    postLink() {
      return this.isAdmin ? '/admin/' + this.id : '/posts/' + this.id
    },
  },
admin/index.vueからadmin/_postId/index.vueに遷移する際に、ブログ情報が必要になるわけですが、これはvuexから情報を引っ張ってくるようにします。
よってstore/index.tsに追記していきます。
const createStore = () => {
  return new Vuex.Store({

     ...

    mutations: {

      ...

+     editPost(state, editedPost) {
+       const postIndex = state.loadedPosts.findIndex(
+         (post) => post.id === editedPost.id
+       )
+       state.loadedPosts[postIndex] = editedPost
+     },
+   },
    actions: {
      async nuxtServerInit(
        vuexContext: ActionContext<RootState, RootState>,
        context
      ) {

      ...

+     async editPost(vuexContext, editedPost) {
+       try {
+         await firebase
+           .firestore()
+           .collection('blog')
+           .doc(editedPost.id)
+           .update({
+             ...editedPost,
+             editedDate: new Date(),
+           })
+         vuexContext.commit('editPost', editedPost)
+       } catch (e) {
+         return console.log(e)
+       }
+     },
    },
    getters: {

      ...

+     getPost: (state) => (id: string | undefined) => {
+       return state.loadedPosts.find((post) => post.id === id)
+     },
    },
  })
}

export default createStore
store/index.tsの全コード
import Vuex from 'vuex'
import { ActionContext } from 'vuex/types'

import { Blog } from '../types/index'
import firebase from 'firebase/compat/app'

export const state = () => ({})
export type RootState = ReturnType<typeof state>

const createStore = () => {
  return new Vuex.Store({
    state: {
      loadedPosts: [] as Blog[],
    },
    mutations: {
      setPosts(state, posts) {
        state.loadedPosts = posts
      },
      addPost(state, post: Blog) {
        state.loadedPosts.push(post)
      },
      editPost(state, editedPost) {
        const postIndex = state.loadedPosts.findIndex(
          (post) => post.id === editedPost.id
        )
        state.loadedPosts[postIndex] = editedPost
      },
    },
    actions: {
      async nuxtServerInit(
        vuexContext: ActionContext<RootState, RootState>,
        context
      ) {
        const data: Blog[] = []
        return await firebase
          .firestore()
          .collection('blog')
          .get()
          .then((res) => {
            res.forEach((doc) => {
              const obj = {
                ...(doc.data() as Blog),
                id: doc.id,
              }
              data.push(obj)
            })
            vuexContext.commit('setPosts', data)
          })
          .catch((e) => context.error(e))
      },
      setPosts(vuexContext, posts) {
        vuexContext.commit('setPosts', posts)
      },
      async addPost(vuexContext, post: Blog) {
        const createdPost = {
          ...post,
          updatedDate: new Date(),
        }
        return await firebase
          .firestore()
          .collection('blog')
          .add({
            ...post,
            updatedDate: new Date(),
          })
          .then(
            (result) =>
              vuexContext.commit('addPost', { ...createdPost, id: result.id })
          )
          .catch((e) => console.log(e))
      },
      async editPost(vuexContext, editedPost) {
        try {
          await firebase
            .firestore()
            .collection('blog')
            .doc(editedPost.id)
            .update({
              ...editedPost,
              editedDate: new Date(),
            })
          vuexContext.commit('editPost', editedPost)
        } catch (e) {
          return console.log(e)
        }
      },
    },
    getters: {
      loadedPosts(state) {
        return state.loadedPosts
      },
      getPost: (state) => (id: string | undefined) => {
        return state.loadedPosts.find((post) => post.id === id)
      },
    },
  })
}

export default createStore
ポイント
editPost
- (firestoreの)ドキュメントの一部のフィールド(各ブログ)を更新するには、
update()メソッドを使用 - アップデートの対象はブログ情報とアップデートした日付特に
自分用メモ
-
update()メソッドはドキュメント(doc())が無いとエラーを吐く -
set()メソッドはドキュメントの追加、上書き、fieldの追加を担うのに対し、update()メソッドはドキュメントのfieldを更新を担当
getPost
- 各ブログ情報を取得
- 引数の
idにはFirestoreのドキュメントIDが渡る
あとはadmin/_postId/indexを作成し、vuexからブログ情報(getPost)と編集機能(editPost)を受け取る処理を書きます。
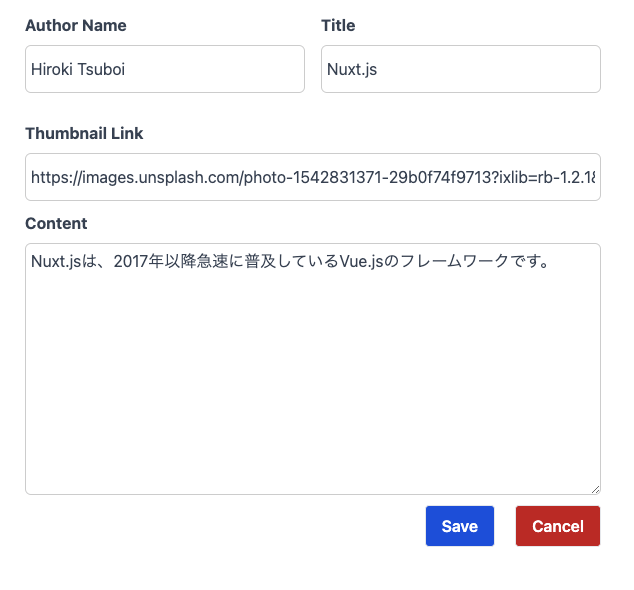
<template lang="">
  <div>
    <section class="w-2/5 mx-auto my-5">
      <AdminPostForm isEdit :post="loadedPost" @submit="onSubmitted" />
    </section>
  </div>
</template>

<script lang="ts">
import AdminPostForm from '@/components/Admin/AdminPostForm.vue'
import Vue from 'vue'
import { Blog } from '../../../types/index'

export default Vue.extend({
  layout: 'admin',
  components: {
    AdminPostForm,
  },
  methods: {
    onSubmitted(editedPost: Blog) {
      this.$store.dispatch('editPost', editedPost).then(() => {
        this.$router.push('/admin')
      })
    },
  },
  computed: {
    loadedPost() {
      return this.$store.getters.getPost(this.$route.params.postId)
    },
  },
})
</script>
AdminPostForm.vue
<template lang="">
  <form @submit.prevent="onSave" class="text-white">
    <div class="flex justify-between mt-4 space-x-4">
      <AppControlInput class="w-1/2" v-model="editedPost.author"
        >Author Name</AppControlInput
      >
      <AppControlInput class="w-1/2" v-model="editedPost.title"
        >Title</AppControlInput
      >
    </div>
    <AppControlInput v-model="editedPost.thumbnail"
      >Thumbnail Link</AppControlInput
    >
    <AppControlInput control-type="textarea" v-model="editedPost.content"
      >Content</AppControlInput
    >
    <div class="flex justify-end">
      <CustomButton type="submit" class="mr-5 text-white bg-blue-700"
        >Save</CustomButton
      >
      <CustomButton
        type="button"
        btn-style="red"
        class="bg-red-700"
        @click="onCancel"
        >Cancel</CustomButton
      >
    </div>
  </form>
</template>

<script lang="ts">
import AppControlInput from '@/components/UI/AppControlInput.vue'
import CustomButton from '@/components/UI/CustomButton.vue'
import Vue from 'vue'
import useRoute from 'vue-router'

export default Vue.extend({
  components: {
    AppControlInput,
    CustomButton,
  },
  props: {
    post: {
      type: Object,
      required: false,
    },
  },
  data() {
    return {
      editedPost: this.post
        ? { ...this.post }
        : {
            author: '',
            title: '',
            thumbnail: '',
            content: '',
          },
    }
  },
  methods: {
    onSave() {
      this.$emit('submit', this.editedPost)
    },
    onCancel() {
      // Navigate back
      this.$router.push('/')
    },
  },
})
</script>
ポイント
getPost
- ファイル名の
_postIdが$route.params.postIdと紐づいている(Nuxt.jsの動的ルーティング) - パスの値(ドキュメントID)を取得
- このドキュメントIDを
store/index.tsで作成したgetPostの引数に渡す
このチャプターの最後に、ここまでの変更を動作確認しておきましょう!
カードをタップし、編集画面に入ります。

内容を編集していきます。
saveボタンをタップすると、admin/indexに遷移し、ブログ情報が編集できています。
以上でブログの編集機能を実装できました!
ブログの削除機能
Delete(ブログの削除)ボタン設置
ブログの削除機能も編集ページ(admin/_postId/index.vue)で行います。
AdminPostFormで新たにpropsでisEditというboolean値を受け取れるようにし、v-ifでDeleteボタンの表示・非表示を切り替えます。
//html
<CustomButton
+       v-if="isEdit"
        type="button"
        @click="isOpen = true"
        class="bg-red-700"
        >Delete</CustomButton
      >
次にAdminPostFormを使用しているpages/admin/_postId/index.vueにisEditを追記します。
<template lang="">
  <div class="admin-post-page">
    <section class="w-2/5 mx-auto my-5">
+     <AdminPostForm isEdit :post="loadedPost" @submit="onSubmitted" />
    </section>
  </div>
</template>
スタイル調整
このままだとスタイルが崩れているので簡単ではありますが、スタイリングしていきます。
v-bindを使ったclassに書き換え、三項演算子でスタイリングしています。
...

<div :class="[isEdit ? 'flex justify-between' : '']">
  <CustomButton
    v-if="isEdit"
    type="button"
    @click="isOpen = true"
    class="bg-red-700"
    >Delete</CustomButton
  >
  <div :class="[isEdit ? '' : 'flex justify-end']">
    <CustomButton type="submit" class="mr-5 text-white bg-blue-700"
      >Save</CustomButton
    >
    <CustomButton
      type="button"
      btn-style="red"
      class="bg-gray-600"
      @click="onCancel"
      >Cancel</CustomButton
    >
  </div>
</div>

...
AdminPostFormの全コード
<template lang="">
  <form @submit.prevent="onSave" class="text-white">
    <div class="flex justify-between mt-4 space-x-4">
      <AppControlInput class="w-1/2" v-model="editedPost.author"
        >Author Name</AppControlInput
      >
      <AppControlInput class="w-1/2" v-model="editedPost.title"
        >Title</AppControlInput
      >
    </div>
    <AppControlInput v-model="editedPost.thumbnail"
      >Thumbnail Link</AppControlInput
    >
    <AppControlInput control-type="textarea" v-model="editedPost.content"
      >Content</AppControlInput
    >
    <div :class="[isEdit ? 'flex justify-between' : '']">
      <CustomButton
        v-if="isEdit"
        type="button"
        @click="isOpen = true"
        class="bg-red-700"
        >Delete</CustomButton
      >
      <div :class="[isEdit ? '' : 'flex justify-end']">
        <CustomButton type="submit" class="mr-5 text-white bg-blue-700"
          >Save</CustomButton
        >
        <CustomButton
          type="button"
          btn-style="red"
          class="bg-gray-600"
          @click="onCancel"
          >Cancel</CustomButton
        >
      </div>
    </div>
    <div
      v-show="isOpen"
      class="absolute inset-0 flex items-center justify-center bg-gray-700 bg-opacity-50"
    >
      <div class="max-w-2xl p-6 bg-white rounded-md shadow-xl">
        <div class="mt-4">
          <p class="mb-4 text-lg text-center text-black">
            本当に削除しますか?
          </p>
          <div class="flex justify-between">
            <button
              @click="onDelete"
              class="px-6 py-2 text-blue-100 bg-blue-600 rounded"
            >
              Yes
            </button>
            <button
              @click="isOpen = false"
              class="px-6 py-2 text-blue-800 border border-blue-600 rounded"
            >
              No
            </button>
          </div>
        </div>
      </div>
    </div>
  </form>
</template>

<script lang="ts">
import AppControlInput from '@/components/UI/AppControlInput.vue'
import CustomButton from '@/components/UI/CustomButton.vue'
import Vue from 'vue'

export default Vue.extend({
  components: {
    AppControlInput,
    CustomButton,
  },

  props: {
    post: {
      type: Object,
      required: false,
    },
    isEdit: {
      type: Boolean,
      default: false,
    },
  },
  data() {
    return {
      editedPost: this.post
        ? { ...this.post }
        : {
            author: '',
            title: '',
            thumbnail: '',
            content: '',
          },
      isOpen: false,
    }
  },
  methods: {
    onSave() {
      this.$emit('submit', this.editedPost)
    },
    onCancel() {
      // Navigate back
      this.$router.push('/')
    },
    onDelete() {
      this.$store.dispatch('deletePost', this.post).then(() => {
        this.$router.push('/')
      })
    },
  },
})
</script>
admin/new-postページ

admin/ドキュメントIDページ

Delete機能を実装
下準備はこの程度に留め、Delete機能を実装していきます!
const createStore = () => {

    ...

    mutations: {

      ...

      deletePost(state, deletePost) {
        const postIndex = state.loadedPosts.findIndex(
          (post) => post.id === deletePost.id
        )
        state.loadedPosts[postIndex] = deletePost
      },
    },
    actions: {

      ...

      async deletePost(vuexContext, post) {
        try {
          await firebase
            .firestore()
            .collection('blog')
            .doc(post.id)
            .delete()
          vuexContext.commit('deletePost', post)
        } catch (e) {
          return console.log(e)
        }
      },
    },

    ...

  })
}

export default createStore
特にポイントはなく、firestore上の特定のフィールドをドキュメントから削除するには、deleteメソッドを用います。
store/index.tsの全コード
import Vuex from 'vuex'
import { ActionContext } from 'vuex/types'

import { Blog } from '../types/index'
import firebase from 'firebase/compat/app'

export const state = () => ({})
export type RootState = ReturnType<typeof state>

const createStore = () => {
  return new Vuex.Store({
    state: {
      loadedPosts: [] as Blog[],
    },
    mutations: {
      setPosts(state, posts) {
        state.loadedPosts = posts
      },
      addPost(state, post: Blog) {
        state.loadedPosts.push(post)
      },
      editPost(state, editedPost) {
        const postIndex = state.loadedPosts.findIndex(
          (post) => post.id === editedPost.id
        )
        state.loadedPosts[postIndex] = editedPost
      },
      deletePost(state, deletePost) {
        const postIndex = state.loadedPosts.findIndex(
          (post) => post.id === deletePost.id
        )
        state.loadedPosts[postIndex] = deletePost
      },
    },
    actions: {
      async nuxtServerInit(
        vuexContext: ActionContext<RootState, RootState>,
        context
      ) {
        const data: Blog[] = []
        return await firebase
          .firestore()
          .collection('blog')
          .get()
          .then((res) => {
            res.forEach((doc) => {
              const obj = {
                ...(doc.data() as Blog),
                id: doc.id,
              }
              data.push(obj)
            })
            vuexContext.commit('setPosts', data)
          })
          .catch((e) => context.error(e))
      },
      setPosts(vuexContext, posts) {
        vuexContext.commit('setPosts', posts)
      },
      async addPost(vuexContext, post: Blog) {
        const createdPost = {
          ...post,
          updatedDate: new Date(),
        }
        return await firebase
          .firestore()
          .collection('blog')
          .add({
            ...post,
            updatedDate: new Date(),
          })
          .then(
            (result) =>
              vuexContext.commit('addPost', { ...createdPost, id: result.id }) //result.idには一意なID
          )
          .catch((e) => console.log(e))
      },
      async editPost(vuexContext, editedPost) {
        try {
          await firebase
            .firestore()
            .collection('blog')
            .doc(editedPost.id)
            .update({
              ...editedPost,
              editedDate: new Date(),
            })
          vuexContext.commit('editPost', editedPost)
        } catch (e) {
          return console.log(e)
        }
      },
      async deletePost(vuexContext, post) {
        try {
          await firebase
            .firestore()
            .collection('blog')
            .doc(post.id)
            .delete()
          vuexContext.commit('deletePost', post)
        } catch (e) {
          return console.log(e)
        }
      },
    },
    getters: {
      loadedPosts(state) {
        return state.loadedPosts
      },
      getPost: (state) => (id: string | undefined) => {
        return state.loadedPosts.find((post) => post.id === id)
      },
    },
  })
}

export default createStore
storeでの削除機能をAdminPostForm.vueで受け取れるようにします。
<template lang="">
  <form @submit.prevent="onSave" class="text-white">

  ...

    <div
      v-show="isOpen"
      class="absolute inset-0 flex items-center justify-center bg-gray-700 bg-opacity-50"
    >
      <div class="p-10 bg-white rounded-md shadow-xl ">
        <div class="mt-4">
          <p class="mb-4 text-lg text-center text-black">
            削除しますか?
          </p>
          <div class="flex justify-between gap-x-10">
            <button
+             @click="onDelete"
              class="px-5 py-2 text-blue-100 bg-blue-600 rounded"
            >
              Yes
            </button>
            <button
              @click="isOpen = false"
              class="px-5 py-2 text-blue-800 border border-blue-600 rounded"
            >
              No
            </button>
          </div>
        </div>
      </div>

    ...

  </form>
</template>

<script lang="ts">

...

export default Vue.extend({

  ...

  methods: {

    ...

+   onDelete() {
+     this.$store.dispatch('deletePost', this.post).then(() => {
+       this.$router.push('/admin')
+     })
+   },
  },
})
</script>
最後に、ここまでの変更を動作確認しておきましょう!
事前にブログカードを2つ作成しておきます。

admin/_postId/indexに遷移し、Deleteボタンをタップするとモーダルが開きます。
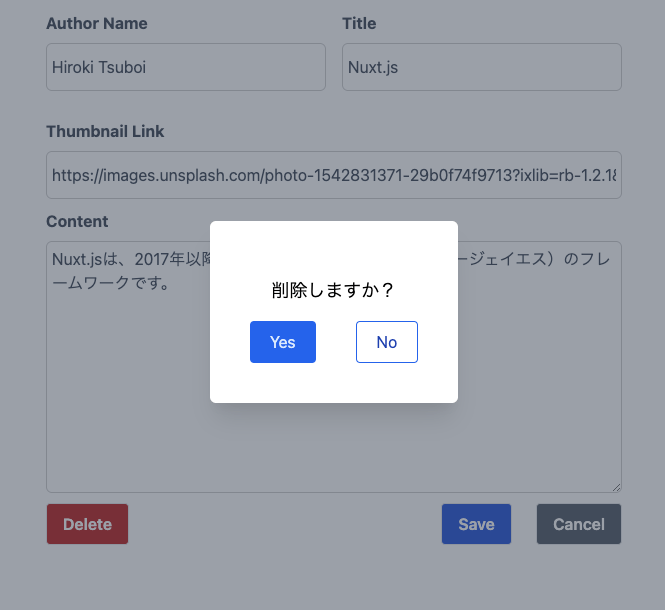
「Yes」をタップでトップページに遷移し、カードが削除されていることが確認できます。

firesotre上からもブログ情報が削除されています!

〆
以上になります。
パート3では,firebase authを用いた認証機能
↑こちらを実装しようと検討しています!
最後に, 現在働かせて頂いております会社のご紹介です🙌
株式会社ドリグロでは新しい仲間となるエンジニア/PM/デザイナーを募集しております。
こちらから以下の内容とともにお気軽にご応募ください。①どの勤務形態(正社員・アルバイト・業務委託など)に興味があるか
②対応開発言語やその他スキルと各経験年数
③生年月日・最終学歴
Discussion