Open8
Astro × Newt × Vercelで自作ブログ作成
ローカル環境構築
Astroプロジェクト起動
npm create astro@latest
→optionは全部デフォルト設定
tailwindcss追加
npx astro add tailwind
flowbiteインストール
npm install flowbite
tailwind.config.cjsに設定
tailwind.config.cjs
/** @type {import('tailwindcss').Config} */
module.exports = {
	content: [
		'./src/**/*.{astro,html,js,jsx,md,mdx,svelte,ts,tsx,vue}',
		'./node_modules/flowbite/**/*.js'
	],
	theme: {
		extend: {},
	},
	plugins: [
		require('flowbite/plugin')
	],
}
NEWTとastroを連携させる
NEWT公式がastro連携をドキュメント化してくれているのでこの通り進める。 ↑NEWT側の設定は上記を参考に。
環境変数設定
.env(無ければルートディレクトリに作成)
NEWT_SPACE_UID=sample-for-docs
NEWT_CDN_API_TOKEN=xxxxxxxxxxxxxxx
env.d.ts
/// <reference types="astro/client" />

interface ImportMetaEnv {
  readonly NEWT_SPACE_UID: string;
  readonly NEWT_CDN_API_TOKEN: string;
}
newt-client-jsライブラリをインストール
npm install newt-client-js
newt.tsを設定
src/lib/newt.ts(無ければ作成)
import { createClient } from "newt-client-js";

export interface Article {
  title: string;
  slug: string;
  body: string;
  coverImage: object;
  _sys: {
    createdAt: string;
    updatedAt: string;
    raw: {
      createdAt: string;
      updatedAt: string;
      firstPublishedAt: string;
      publishedAt: string;
    };
  };
  meta: {
    title: string;
    description: string;
    ogImage: {
      _id: string;
      src: string;
      fileType: string;
      fileSize: number;
      fileName: string;
      width: number;
      height: number;
    };
  };
}

export const newtClient = createClient({
  spaceUid: import.meta.env.NEWT_SPACE_UID,
  token: import.meta.env.NEWT_CDN_API_TOKEN,
  apiType: "cdn",
});
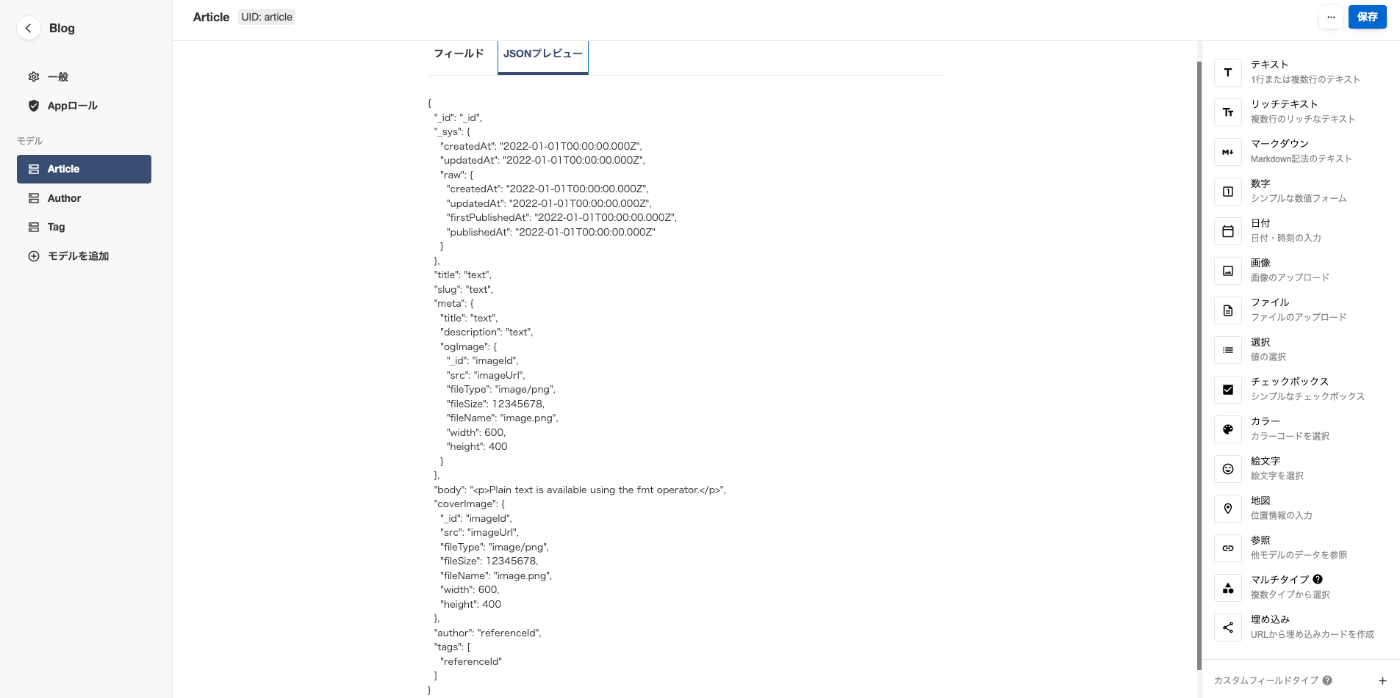
newtから受け取りたい値をjson形式で受け取っている。
受け取る値や階層構造はnewtのAPP設定から確認できる。(今回は一旦設定した値すべてを受け取る)
astroサイトをvarcelにデプロイする
astroがvarcelデプロイ方法をドキュメント化してくれているのでこの通り進める。
github上からデプロイする場合は、特にライブラリインストールは不要。
- varcelにサインインする(まだの場合はサインアップ)
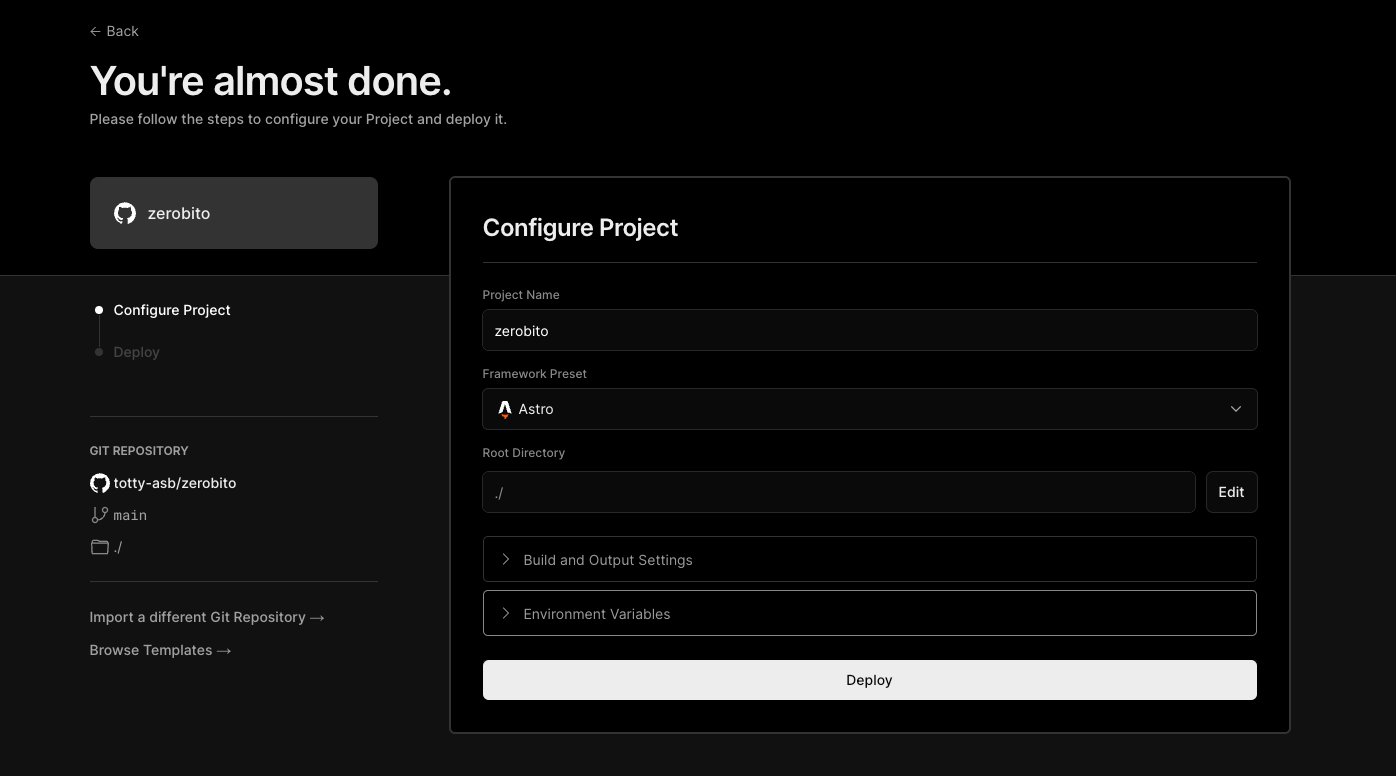
- プロジェクト作成
- githubと連携
- デプロイ(添付画像参照)
以降は、mainブランチにプッシュされるたびに本番環境へデプロイされる。
また、main以外のブランチがプッシュされるとテスト環境へデプロイされる。
※一応、設定で本番ブランチもmain以外に変更できる
astroファイルをprettierでコード整形をする方法について
astro公式ドキュメント通り、ライブラリを入れたが効かない。。
全く同じように環境構築した以前のブログは効いてるのに。。謎現象。
下記、設定を追加したら整形が効いた!(素晴らしい記事をありがとうございます。)
一応自身の手順をメモ。
ライブラリインストール
npm install --save-dev prettier prettier-plugin-astro
prettier設定ファイル追加
.prettierrc.cjs
module.exports = {
  plugins: [require.resolve("prettier-plugin-astro")],
  overrides: [
    {
      files: "*.astro",
      options: {
        parser: "astro",
      },
    },
  ],
};
vscodeのsetting.jsonに追記
setting.jsonは『command + ,』で設定を開いたのち、右上のファイルボタンを押すと出る。

setting.json
  // astroファイルを整形対象にする
  "prettier.documentSelectors": ["**/*.astro"],
  "[astro]": {
    "editor.defaultFormatter": "esbenp.prettier-vscode"
  }
newtから取得したbody要素(dom)の中身を取り出す。
jsdomのライブラリをインストール
npm install jsdom
今回は[page].astroのブログ一覧ページの本文表示に使用。
/src/pages/[page].astro
---
import { JSDOM } from "jsdom"; // ライブラリimport
---

// ...(略)
const dom = new JSDOM(blog.body); // ブログ本文の中身を取り出す
const text = dom.window.document.body.textContent || "";
<p class="text-gray-500 text-sm">{truncateText(text, 50)}</p>
カスタムフォントでweight付きのクラスを設定する
この設定により、.font-noto-sans-jp-100、.font-noto-sans-jp-200 などといったクラスが生成され、それぞれでNoto Sans JPの特定のフォントウェイトが適用される。
tailwind.config.cjs
// tailwind.config.js
module.exports = {
  // ...
  theme: {
    extend: {
      fontFamily: {
        'noto-sans-jp': ['Noto Sans JP', 'sans-serif'],
      },
    },
  },
  plugins: [
    function ({ addUtilities }) {
      const newUtilities = {};
      ['100', '200', '300', '400', '500', '600', '700', '800', '900'].forEach(weight => {
        newUtilities[`.font-noto-sans-jp-${weight}`] = {
          'font-family': '\'Noto Sans JP\', sans-serif',
          'font-weight': weight,
        };
      });
      addUtilities(newUtilities, ['responsive', 'hover']);
    },
  ],
  // ...
};
作ったサイト