🐱
Flutter × Teachable Machineで画像識別してみた
Flutter×Teachable Machineを使ってみたので備忘録(Android用)
完成イメージ
主な使用パッケージ
おおまかな流れ
- Teachable MachineでModelの作成し、作成したファイルをダウンロードしプロジェクトに配置する
- カメラorアルバムから写真を選択し、識別処理を行う
1. Teachable MachineでModelの作成。作成したファイルをダウンロードしプロジェクトに配置する
・まずはPythonで画像の収集
from icrawler.builtin import GoogleImageCrawler

class Clawler:
    def __init__(self,file_name, max_num):
        self.file_name = file_name
        self.max_num = max_num

    def getImages(self,dirs):
        for dir in dirs:
            google_crawler = GoogleImageCrawler(storage={'root_dir': 'C:/Users/beppu/python/get_images/samples/'+ dir})
            google_crawler.crawl(keyword=dir, max_num=self.max_num)

image = Clawler('search_images', 50)

samples = ['猫','京都タワー','リンゴ']  //検索ワード

image.getImages(samples)
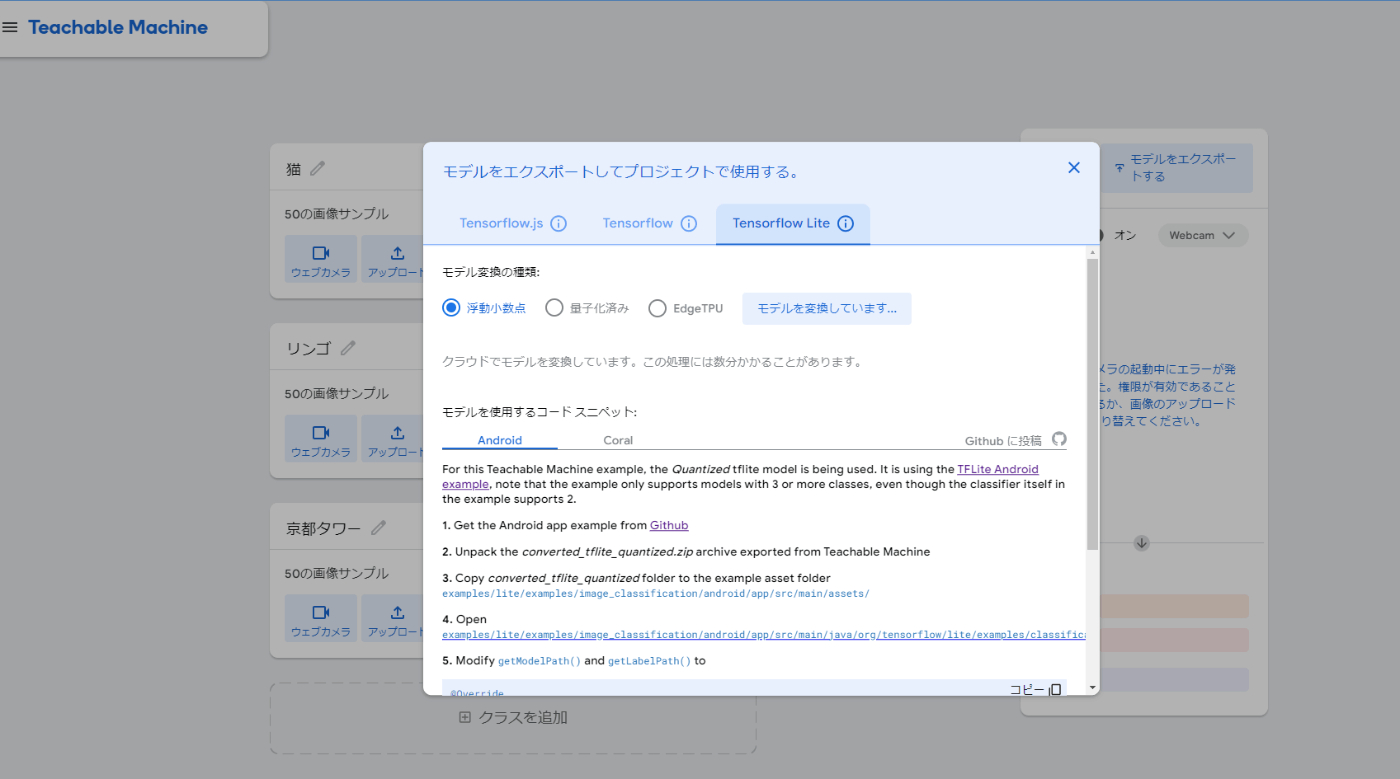
・収集した画像を使用し、下記サイトでモデルを作成(詳しい手順は割愛)
・モデルの学習が出来たら、Tensorflow Liteの浮動小数点を選択し、モデルをダウンロード。
・保存したzipファイルを展開し、中身をプロジェクトのassets以下に配置する。
2. カメラorアルバムから写真を選択し、識別処理を行う
画像の読込処理
import 'package:camera/camera.dart';
import 'package:image_picker/image_picker.dart';
//カメラ or アルバムから画像取得
    final imageXFile = switch (type) {
      ImageType.camera => await cameraController!.takePicture(),
      ImageType.gallery =>
        await ImagePicker().pickImage(source: ImageSource.gallery),
    };
画像を .tflite で読み込める形式に変換
import 'package:image/image.dart' as img;

  List<List<List<List<num>>>> convertImageToTensor(File image) {
    img.Image inputImage =
        img.decodeImage(image.readAsBytesSync())!; //FileをImageに変換

    final inputImageResize = img.copyResize(inputImage,
        height: 224, width: 224); //適した画像サイズに変換(Android用サイズ)

    inputImage = img.copyRotate(inputImage, angle: 90); //画像を90度回転

//Modelで読み込めるように、画像をテンソルに変換
    final imageMatrix = List.generate(1, (index) {
      return List.generate(
          inputImageResize.height,
          (y) => List.generate(inputImageResize.width, (x) {
                final pixel = inputImageResize.getPixel(x, y);
                return [pixel.r / 255.0, pixel.g / 255.0, pixel.b / 255.0];
              }));
    });
    return imageMatrix;
  }
assets以下に配置した、model_unquant.tfliteを読み込む
Future<Interpreter> loadModel() async {
    //assetsからモデルを読み込む
    final options = InterpreterOptions();

    options.addDelegate(XNNPackDelegate());

    final interpreter =
        await Interpreter.fromAsset(Assets.modelUnquant,
            options: options);

    return interpreter;
  }
assets以下に配置した,labels.textを読み込む
  Future<List<String>> loadLabels() async {
    //assetsからラベルファイルを読み込み、行ごとに配列に格納する
    final labels =
        await rootBundle.loadString(Assets.labels);
    return labels.split('\n');
  }
実際に実行する関数
全ソース表示
import 'dart:async';
import 'dart:io';

import 'package:camera/camera.dart';
import 'package:flutter/services.dart';
import 'package:flutter_riverpod/flutter_riverpod.dart';
import 'package:homo_simian_scan/features/features.dart';
import 'package:image/image.dart' as img;
import 'package:image_picker/image_picker.dart';
import 'package:tflite_flutter/tflite_flutter.dart';

import '../../../core/core.dart';
import '../../../gen/assets.gen.dart';

  Future<Result> identifyImage(XFile imageXFile) async {
    final imageFile = File(imageXFile.path); //XFileをFileに変換
    final labels = await loadLabels(); //ラベルファイルを読み込む

    final input = convertImageToTensor(imageFile); //画像をテンソルに変換
    final output = [List<double>.filled(labels.length, 0.0)]; //出力用の配列

    final interpreter = await loadModel();
    //Teachable Machineからダウンロードしたモデルを読み込む

    interpreter.run(input, output); //識別処理を実行

    final outputList = output[0]; //出力用の配列から、識別結果を取得
    final confidence = outputList.reduce((a, b) => a + b); //識別結果の一致率を計算

    List<double> inferenceValues = [];

    for (int i = 0; i < outputList.length; i++) {
      if (outputList[i] != 0) {
        inferenceValues.add(outputList[i] / confidence);
      }
    }

    final maxProbabilityIndex = inferenceValues.indexOf(
        inferenceValues.reduce((a, b) => a > b ? a : b));
	//一致率が最大のインデックスを取得

    double probability =
        inferenceValues[maxProbabilityIndex] * 100; //一致率をパーセントに変換

    return Result(
        labelName: labels[maxProbabilityIndex],
        probability: probability); //Resultクラスに結果を格納する
  }
実装してみて
選択肢が多かったり、似たようなものを識別するに精度が低いなと感じました。
単純に学習不足なのか、処理コードがよくないのか...
知見がある方いましたら、ぜひ教えてください!
Discussion