Azure Developer CLIでアプリコードからIaC自動生成できるの知ってました?
はじめに
Azure Developer CLI (azd)を使って、アプリのIaCを自動生成する方法を紹介します。
背景
以下の6月のazdアップデート情報でazd infra genという単語を発見しました。ベータ版に昇格されたということで早速試してみます。
アプリコードしかない状態からIaCを自動生成して、デプロイまでやってみます。
前提事項
- アプリがある
- Dockerfileがある
- azdインストール済み
- Azureサブスクリプション作成済み
- azd auth login済み
ちなみにアプリは以下のような、Microsoft LearnのMCPを利用したAzure資格勉強用のエージェントです。PythonのStreamlitを使っています。

本記事の手順をすべて行い、IaCを自動生成した後のアプリコードは以下のようになります。
ちなみに今回はPythonアプリで行いましたが、ほかの言語でも同様にできるようです。フロントエンド(React)&バックエンド(Node.js)のアプリでもできました。
実行環境
- Windows 11(WSL2)
- Ubuntu(22.04.5)
- azd 1.17.2
手順
(Python uv限定)requirements.txtの作成
最初にuv.lockからrequirements.txtを作成します。
この後のazd initではazdがアプリコードを検出してくれるのですが、requirements.txtがないと検出されませんでした。Pythonでも最初からrequirements.txtがある方、そもそもほかの言語の場合は不要です。
以下のコマンドでuv.lockからrequirements.txtを作成します。
cd src; uv export --format requirements-txt --no-editable > requirements.txt
Init作業(azd init)
次にazdを初期化します。このとき、ディレクトリにあるアプリコードを検出してくれます。
azd init
Scan current directoryを選択します。

検出されるとDetected inのところにアプリコードのパスが表示されます。

Azure Container Appsにデプロイするね、と書いてありますね。
Confirm and continue initializing my appを選択します。

azure.yaml、next-steps.mdが作成されます。
azure.yamlは以下のようになっています。src配下のPythonアプリをDockerfileを使ってAzure Container Appsにデプロイするための設定が書かれています。
# yaml-language-server: $schema=https://raw.githubusercontent.com/Azure/azure-dev/main/schemas/v1.0/azure.yaml.json

name: strands-mcp-agent
metadata:
    template: azd-init@1.17.2
services:
    src:
        project: src
        host: containerapp
        language: python
        docker:
            path: Dockerfile
resources:
    src:
        type: host.containerapp
        port: 8501
next-steps.mdは以降の手順の解説ですね。GitHubにあげているので興味ある人は見てみてください。
IaC作成(azd infra gen)
次にIaCを作成します。
azd infra gen

infraディレクトリが作成され、Bicepが自動生成されます。
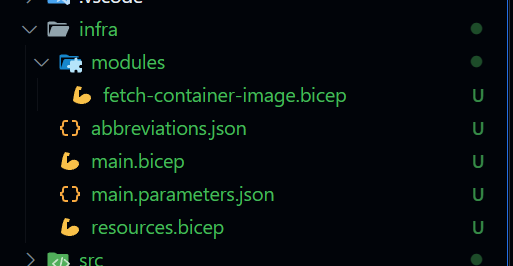
最初に書いてあったように、Container AppsにデプロイするためのBicepが生成されます。Container RegistryやApplication Insightsなども自動生成されます。
@description('The location used for all deployed resources')
param location string = resourceGroup().location

@description('Tags that will be applied to all resources')
param tags object = {}


param srcExists bool

@description('Id of the user or app to assign application roles')
param principalId string

@description('Principal type of user or app')
param principalType string

var abbrs = loadJsonContent('./abbreviations.json')
var resourceToken = uniqueString(subscription().id, resourceGroup().id, location)

// Monitor application with Azure Monitor
module monitoring 'br/public:avm/ptn/azd/monitoring:0.1.0' = {
  name: 'monitoring'
  params: {
    logAnalyticsName: '${abbrs.operationalInsightsWorkspaces}${resourceToken}'
    applicationInsightsName: '${abbrs.insightsComponents}${resourceToken}'
    applicationInsightsDashboardName: '${abbrs.portalDashboards}${resourceToken}'
    location: location
    tags: tags
  }
}
// Container registry
module containerRegistry 'br/public:avm/res/container-registry/registry:0.1.1' = {
  name: 'registry'
  params: {
    name: '${abbrs.containerRegistryRegistries}${resourceToken}'
    location: location
    tags: tags
    publicNetworkAccess: 'Enabled'
    roleAssignments:[
      {
        principalId: srcIdentity.outputs.principalId
        principalType: 'ServicePrincipal'
        roleDefinitionIdOrName: subscriptionResourceId('Microsoft.Authorization/roleDefinitions', '7f951dda-4ed3-4680-a7ca-43fe172d538d')
      }
    ]
  }
}

// Container apps environment
module containerAppsEnvironment 'br/public:avm/res/app/managed-environment:0.4.5' = {
  name: 'container-apps-environment'
  params: {
    logAnalyticsWorkspaceResourceId: monitoring.outputs.logAnalyticsWorkspaceResourceId
    name: '${abbrs.appManagedEnvironments}${resourceToken}'
    location: location
    zoneRedundant: false
  }
}

module srcIdentity 'br/public:avm/res/managed-identity/user-assigned-identity:0.2.1' = {
  name: 'srcidentity'
  params: {
    name: '${abbrs.managedIdentityUserAssignedIdentities}src-${resourceToken}'
    location: location
  }
}
module srcFetchLatestImage './modules/fetch-container-image.bicep' = {
  name: 'src-fetch-image'
  params: {
    exists: srcExists
    name: 'src'
  }
}

module src 'br/public:avm/res/app/container-app:0.8.0' = {
  name: 'src'
  params: {
    name: 'src'
    ingressTargetPort: 8501
    scaleMinReplicas: 1
    scaleMaxReplicas: 10
    secrets: {
      secureList:  [
      ]
    }
    containers: [
      {
        image: srcFetchLatestImage.outputs.?containers[?0].?image ?? 'mcr.microsoft.com/azuredocs/containerapps-helloworld:latest'
        name: 'main'
        resources: {
          cpu: json('0.5')
          memory: '1.0Gi'
        }
        env: [
          {
            name: 'APPLICATIONINSIGHTS_CONNECTION_STRING'
            value: monitoring.outputs.applicationInsightsConnectionString
          }
          {
            name: 'AZURE_CLIENT_ID'
            value: srcIdentity.outputs.clientId
          }
          {
            name: 'PORT'
            value: '8501'
          }
        ]
      }
    ]
    managedIdentities:{
      systemAssigned: false
      userAssignedResourceIds: [srcIdentity.outputs.resourceId]
    }
    registries:[
      {
        server: containerRegistry.outputs.loginServer
        identity: srcIdentity.outputs.resourceId
      }
    ]
    environmentResourceId: containerAppsEnvironment.outputs.resourceId
    location: location
    tags: union(tags, { 'azd-service-name': 'src' })
  }
}
output AZURE_CONTAINER_REGISTRY_ENDPOINT string = containerRegistry.outputs.loginServer
output AZURE_RESOURCE_SRC_ID string = src.outputs.resourceId
(私のアプリ特有設定) Bicepの修正
私のアプリではOPENAI_API_KEY,LANGSMITH_API_KEYの環境変数を設定する必要があります。
IaC自動作成もさすがにそれは汲んでくれなかったので、それだけBicepに追記します。
   @description('Principal type of user or app')
   param principalType string

+  @description('OpenAI API Key')
+  param openAiApiKey string
+
+  @description('LangSmith API Key')
+  param langSmithApiKey string
+
   var abbrs = loadJsonContent('./abbreviations.json')
   var resourceToken = uniqueString(subscription().id,
  resourceGroup().id, location)
       scaleMaxReplicas: 10
       secrets: {
         secureList:  [
+          {
+            name: 'openai-api-key'
+            value: openAiApiKey
+          }
+          {
+            name: 'langsmith-api-key'
+            value: langSmithApiKey
+          }
         ]
       }
       containers: [
               name: 'PORT'
               value: '8501'
             }
+            {
+              name: 'OPENAI_API_KEY'
+              secretRef: 'openai-api-key'
+            }
+            {
+              name: 'LANGSMITH_API_KEY'
+              secretRef: 'langsmith-api-key'
+            }
           ]
         }
       ]
         },
         "principalType": {
           "value": "${AZURE_PRINCIPAL_TYPE}"
+        },
+        "openAiApiKey": {
+          "value": "${OPENAI_API_KEY}"
+        },
+        "langSmithApiKey": {
+          "value": "${LANGSMITH_API_KEY}"
         }
       }
   }
(私のアプリ特有設定) azd環境変数の設定
以下のコマンドで環境変数を設定します。
azd env new demo-app
azd env set OPENAI_API_KEY <your-openai-api-key>
azd env set LANGSMITH_API_KEY <your-langsmith-api-key>
デプロイする(azd up)
早速デプロイしてみます。
azd up
subscription name, regionなどを選択します。

最後に表示されているEndpointにアクセスして、アプリが動いていることを確認します。
無事に開けました。

Azureポータルで確認すると以下のようにリソースができていますね。

おわりに
azdを使うとContainer Apps限定とはいえ、アプリコードしかない状態からIaCを自動生成して、デプロイまで簡単にできてしまいます。
ベータ版ということで、まだ機能的には限定的ですが、IaCの自動生成はかなり便利でした。
また、azdにはそもそもazd pipeline configというコマンドでPipelineの設定も自動でできます。
本記事の趣旨と外れるので今回は触れませんでしたが、実際にazd init→azd infra gen→azd pipeline configを一気に試してみましたが、かなり体験がよかったです。特にVive Codingでアプリを簡単に開発できるようになった世界とは相性が良い気がします。
個人的にはアップデートに注目したいなと思います。
以上です。ありがとうございました。
Discussion