もくまっち開発 Week 13
これまで
今週のタスク
- GitHub Actions でテストフライト公開する準備(2/2)
今週は GitHub Actions 集中でいく!
証明書も Apple ID アカウントで発行しないといけないのでは...!
- Apple Developer Program に登録してる Apple アカウントでログインした Mac で Signing Request を実行
- そのアカウントでキーチェーンに登録 & p12 ファイルに書き出し
で iOS Distribution の秘密鍵ゲットできた!
- 普段利用してる Apple アカウント
- Apple Developer に登録した Apple アカウント
が異なってるとダメっぽい。
キーチェーンアクセスで 証明書が信頼できない みたいなメッセージが出てきたので、
下記ページの手順で解消
先人の知恵にマジ感謝。
今回の知見をまとめた
GitHub Actions のパラメータ変更 DONE
FlutterFlow の Flutter バージョンが 3.19 にアップデートされるらしい
https://community.flutterflow.io/discussions/post/heads-up-flutter-3-19-is-coming-4oPqISVt3RWZB5e
おや...
とりあえず Automatically manage signing を true にした
こっちのほうが詳しそう
現代は自動で署名する時代の様子。
色々してたら JOB がちょっと先まで進むようになった
エラー
Run xcodebuild -exportArchive -archivePath ./build/ios/Runner.xcarchive -exportPath ./build/ios/ipa -exportOptionsPlist ./ios/ExportOptions.plist -allowProvisioningUpdates -authenticationKeyIssuerID $APPLE_API_ISSUER_ID -authenticationKeyID $APPLE_API_KEY_ID -authenticationKeyPath `pwd`/private_keys/AuthKey_$APPLE_API_KEY_ID.p8
error: Couldn't load -exportOptionsPlist: The file “ExportOptions.plist” couldn’t be opened because there is no such file.
** EXPORT FAILED **

Error Domain=NSCocoaErrorDomain Code=260 "The file “ExportOptions.plist” couldn’t be opened because there is no such file." UserInfo={NSFilePath=/Users/runner/work/mochmatch/mochmatch/ios/ExportOptions.plist, NSUnderlyingError=0x600001cb86c0 {Error Domain=NSPOSIXErrorDomain Code=2 "No such file or directory"}}


Error: Process completed with exit code 70.
ExportOptions.plist をプロジェクトルートにおいてたけど ios ディレクトリに移動して再実行
1 トライに 20 分くらいかかるがつらいところ
でも xcodebuild archive が成功してるのはすごい!
ビルドが途中で止まってしまうのが謎すぎて解決できないので
Xcode Cloud を触っていくことにする
ワークフローの設定
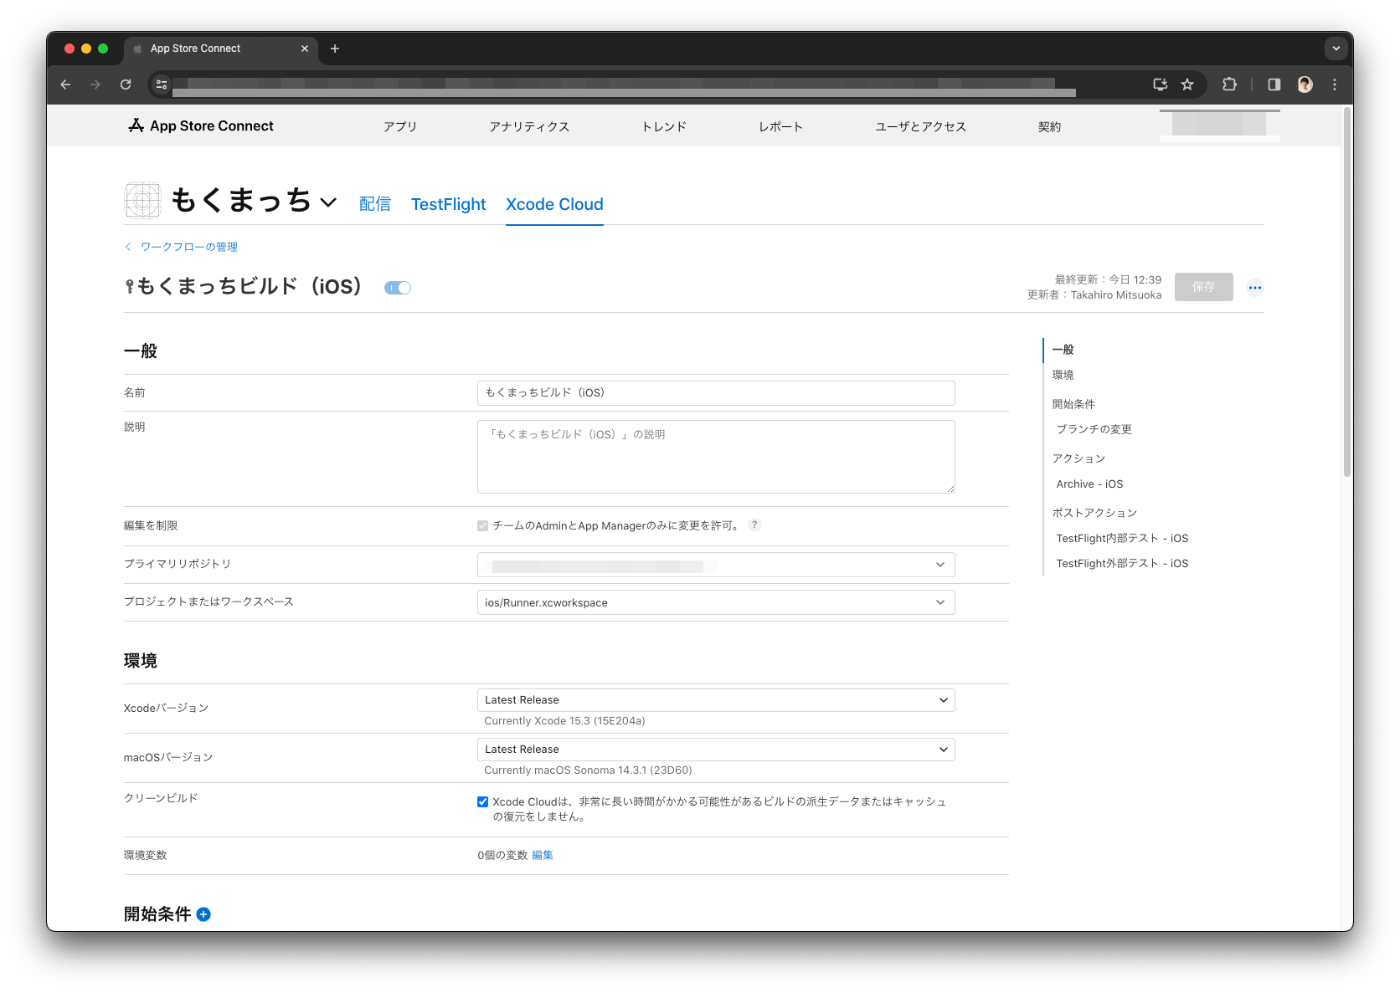

実行してみたけどエラー。

一つずつ解消していく
Unable to load contents of file list: '/Target Support Files/Pods-Runner/Pods-Runner-frameworks-Release-input-files.xcfilelist'

Unable to load contents of file list: '/Target Support Files/Pods-Runner/Pods-Runner-resources-Release-output-files.xcfilelist'

Unable to load contents of file list: '/Target Support Files/Pods-Runner/Pods-Runner-frameworks-Release-output-files.xcfilelist'

could not find included file 'Pods/Target Support Files/Pods-Runner/Pods-Runner.release.xcconfig' in search paths
Release.xcconfig:1

Unable to load contents of file list: '/Target Support Files/Pods-Runner/Pods-Runner-resources-Release-input-files.xcfilelist'

could not find included file 'Generated.xcconfig' in search paths
Release.xcconfig:2
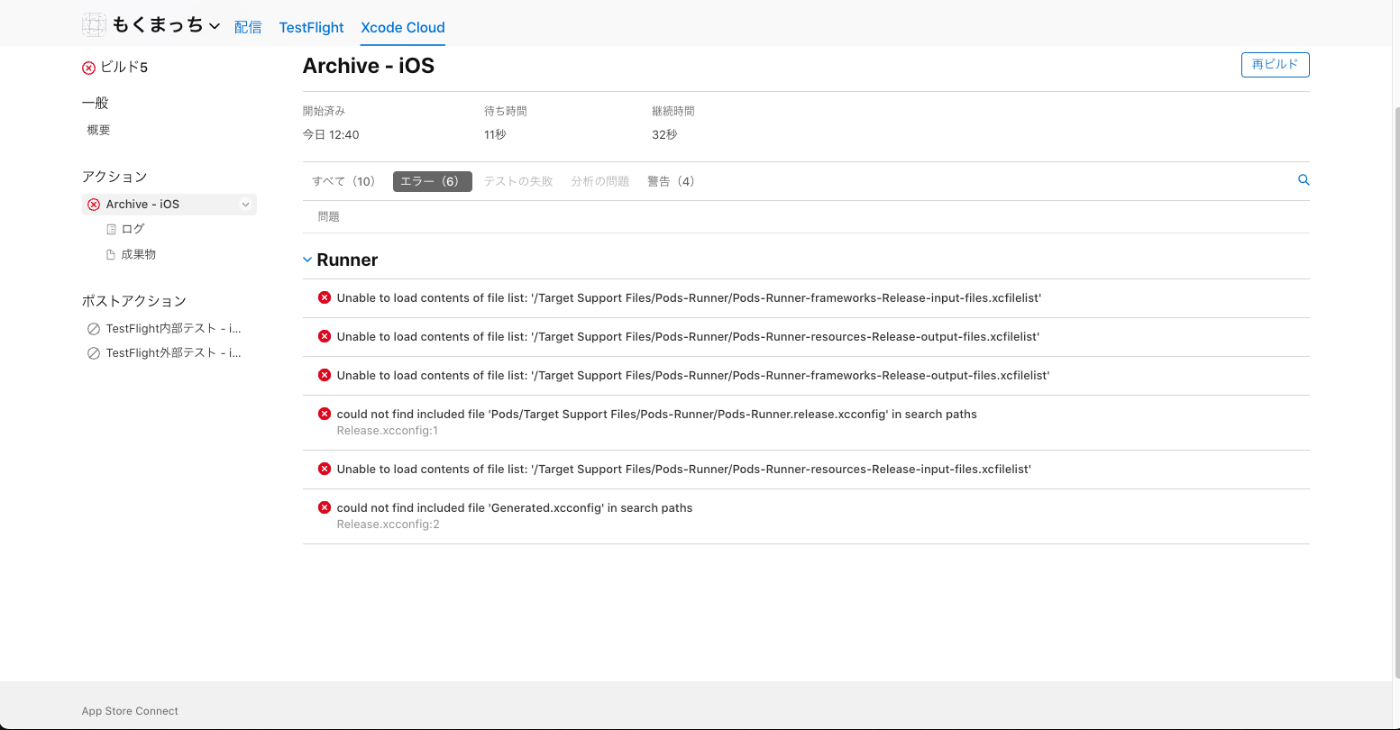
Unable to load contents of file list: '/Target Support Files/Pods-Runner/Pods-Runner-frameworks-Release-input-files.xcfilelist'
途中で flutter build ios が必要そうだったので Flutter 環境を再構築する
2 回目の構築は割とすんなり終わった
ローカル環境壊れた説あるので、確認していく
-
flutter build ios --no-codesign -
Xcode > Project > Archive
flutter build ios --no-codesign
$ flutter build ios --no-codesign

Warning: Building for device with codesigning disabled. You will have to manually codesign before deploying to device.
Building studio.protoout.miliconvalley.mochmatch for device (ios-release)...
Running pod install...                                              3.1s
Running Xcode build...
 └─Compiling, linking and signing...                      2,509ms
Xcode build done.                                           14.4s
Failed to build iOS app
Error (Xcode): Undefined symbols:


Error (Xcode): Linker command failed with exit code 1 (use -v to see invocation)


Encountered error while building for device.
make: *** [build-ios] Error 1
見たことないエラー出てきた。
Pods 周りが原因っぽいので、下記を削除して再実行する
ios/Podsios/Podfile.lock~/Library/Developer/Xcode/DerivedData/
直らなかった。
$ flutter build ios --no-codesign

Warning: Building for device with codesigning disabled. You will have to manually codesign before deploying to device.
Building studio.protoout.miliconvalley.mochmatch for device (ios-release)...
Running pod install...                                             72.2s
Running Xcode build...
 └─Compiling, linking and signing...                         7.3s
Xcode build done.                                           53.2s
Failed to build iOS app
Error (Xcode): Undefined symbols:


Error (Xcode): Linker command failed with exit code 1 (use -v to see invocation)


Encountered error while building for device.
make: *** [build-ios] Error 1
前に Podfile に追加した行を消したら直った
$ flutter build ios --no-codesign

Warning: Building for device with codesigning disabled. You will have to manually codesign before deploying to device.
Building studio.protoout.miliconvalley.mochmatch for device (ios-release)...
Running pod install...                                            103.3s
Running Xcode build...
 └─Compiling, linking and signing...                        16.9s
Xcode build done.                                           256.7s
Built /Users/protoout2/Desktop/mochmatch/build/ios/iphoneos/Runner.app.
-
flutter build ios --no-codesign -
Xcode > Project > Archive
次はこっち。
Xcode > Project > Archive
次の相手はこちら。
たぶん、プロジェクトに登録されてる証明書と自分が持ってる鍵が食い違ってるんではないかと。

ちょっと Certificates や Provisioning Profile 周りで色々やりすぎてよくわからなくなってきたので、基本に立ち戻って Flutter の公式ドキュメントを参考に進めてみる
こちらの 7 ステップ
-
Register your app on App Store Connect
- Register a Bundle ID
- Create an application record on App Store Connect
- Review Xcode project settings
- Updating the app’s deployment version
- Add an app icon
- Add a launch image
-
Create a build archive and upload to App Store Connect
- Update the app’s build and version numbers
- Create an app bundle
- Upload the app bundle to App Store Connect
- Release your app on TestFlight
まずはこちら。
- Register your app on App Store Connect
- Register a Bundle ID
- Create an application record on App Store Connect
アプリを登録するには下記 2 通りの方法がある
- Apple Developer で Bundle ID を登録する
- App Store Connect でアプリケーションレコードを作成する
→ すでに登録済みなので問題なし

-
Register your app on App Store Connect
- Register a Bundle ID
- Create an application record on App Store Connect
- Review Xcode project settings
- Updating the app’s deployment version
- Add an app icon
- Add a launch image
-
Create a build archive and upload to App Store Connect
- Update the app’s build and version numbers
- Create an app bundle
- Upload the app bundle to App Store Connect
- Release your app on TestFlight
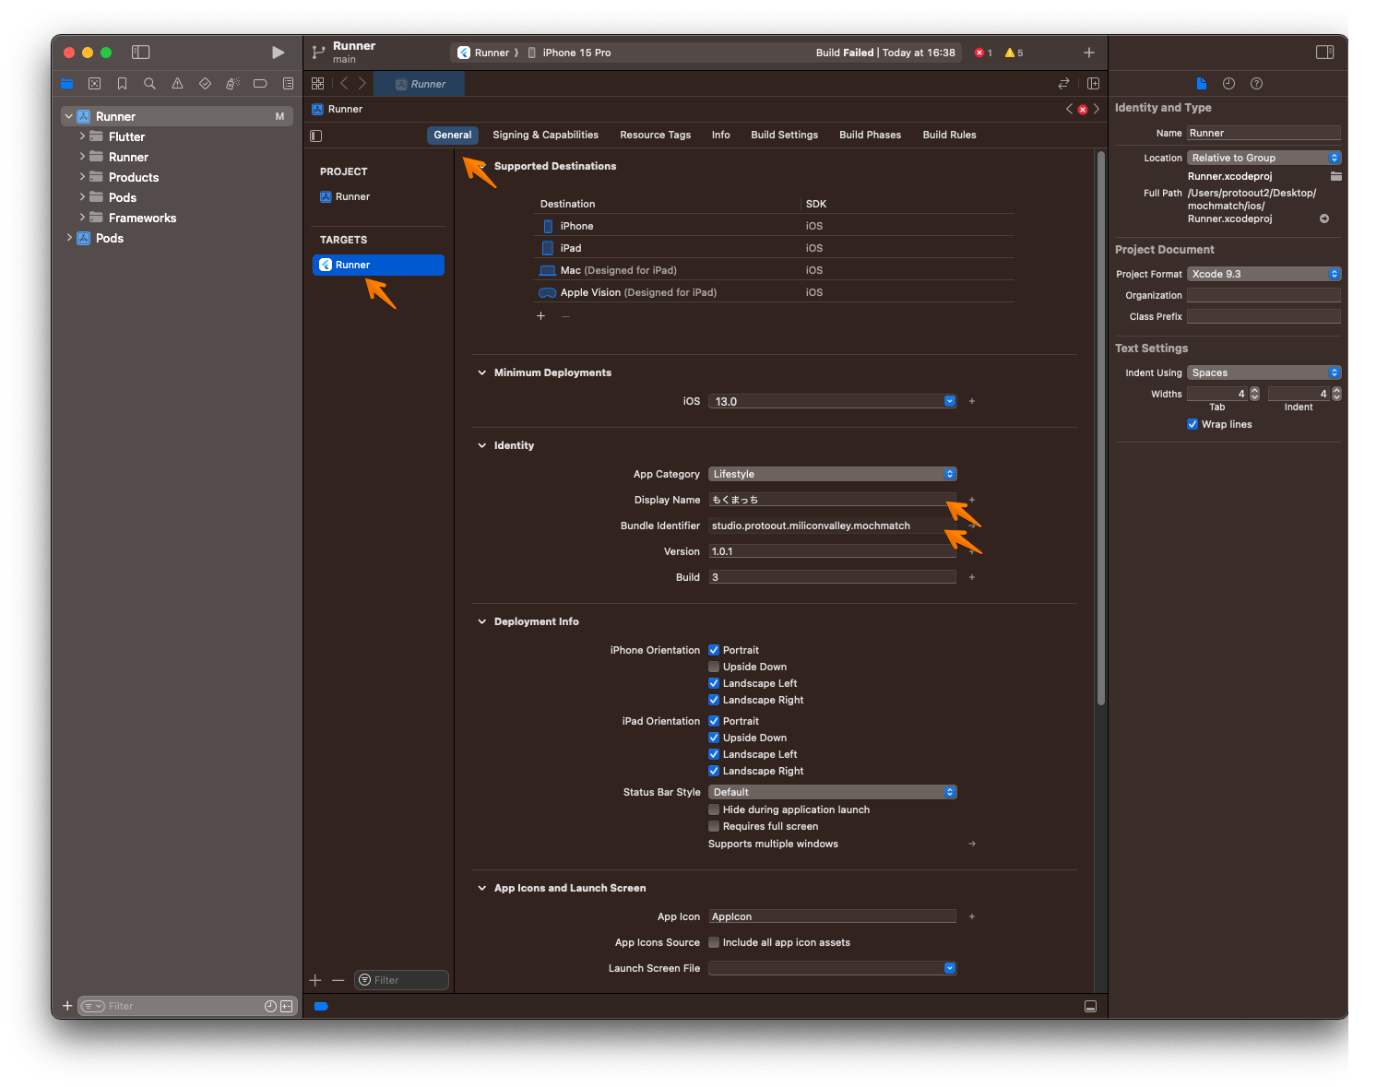
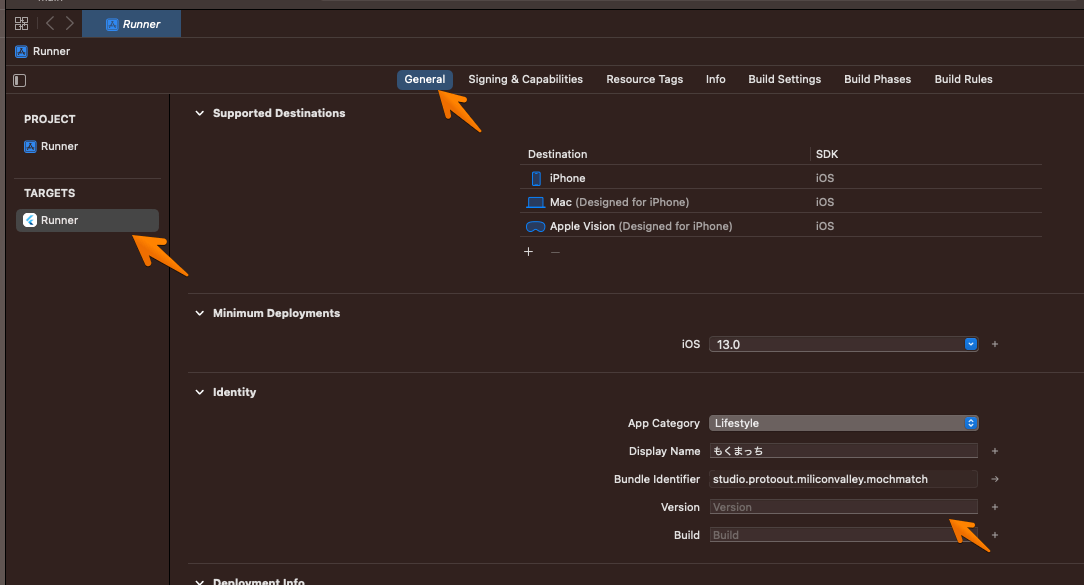
- Review Xcode project settings
In the Identity section of the General tab:
- Display Name
- The display name of your app.
- Bundle Identifier
- The App ID you registered on App Store Connect.
In the Signing & Capabilities tab:
- Automatically manage signing
- Whether Xcode should automatically manage app signing and provisioning. This is set true by default, which should be sufficient for most apps. For more complex scenarios, see the Code Signing Guide.
- Team
- Select the team associated with your registered Apple Developer account. If required, select Add Account…, then update this setting.

In the Deployment section of the Build Settings tab:
- iOS Deployment Target
- The minimum iOS version that your app supports. Flutter supports iOS 12 and later. If your app or plugins include Objective-C or Swift code that makes use of APIs newer than iOS 12, update this setting to the highest required version.
これよくわからんかったけど、 Minimum Deployments が iOS 13.0 になってるので大丈夫そう

-
Register your app on App Store Connect
- Register a Bundle ID
- Create an application record on App Store Connect
- Review Xcode project settings
- Updating the app’s deployment version
- Add an app icon
- Add a launch image
-
Create a build archive and upload to App Store Connect
- Update the app’s build and version numbers
- Create an app bundle
- Upload the app bundle to App Store Connect
- Release your app on TestFlight
- Updating the app’s deployment version
Xcode で iOS の最小バージョンを変更した場合、 Flutter アプリの ios/Flutter/AppFrameworkInfo.plist の MinimumOSVersion の値を変更して一致させないといけない。

こちらも 13.0 になってたので OK 。
-
Register your app on App Store Connect
- Register a Bundle ID
- Create an application record on App Store Connect
- Review Xcode project settings
- Updating the app’s deployment version
- Add an app icon
- Add a launch image
-
Create a build archive and upload to App Store Connect
- Update the app’s build and version numbers
- Create an app bundle
- Upload the app bundle to App Store Connect
- Release your app on TestFlight
- Add an app icon
- Add a launch image
一旦スキップ。
- Create a build archive and upload to App Store Connect
- Update the app’s build and version numbers
- Create an app bundle
- Upload the app bundle to App Store Connect
- Update the app’s build and version numbers
pubspec.yaml のバージョンを 1.0.0+6 にしてみた
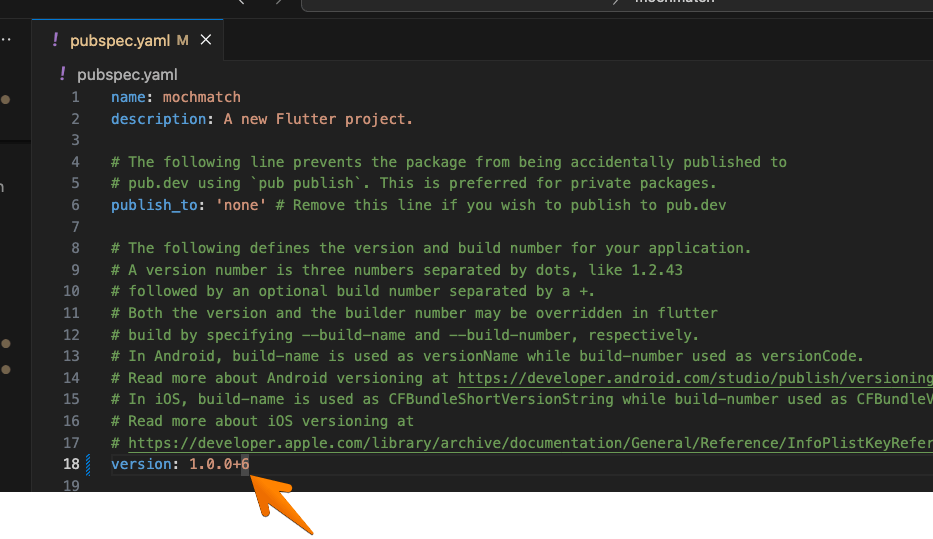
Xcode 側は上書きしないように空欄に。
- Create an app bundle
flutter build ipa を実行すると下記のファイルが生成される
- Xcode ビルドアーカイブ(
.xcarchive)(出力先:build/ios/achive/) - App Store アプリバンドル (
.ipa)(出力先:build/ios/ipa)
また、オプションに --obfuscate --split-debug-info を付与することで、コードを難読化することができる
ビルド実行してるけど、10 分くらい待っても終わらない。
もうちょい待ってみる。
$ flutter build ipa --debug

Archiving studio.protoout.miliconvalley.mochmatch...
Automatically signing iOS for device deployment using specified development team in
Xcode project: 9Z99MR8XP3
Running Xcode build...
→ 30 分くらい経っても終わらないので、一旦キャンセル。
代わりに flutter build ios --no-codesign を実行してみる
$ flutter build ios --no-codesign --debug

Warning: Building for device with codesigning disabled. You will have to manually codesign before deploying to device.
Building studio.protoout.miliconvalley.mochmatch for device (ios)...
Running Xcode build...
 └─Compiling, linking and signing...                        22.6s
Xcode build done.                                           199.9s
Built /Users/protoout2/Desktop/mochmatch/build/ios/iphoneos/Runner.app.
→ 5 分くらいであっさり完了。
次は Xcode > Project > Archive してみる(内部的には ipa ファイル作ってるはず)
→ またこいつが出てきた。
もともと個人の Apple アカウントで開発してたときはこの表示が出てこなかったので、
アカウントを切り替えてやってみる。
→ 署名された証明書が見つからないとのこと。
$ flutter build ipa --debug

Archiving studio.protoout.miliconvalley.mochmatch...
Automatically signing iOS for device deployment using specified development team in Xcode project:
9Z99MR8XP3
Running pod install...                                            478.6s
Running Xcode build...
Xcode archive done.                                         19.9s
Failed to build iOS app
Error (Xcode): No signing certificate "iOS Development" found: No "iOS Development" signing certificate
matching team ID "9Z99MR8XP3" with a private key was found.
/Users/nix/ghq/github.com/protoout/mochmatch/ios/Runner.xcodeproj


Encountered error while archiving for device.
下記の手順で証明書を発行しなおしてみる
- もともと開発に使ってた個人用の Apple アカウントで Mac にログイン
- キーチェーンアクセスで認証局に証明書(①)を要求
- ここで入力したメールアドレスは Apple Developer Program に加入してる Apple アカウント
- 個人のものとは別
- ①を使って、iOS Developer 証明書(②)を発行
- ②を使って、Provisioning Profile を発行
上記に加えて、
- Xcode で Apple Developer Program に加入してる Apple アカウントでログイン
- Xcode > Product > Archive でビルドしてみる
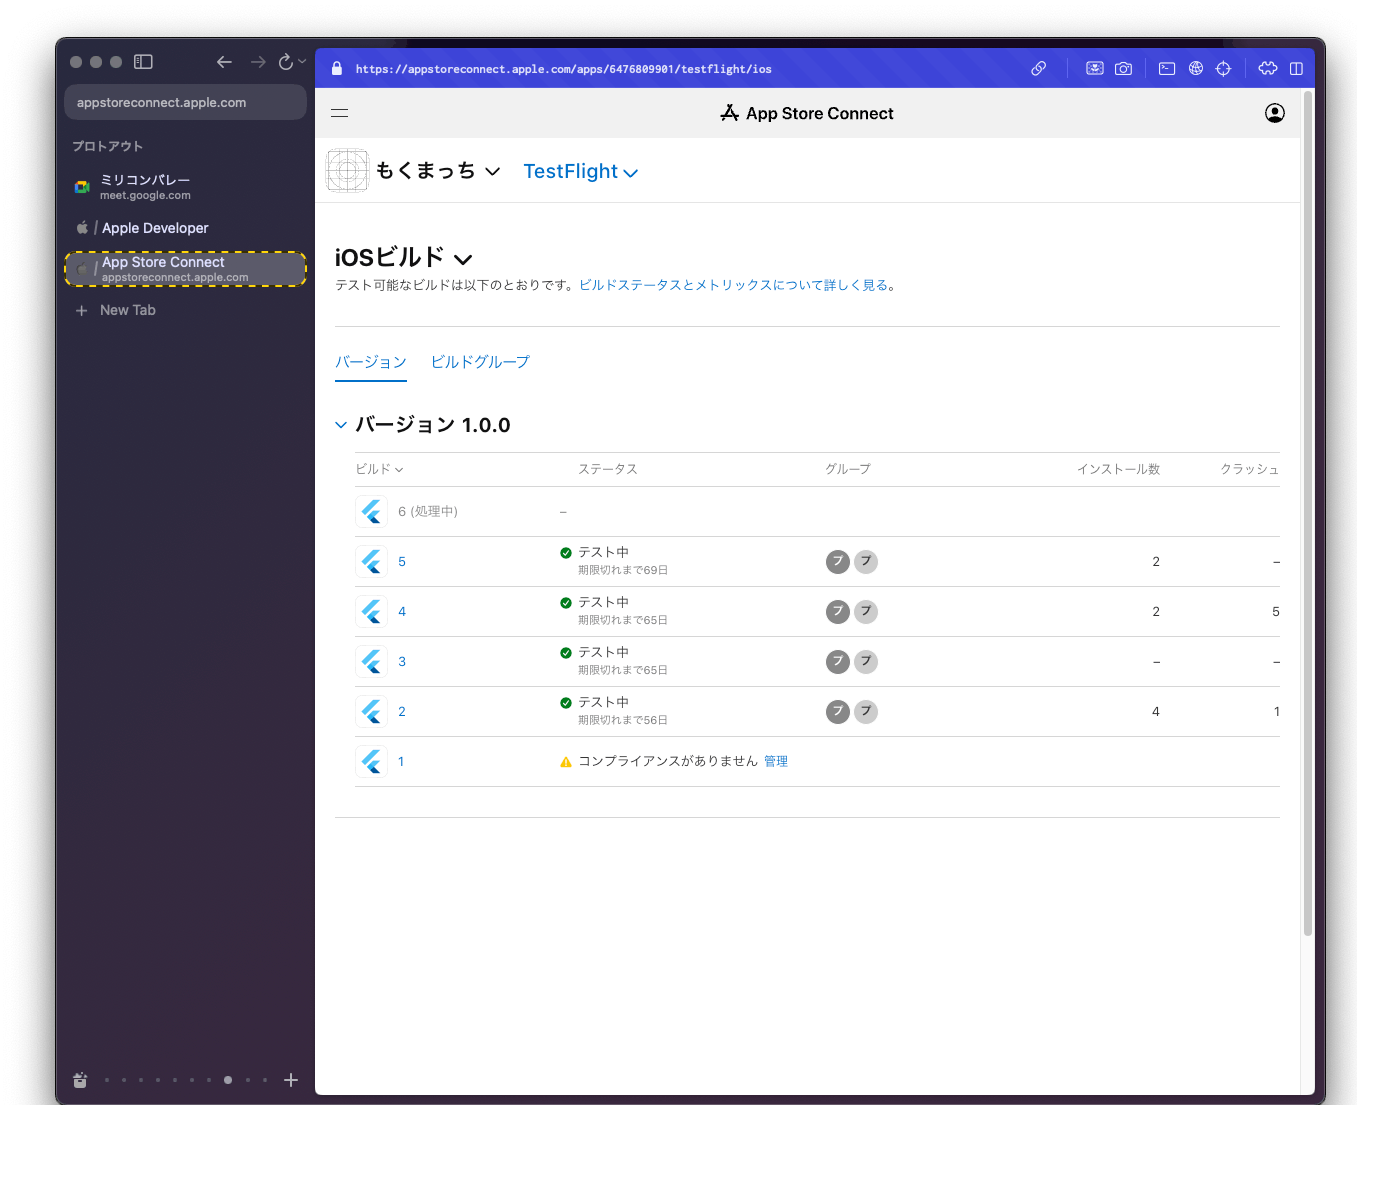
→ ビルドできた!!!!!!!

だいぶ遠回りしたけど、手作業で TestFlight にアップロードできるように戻った
証明書周りは fastlane match で管理するのが今はベストプラクティスっぽい
Flutter のドキュメントを一通りやって、手作業でデプロイできるようになった。
-
Register your app on App Store Connect
- Register a Bundle ID
- Create an application record on App Store Connect
- Review Xcode project settings
- Updating the app’s deployment version
-
Add an app icon -
Add a launch image -
Create a build archive and upload to App Store Connect
- Update the app’s build and version numbers
- Create an app bundle
- Upload the app bundle to App Store Connect
- Release your app on TestFlight
自動化にちょっと時間使いすぎてるので、一旦ストップ。
来週のタスク
- Android アプリのテスト配信( 1 / 2 )
- 距離順ソートのペアプロ