Next.js Auth.js Prisma Postgres
Next.jsのAuth.jsでPrisma(Postgres)に認証情報を保存する方法です。
Auth.js自体の説明はしません。詳しくはこちらをご覧ください。
ソースコードをこちらに置きます。
環境変数
環境変数をセットします。Vercel PostgressとGoogle OAuthの設定は済ませておいてください。
POSTGRES_DATABASE="verceldb"
POSTGRES_HOST="xxx-pooler.us-east-1.postgres.vercel-storage.com"
POSTGRES_PASSWORD="xxx"
POSTGRES_PRISMA_URL="postgres://default:xxx@xxx-pooler.us-east-1.postgres.vercel-storage.com/verceldb?pgbouncer=true&connect_timeout=15&connection_limit=1"
POSTGRES_URL="postgres://default:xxx@xxx-pooler.us-east-1.postgres.vercel-storage.com/verceldb"
POSTGRES_URL_NON_POOLING="postgres://default:xxx@xxx.us-east-1.postgres.vercel-storage.com/verceldb"
POSTGRES_USER="default"

NEXTAUTH_SECRET="+xxxVjLkIRXn0hwc="
NEXTAUTH_URL=http://localhost:3000

GOOGLE_CLIENT_ID=xxx.apps.googleusercontent.com
GOOGLE_CLIENT_SECRET=GOCSPX-xxx
Prismaの設定
Prismaをインストールします。
pnpm add @prisma/client
pnpm add prisma --save-dev
PrismaからVercelのPostgresを使用するように設定します。
npx prisma init --datasource-provider postgresql
prisma/schema.prismaのテンプレが作成されます。
以下のようにAuth.js用のテーブルを定義します。
// This is your Prisma schema file,
// learn more about it in the docs: https://pris.ly/d/prisma-schema

generator client {
  provider = "prisma-client-js"
}

datasource db {
  provider          = "postgresql"
  url               = env("POSTGRES_PRISMA_URL") // uses connection pooling
  directUrl         = env("POSTGRES_URL_NON_POOLING") // uses a direct connection
  shadowDatabaseUrl = env("POSTGRES_URL_NON_POOLING") // used for migrations
}

// schema.prisma

model Post {
  id        String  @id @default(cuid())
  title     String
  content   String?
  published Boolean @default(false)
  author    User?   @relation(fields: [authorId], references: [id])
  authorId  String?
}

model Account {
  id                 String  @id @default(cuid())
  userId             String  @map("user_id")
  type               String
  provider           String
  providerAccountId  String  @map("provider_account_id")
  refresh_token      String?
  access_token       String?
  expires_at         Int?
  token_type         String?
  scope              String?
  id_token           String?
  session_state      String?
  oauth_token_secret String?
  oauth_token        String?

  user User @relation(fields: [userId], references: [id], onDelete: Cascade)

  @@unique([provider, providerAccountId])
}

model Session {
  id           String   @id @default(cuid())
  sessionToken String   @unique @map("session_token")
  userId       String   @map("user_id")
  expires      DateTime
  user         User     @relation(fields: [userId], references: [id], onDelete: Cascade)
}

model User {
  id            String    @id @default(cuid())
  name          String?
  email         String?   @unique
  emailVerified DateTime?
  image         String?
  accounts      Account[]
  sessions      Session[]
  Post          Post[]
}

model VerificationToken {
  id         Int      @id @default(autoincrement())
  identifier String
  token      String   @unique
  expires    DateTime

  @@unique([identifier, token])
}
Vercelにデプロイしたときにモデルを生成するように、package.jsonに下記を追加しておきます。
"postinstall": "prisma generate"
ローカル環境で実行してnode_modulesにモデルを生成しておきます。
pnpm postinstall
Postgresに反映させます。
npx prisma db push
Prismaのコネクションプールの設定です。
import { PrismaClient } from '@prisma/client'

const globalForPrisma = global as unknown as {
    prisma: PrismaClient | undefined
}

export const prisma =
    globalForPrisma.prisma ??
    new PrismaClient({
        // log: ['query', 'info', 'warn', 'error'],
        log: ['warn', 'error'],
    })

if (process.env.NODE_ENV !== 'production') globalForPrisma.prisma = prisma
Auth.jsの設定
詳しく説明はしませんが、Auth.js用のファイルを作成しておいてください。
pnpm add next-auth @next-auth/prisma-adapter
import { options } from "@/app/options";
import NextAuth from "next-auth";


const handler = NextAuth(options);

export {handler as GET,handler as POST}
OAuthプロバイダーにはGoogleを使用します。
データベースを使用する場合は、PrismaAdapterをadapterに設定します。
import type {NextAuthOptions} from "next-auth";
import GoogleProvider from "next-auth/providers/google";
import {PrismaAdapter} from '@next-auth/prisma-adapter';
import {prisma} from '@/lib/prisma';

export const options: NextAuthOptions = {
        debug: true,
        adapter: PrismaAdapter(prisma),

        providers: [
            // https://next-auth.js.org/providers/google
            GoogleProvider({
                clientId: process.env.GOOGLE_CLIENT_ID!,
                clientSecret: process.env.GOOGLE_CLIENT_SECRET!,
                authorization: {
                    params: {
                        prompt: "consent",
                        access_type: "offline",
                        response_type: "code",
                        scope: "https://www.googleapis.com/auth/userinfo.profile https://www.googleapis.com/auth/userinfo.email",
                    }
                }
            }),
        ],
        callbacks: {
            jwt: async ({token, user, account, profile, isNewUser}) => {
                // strategyをdatabaseにした場合は呼ばれません。
                console.log("this won't be called as DB is used.")
                return token;
            },
            session: ({session, token, user}) => {
                // データベースを利用する場合は、userにユーザ情報が渡されます
                // tokenはundefinedになります。

                console.log("in session", {session, token, user});

                return {
                    ...session,
                    user: {
                        ...session.user,
                    },
                };
            },
        }
    }
;
ログインページ
ログインページを作成します。
"use client";

import {signIn, signOut} from "next-auth/react";

export const LoginButton = () => {
    return (
        <button style={{marginRight: 10}} onClick={() => signIn()}>
            Sign in
        </button>
    );
};
import {
    LoginButton
} from "@/app/components/buttons";

export default async function Home() {

    return (
        <main
            style={{
                display: "flex",
                justifyContent: "center",
                alignItems: "center",
                height: "70vh",
            }}
        >
            <div>
                <LoginButton/>
            </div>
        </main>
    );
}
検証用にAPIを作っておきます。
import {NextResponse} from 'next/server';

import {getServerSession} from "next-auth/next"
import {options} from "@/app/options";

export async function GET() {
    const session = await getServerSession(options)

    console.log('API session>', session) // Userテーブルの中身が見れます

    return NextResponse.json({message: "ok"});
}
実行
実行しましょう。
pnpm dev
認可画面で承諾しコールバック(redirectURI)が呼ばれると、Auth.jsはPrisma経由でAccount、Userテーブルにレコードを追加します。
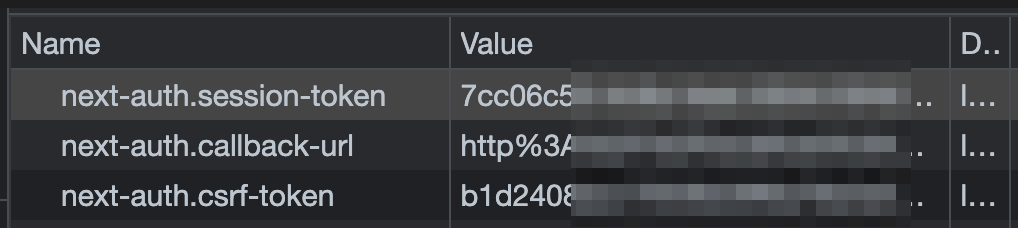
Chrome Dev Toolからクッキーnext-auth.session-tokenをコピペします。
cURLでクッキーをセットしてAPIを叩きます。
curl -v http://localhost:3000/my-api-auth -H 'Cookie: next-auth.session-token=794a08bd-...-562b0186f6b8'
Next.jsのコンソール・ログを確認します。セッション情報が正しく取得できていますね。
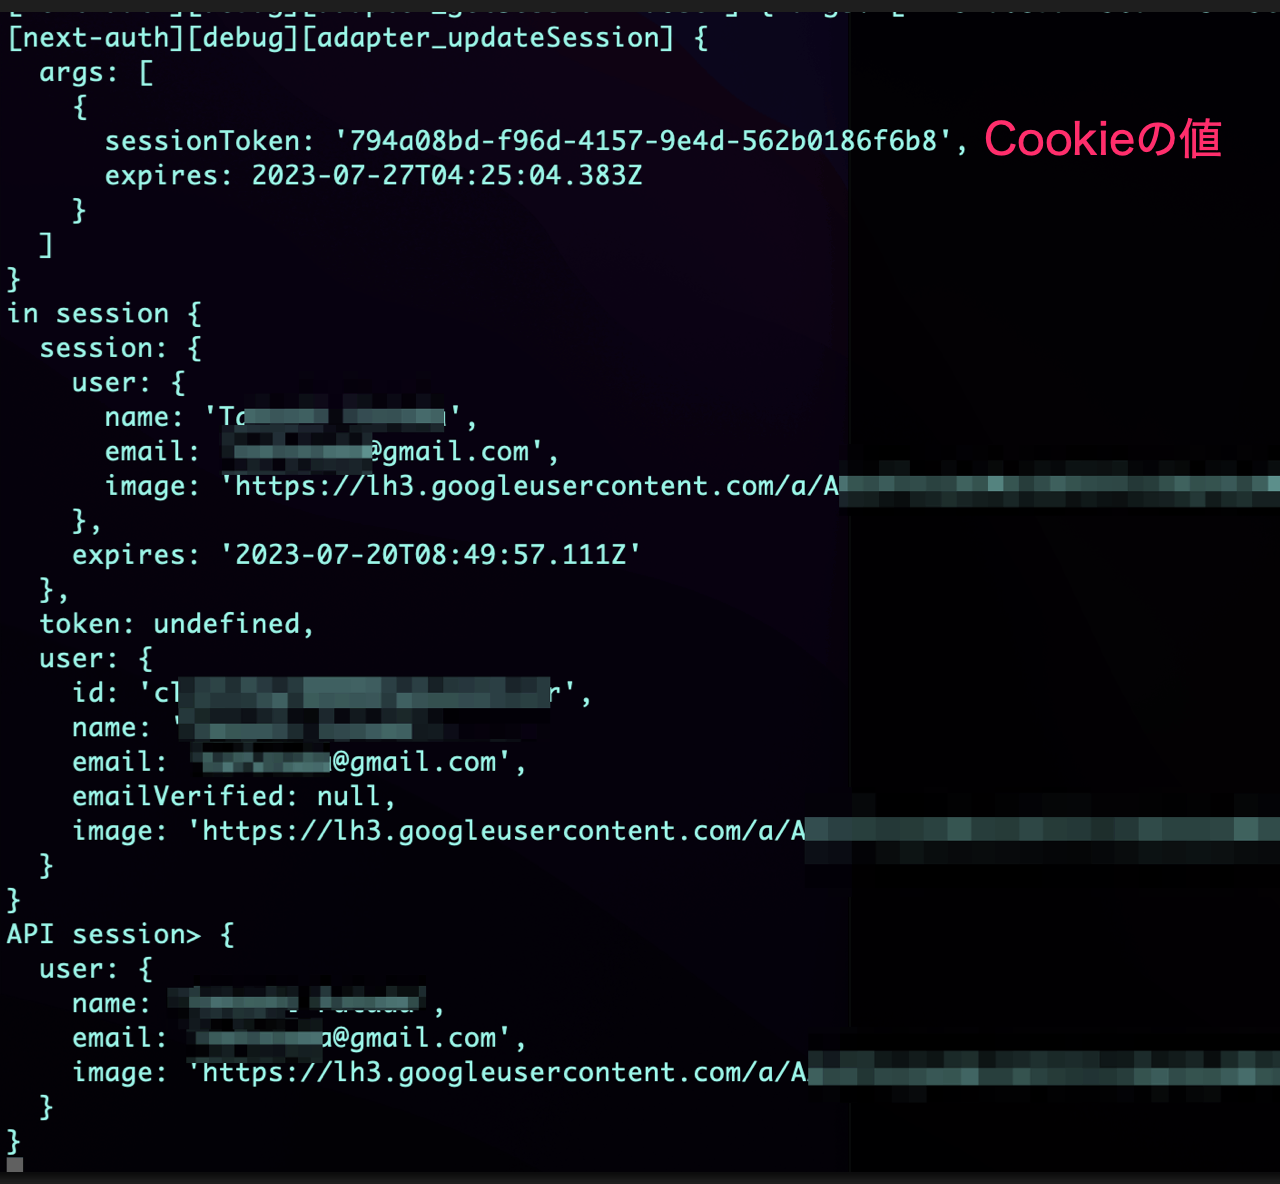
PrismaのSQLログを見ると、Sessionテーブルからuser_idを取得し、そのIDでUserテーブルからユーザ情報を取得しているのが分かります。

テーブルの中身を確認する
認可画面で承諾するとテーブルに認証情報が書き込まれます。それぞれのテーブルの中身をお使いのデータベースツールでのぞいてみてください。
Accountテーブル

provider_account_idというのがGoogleで管理されているIDになります。
AccountテーブルのDDL文を確認すると、以下のようにprovider、provider_account_idのコンポジットのインデックスが貼られています。つまり、Auth.jsが裏で、このコンポジットで検索をしているのだと分かります。
create unique index "Account_provider_provider_account_id_key"
    on "Account" (provider, provider_account_id);
Sessionテーブル

session-tokenというのが、セッション・クッキーの値になります。この値で、Sessionテーブルを検索することでユーザを特定できるわけですね。マスクする必要はないですが一応しておきます。
Userテーブル
Gmailの情報が入ります。emailフィールドはオプショナルですがユニークである必要があります。

VerificationTokenテーブルは空になります。
ログアウトすると、Sessionテーブルからレコードは削除されます。もちろん、UserとAccountはそのままです。
accessTokenをセッションから取得する場合
accessTokenはAccountテーブルに格納されているため、そのままですとセッションから取得することができません。
明示的にPrisma経由でAccountテーブルからレコードを取得して、セッションにねじ込みます。
            session: async ({session, token, user}) => {
                // When using database sessions, the User (user) object is passed as an argument.
                // When using JSON Web Tokens for sessions, the JWT payload (token) is provided instead.

                console.log("in session", {session, token, user});

                const getToken = await prisma.account.findFirst({
                    where: {
                        userId: user.id,
                    },
                });

                console.log("in session", getToken?.access_token);

                return {
                    ...session,
                    user: {
                        ...session.user,
                        accessToken: getToken?.access_token,
                    },

                };
            },
ログ出力を確認すると、accessTokenが取得できたのが分かります。

Discussion