React×Firebaseでちゃんと開発するときの環境構築手順と解説
はじめに
ReactとFirebaseを用いてフロントエンド開発するにあたって、追加で入れておきたい各種パッケージや設定を組み込んだ環境構築手順です。
この記事で構築する環境は以下の通りです。

ローカルで開発した内容をGitHubにpushすると、構文チェック→テスト→ビルド→デプロイされます。
また、mainブランチにpushしたらFirebaseの本番環境にデプロイされ、developブランチにpushしたらFirebaseの開発環境にデプロイされます。
事前準備
環境構築をするにあたって、以下は事前に準備してください。
- VS Codeのインストール
- GitHubのアカウント登録
- Node.jsのインストール
- 今回は
v16.14.0を利用します
- 今回は
- Firebaseのプロジェクト作成
GitHubリポジトリの作成
GitHubのリポジトリを作成します。
公開範囲はPublic,Privateどちらでも構いません。

アプリケーションの開発環境を作る
概要

まずはアプリケーションを動かす基本的な環境を作ります。
Viteが公式で用意しているテンプレートを利用して、React、TypeScript、Viteでアプリケーションを動かせる環境を作ります。
手順
# sample-appは任意のプロジェクト名に変更してください
$ npm create vite@latest sample-app -- --template react-ts
Need to install the following packages:
  create-vite@latest
Ok to proceed? (y) # Enterを押す

Scaffolding project in /Users/user/src/sample-app...

Done. Now run:

  cd sample-app
  npm install
  npm run dev
初期テンプレートができたら試しに起動してみます。
$ cd sample-app
$ npm install
$ npm run dev
  VITE v3.0.9  ready in 575 ms

  ➜  Local:   http://127.0.0.1:5174/
  ➜  Network: use --host to expose
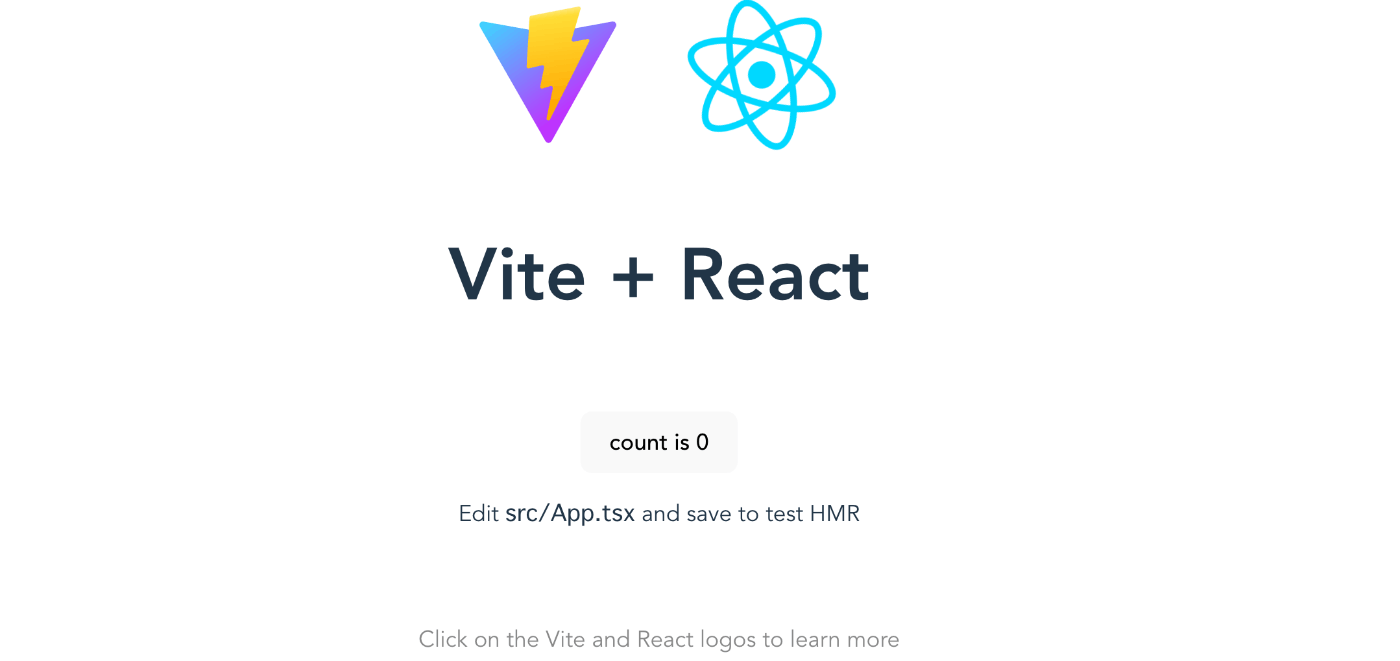
npm run devの後に表示されたURL( http://127.0.0.1:5174/ )にアクセスして初期画面が表示されることを確認しましょう。
確認が終わったらCtrl + Cでローカルサーバーを停止します。
コンポーネントカタログを作るためにStorybookを導入
概要

続いて、開発をしながらコンポーネントカタログを作れるStorybookを導入します。
Storybookを導入することで、開発時にコンポーネント単位で開発をすすめることができたり、どういったコンポーネントが存在するのか確認できるカタログを開発しながら作ることが出来ます。
手順
$ npx storybook init --builder @storybook/builder-vite
Need to install the following packages:
  storybook
Ok to proceed? (y) # Enterを押す

(構築ログ省略)

? Do you want to run the 'npm7' migration on your project? › (y/N) # Enterを押す

Skipping the npm7 migration.

If you change your mind, run 'npx storybook@next automigrate'

✅ migration check successfully ran


To run your Storybook, type:

   npm run storybook

For more information visit: https://storybook.js.org
Storybookの環境構築が完了したので、起動して初期画面が表示されるか確認しましょう。
$ npm run storybook

(ログ省略)
╭──────────────────────────────────────────────────╮
│                                                  │
│   Storybook 6.5.10 for React started             │
│   8.7 s for manager and 3 s for preview          │
│                                                  │
│    Local:            http://localhost:6006/      │
│    On your network:  http://192.168.1.9:6006/    │
│                                                  │
╰──────────────────────────────────────────────────╯
npm run storybookの後に表示されたURL( http://localhost:6006/ )にアクセスして初期画面が表示されることを確認しましょう。

確認が終わったらCtrl + Cでローカルサーバーを停止します。
linterおよびformatterを導入
概要

個人、チーム開発問わずlinter(構文チェック)、formatter(コード整形)は必ず設定しましょう。
linterのルールは今回は変更しないので、各自で設定してください。
手順
ESLint
まずはlinterを導入します。
eslintというJavaScriptの静的検証ツールを開発用パッケージとしてインストールします。
$ npm install -D eslint
続いて、eslintの設定をします。
$ npx eslint --init
You can also run this command directly using 'npm init @eslint/config'.
? How would you like to use ESLint? …
  To check syntax only
❯ To check syntax and find problems
  To check syntax, find problems, and enforce code style

# ESLintの使い道を聞かれるので、初期選択されている「構文チェックと問題の発見」が選択されている状態でEnterを押します

? What type of modules does your project use? …
❯ JavaScript modules (import/export)
  CommonJS (require/exports)
  None of these

# モジュールの種類を聞かれていますが、今回の手順ではESModulesを利用するため、「JavaScript modules (import/export)」が選択されている状態でEnterを押します

? Which framework does your project use? …
❯ React
  Vue.js
  None of these

# どのフレームワークを利用しているか聞かれているので、「React」が選択されている状態でEnterを押します

? Does your project use TypeScript? › No / Yes

# TypeScriptを利用しているか聞かれているので、Yesを選択してEnterを押します

? Where does your code run? …  (Press <space> to select, <a> to toggle all, <i> to invert selection)
✔ Browser
  Node

# コードの実行環境を聞かれているので、「Browser」が選択されている状態でEnterを押します

? What format do you want your config file to be in? …
❯ JavaScript
  YAML
  JSON

# ESLintの設定ファイルをどの形式で作成するか聞かれるので、お好きなファイル形式を選択してEnterを押します(今回はJavaScriptを選択します)

eslint-plugin-react@latest @typescript-eslint/eslint-plugin@latest @typescript-eslint/parser@latest
? Would you like to install them now? › No / Yes

# 必要なパッケージを今すぐインストールするか聞かれるので、「Yes」が選択されている状態でEnterを押します

? Which package manager do you want to use? …
❯ npm
  yarn
  pnpm

# どのパッケージマネージャーを利用しているか聞かれているので、「npm」が選択されている状態でEnterを押します
インストールが完了したらプロジェクトルートに.eslintrc.cjsが作られていることを確認してください。
.eslintrc.cjsの中身
module.exports = {
    "env": {
        "browser": true,
        "es2021": true
    },
    "extends": [
        "eslint:recommended",
        "plugin:react/recommended",
        "plugin:@typescript-eslint/recommended"
    ],
    "overrides": [
    ],
    "parser": "@typescript-eslint/parser",
    "parserOptions": {
        "ecmaVersion": "latest",
        "sourceType": "module"
    },
    "plugins": [
        "react",
        "@typescript-eslint"
    ],
    "rules": {
    }
}
続いて、構文チェックを実行するためのlintコマンドをpackage.jsonに登録します。
{
  "name": "sample-app",
  "private": true,
  "version": "0.0.0",
  "type": "module",
  "scripts": {
    "dev": "vite",
    "build": "tsc && vite build",
    "preview": "vite preview",
    "storybook": "start-storybook -p 6006",
    "build-storybook": "build-storybook",
+   "lint": "eslint src"
  },
  "dependencies": {
    "react": "^18.2.0",
    "react-dom": "^18.2.0"
  },
  "devDependencies": {
    "@babel/core": "^7.18.10",
    "@storybook/addon-actions": "^6.5.10",
    "@storybook/addon-essentials": "^6.5.10",
    "@storybook/addon-interactions": "^6.5.10",
    "@storybook/addon-links": "^6.5.10",
    "@storybook/builder-vite": "^0.2.2",
    "@storybook/react": "^6.5.10",
    "@storybook/testing-library": "^0.0.13",
    "@types/react": "^18.0.17",
    "@types/react-dom": "^18.0.6",
    "@typescript-eslint/eslint-plugin": "^5.33.1",
    "@typescript-eslint/parser": "^5.33.1",
    "@vitejs/plugin-react": "^2.0.1",
    "babel-loader": "^8.2.5",
    "eslint": "^8.22.0",
    "eslint-plugin-react": "^7.30.1",
    "typescript": "^4.6.4",
    "vite": "^3.0.7"
  }
}
登録したコマンドを実行してESLintによる構文チェックが走るか確認します。
$ npm run lint

> sample-app@0.0.0 lint
> eslint src

Warning: React version not specified in eslint-plugin-react settings. See https://github.com/jsx-eslint/eslint-plugin-react#configuration .

/Users/user/src/sample-app/src/App.tsx
   9:5   error  'React' must be in scope when using JSX                                                                                                                                                react/react-in-jsx-scope
  10:7   error  'React' must be in scope when using JSX                                                                                                                                                react/react-in-jsx-scope
  11:9   error  Using target="_blank" without rel="noreferrer" (which implies rel="noopener") is a security risk in older browsers: see https://mathiasbynens.github.io/rel-noopener/#recommendations  react/jsx-no-target-blank
  11:9   error  'React' must be in scope when using JSX                                                                                                                                                react/react-in-jsx-scope
  12:11  error  'React' must be in scope when using JSX                                                                                                                                                react/react-in-jsx-scope
  14:9   error  Using target="_blank" without rel="noreferrer" (which implies rel="noopener") is a security risk in older browsers: see https://mathiasbynens.github.io/rel-noopener/#recommendations  react/jsx-no-target-blank
  14:9   error  'React' must be in scope when using JSX                                                                                                                                                react/react-in-jsx-scope
  15:11  error  'React' must be in scope when using JSX                                                                                                                                                react/react-in-jsx-scope
  18:7   error  'React' must be in scope when using JSX                                                                                                                                                react/react-in-jsx-scope
  19:7   error  'React' must be in scope when using JSX                                                                                                                                                react/react-in-jsx-scope
  20:9   error  'React' must be in scope when using JSX                                                                                                                                                react/react-in-jsx-scope
  23:9   error  'React' must be in scope when using JSX                                                                                                                                                react/react-in-jsx-scope
  24:16  error  'React' must be in scope when using JSX                                                                                                                                                react/react-in-jsx-scope
  27:7   error  'React' must be in scope when using JSX                                                                                                                                                react/react-in-jsx-scope

/Users/user/src/sample-app/src/stories/Page.tsx
  39:13  error  `"` can be escaped with `"`, `“`, `"`, `”`  react/no-unescaped-entities
  39:18  error  `"` can be escaped with `"`, `“`, `"`, `”`  react/no-unescaped-entities

✖ 16 problems (16 errors, 0 warnings)
  2 errors and 0 warnings potentially fixable with the `--fix` option.
このようにエラーが表示されれば正常に構文チェックが走っています。
いくつか構文チェックのルールを修正します。
lint errorの内容
以下のエラーはJSXを使う際はReactをインポートしなければいけない、というルールですが、React17からJSXを使う際にReactをインポートしなくても良くなったので、こちらのルールをオフにします。
参考) https://ja.reactjs.org/blog/2020/09/22/introducing-the-new-jsx-transform.html
27:7 error 'React' must be in scope when using JSX react/react-in-jsx-scope
eslintの特定のルールをオフにするには先程作成された.eslintrc.cjsのrulesに以下のように追記します。
module.exports = {
  env: {
    browser: true,
    es2021: true,
  },
  extends: [
    "eslint:recommended",
    "plugin:react/recommended",
    "plugin:@typescript-eslint/recommended",
  ],
  overrides: [],
  parser: "@typescript-eslint/parser",
  parserOptions: {
    ecmaVersion: "latest",
    sourceType: "module",
  },
  plugins: ["react", "@typescript-eslint"],
  rules: {
+   "react/react-in-jsx-scope": "off",
  },
};
ファイルを保存してもう一度npm run lintを実行すると、先程のエラーが消えていることがわかります。
残りのエラーは内容は以下の通りです。
| エラー | 詳細 | 解決策 |
|---|---|---|
react/no-unescaped-entities |
文字列内のシングル、ダブルクォーテーションをエスケープされていない | 文字列内のシングル、ダブルクォーテーションを", “, ", ”のいずれかでエスケープする |
react/jsx-no-target-blank |
rel="noreferrer" (これはrel="noopener"を意味します) なしで target="_blank" を使用すると、古いブラウザではセキュリティリスクがあります( https://mathiasbynens.github.io/rel-noopener/#recommendations ) |
aタグにtarget="_blank"を使用する場合はrel="noopener noreferrer"を指定する |
とのことなので、サクッと修正しましょう。
App.tsxの修正内容
import { useState } from 'react'
import reactLogo from './assets/react.svg'
import './App.css'

function App() {
  const [count, setCount] = useState(0)

  return (
    <div className="App">
      <div>
-       <a href="https://vitejs.dev" target="_blank">
+       <a href="https://vitejs.dev" target="_blank" rel="noopener noreferrer">
          <img src="/vite.svg" className="logo" alt="Vite logo" />
        </a>
-        <a href="https://reactjs.org" target="_blank">
+        <a href="https://reactjs.org" target="_blank" rel="noopener noreferrer">
          <img src={reactLogo} className="logo react" alt="React logo" />
        </a>
      </div>
      <h1>Vite + React</h1>
      <div className="card">
        <button onClick={() => setCount((count) => count + 1)}>
          count is {count}
        </button>
        <p>
          Edit <code>src/App.tsx</code> and save to test HMR
        </p>
      </div>
      <p className="read-the-docs">
        Click on the Vite and React logos to learn more
      </p>
    </div>
  )
}

export default App
Page.tsxの修正内容
import React from 'react';
import { Header } from './Header';
import './page.css';
type User = {
name: string;
};
export const Page: React.VFC = () => {
const [user, setUser] = React.useState<User>();
return (
<article>
<Header
user={user}
onLogin={() => setUser({ name: 'Jane Doe' })}
onLogout={() => setUser(undefined)}
onCreateAccount={() => setUser({ name: 'Jane Doe' })}
/>
<section>
<h2>Pages in Storybook</h2>
<p>
We recommend building UIs with a{' '}
<a href="https://componentdriven.org" target="_blank" rel="noopener noreferrer">
<strong>component-driven</strong>
</a>{' '}
process starting with atomic components and ending with pages.
</p>
<p>
Render pages with mock data. This makes it easy to build and review page states without
needing to navigate to them in your app. Here are some handy patterns for managing page
data in Storybook:
</p>
<ul>
<li>
Use a higher-level connected component. Storybook helps you compose such data from the
- "args" of child component stories
+ “args“ of child component stories
</li>
<li>
Assemble data in the page component from your services. You can mock these services out
using Storybook.
</li>
</ul>
<p>
Get a guided tutorial on component-driven development at{' '}
<a href="https://storybook.js.org/tutorials/" target="_blank" rel="noopener noreferrer">
Storybook tutorials
</a>
. Read more in the{' '}
<a href="https://storybook.js.org/docs" target="_blank" rel="noopener noreferrer">
docs
</a>
.
</p>
<div className="tip-wrapper">
<span className="tip">Tip</span> Adjust the width of the canvas with the{' '}
<svg width="10" height="10" viewBox="0 0 12 12" xmlns="http://www.w3.org/2000/svg">
<g fill="none" fillRule="evenodd">
<path
d="M1.5 5.2h4.8c.3 0 .5.2.5.4v5.1c-.1.2-.3.3-.4.3H1.4a.5.5 0 01-.5-.4V5.7c0-.3.2-.5.5-.5zm0-2.1h6.9c.3 0 .5.2.5.4v7a.5.5 0 01-1 0V4H1.5a.5.5 0 010-1zm0-2.1h9c.3 0 .5.2.5.4v9.1a.5.5 0 01-1 0V2H1.5a.5.5 0 010-1zm4.3 5.2H2V10h3.8V6.2z"
id="a"
fill="#999"
/>
</g>
</svg>
Viewports addon in the toolbar
</div>
</section>
</article>
);
};
これでlinterのエラーが解消されたので、確認してみましょう。
$ npm run lint

> sample-app@0.0.0 lint
> eslint src

Warning: React version not specified in eslint-plugin-react settings. See https://github.com/jsx-eslint/eslint-plugin-react#configuration .
その他ルールのカスタマイズ等はプロジェクトに応じて適宜修正してください。
Prettier
PrettierはVS Codeの拡張機能を入れて設定します。
VS Codeの拡張機能の検索窓に「Prettier」といれ、インストールします。

続いてプロジェクトルートに.prettierrcというファイルを作成して、フォーマットしたいルールを記述します。
{
  "semi": true,
  "tabWidth": 2,
  "singleQuote": true
}
Prettierで設定可能なオプションは下記サイトをご覧ください。
また、VS Codeの設定でファイル保存時にフォーマットを有効にすることをおすすめします。

Firebaseの設定
概要

次に、Firebase関連の設定を行います。
SDKのインストールや初期設定、CI/CDのCD部分を設定していきます。
手順
Firebaseプロジェクトを作成およびFirestoreの有効化をしていない方は以下手順を参考にしながら作成してください。
Firebaseプロジェクト作成
プロジェクト名を入力して「続行」をクリック


GoogleAnalyticsは今回利用しないので、オフにして「プロジェクトを作成」をクリック

「続行」をクリック

「</>ウェブ」をクリック

アプリのニックネームを入力し、Firebase Hostingの設定にチェックをいれて「アプリを登録」をクリック

「データベースの作成」をクリック
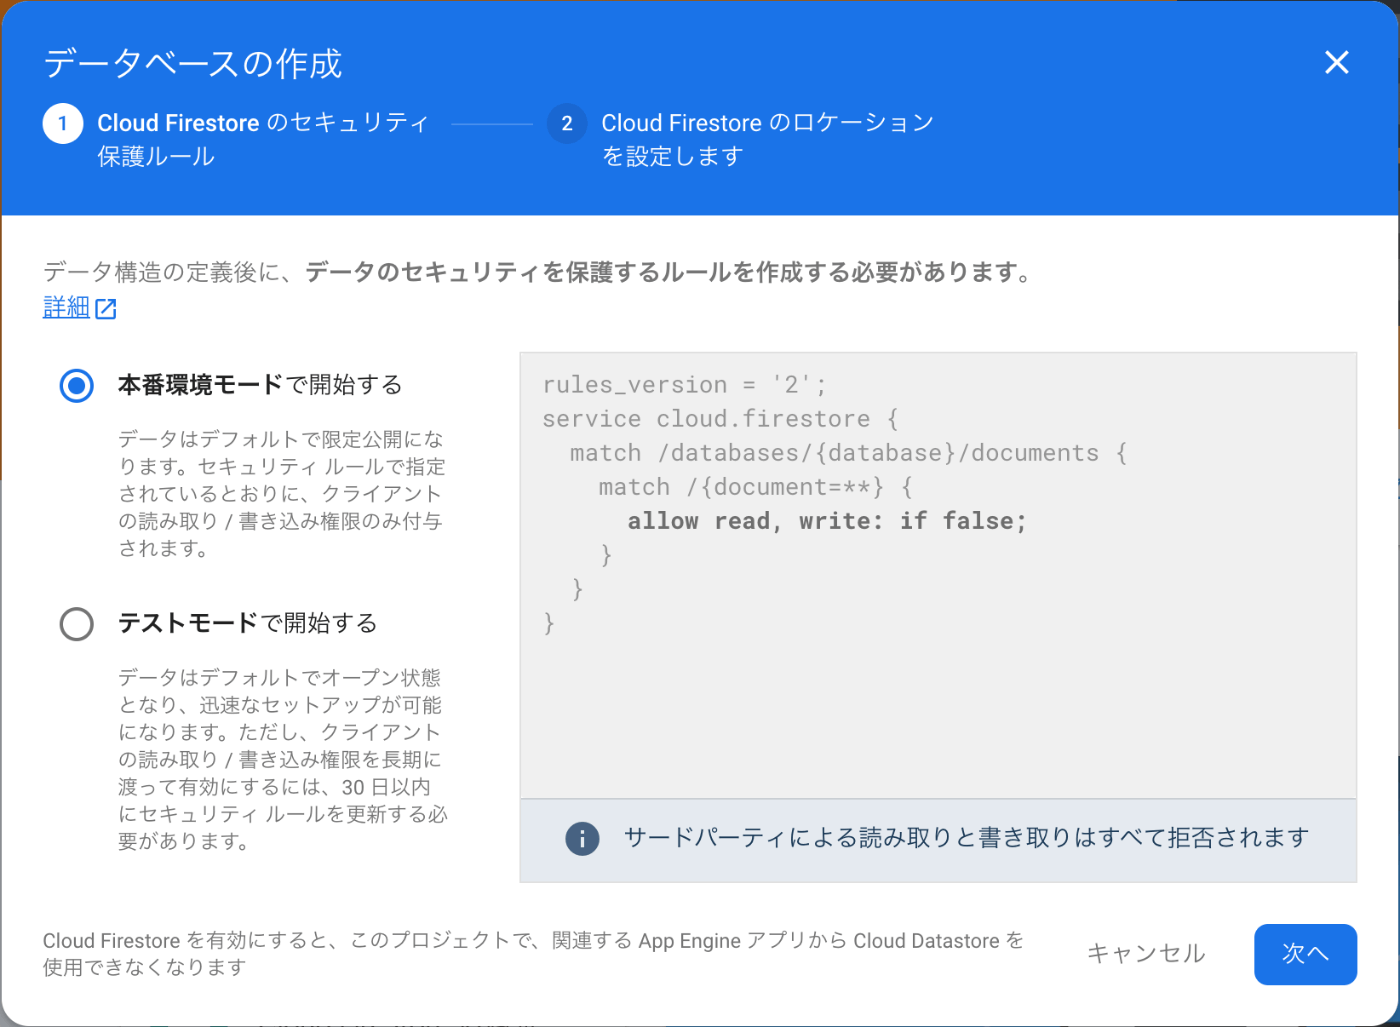
「次へ」をクリック

「asia-northeast1」を選択して「有効にする」をクリック
SDK install
プロジェクトの作成が完了している場合は先ほど作成したアプリのプロジェクトルートで以下コマンドを実行してFirebase SDKをインストールします。
$ npm install firebase
production用環境変数作成
プロジェクトルートに.env.productionというファイルを作成し、Firebaseの環境変数を設定します。
値は適宜ご自身の環境にあわせて書き換えてください。
envファイルについて
envファイルは環境変数を記載するためのファイルです。
key=value形式で記述します。
.envが基本的な拡張子ですが、本番環境や開発環境などで環境変数をわけたい場合は.env.productionや.env.development等を指定できます。
.env.XXXのXXXは任意で指定することができ、ローカルサーバー起動時やアプリケーションビルド時にどの環境を利用するか指定することができます。
また、envファイルの中身を記述する際に、Viteを利用している場合は、VITE_という接頭辞を付ける必要があります。
VITE_API_KEY=apiKeyの値
VITE_AUTH_DOMAIN=authDomainの値
VITE_PROJECT_ID=projectIdの値
VITE_STORAGE_BUCKET=storageBucketの値
VITE_MESSAGING_SENDER_ID=messagingSenderIdの値
VITE_APP_ID=appIdの値
Firebase initialize
Firebase SDKをプログラムで利用できるように、main.tsxを修正して初期化します。
import React from "react";
import ReactDOM from "react-dom/client";
import App from "./App";
import "./index.css";
+ import { initializeApp } from "firebase/app";

+ const firebaseConfig = {
+   apiKey: import.meta.env.VITE_API_KEY,
+   authDomain: import.meta.env.VITE_AUTH_DOMAIN,
+   projectId: import.meta.env.VITE_PROJECT_ID,
+   storageBucket: import.meta.env.VITE_STORAGE_BUCKET,
+   messagingSenderId: import.meta.env.VITE_MESSAGING_SENDER_ID,
+   appId: import.meta.env.VITE_APP_ID,
+ };

+ const app = initializeApp(firebaseConfig);

ReactDOM.createRoot(document.getElementById("root") as HTMLElement).render(
  <React.StrictMode>
    <App />
  </React.StrictMode>
);
firebase-tools install
FirebaseのCLIをインストールしていない方はここでインストールします。
firebase-toolsはコマンドラインでFirebaseにデプロイしたり等、様々な操作ができるCLIです。
$ npm install -g firebase-tools
続いてfirebase-toolsでプロジェクトを作成したGoogleアカウントにログインし、CLIを使えるようにします。
$ firebase login
後ほどの設定をする前に一度アプリケーションをビルドして、distディレクトリが作られることを確認しましょう。
$ npm run build
ビルドすると「dist」ディレクトリの中に静的ファイルが作られます。
ここにあるファイル一式をデプロイすることで、サイトを公開することができます。
続いてFirebaseの初期設定をします。
$ firebase init

     ######## #### ########  ######## ########     ###     ######  ########
     ##        ##  ##     ## ##       ##     ##  ##   ##  ##       ##
     ######    ##  ########  ######   ########  #########  ######  ######
     ##        ##  ##    ##  ##       ##     ## ##     ##       ## ##
     ##       #### ##     ## ######## ########  ##     ##  ######  ########

You're about to initialize a Firebase project in this directory:

  /Users/user/src/sample-app

? Which Firebase features do you want to set up for this directory? Press Space to
 select features, then Enter to confirm your choices. (Press <space> to select, <a
> to toggle all, <i> to invert selection, and <enter> to proceed)
 ◯ Realtime Database: Configure a security rules file for Realtime Database and (o
ptionally) provision default instance
 ◉ Firestore: Configure security rules and indexes files for Firestore
 ◉ Functions: Configure a Cloud Functions directory and its files
 ◉ Hosting: Configure files for Firebase Hosting and (optionally) set up GitHub Ac
tion deploys
 ◉ Hosting: Set up GitHub Action deploys
 ◉ Storage: Configure a security rules file for Cloud Storage
❯◉ Emulators: Set up local emulators for Firebase products
 ◯ Remote Config: Configure a template file for Remote Config

# 上記のように選択してEnter

? Please select an option: (Use arrow keys)
❯ Use an existing project
  Create a new project
  Add Firebase to an existing Google Cloud Platform project
  Don't set up a default project

# 既に作成したプロジェクトを利用するので、「Use an existing project」を選択してEnter

? Select a default Firebase project for this directory: (Use arrow keys)
❯ sample-app-12bf5 (sample-app)

=== Firestore Setup

Firestore Security Rules allow you to define how and when to allow
requests. You can keep these rules in your project directory
and publish them with firebase deploy.

? What file should be used for Firestore Rules? (firestore.rules)

# Firestoreのruleを記述するファイルを何にするか聞かれているので、デフォルトのままEnter

Firestore indexes allow you to perform complex queries while
maintaining performance that scales with the size of the result
set. You can keep index definitions in your project directory
and publish them with firebase deploy.

? What file should be used for Firestore indexes? (firestore.indexes.json)

# Firestoreのindexを記述するファイルを何にするか聞かれているので、デフォルトのままEnter

? What language would you like to use to write Cloud Functions?
  JavaScript
❯ TypeScript

# CloudFunctionsを利用する言語を聞かれているので、「TypeScript」を選択してEnter

? Do you want to use ESLint to catch probable bugs and enforce style? (Y/n)

# CloudFunctionsでESLintを利用するか聞かれているので、Enter

? Do you want to install dependencies with npm now? (Y/n)

# 必要なパッケージを今すぐインストールするか聞かれるのでEnter

? What do you want to use as your public directory? (public) dist

# Firebaseにデプロイするディレクトリを聞かれているので、build時に生成される「dist」ディレクトリを入力してEnter

? Configure as a single-page app (rewrite all urls to /index.html)? (y/N) y

# SPAとして構成するか聞かれているので、「y」を入力してEnter

? Set up automatic builds and deploys with GitHub? (y/N) y

# GitHub ActionsでCI/CDの設定をするか聞かれているので「y」を入力してEnter

? File dist/index.html already exists. Overwrite? (y/N)

# index.htmlが既に存在していますが、書き換えますか?と聞かれていますが書き換えたくないのでそのままEnter

? For which GitHub repository would you like to set up a GitHub workflow? (format: user/repository) user-name/sample-app

# どのリポジトリに設定するか聞かれているので、最初に作成したリポジトリを指定してEnter

? Set up the workflow to run a build script before every deploy? (y/N) y

# デプロイ前に毎回build scriptを実行するか聞かれているので、「y」を入力してEnter

? What script should be run before every deploy? (npm ci && npm run build) npm run build

# デプロイ前に実行するスクリプトを聞かれているので、「npm run build」を入力してEnter
# 後ほどtestコマンドやlintコマンドを追加します。

? Set up automatic deployment to your site's live channel when a PR is merged? (Y/n)

# プルリクエストがマージされたタイミングでデプロイするか聞かれているので、そのままEnter

? What is the name of the GitHub branch associated with your site's live channel? (main)

# 上記トリガーとなるブランチ名を聞かれているので、そのままEnter

? What file should be used for Storage Rules? (storage.rules)

# Firebase Storageのルールを記述するファイルを何にするか聞かれているので、デフォルトのままEnter

? Which Firebase emulators do you want to set up? Press Space to select emulators,
 then Enter to confirm your choices. (Press <space> to select, <a> to toggle all,
<i> to invert selection, and <enter> to proceed)
 ◉ Authentication Emulator
 ◉ Functions Emulator
 ◉ Firestore Emulator
❯◯ Database Emulator
 ◉ Hosting Emulator
 ◉ Pub/Sub Emulator
 ◉ Storage Emulator
 ◯ Eventarc Emulator
(Move up and down to reveal more choices)

# どのエミュレータを利用するか聞かれているので、上記のように選択してEnter

? Which port do you want to use for the auth emulator? (9099)
# auth emulatorで利用するポート番号を聞かれているので、デフォルトのままEnter

? Which port do you want to use for the functions emulator? (5001)
# functions emulatorで利用するポート番号を聞かれているので、デフォルトのままEnter

? Which port do you want to use for the firestore emulator? (8080)
# firestore emulatorで利用するポート番号を聞かれているので、デフォルトのままEnter

? Which port do you want to use for the hosting emulator? (5000)
# hosting emulatorで利用するポート番号を聞かれているので、デフォルトのままEnter

? Which port do you want to use for the pubsub emulator? (8085)
# pubsub emulatorで利用するポート番号を聞かれているので、デフォルトのままEnter

? Which port do you want to use for the storage emulator? (9199)
# storage emulatorで利用するポート番号を聞かれているので、デフォルトのままEnter

? Would you like to enable the Emulator UI? (Y/n)
# エミュレータUIを有効にするか聞かれているので、デフォルトのままEnter

Which port do you want to use for the Emulator UI (leave empty to use any available port)? 3001
# エミュレータのUIで利用するポート番号を聞かれているので、ご自身の環境で使っていないポート番号を入力してEnter

? Would you like to download the emulators now? (y/N) y
エミュレータに必要なもの今すぐダウンロードするか聞かれているので、「y」を入力してEnter
初期化が完了したので、プロジェクトルートに以下ファイル/ディレクトリが作成されていることを確認しましょう。
| ファイル/ディレクトリ名 | 説明 |
|---|---|
| .github | GitHubに関する各種設定ファイルが格納されているディレクトリ。今回はGitHub Actionsに関する設定ファイルが入っている。 |
| .firebaserc | Firebaseのプロジェクト関する設定。どのプロジェクトを向いているかが記載されている。 |
| .firebase.json | firebaseの基本設定。各種設定ファイルの定義や、エミュレータのポート番号等が記載されている |
| .firestore.indexes.json | Firestoreのインデックスを作成した際に、exportすると記載される |
| firestore.rules | Firestoreのセキュリティルールが記載されている |
| storage.rules | CloudStorageのセキュリティルールが記載されている |
vitest
概要

続いてunit testツールであるvitestをインストールします。
手順
vitestを開発用パッケージとしてインストール。
$ npm install -D vitest
vite.config.tsにvitestの型参照を追加します。
+ /// <reference types="vitest" />
import { defineConfig } from 'vite'
import react from '@vitejs/plugin-react'

// https://vitejs.dev/config/
export default defineConfig({
  plugins: [react()]
})
動作確認のために、仮のテストファイルを作成します。
testsディレクトリを作成し、その中にsample.test.tsというファイルを作成してください。
import { describe, expect, it } from "vitest";

describe("sample test", () => {
  it("sample", () => {
    expect(true).toBe(true);
  });
});
仮のテストファイルを追加したら、package.jsonのscriptsにテストコマンドを登録します。
{
  "name": "sample-app",
  "private": true,
  "version": "0.0.0",
  "type": "module",
  "scripts": {
    "dev": "vite",
    "build": "tsc && vite build",
    "preview": "vite preview",
    "storybook": "start-storybook -p 6006",
    "build-storybook": "build-storybook",
    "lint": "eslint src"
+   "test": "vitest run"
  },
...
コマンドを登録したらテストの動作確認をします。
$ npm test

> sample-app@0.0.0 test
> vitest run


 RUN  v0.22.1 /Users/user/src/sample-app

 ✓ tests/sample.test.ts (1)

Test Files  1 passed (1)
     Tests  1 passed (1)
  Start at  11:05:09
  Duration  1.13s (transform 472ms, setup 0ms, collect 22ms, tests 5ms)
このようなログが表示されれば動作確認は完了です。
CI/CDの設定修正
概要

firebase-toolsインストール時に自動で作られたGitHub Actionsの設定ファイルを書き換えます。
自動で作られた設定はbuild→deployまでが記述されているので、lintとtestを追加します。
手順
ファイル名の変更および不要なファイル削除
後ほど開発環境も作成するので、わかりやすいようにfirebase-hosting-merge.ymlをdeploy-production.ymlというファイル名に変更しましょう。(ファイル名は何でも良いです)
また、firebase-tools設定時に自動で作られたもう1つの設定ファイルfirebase-hosting-merge.ymlは今回は不要なので削除します。
lintおよびtestコマンド追加
deploy-production.ymlを開いて、次のように書き換えます。
- # This file was auto-generated by the Firebase CLI
- # https://github.com/firebase/firebase-tools

name: Deploy to Firebase Hosting on merge
'on':
  push:
    branches:
      - main
jobs:
  build_and_deploy:
    runs-on: ubuntu-latest
+   steps:
+     - uses: actions/checkout@v3
+     - name: Use Node.js 16
+       uses: actions/setup-node@v3
+       with:
+         node-version: 16
+     - name: lint and test
+       run: |
+         npm install
+         npm run lint
+         npm run test
-     - uses: actions/checkout@v2
      - run: npm run build
      - uses: FirebaseExtended/action-hosting-deploy@v0
        with:
          repoToken: '${{ secrets.GITHUB_TOKEN }}'
          firebaseServiceAccount: '${{ secrets.FIREBASE_SERVICE_ACCOUNT_SAMPLE_APP_12BF5 }}'
          channelId: live
          projectId: sample-app-12bf5
これでmainブランチにpushしたらlint→test→biuld→deployを自動で行ってくれるようになります。
仮にテストが失敗した場合はdeployされないので、テストを書いていれば安心して開発ができます。
git、GitHub設定
gitを使えるようにし、作成したGitHubリポジトリと接続します。
# gitの有効化
$ git init
# 作成したリポジトリと接続します
$ git remote add origin https://github.com/user/sample-app.git
$ git remote -v
origin	https://github.com/user/sample-app.git (fetch)
origin	https://github.com/user/sample-app.git (push)
# 作成したリポジトリからREADME.mdを取得
$ git pull origin main
# ブランチ名を変更してGitHubとあわせる
$ git branch -m main
動作確認
GitHubとの接続が完了したら動作確認も兼ねて、これまで作成したファイル一式をpushします。
$ git add .
$ git commit -m "first commit"
$ git push origin main
pushした後にGitHubのActionsタブを確認すると、先程記述したワークフローが動いているのが確認できます。

こちらの画像のように緑のチェックマークがついたらワークフローの全てのステップが完了したことを表すので、無事にデプロイされているか確認しましょう。
Firebaseコンソールを開き、Hostingを選択します。

上記画像のURLをクリックすると、最初に確認した初期画面が表示され、デプロイされていることが確認できます。

Firestoreのセキュリティルールのテスト
概要
FirestoreのセキュリティルールのユニットテストがかけるパッケージがFirebaseの公式から出ているので、そちらをインストールしていきます。
手順
@firebase/rules-unit-testing install
まずはパッケージをインストールします。
$ npm install -D @firebase/rules-unit-testing
テストコマンド登録
次に、Firestore ruleのテストを走らせるためのコマンドを登録します。
Firestoreのルールをテストするにはエミュレータを起動して、実際の流れをシミュレーションしながらテストを実行する必要があるため、firestoreのエミュレータを起動した後にテストコマンドを走らせます。
{
  "name": "sample-app",
  "private": true,
  "version": "0.0.0",
  "type": "module",
  "scripts": {
    "dev": "vite",
    "build": "tsc && vite build",
    "preview": "vite preview",
    "storybook": "start-storybook -p 6006",
    "build-storybook": "build-storybook",
    "lint": "eslint src",
-   "test": "vitest run",
+   "test": "firebase emulators:exec --only firestore 'vitest run'"
  },
登録したコマンドが正しく動作するか確認します。
$ npm test

> sample-app@0.0.0 test
> firebase emulators:exec --only firestore 'vitest run'

i  emulators: Starting emulators: firestore
i  firestore: Firestore Emulator logging to firestore-debug.log
i  Running script: vitest run

 RUN  v0.22.1 /Users/user/src/sample-app

 ✓ tests/sample.test.ts (1)

Test Files  1 passed (1)
     Tests  1 passed (1)
  Start at  17:48:47
  Duration  1.12s (transform 492ms, setup 0ms, collect 22ms, tests 2ms)

✔  Script exited successfully (code 0)
i  emulators: Shutting down emulators.
i  firestore: Stopping Firestore Emulator
i  hub: Stopping emulator hub
エミュレータが起動して終了したログが確認できればOKです。
以上で必要なパッケージの導入は完了です。
開発環境を整える
概要

これまで一つの環境での開発環境を整えてきましたが、しっかりと開発していく場合は少なくとも本番環境と開発環境の二つ(以上)の環境は必要ですので、次は開発環境を作成していきます。
手順
開発環境用のFirebaseプロジェクトを作成
作成手順は前半に載せていますので、ここでは省略します。
作成するプロジェクト名は開発環境とわかるように「sample-app-dev」とします。
開発環境用envファイルの作成
開発環境のFirebaseのプロジェクトを読み込むために、開発環境用の環境変数を記載する.env.developmentを作成します。
VITE_API_KEY=開発環境のapiKeyの値
VITE_AUTH_DOMAIN=開発環境のauthDomainの値
VITE_PROJECT_ID=開発環境のprojectIdの値
VITE_STORAGE_BUCKET=開発環境のstorageBucketの値
VITE_MESSAGING_SENDER_ID=開発環境のmessagingSenderIdの値
VITE_APP_ID=開発環境のappIdの値
コマンドの修正
ローカルサーバの起動コマンドや、ビルドコマンドを修正して本番、開発環境で分けられるようにします。
--mode XXXと.env.XXXが対応するように登録します。
{
  "name": "sample-app",
  "private": true,
  "version": "0.0.0",
  "type": "module",
  "scripts": {
-   "dev": "vite",
-   "build": "tsc && vite build",
+   "dev": "vite --mode development",
+   "prod": "vite --mode production",
+   "build:prod": "tsc && vite build --mode production",
+   "build:dev": "tsc && vite build --mode development",
    "preview": "vite preview",
    "storybook": "start-storybook -p 6006",
    "build-storybook": "build-storybook",
    "lint": "eslint src",
    "test": "vitest run",
    "test:rule": "firebase emulators:exec --only firestore 'vitest run'"
  },
これで環境別にローカルサーバの起動やビルドができるようになりました。
動作確認をする前に、どちらの環境で動いているのかわかりやすくするためにApp.tsxを以下のように修正します。
import { useState } from "react";
import reactLogo from "./assets/react.svg";
import "./App.css";

function App() {
  const [count, setCount] = useState(0);

  return (
    <div className="App">
      <div>
        <a href="https://vitejs.dev" target="_blank" rel="noopener noreferrer">
          <img src="/vite.svg" className="logo" alt="Vite logo" />
        </a>
        <a href="https://reactjs.org" target="_blank" rel="noopener noreferrer">
          <img src={reactLogo} className="logo react" alt="React logo" />
        </a>
      </div>
-     <h1>Vite + React</h1>
+     <h1>Vite + React ({import.meta.env.MODE})</h1>
      <div className="card">
        <button onClick={() => setCount((count) => count + 1)}>
          count is {count}
        </button>
        <p>
          Edit <code>src/App.tsx</code> and save to test HMR
        </p>
      </div>
      <p className="read-the-docs">
        Click on the Vite and React logos to learn more
      </p>
    </div>
  );
}

export default App;
これでnpm run devとnpm run prodを実行してそれぞれ画面を確認します。
$ npm run dev
# 添付画像1枚目が表示される

$ npm run prod
# 添付画像2枚目が表示される


これで環境別に起動できるようになりました。
CI/CDの修正
続いて、developブランチにpushされたら開発環境(sample-app-dev)にデプロイされ、mainブランチにpushされたら本番環境(sample-app)にデプロイされるように、CI/CDの設定を修正します。
本番環境の設定を修正
まずは本番環境へのデプロイ設定が書かれているdeploy-production.ymlのビルドコマンドを修正します。
name: Deploy to Firebase Hosting on merge
'on':
  push:
    branches:
      - main
jobs:
  build_and_deploy:
    runs-on: ubuntu-latest
    steps:
      - uses: actions/checkout@v3
      - name: Use Node.js 16
        uses: actions/setup-node@v3
        with:
          node-version: 16
      - name: lint and test
        run: |
          npm install
          npm run lint
          npm run test
-     - run: npm run build
+     - run: npm run build:prod
      - uses: FirebaseExtended/action-hosting-deploy@v0
        with:
          repoToken: '${{ secrets.GITHUB_TOKEN }}'
          firebaseServiceAccount: '${{ secrets.FIREBASE_SERVICE_ACCOUNT_SAMPLE_APP_12BF5 }}'
          channelId: live
          projectId: sample-app-12bf5
開発環境のserviceAccountを発行
本番環境ではfirebase initでトークンを自動発行→登録まで行ってくれましたが、dev環境のトークンも同様の操作が必要なので、発行します。
ちょっと楽な方法
手動でトークンを発行するやり方が正しいやり方ですが、ここではちょっと楽をするやり方で別のディレクトリで再度initをします。
今回はトークンを発行→登録さえできれば良いので、リポジトリ情報やCI/CDの設定以外は適当な値で構いません。
$ mkdir sample-app-dev
$ cd sample-app-dev
$ firebase init hosting

? Please select an option: Use an existing project
? Select a default Firebase project for this directory: sample-app-dev-eeeb9 (sample-app-dev)
? What do you want to use as your public directory? (public)
? Configure as a single-page app (rewrite all urls to /index.html)? No
? Set up automatic builds and deploys with GitHub? Yes
? For which GitHub repository would you like to set up a GitHub workflow? (form
at: user/repository) user/sample-app
? Set up the workflow to run a build script before every deploy? (y/N) Yes
? What script should be run before every deploy? (npm ci && npm run build) Enter
? Set up automatic deployment to your site's live channel when a PR is merged? Yes
? What is the name of the GitHub branch associated with your site's live channel? (main) develop
GitHubのSecretsにトークンが登録されたことを確認しましょう。
トークンを手動で発行するやり方
firebase initで行ったトークンの登録作業を手動で行う方法です。
※firebase initでトークンを登録できた方はこの作業は不要です。
GCPのサービスアカウントにアクセスし、今回作成したdev環境のプロジェクトを選択します。

「サービスアカウントを作成」をクリック

わかりやすい名前とIDを入力して「作成して続行」をクリック

以下ロールを追加して「続行」をクリック→「完了」をクリック
-
Firebase Authentication 管理者(Auth 承認済みドメインにプレビュー URL を追加するために必要)
- roles/firebaseauth.admin
-
Firebase Hosting 管理者(プレビュー チャネルのデプロイに必要)
- roles/firebasehosting.admin
-
Cloud Run 閲覧者( Cloud Run または Cloud Functions への Hosting リライトを使用するプロジェクトに必要)
- roles/run.viewer
-
API キー 閲覧者(CLI デプロイに必要)
- roles/serviceusage.apiKeysViewer

- roles/serviceusage.apiKeysViewer
作成したIDを選択し、「キー」タブをクリック→「鍵を追加」→「新しい鍵を作成」をクリック

「JSON」を選択して「作成」をクリック

jsonファイルがダウンロードされるので、jsonファイルの中身をすべてbase64エンコードし、コピーします。
※base64エンコードはデコードができるので、エンコード結果を公開しないようにしましょう。
$ cd ~/Downloads
$ cat sample-app-dev-eeeb9-31754c6176ec.json | base64
ewogICJ0eXBlIjogInNlcnZpY2VfYWNjb3VudCIsCiAgInByb2plY3RfaWQiOiAic2FtcGxlLWFwc
(省略)
YW1wbGUtYXBwLWRldi1lZWViOS5pYW0uZ3NlcnZpY2VhY2NvdW50LmNvbSIKfQo=

# (Macの場合) base64エンコードした結果をクリップボードにコピー
$ cat sample-app-dev-eeeb9-31754c6176ec.json | base64 | pbcopy
GitHubのSecretsにトークンを登録
GitHubの「Settings」→「Secrets」→「Actions」→「New repository secret」をクリック

NameにFIREBASE_SERVICE_ACCOUNT_プロジェクトIDと入力し、Valueに先程base64エンコードした結果を貼り付け、「Add secret」をクリック。

開発環境の設定を追加
次に、開発環境へデプロイするための設定を追加します。
deploy-production.ymlをコピーしてdeploy-development.ymlを同じ階層に作成し、以下のように書き換えます。
name: Deploy to Firebase Hosting on merge
'on':
  push:
    branches:
-     - main
+     - develop
jobs:
  build_and_deploy:
    runs-on: ubuntu-latest
    steps:
      - uses: actions/checkout@v3
      - name: Use Node.js 16
        uses: actions/setup-node@v3
        with:
          node-version: 16
      - name: lint and test
        run: |
          npm install
          npm run lint
          npm run test
-     - run: npm run build:prod
+     - run: npm run build:dev
      - uses: FirebaseExtended/action-hosting-deploy@v0
        with:
          repoToken: '${{ secrets.GITHUB_TOKEN }}'
-         firebaseServiceAccount: '${{ secrets.FIREBASE_SERVICE_ACCOUNT_SAMPLE_APP_12BF5 }}'
+         firebaseServiceAccount: '${{ secrets.FIREBASE_SERVICE_ACCOUNT_SAMPLE_APP_DEV_EEEB9 }}'
          channelId: live
-         projectId: sample-app-12bf5
+         projectId: sample-app-dev-eeeb9
GitHubに反映
ファイルを作成したら一度全ての変更をmainブランチに反映させます。
$ git add .
$ git commit -m "Add development setting"
$ git push origin main
ここで本番環境の設定が正しく変更されているか確認するために、一度GitHubのActionsタブを確認します。
GitHub Actionsのジョブが完了したら念の為本番環境のURLにアクセスして、先程App.tsxに追加した実行環境の文字列が表示されているか確認すると良いと思います。
次に、developブランチを作成し、GitHub上のdevleopブランチに対してpushします。
※存在しないブランチがpushされると新たにブランチが作成されます。
$ git checkout -b develop
$ git push origin develop
再びGitHubのActionsタブを確認すると、開発環境へのデプロイジョブが動いているのが確認できます。
ジョブが完了したら開発環境のFirebaseコンソールを開き、Hostingページに行ってデプロイされていることを確認しましょう。
これで、developブランチにpushしたら開発環境へデプロイされ、mainブランチにpushしたら本番環境へデプロイされる設定が完了しました。
Discussion
有用な記事をありがとうございます。
.env.develop、.env.productionはGithubへpushしないのでDeployが成功しても
FirebaseError: Firebase: Error (auth/invalid-api-key).
になります。
調べると、action内でgithub secretからtouchコマンドにて.envを作成する方法しか見つかりません。
他に方法はないのでしょうか?
記事をご覧いただきありがとうございます!
恐らくこの記事の範囲外の質問&状況が曖昧なので適切な回答になるかわかりませんが、以下ご参考までに。
まず、前提としてFirebase SDKを利用するにはAPI Key等を含めて初期化する必要があるため、アプリケーションコードに含める必要があります。
上記の都合上、FirebaseのAPI Keyは公開される前提のものなので、GitHubのシークレットに入れずに
.envをpushしてしまって良いと思います。ただし、この記事のようなSPAでFirebase Client SDKを利用する場合、セキュリティルールを適切に設定していないと、公開されたウェブサイトからAPI Keyを取得して別プロジェクトをたててFirestoreを操作できてしまうので、必ずセキュリティルールを設定してから公開することをおすすめします。
セキュリティルールの必要性については、こちらの記事が参考になると思います。
また、FirebaseのAPI Key等の他に、別サービスのシークレットキーを
.envに含めている場合は、そちらの記述は.envからは取り除き、CloudFunctions等のバックエンドを利用して処理する必要があります。余談ですが、別のホスティングサービスでは環境変数を設定できるサービスもあります。
返信いただき、ありがとうございます。
記事の範囲外の質問で申し訳ありません。
Github上で、development, productionの環境を作成し、それぞれに.envの変数を登録しました。
以下のWorkflowにてdevelopブランチにpushすると自動でリリースできました。
再度になりますが、有用な記事をありがとうございます。
name: Deploy to Firebase DevHosting on merge
'on':
push:
branches:
- develop
jobs:
build_and_deploy:
runs-on: ubuntu-latest
environment: development
steps:
- uses: actions/checkout@v3
- name: Use Node.js 18
uses: actions/setup-node@v3
with:
node-version: '18'
- name: lint and test
run: |
touch .env.development
echo VITE_API_KEY='${{ vars.VITE_API_KEY }}' >> .env.development
echo VITE_AUTH_DOMAIN='${{ vars.VITE_AUTH_DOMAIN }}' >> .env.development
echo VITE_DATABASE_URL='${{ vars.VITE_DATABASE_URL }}' >> .env.development
echo VITE_PROJECT_ID='${{ vars.VITE_PROJECT_ID }}' >> .env.development
echo VITE_STORAGE_BUCKET='${{ vars.VITE_STORAGE_BUCKET }}' >> .env.development
echo VITE_MESSAGING_SENDER_ID='${{ vars.VITE_MESSAGEING_SENDER_ID }}' >> .env.development
echo VITE_APP_ID='${{ vars.VITE_APP_ID }}' >> .env.development
echo VITE_MEASUREMENT_ID='${{ vars.VITE_MEASRUREMENT_ID }}' >> .env.development
npm install
npm run lint
- run: npm run build:dev
- uses: FirebaseExtended/action-hosting-deploy@v0
with:
repoToken: '${{ secrets.GITHUB_TOKEN }}'
firebaseServiceAccount: '${{ secrets.FIREBASE_SERVICE_ACCOUNT_XXXXXX_DEV }}'
channelId: live
projectId: xxxxxxxxxx