Jotai入門がまだの方はこちらからぜひ!
はじめに
デバッグ方法なんてconsole.log()で十分、なんて方もいらっしゃるかも?ですが、JotaiはReact Dev Tools と Redux Dev toolsが使えます。なんと、まさか?
簡単なexampleで確かめてみます。
参考:
Debug labels
と、そのまえに前情報としてDebug labelについてお話します。
JotaiはRecoilのようにKey文字列を指定せずに使用しますが、実はatomごとにラベルを持っています。これは自動的に割り当てられた数字と共に持たされており、1:<no debugLabel>という様になっています。
デフォルトではラベル名が無いのでこれに名前をつけることが出来ます。
const countAtom = atom(0)
// countAtom's debugLabel by default is 'atom1'
if (process.env.NODE_ENV !== 'production') {
  countAtom.debugLabel = 'count'
  // debugLabel is 'count' now
}
上記のようにatomのdebugLabelプロパティへ指定します。
なるほど。アプリ内のatom100個にいちいち命名したくないですね。とりあえず進みましょう。
React Dev Tools
以下のようにdebugLabelを付与してみます。(production判定は省略)
(こちらを使うにはProvider-lessモードでは使えないようです.参照)
const textAtom = atom('hello')
textAtom.debugLabel = 'textAtom'
const textLenAtom = atom((get) => get(textAtom).length)
textAtom.debugLabel = 'textLenAtom'
const uppercaseAtom = atom((get) => get(textAtom).toUpperCase())
uppercaseAtom.debugLabel = 'uppercaseAtom'
React Dev Toolsで確認してみると・・・
いいですね、ちゃんとステートの中身が見えてます。

Redux Dev tools
さて、お次は"""Redux""" Dev Toolsです。Redux!!!???
確認したいatomを使うコンポーネント内でuseAtomDevtools()に渡す必要があるみたいです。
import { atom, useAtom } from 'jotai'
import { useAtomDevtools } from 'jotai/devtools'

const textAtom = atom('hello')
textAtom.debugLabel = 'textAtom'

const Input = () => {
  useAtomDevtools(textAtom)
  const [text, setText] = useAtom(textAtom)
  return <input value={text} onChange={(e) => setText(e.target.value)} />
}
👻「ジョータイウソツカナイネ」
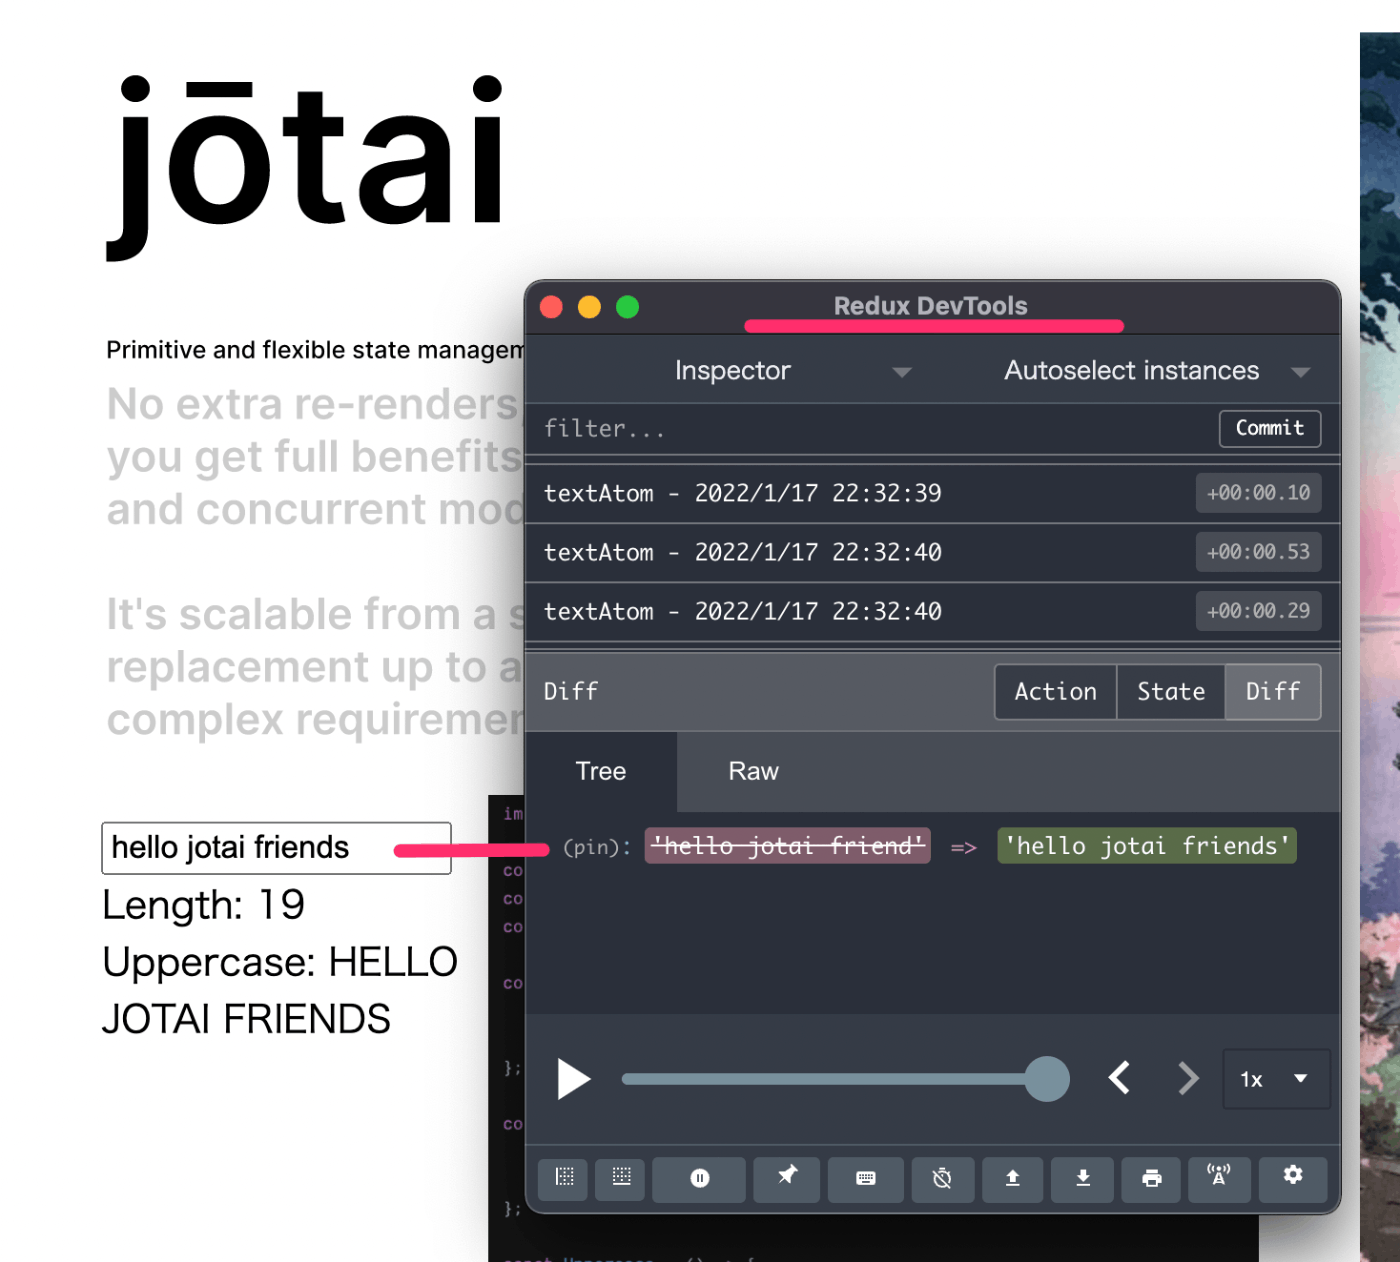
疑ってすみませんでした!
(こちらはProvider-lessでも動いちゃいます)
(欲を言えばコンポーネント内でいちいちuseAtomDevtools()したくないなぁ👀)
Redux Dev ToolsのTime travel,Pause,Dispatchが使える
読者の方にはそもそもRedux Dev Tools自体をご存じない方がいらっしゃるかもしれません。このツール、ステートを過去にさかのぼって見たりツールから値を更新できたりしちゃいます。これぞまさにDebugger、ですね。こんな素敵な機能をJotaiでも使えるなんて頭おかしいです。(褒め言葉)
useAtomDevtools()を1回で済ませる裏技(ではないけど嬉しい機能)
先程はuseAtomDevtools()を使いましたが、それ相当で1度書けばOKなuseAtomsDevtools()というものが提供されています。sが付いて複数形になってますね。まってました!
import { useAtomsDevtools } from 'jotai/devtools'

const textAtom = atom('hello')
textAtom.debugLabel = 'textAtom'
const textLenAtom = atom((get) => get(textAtom).length)
textLenAtom.debugLabel = 'textLenAtom'
const uppercaseAtom = atom((get) => get(textAtom).toUpperCase())
uppercaseAtom.debugLabel = 'textLenAtom'

...(省略)

// ツリーをこれでラップしてあげてそこで1回だけuseAtomsDevtools()する
const AtomsDevtools = ({ children }) => {
  useAtomsDevtools('demo')
  return children
}

const App = () => (
  <AtomsDevtools>
    <>
      <Input />
      <CharCount />
      <Uppercase />
    </>
  </AtomsDevtools>
)

export default App
👏
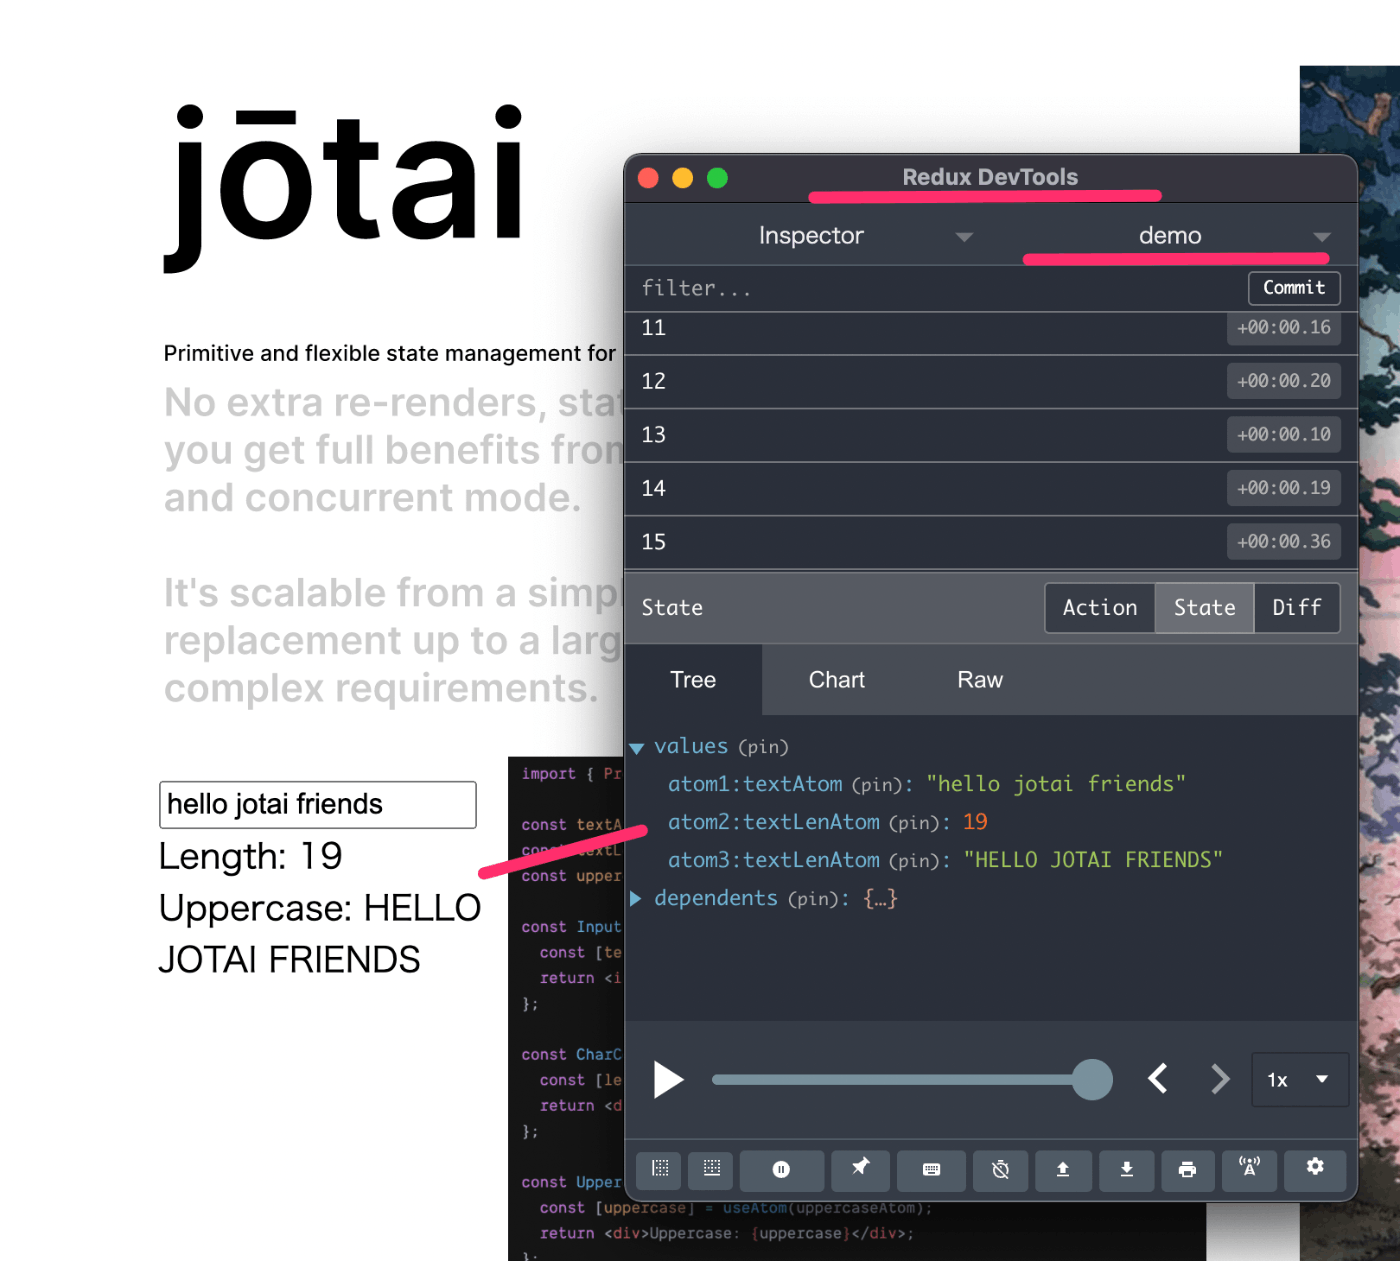
素晴らしいですね。コンポーネントごとにuseAtomDevtools()を追加する必要がなくなりました。
BabelプラグインでdebugLabel命名を省略
Jotaiから、Babelプラグインのplugin-debug-labelが提供されています。
あなたのアプリがBabelを使っているならば、これを設定しておくとdebugLabel命名を省略することが出来ます。
これが
export const countAtom = atom(0);
以下のようにdebugLabelを命名するコードを追加してくれます。
export const countAtom = atom(0);
countAtom.debugLabel = "countAtom";
Next.jsはBabelをサポートしているので、該当する方は設定しておくと良さそうですね。
まとめ
アプリケーション規模が大きくなるとデバッグツールの役立つ場面が増えてくるかと思います。
また、ツールがサポートされていることはJotaiを使う安心材料になるのではないでしょうか。useAtomDevtools()は手軽に設定できるのでぜひ使っていきたいですね。
Jotaiの紹介特集について
この記事はJotai FriendsによるJotai紹介特集記事の1つです。記事一覧はこちらからどうぞ。
Jotai Friendsとは
いちJotaiファンとして、エンジニアの皆さんにもっとJotaiを知ってもらって使ってもらいたい、そんな思いから立ち上げたのがJotai Friendsです。
現在まだまだ準備中ですが今後ともよろしくお願いします!
(ご興味持っていただけた方は是非jotaifriends.devにてEメールアドレスのご登録をお願いします🙏)

Jotai Friends のテックブログです。 React状態管理ライブラリJotai(jotai.org)を新たな選択肢に。 エンジニアの皆さんが安心してJotaiを採用できるように支援します。 Powered by twitter.com/t6adev
Discussion