Gatsbyでリッチなリンクを作る
ブログに整理した
昔から定期的に調べてみてもデファクトなやり方は見いだせず、先送りにしていた機能。独自コンポーネントでよしなにやるしかないのかなと思い試してみる。
きっかけ:
tsxだと
import rehypeReact from "rehype-react";

const renderAst = new rehypeReact({
  createElement: React.createElement,
  components: { RichLink: RichLink },
}).Compiler;
この部分に、
'new' キーワードを指定して呼び出せるのは void 関数のみです。
ってエラー出るな。
公式見ると、unifiedで使っていくほうが書いてあるけど、それでもまだ上手く行かない
const file = await unified()
          .use(rehypeParse, {fragment: true})
          .use(rehypeReact, production)
          .process(text)
どっかの記事とかではhtmlAstを使っていたけど、htmlをparseして変換するというのはとりあえず動いた
import * as prod from "react/jsx-runtime";

// rehypeReactの設定
const options = {
  // @ts-expect-error: the react types are missing.
  Fragment: prod.Fragment,
  // @ts-expect-error: the react types are missing.
  jsx: prod.jsx,
  // @ts-expect-error: the react types are missing.
  jsxs: prod.jsxs,
};
  const postContent = unified()
    .use(rehypeParse, { fragment: true })
    .use(rehypeReact, options)
    .processSync(post.html).result;
dangerouslySetInnerHTMLする代わりに変換したものをrenderできたっぽい
見た感じ、内容はデグレせず、変わらず表示できている様子を感じる
-                <PostBody
-                  dangerouslySetInnerHTML={{ __html: post.html }}
-                  itemProp="articleBody"
-                  className="post-body"
-                />
+                <PostBody itemProp="articleBody" className="post-body">
+                  {postContent}
+                </PostBody>
設定にcomponentsを足したら置き換えがうまくいった
const options = {
  // @ts-expect-error: the react types are missing.
  Fragment: prod.Fragment,
  // @ts-expect-error: the react types are missing.
  jsx: prod.jsx,
  // @ts-expect-error: the react types are missing.
  jsxs: prod.jsxs,
  components: {
    "rich-link": RichLink,
  },
};
後は受け取ったURLをもとにそれっぽい見た目を表示させればいける気がする
unifiedの方で何故か型エラーが起きるようになったのでそのあたりは適当に握りつぶすなどして処理する(まぁそんな重要なところではないし目をつむる)
markdownに
<rich-link>https://google.com</rich-link>
と書くと、代わりに次のコンポーネントで変換される。
import React from "react";
import { FC } from "react";

type Props = {
  children: string;
};
export const RichLink: FC<Props> = ({ children }) => {
  const url = children;
  return <p>rich link: {url}</p>;
};
そして、ブログには
rich link: https://google.com
と表示される
gatsby-node.jsでどうにかしないとビルド時にデータ取得できないな
ビルド時に混ぜるとめんどくさいからローカルで別のスクリプトとして探索することにした
戦略としては、
- ローカルのマークダウンファイルを全部調べて、
<rich-link>https://google.com</rich-link>のようになっている行をすべて抽出して該当URLを集める - そのURLのOGPデータを取得してjsonにする
- それを静的ファイルとして配信する
- フロントでは実行時に、そのファイルに必要なデータがあればリッチな見た目を展開する
jsonを配信しさえすれば、別にビルド時に変換しきらなくてもいいのでは、ということでこの方針を一旦進める
それっぽいのできた
const fs = require("fs");
const axios = require("axios");
const cheerio = require("cheerio");

const listFiles = (dir) =>
  fs
    .readdirSync(dir, { withFileTypes: true })
    .flatMap((dirent) =>
      dirent.isFile()
        ? [`${dir}/${dirent.name}`]
        : listFiles(`${dir}/${dirent.name}`)
    );

const extractUrls = (fileTexts) => {
  const allUrls = fileTexts.flatMap((fileText) => {
    const lines = fileText.split("\n");
    const urls = lines
      .filter((line) => line.includes("<rich-link>"))
      .map((line) => line.replace(/<rich-link>(.*)<\/rich-link>/, "$1"));
    return urls;
  });
  const uniqueUrls = Array.from(new Set(allUrls));
  return uniqueUrls;
};

const getBlogTexts = (blogPosts) =>
  blogPosts
    .map((path) => {
      const file = fs.readFileSync(path, "utf8");
      return file;
    })
    .filter((text) => text !== "");

const fetchOgpData = async (url) => {
  try {
    const res = await axios.get(url); // axiosを使ってリクエスト
    const $ = cheerio.load(res.data); // 結果をcheerioでパース

    const getMetaContent = (property, name) => {
      return (
        $(`meta[property='${property}']`).attr("content") ||
        $(`meta[name='${name}']`).attr("content") ||
        ""
      );
    };

    const data = {
      originalUrl: url,
      url: getMetaContent("og:url", "") || res.request.res.responseUrl || url,
      domain: new URL(url).hostname,
      title: getMetaContent("og:title", "") || $("title").text() || "",
      description: getMetaContent("og:description", "description") || "",
      image: getMetaContent("og:image", "image") || "",
    };

    return data;
  } catch (e) {
    console.log("failed to fetch ogp data", url);
    return null;
  }
};

const writeUrlsToFile = (urlData) => {
  fs.writeFileSync("./static/ogp-data.json", JSON.stringify(urlData));
};

const main = async () => {
  const blogPosts = [
    ...listFiles("content/blog"),
    ...listFiles("content/hatena"),
  ];
  console.log("start: get blog texts");
  const fileTexts = getBlogTexts(blogPosts);
  console.log("end: get blog texts");
  console.log("start: extract urls", "files: " + fileTexts.length);
  const urls = extractUrls(fileTexts);
  console.log("end: extract urls", "urls: " + urls.length);
  console.log("start: fetch ogp data");
  const dataArray = (
    await Promise.all(urls.map((url) => fetchOgpData(url)))
  ).filter((d) => d !== null);
  console.log("end: fetch ogp data");
  console.log("start: convert to json");
  const data = dataArray.reduce((prev, cur) => {
    prev[cur.originalUrl] = cur;
    return prev;
  }, {});
  console.log("end: convert to json");
  writeUrlsToFile(data);
};

main();
こういうjsonができる
{
  "https://google.com": {
    "originalUrl": "https://google.com",
    "url": "https://www.google.com/",
    "domain": "www.google.com",
    "title": "Google",
    "description": "世界中のあらゆる情報を検索するためのツールを提供しています。さまざまな検索機能を活用して、お探しの情報を見つけてください。",
    "image": ""
  },
  "https://zenn.dev/tawachan/scraps/9793fc5abda9ed": {
    "originalUrl": "https://zenn.dev/tawachan/scraps/9793fc5abda9ed",
    "url": "https://zenn.dev/tawachan/scraps/9793fc5abda9ed",
    "domain": "zenn.dev",
    "title": "Gatsbyでリッチなリンクを作る",
    "description": "",
    "image": "https://lh3.googleusercontent.com/a-/AOh14GisdUlfCEqcCqW7U9prZPlmVmjiGUuooAZzMOylW30=s250-c"
  },
  "https://amzn.to/3sWIwf5": {
    "originalUrl": "https://amzn.to/3sWIwf5",
    "url": "https://www.amazon.co.jp/FoldStand-%E3%82%BF%E3%83%96%E3%83%AC%E3%83%83%E3%83%88%E3%82%B9%E3%82%BF%E3%83%B3%E3%83%89-%E3%83%91%E3%83%83%E3%83%89%E3%82%B9%E3%82%BF%E3%83%B3%E3%83%89-%E7%B9%B0%E3%82%8A%E8%BF%94%E3%81%97%E4%BD%BF%E3%81%88%E3%82%8B-9%EF%BD%9E14%E3%82%A4%E3%83%B3%E3%83%81%E5%AF%BE%E5%BF%9C/dp/B08T5XR3T1?__mk_ja_JP=%E3%82%AB%E3%82%BF%E3%82%AB%E3%83%8A&crid=1CPH28EI88REY&keywords=foldstand%2Btablet%2Bmini&qid=1694950865&s=electronics&sprefix=foldstand%2Btablet%2Bmini,electronics,175&sr=1-3&th=1&linkCode=sl1&tag=pxbub0309-22&linkId=46a0c458f2e8e890142ba81a6e27f9c6&language=ja_JP&ref_=as_li_ss_tl",
    "domain": "www.amazon.co.jp",
    "title": "Amazon | FoldStand Tablet mini タブレットスタンド 超薄型 縦置き 横置き 2Way 貼り付け パッドスタンド 落下防止 繰り返し使える 7~9インチ対応 グレー | DesignNest (デザインネスト) | スタンド 通販",
    "description": "FoldStand Tablet mini タブレットスタンド 超薄型 縦置き 横置き 2Way 貼り付け パッドスタンド 落下防止 繰り返し使える 7~9インチ対応 グレーがスタンドストアでいつでもお買い得。当日お急ぎ便対象商品は、当日お届け可能です。アマゾン配送商品は、通常配送無料(一部除く)。",
    "image": ""
  },
  "https://blog.tawa.me/entry/nextjs-basic-auth": {
    "originalUrl": "https://blog.tawa.me/entry/nextjs-basic-auth",
    "url": "https://blog.tawa.me/entry/nextjs-basic-auth",
    "domain": "blog.tawa.me",
    "title": "Next.jsでベーシック認証を実装する方法 | 飽き性の頭の中",
    "description": "Next.jsアプリケーションにベーシック認証を実装する方法を紹介します。middleware.tsファイルに認証処理を追加し、環境変数を使用して認証の有無を切り替えられるように設定します。認証が通らない場合は、/api/authにリクエストが送信され、そこで認証を行います。",
    "image": "https://blog.tawa.me/static/f5de683591ab30fb7f7e0772891ba365/65dbf/2023-05-08-22-25-55.png"
  }
}
すでに取得済みのは飛ばせるようにしたい
頭でjson取得して、見つからなかったURLだけデータ取得するようにした
const getExistingData = () => {
  const existingData = JSON.parse(
    fs.readFileSync("./static/ogp-data.json", "utf8")
  );
  return existingData;
};
const main = async () => {
  const blogPosts = [
    ...listFiles("content/blog"),
    ...listFiles("content/hatena"),
  ];
  console.log("start: get blog texts");
  const fileTexts = getBlogTexts(blogPosts);
  console.log("end: get blog texts");

  console.log("start: extract urls", "files: " + fileTexts.length);
  const urls = extractUrls(fileTexts);
  const existingData = getExistingData();
  const newUrls = urls.filter((url) => !(existingData[url] !== undefined));

  console.log(
    "end: extract urls",
    "urls: " + urls.length,
    "newUrls: " + newUrls.length
  );

  console.log("start: fetch ogp data");
  const dataArray = (
    await Promise.all(urls.map((url) => fetchOgpData(url)))
  ).filter((d) => d !== null);
  console.log("end: fetch ogp data");

  console.log("start: convert to json");
  const data = dataArray.reduce((prev, cur) => {
    prev[cur.originalUrl] = cur;
    return prev;
  }, {});
  console.log("end: convert to json");

  writeUrlsToFile(data);
};

main();
この書き方だとchildrenがReactNodeに変換されてしまってURLを取るのがめんどくさい
<rich-link>https://google.com</rich-link>
attributeとして設定するほうが楽そう
<rich-link href="https://blog.tawa.me/entry/nextjs-basic-auth"></rich-link>
変換するコンポーネント
type Props = {
  href: string;
};
export const RichLink: FC<Props> = ({ href }) => {
  const url = href;
...略
import {
  AspectRatio,
  HStack,
  Heading,
  Image,
  Stack,
  Text,
  Link,
} from "@chakra-ui/react";
import React, { useMemo } from "react";
import { FC } from "react";
import { isValidUrl } from "../helpers/url";
import { useQuery } from "react-query";
import { useWidthLevel } from "../hooks/useWidthLevel";

type Props = {
  href: string;
};
export const RichLink: FC<Props> = ({ href }) => {
  const url = href;
  const isValid = isValidUrl(url);
  const defaultImageLink = "/default-web-thumbnail.jpg";

  const isSameDomain = useMemo(() => {
    if (!isValid) return false;
    const currentDomain = window.location.hostname;
    const urlDomain = new URL(url).hostname;
    return currentDomain === urlDomain;
  }, [isValid]);

  const { isMobile } = useWidthLevel();

  const { data: allData } = useQuery(
    "ogp-data",
    async () => {
      const res = await fetch("/ogp-data.json");
      const data = await res.json();
      return data;
    },
    { enabled: isValid }
  );

  const data = useMemo(() => {
    if (!allData) return null;
    return allData[url];
  }, [allData, url]);

  if (!isValid || !data) {
    return <Text>{url}</Text>;
  }

  return (
    <Link href={url} isExternal={!isSameDomain} textDecor="none !important">
      <HStack
        borderWidth="1px"
        borderRadius={12}
        p={0}
        h="140px"
        overflow="hidden"
      >
        <Stack flex={1} overflow="hidden" p={6} spacing={3}>
          <Heading as="strong" fontSize="md" isTruncated>
            {data.title}
          </Heading>
          <Text fontSize="sm" m="0px !important" isTruncated color="gray.500">
            {data.description}
          </Text>
          <Text fontSize="xs" m="0px !important" color="gray.800" isTruncated>
            {isMobile ? data.domain : data.url}
          </Text>
        </Stack>
        <Stack w={isMobile ? "140px" : "250px"}>
          <AspectRatio ratio={isMobile ? 1 : 16 / 9} w="full" h="full">
            <Image
              src={data.image || defaultImageLink}
              alt={data.title}
              w="full"
              h="full"
              overflow="hidden"
              objectFit="cover"
            />
          </AspectRatio>
        </Stack>
      </HStack>
    </Link>
  );
};
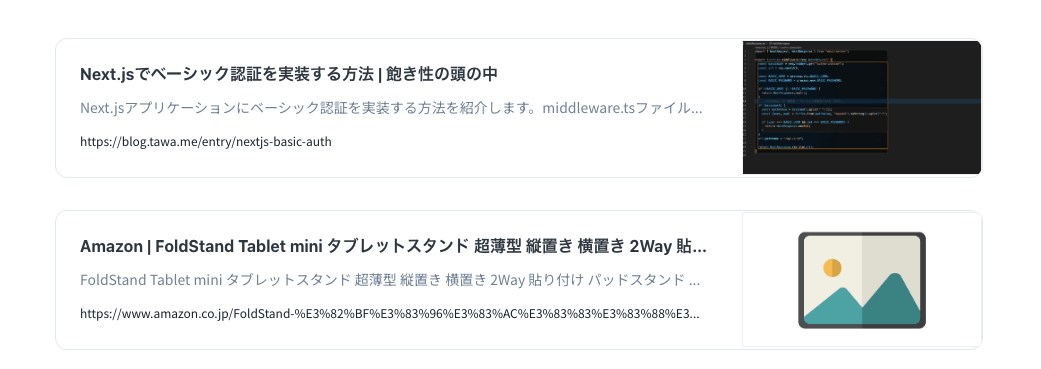
いい感じになったので満足
ローカルではいけるけどビルドできないな
 ERROR #98123  WEBPACK.BUILD-HTML

Generating SSR bundle failed

Reading from "node:path" is not handled by plugins (Unhandled scheme).
Webpack supports "data:" and "file:" URIs by default.
You may need an additional plugin to handle "node:" URIs.

File: node:path


 ERROR #98123  WEBPACK.BUILD-HTML

Generating SSR bundle failed

Reading from "node:process" is not handled by plugins (Unhandled scheme).
Webpack supports "data:" and "file:" URIs by default.
You may need an additional plugin to handle "node:" URIs.

File: node:process


 ERROR #98123  WEBPACK.BUILD-HTML

Generating SSR bundle failed

Reading from "node:url" is not handled by plugins (Unhandled scheme).
Webpack supports "data:" and "file:" URIs by default.
You may need an additional plugin to handle "node:" URIs.

File: node:url

not finished Running gatsby-plugin-sharp.IMAGE_PROCESSING jobs - 9.071s
not finished Building HTML renderer - 2.768s

error Command failed with exit code 1.
info Visit https://yarnpkg.com/en/docs/cli/run for documentation about this command.
これが動かないからとunifiedを使った方法にしていたけど、最新の8系で破壊的変更があったからっぽい
import rehypeReact from "rehype-react";

const renderAst = new rehypeReact({
  createElement: React.createElement,
  components: { RichLink: RichLink },
}).Compiler;
7系にしたら問題なく動いたし、ビルドもできそう
amazonのリンクはサムネが見つからないっぽいので例外的に別の処理を入れた
// amazonの場合は画像を別の方法で取得
if (data.domain === "www.amazon.co.jp") {
  const asin = data.url.match(/([A-Z0-9]{10})/)[0];
  data.image = `https://images-na.ssl-images-amazon.com/images/P/${asin}.09.LZZZZZZZ.jpg`;
}