LINE の Messging API を試してみる
このスクラップについて
このスクラップでは LINE Messaging API を使用してメッセージの送受信を行う方法を試してみる
LINE Developers コンソールへのログイン
LINE Messaging API を使用するには LINE Developers コンソールからチャンネルを作成する必要があるらしい
LINE Developers コンソール にログインするにはアカウントが必要になるので作成する
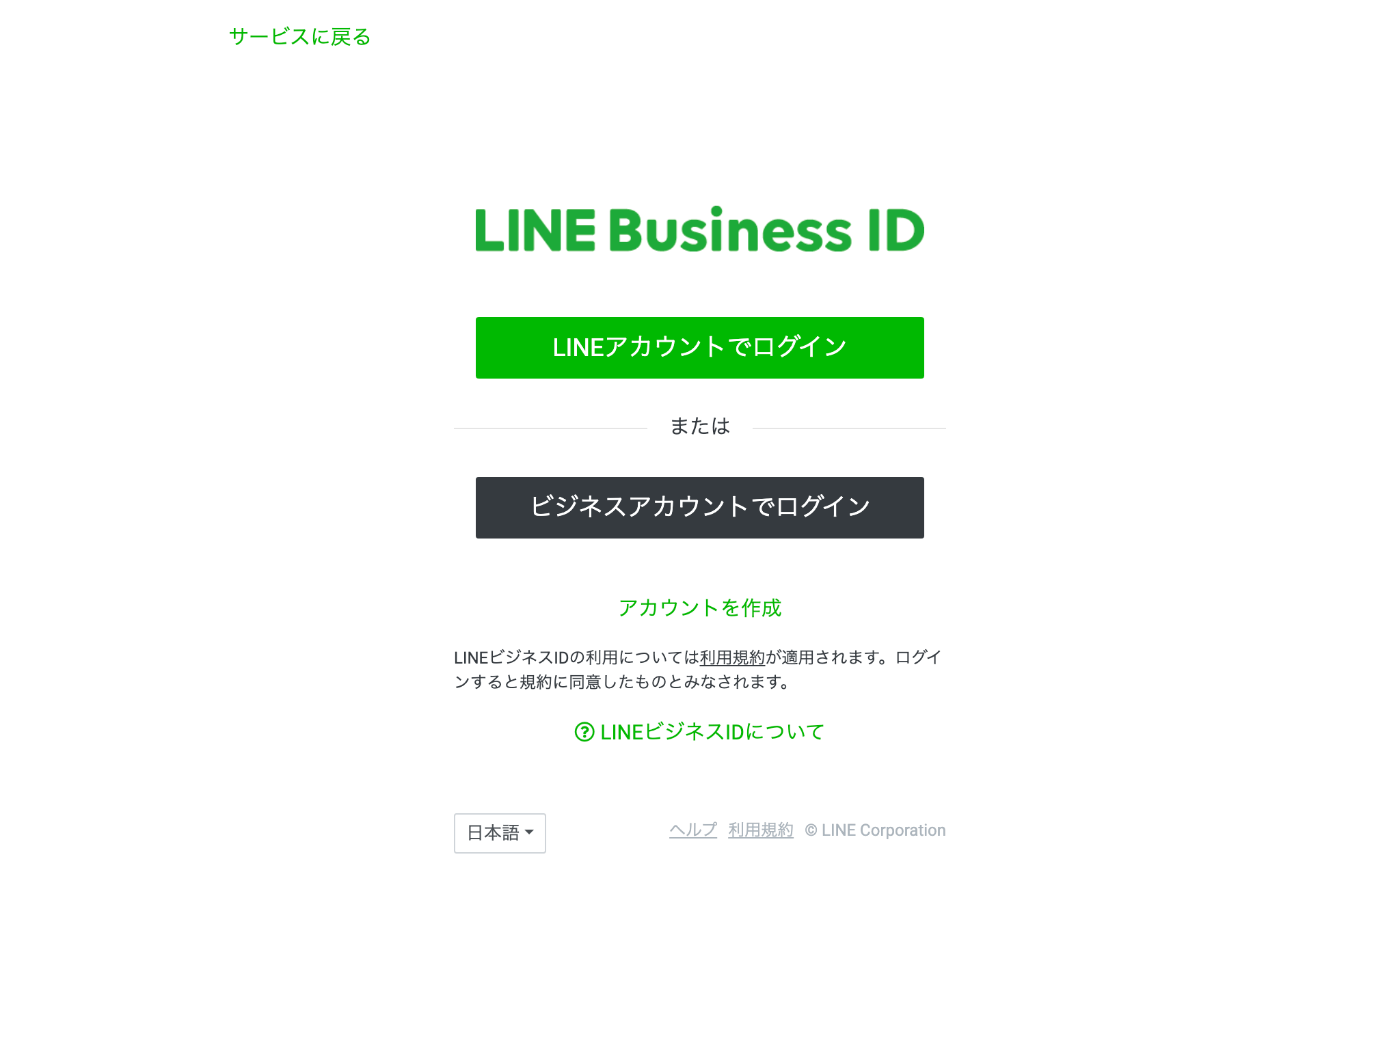
アカウントの作成
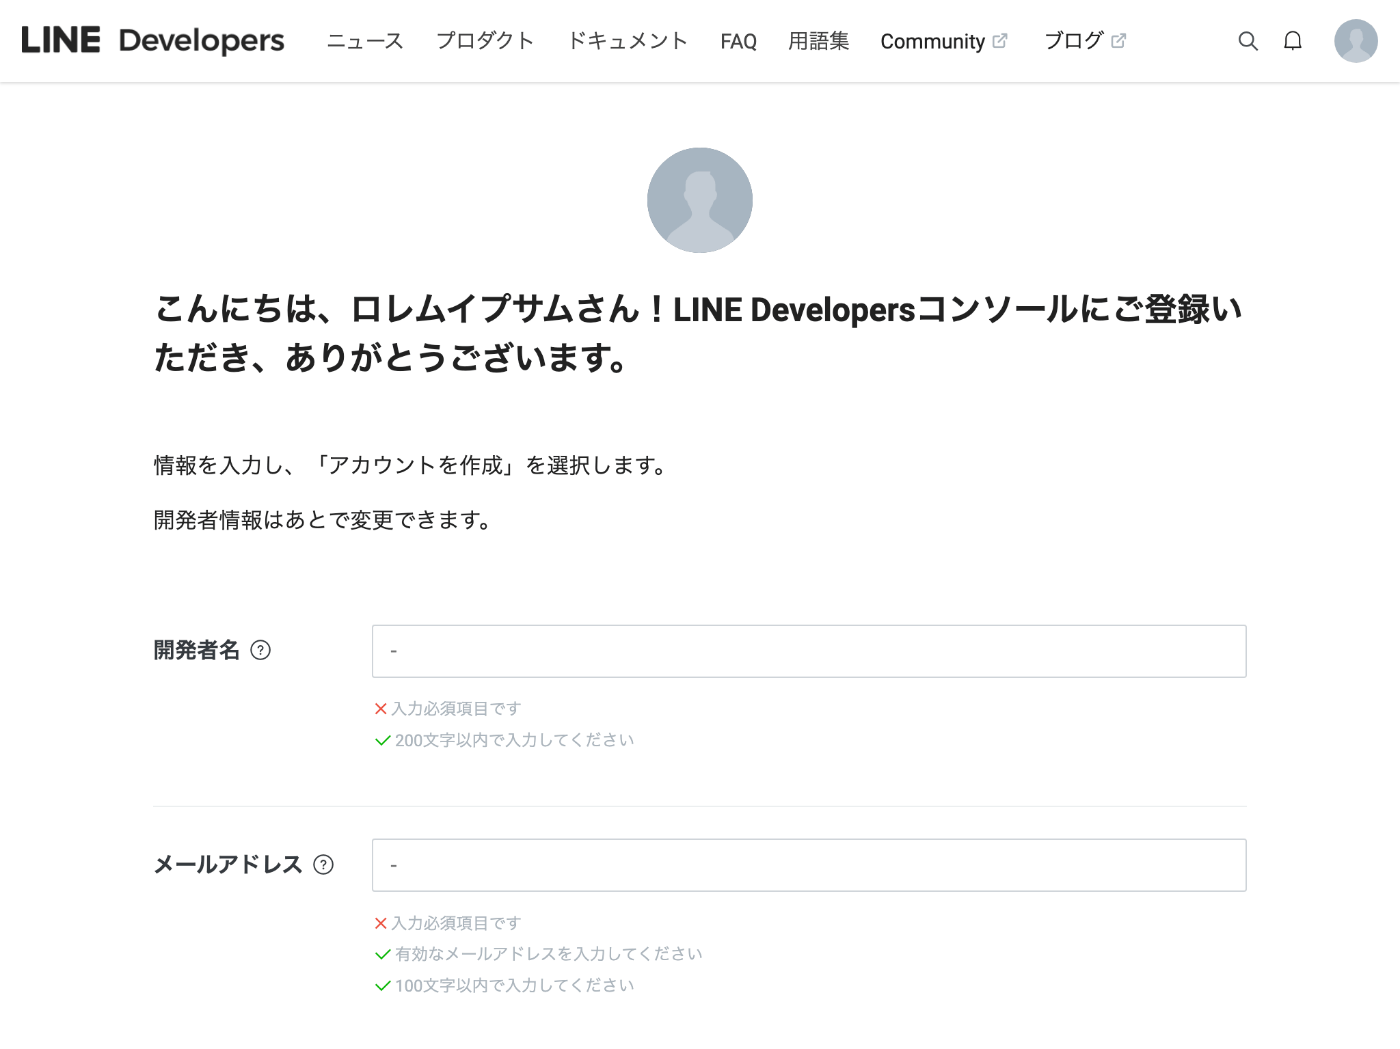
メールアドレスを入力すると登録用のリンクが記載されたメールが送信される
リンクをクリックして登録画面に進む
名前とパスワードを入力する
登録が完了すると開発者登録のページが表示される
LINE Developers コンソールが表示される
ここまで問題なく進めた、ドキュメントもわかりやすい、さすが LINE
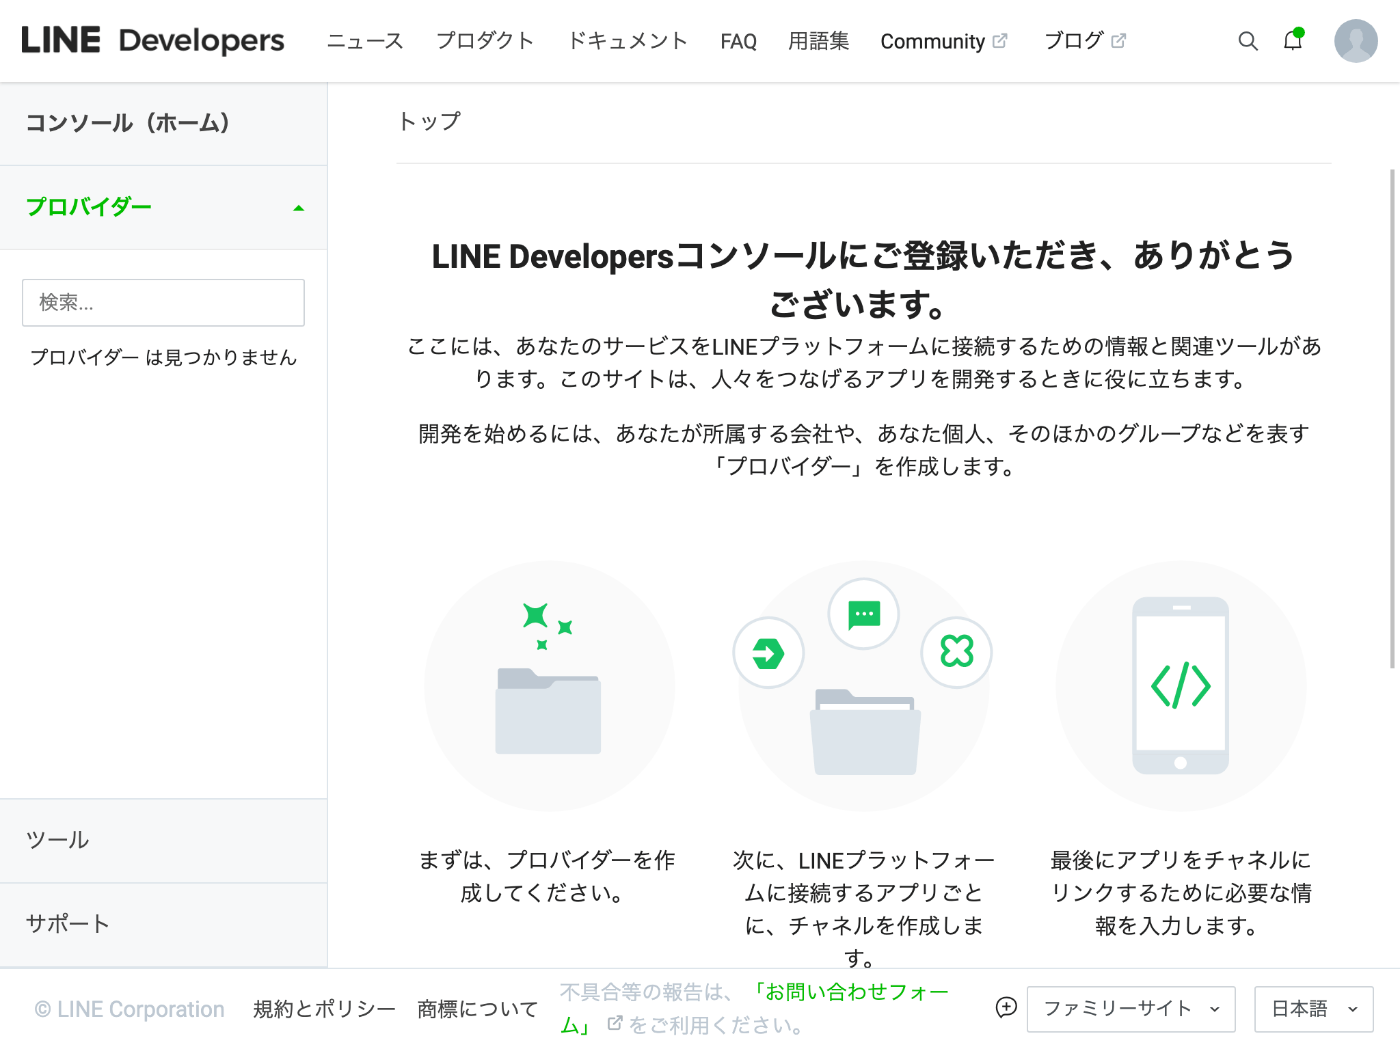
プロバイダーの作成
まずはプロバイダーを作成する必要があるらしい
プロバイダーとは何かと思ったらドキュメントにもフォームにも書いてある
プロバイダーとは、アプリを提供する組織のことです。ご自分の名前や企業名を入力してください。
プロバイダーとは、サービスを提供し、利用者の情報を取得する個人の開発者、企業、組織のことです。詳細は、ドキュメントを参照してください。
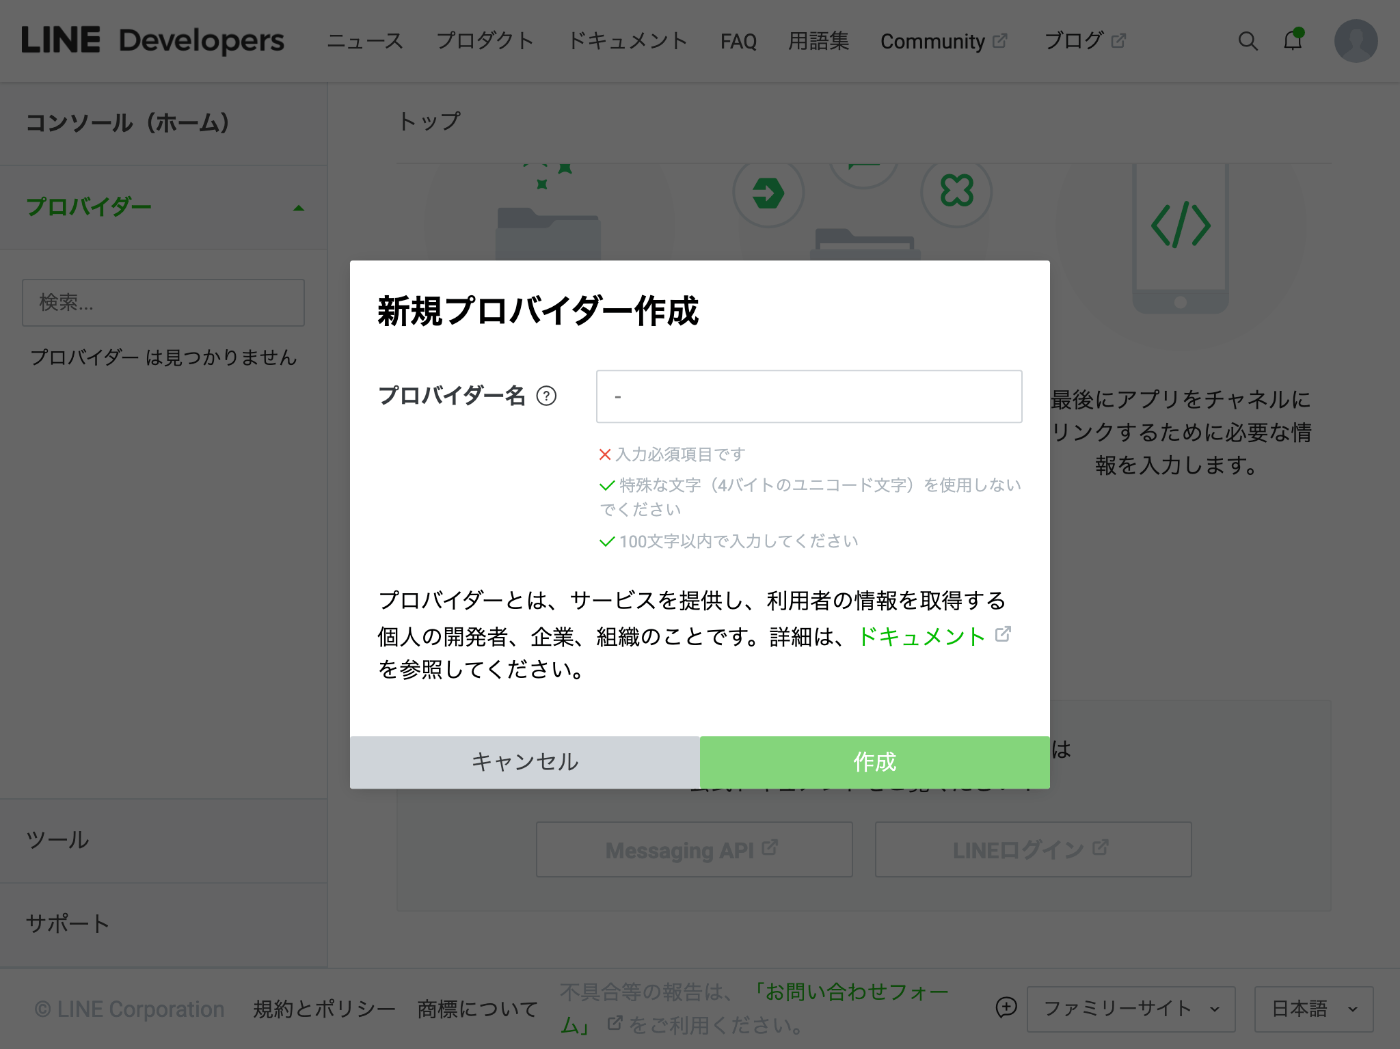
とりあえず会社名でも入れておこう
チャネルの作成
プロバイダー詳細ページのチャネル設定タブで Messaging API をクリックすると新規チャネル作成ページが表示される
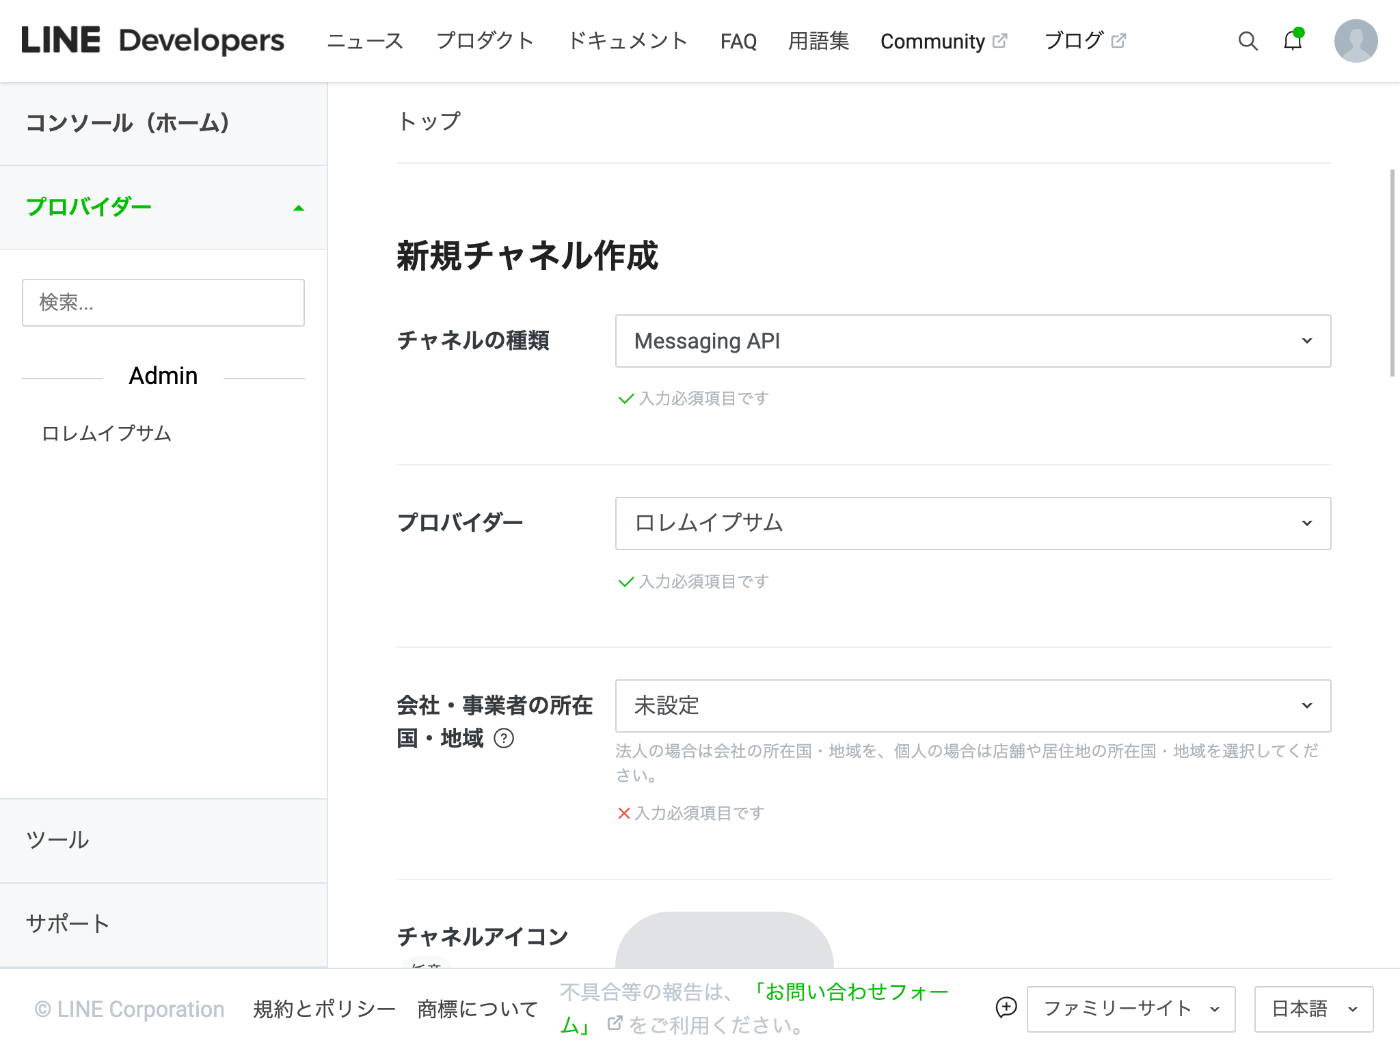
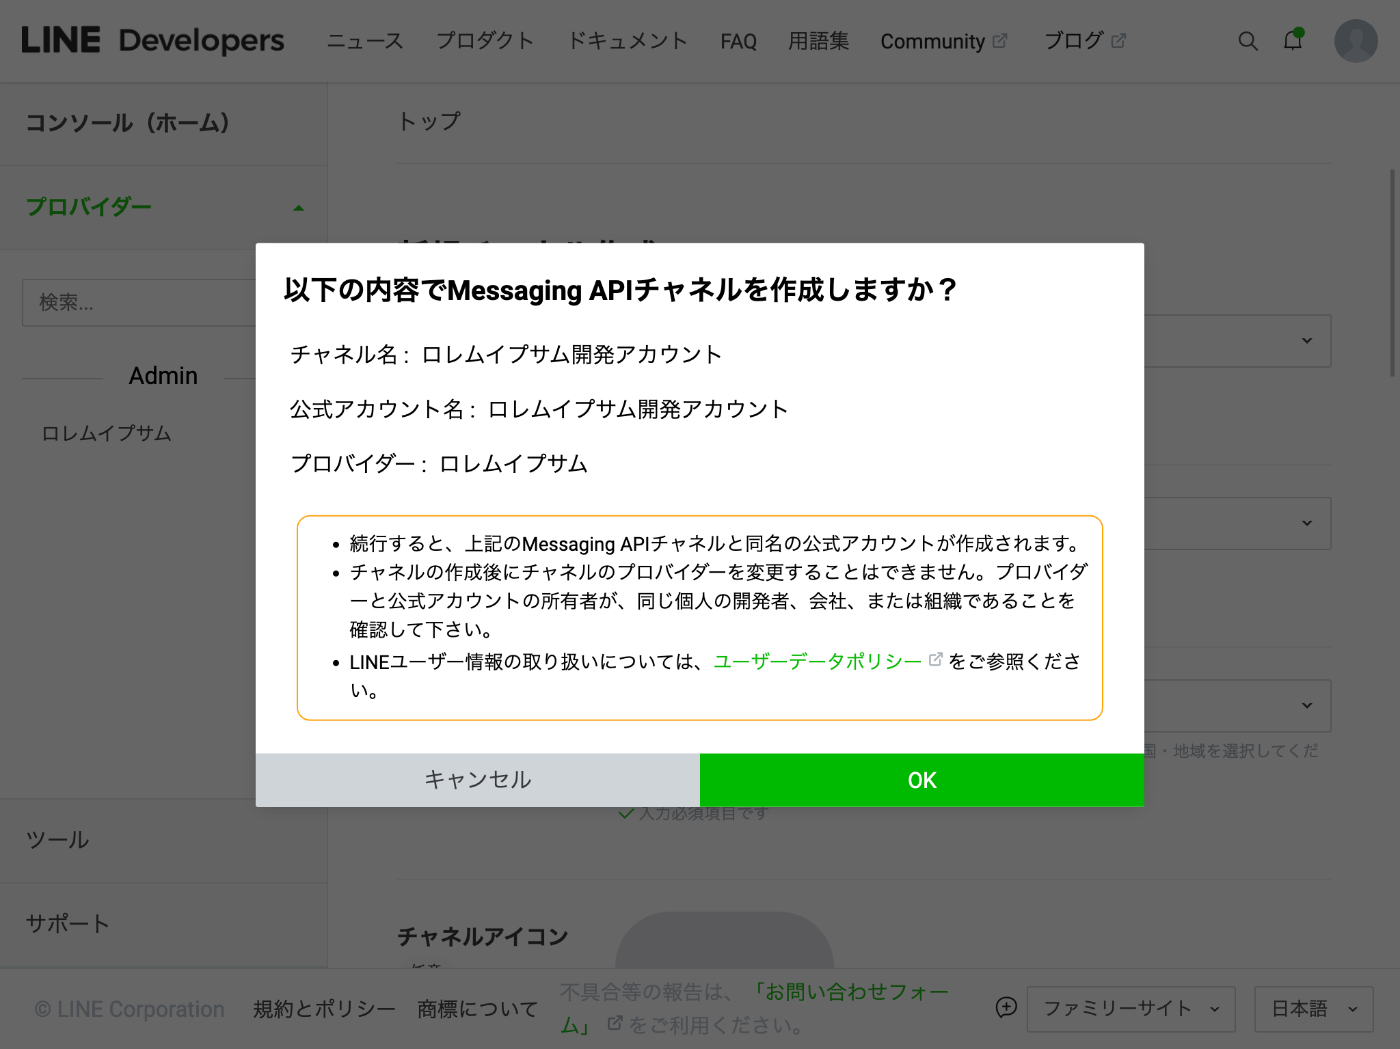
必要事項を入力して作成ボタンをクリックする
チャネル名は公式アカウント名になり、変更するのにも時間がかかる様子なので慎重に設定する
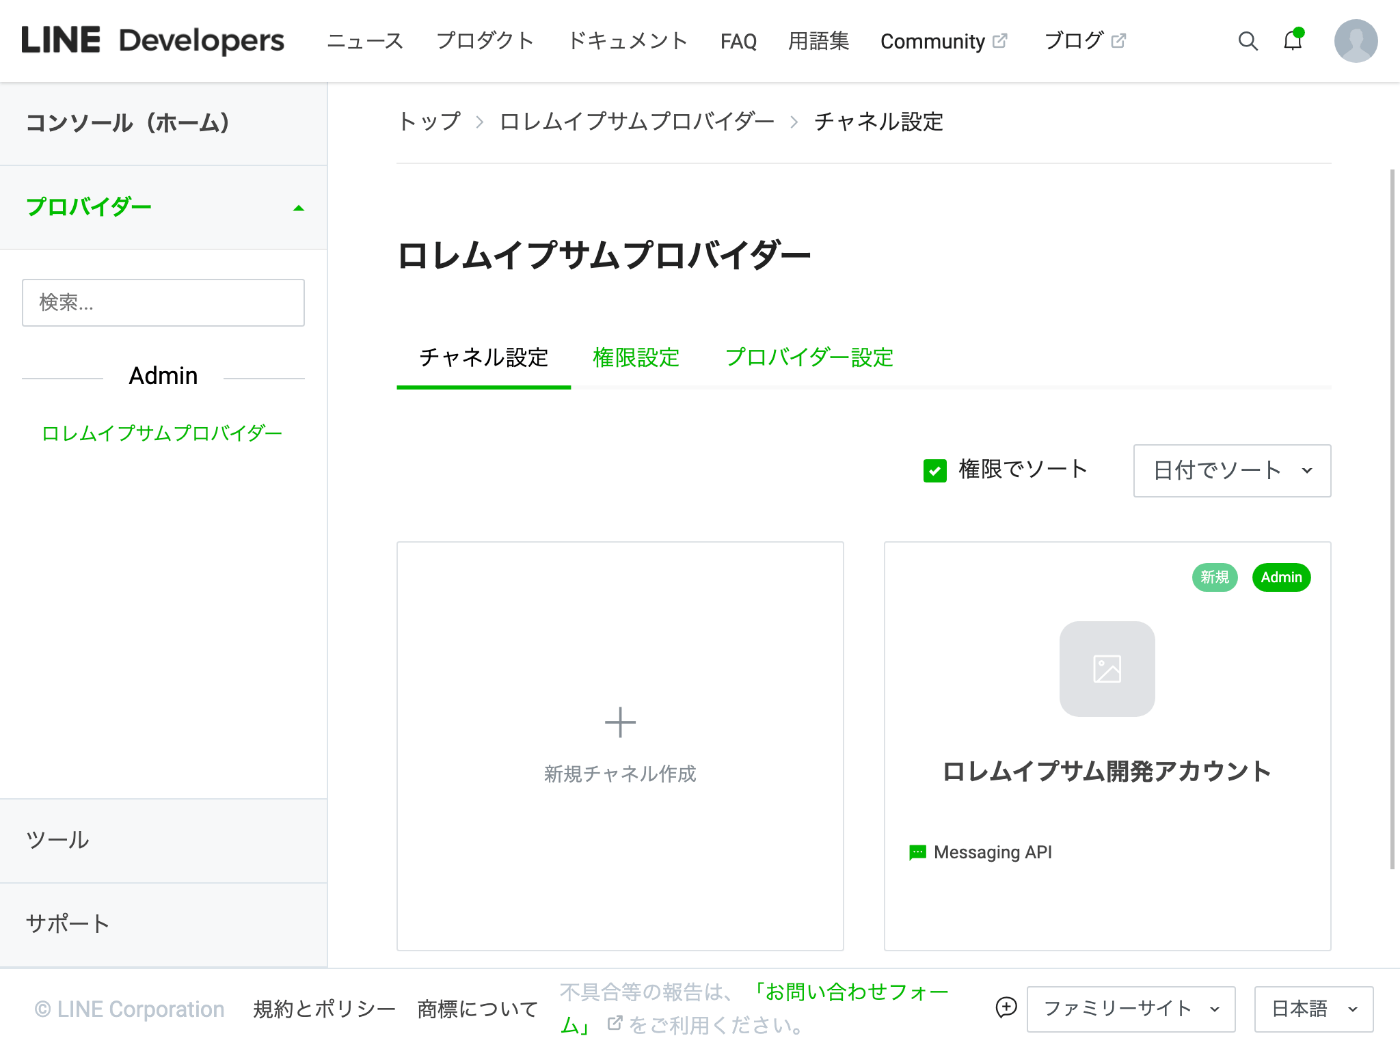
チャネルが作成された
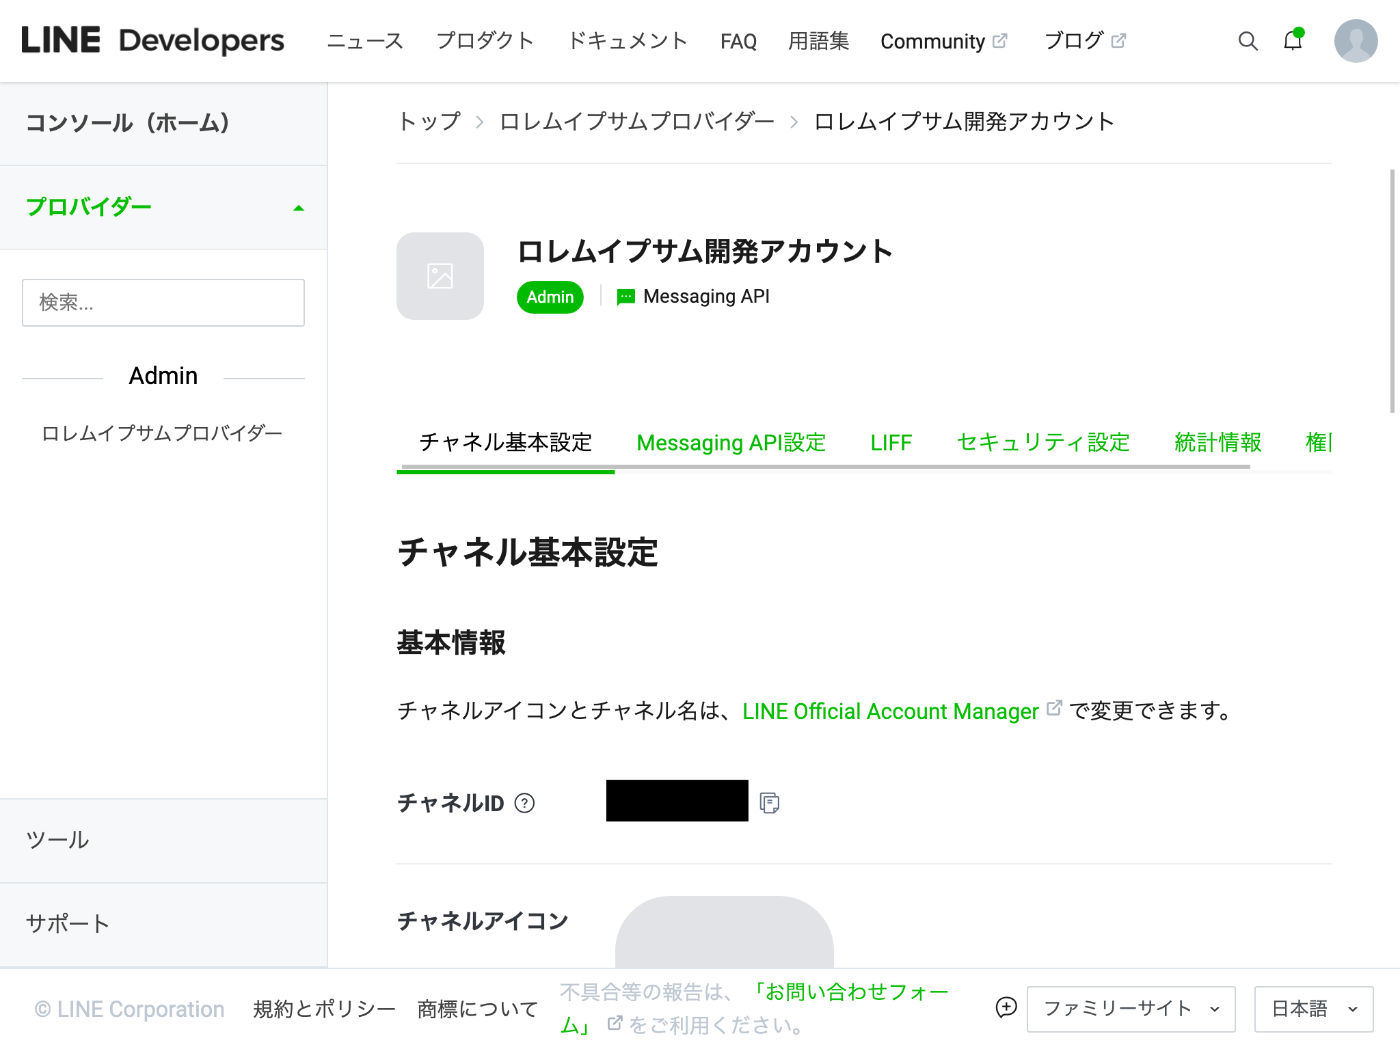
チャネル ID は多分パブリックだけど念のためマスキングしておく
チャネルアクセストークンはスキップされる
チャネルを作成した後に次のステップボタンを押すとボットを作成するページへ移動する
チャネルアクセストークンに関する説明がスキップされるので気になる
後から必要になったら読もう
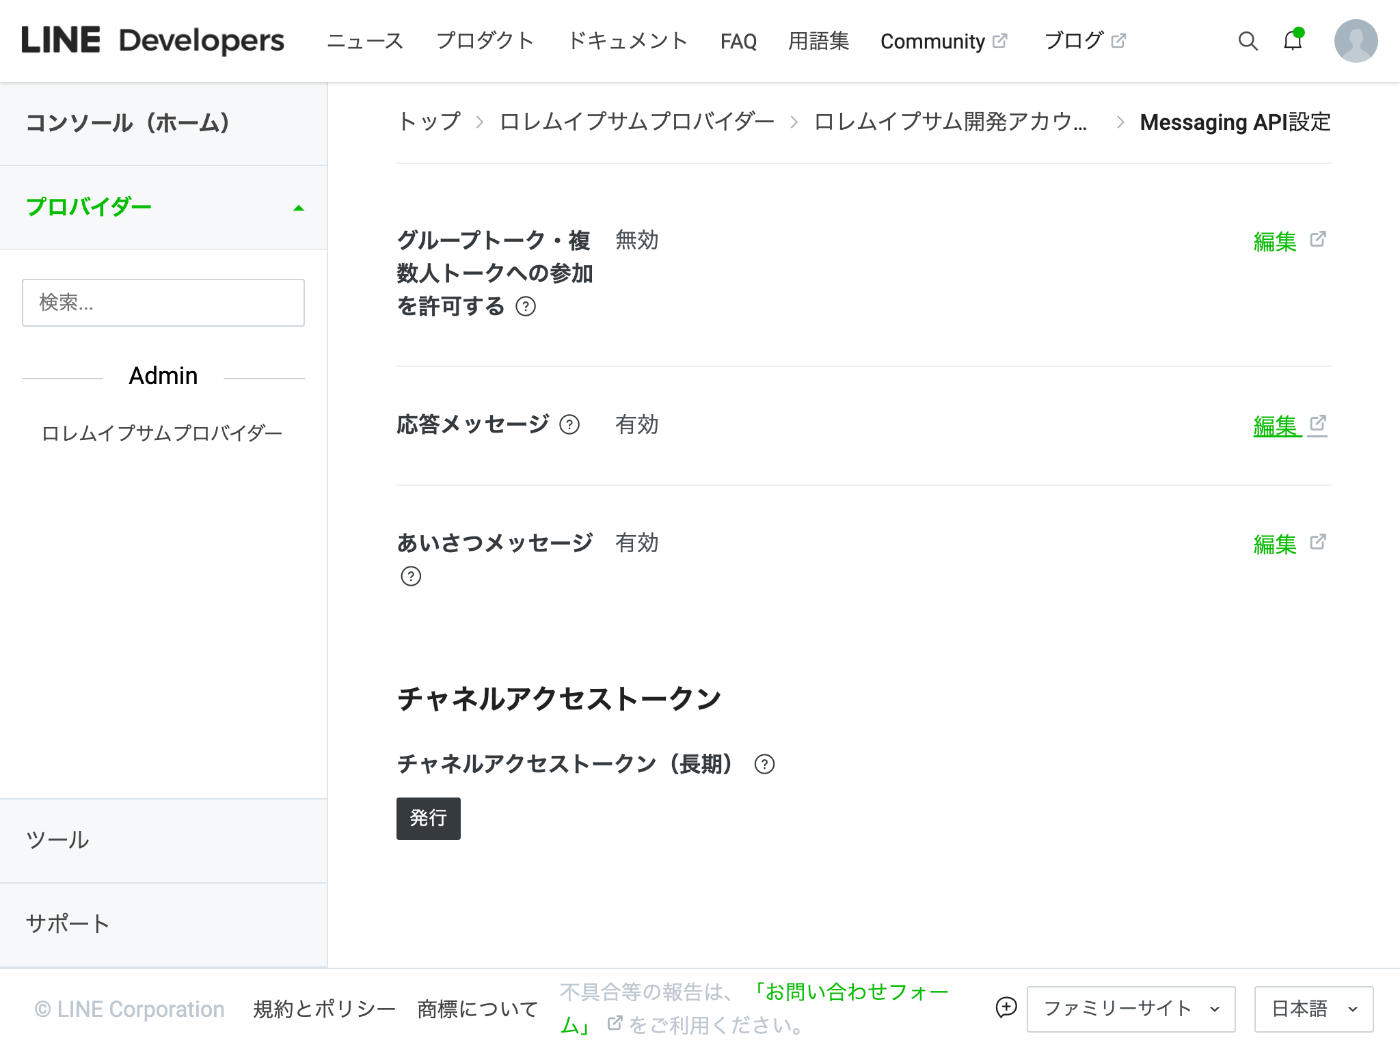
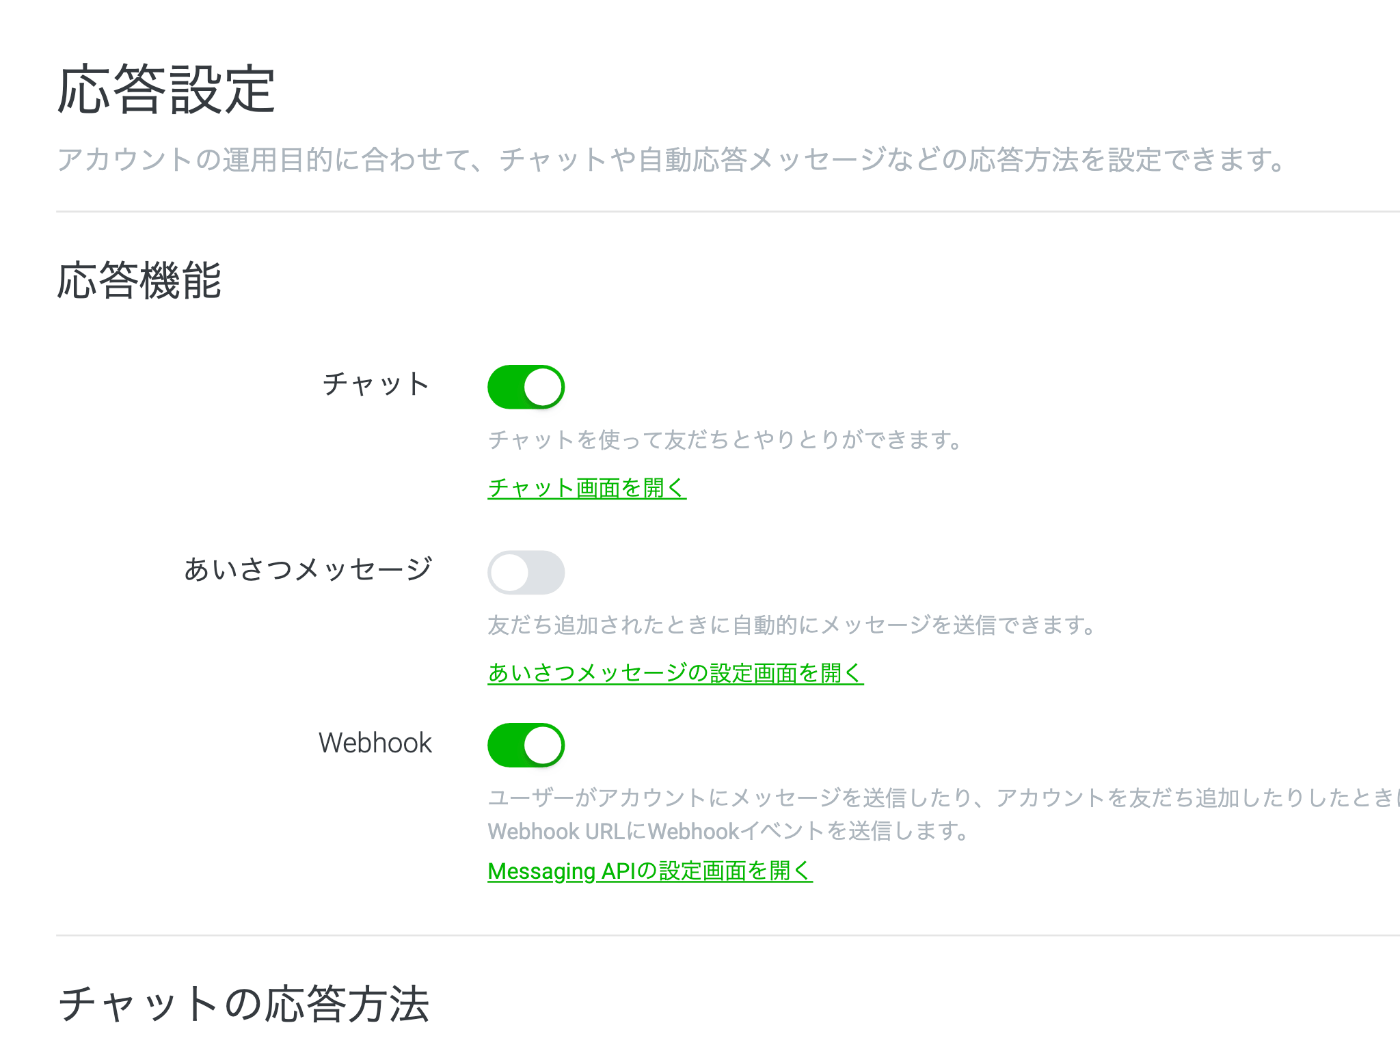
[応答メッセージ]と[あいさつメッセージ]の設定
デフォルトでは 2 つとも有効になっているのでチャネル詳細ページの Messaging API 設定タブから無効にする
チャネルアクセストークンの発行
ここで出てきたかチャネルアクセストークン!
バージョンは v2.1 が推奨のようなのでまずはこれで発行しよう
まずはアサーション署名キーを作成する
Go、Python、JavaScript を作成する方法が紹介されている、今回は JavaScript を使用する
(async () => {
  const pair = await crypto.subtle.generateKey(
    {
      name: 'RSASSA-PKCS1-v1_5',
      modulusLength: 2048,
      publicExponent: new Uint8Array([1, 0, 1]),
      hash: 'SHA-256'
    },
    true,
    ['sign', 'verify']
  );

  console.log('=== private key ===');
  console.log(JSON.stringify(await crypto.subtle.exportKey('jwk', pair.privateKey), null, '  '));

  console.log('=== public key ===');
  console.log(JSON.stringify(await crypto.subtle.exportKey('jwk', pair.publicKey), null, '  '));
})();
秘密鍵と公開鍵はそれぞれ private.key と public.key という名前で保存する
念のため公式ドキュメントのアサーション署名キーの仕様に従っているかを確認する
それにしても公式ドキュメントがわかりやすくて安心感がすごい
公開鍵の登録
LINE Developers コンソールのチャネル詳細ページでチャネル基本設定を選択する
公開鍵を登録するボタンがあるので押す
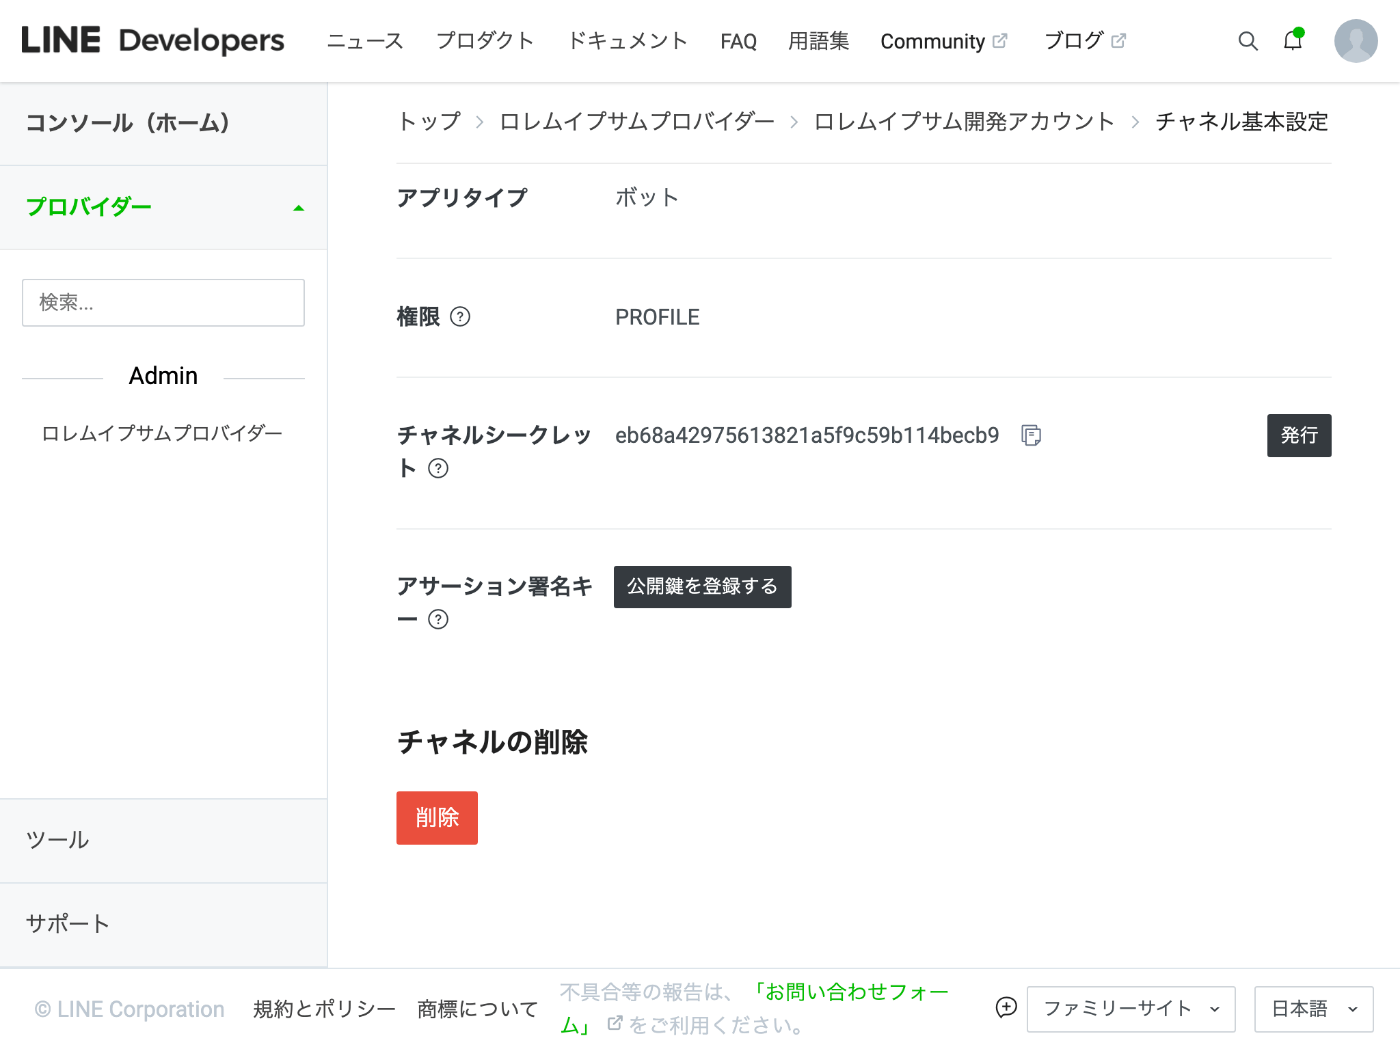
公開鍵をコピー&ペーストして登録ボタンを押す
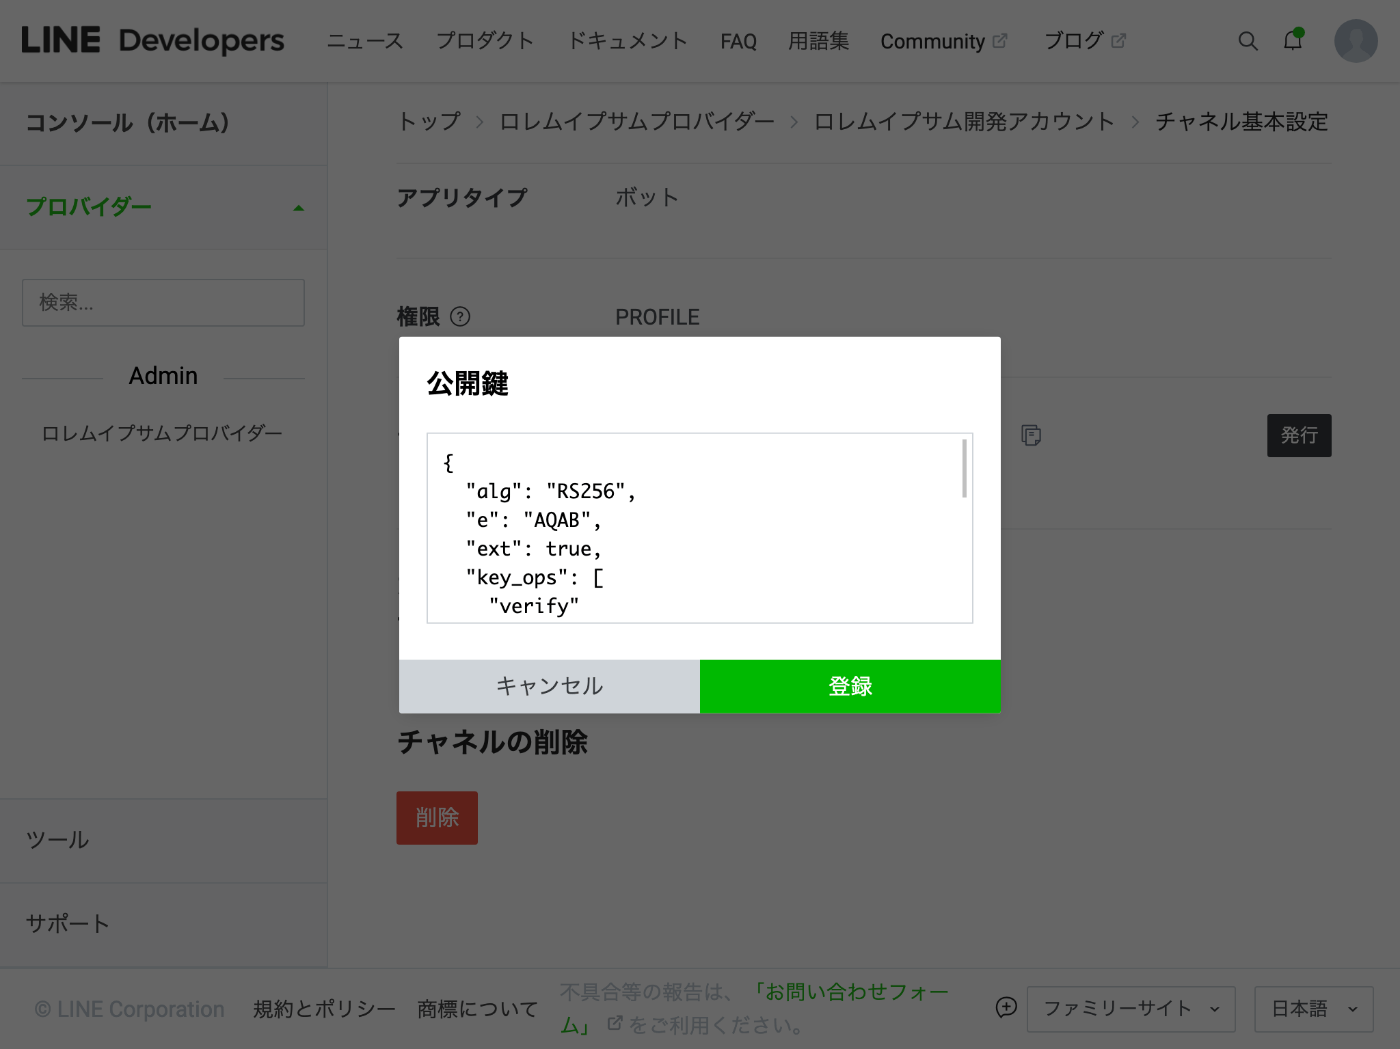
kid が表示されるので控えておく
00000000-0000-0000-0000-000000000000
JWT の生成
ここからは楽しいプログラミング
mkdir hello-line-api
cd hello-line-api
npm init -y
npm install node-jose node-fetch@2 dotenv
npm install --save-dev ts-node @types/node @types/node-jose
touch main.ts .env private.key public.key
import { readFileSync } from "fs";
import { JWS } from "node-jose";
import { join } from "path";
import fetch from "node-fetch";

async function main() {
  const privateKey = readFileSync(join(process.cwd(), "private.key"), "utf-8");

  // チャネルアクセストークンを取得するための JWT を発行します
  const header = {
    alg: "RS256",
    typ: "JWT",
    kid: process.env.KEY_ID!,
  };

  const payload = {
    iss: process.env.CHANNEL_ID!,
    sub: process.env.CHANNEL_ID!,
    aud: "https://api.line.me/",
    exp: Math.floor(new Date().getTime() / 1000) + 60 * 30,
    token_exp: 60 * 60 * 24 * 30,
  };

  const jwt =
    (await JWS.createSign(
      {
        format: "compact",
        fields: header,
      },
      JSON.parse(privateKey)
    )
      .update(JSON.stringify(payload))
      .final()) + "";

  // エンドポイントからチャネルアクセストークンを取得します
  const accessTokenUrl = "https://api.line.me/oauth2/v2.1/token";
  const accessTokenResponse = await fetch(accessTokenUrl, {
    method: "POST",
    headers: {
      "Content-Type": "application/x-www-form-urlencoded",
    },
    body: new URLSearchParams({
      grant_type: "client_credentials",
      client_assertion_type:
        "urn:ietf:params:oauth:client-assertion-type:jwt-bearer",
      client_assertion: jwt,
    }).toString(),
  });

  console.log(await accessTokenResponse.json());
}

main().catch((err) => console.error(err));
KEY_ID="00000000-0000-0000-0000-000000000000"
CHANNEL_ID="0000000000"
npx ts-node -r dotenv/config main.ts
{
  "access_token": "eyJhbGciOiJIUz.....",
  "token_type": "Bearer",
  "expires_in": 2592000,
  "key_id": "sDTOzw5wIfxxxxPEzcmeQA"
}
無事に取得できて良かった
ここまで 1 回もつまづいていない、公式ドキュメントが素晴らし過ぎる
ここで唐突に検証したいことをまとめる
- メッセージの受信
- メッセージの送信
- リッチメニュー
- LINE アカウントと Web サイトアカウントの紐付け
Webhook の作成
Webhook は NestJS で作成してみる
nest new hello-line-bot
cd hello-line-bot
npm run start:dev
チャネルアクセストークン取得コードのリファクタリング
Webhook で再利用するためにチャネルアクセストークン取得コードをリファクタリングしておく
touch line-access-token.ts
import { JWS } from "node-jose";
import fetch from "node-fetch";

// LINE Messaging API のチャンネルトークン v2.1 を取得します
// https://developers.line.biz/ja/docs/messaging-api/generate-json-web-token/
export async function getLineAccessToken(
  privateKey: string,
  keyId: string,
  channelId: string
): Promise<string> {
  // チャネルアクセストークンを取得するための JWT を発行します
  const header = {
    alg: "RS256",
    typ: "JWT",
    kid: keyId,
  };

  const payload = {
    iss: channelId,
    sub: channelId,
    aud: "https://api.line.me/",
    exp: Math.floor(new Date().getTime() / 1000) + 60 * 30,
    token_exp: 60 * 60 * 24 * 30,
  };

  const jwt =
    (await JWS.createSign(
      {
        format: "compact",
        fields: header,
      },
      JSON.parse(privateKey)
    )
      .update(JSON.stringify(payload))
      .final()) + "";

  // エンドポイントからチャネルアクセストークンを取得します
  const accessTokenUrl = "https://api.line.me/oauth2/v2.1/token";
  const accessTokenResponse = await fetch(accessTokenUrl, {
    method: "POST",
    headers: {
      "Content-Type": "application/x-www-form-urlencoded",
    },
    body: new URLSearchParams({
      grant_type: "client_credentials",
      client_assertion_type:
        "urn:ietf:params:oauth:client-assertion-type:jwt-bearer",
      client_assertion: jwt,
    }).toString(),
  });

  const accessTokenBody = await accessTokenResponse.json();
  return accessTokenBody.access_token;
}
import { readFileSync } from "fs";
import { join } from "path";
import { getLineAccessToken } from "./line-access-token";

async function main() {
  const privateKey = readFileSync(join(process.cwd(), "private.key"), "utf-8");
  const keyId = process.env.KEY_ID!;
  const channelId = process.env.CHANNEL_ID!;
  const accessToken = await getLineAccessToken(privateKey, keyId, channelId);

  console.log(accessToken);
}

main().catch((err) => console.error(err));
実行コマンドは同じ
npx ts-node -r dotenv/config main.ts
Webhook コーディングを始める
行儀が悪いがコントローラーに直接記述していく
import { Body, Controller, Headers, HttpCode, Post } from '@nestjs/common';
import { AppService } from './app.service';

interface LineWebhookDto {
  destination: string;
  events: any[];
}

@Controller()
export class AppController {
  constructor(private readonly appService: AppService) {}

  @HttpCode(200)
  @Post('api/v1/line/webhook')
  onApiV1LineWebhook(
    @Headers() headers: { string: string },
    @Body() body: LineWebhookDto,
  ) {
    const lineSignature = headers['x-line-signature'];

    return {
      lineSignature,
      body,
    };
  }
}
LINE から来るであろうリクエストの curl コマンドは下記の通り
curl -v \
  'http://localhost:3000/api/v1/line/webhook' \
  -H 'X-Line-Signature: xxx' \
  -H 'Content-Type: application/json' \
  -d '{"destination": "U00000000000000000000000000000000", "events": []}'
*   Trying 127.0.0.1:3000...
* Connected to localhost (127.0.0.1) port 3000 (#0)
> POST /api/v1/line/webhook HTTP/1.1
> Host: localhost:3000
> User-Agent: curl/7.79.1
> Accept: */*
> X-Line-Signature: xxx
> Content-Type: application/json
> Content-Length: 66
>
* Mark bundle as not supporting multiuse
< HTTP/1.1 200 OK
< X-Powered-By: Express
< Content-Type: application/json; charset=utf-8
< Content-Length: 94
< ETag: W/"5e-tPh1djYAleIeS8SAezHXB+FN4e0"
< Date: Thu, 16 Feb 2023 06:39:20 GMT
< Connection: keep-alive
< Keep-Alive: timeout=5
<
* Connection #0 to host localhost left intact
{"lineSignature":"xxx","body":{"destination":"U00000000000000000000000000000000","events":[]}}
curl の代わりに node-fetch を使う
ダイジェストの作成などがあるので curl を使うよりも node-fetch を使ってテストコードを書いた方が良さそう
npm install --save dotenv node-fetch@2
npm install --save-dev @types/node-fetch
touch test/line-webhook.e2e-spec.ts
import { createHmac } from 'crypto';
import fetch from 'node-fetch';

describe('LINE Webhook', () => {
  it('/ (GET)', async () => {
    const targetUrl = 'http://localhost:3000/api/v1/line/webhook';
    const requestBody = JSON.stringify({
      destination: 'U00000000000000000000000000000000',
      events: [],
    });

    const channelSecret = process.env.CHANNEL_SECRET;
    const lineSignature = createHmac('SHA256', channelSecret)
      .update(requestBody)
      .digest('base64');

    const webhookResponse = await fetch(targetUrl, {
      method: 'POST',
      headers: {
        'X-Line-Signature': lineSignature,
        'Content-Type': 'application/json',
      },
      body: requestBody,
    });

    console.log(webhookResponse.status);
    console.log(await webhookResponse.text());
  });
});
npm run test:e2e -- line-webhook --setupFiles dotenv/config
> hello-line-bot@0.0.1 test:e2e
> jest --config ./test/jest-e2e.json

  console.log
    {"lineSignature":"BAIoOyyfsaue4mu7nzN8NNTnJwFbi7QezFkI+LkcEZc=","body":{"destination":"U00000000000000000000000000000000","events":[]}}

      at Object.<anonymous> (line-webhook.e2e-spec.ts:26:13)

 PASS  test/line-webhook.e2e-spec.ts
  LINE Webhook
    ✓ / (GET) (27 ms)

Test Suites: 1 passed, 1 total
Tests:       1 passed, 1 total
Snapshots:   0 total
Time:        1.676 s, estimated 2 s
Ran all test suites matching /line-webhook/i.
NestJS で .env を読み込む
npm i --save @nestjs/config
import { Module } from '@nestjs/common';
import { ConfigModule } from '@nestjs/config'; // この行を追加します
import { AppController } from './app.controller';
import { AppService } from './app.service';

@Module({
  imports: [ConfigModule.forRoot()], // この行を追加します
  controllers: [AppController],
  providers: [AppService],
})
export class AppModule {}
リクエストボディの生データにアクセスする
import { NestFactory } from '@nestjs/core';
import { AppModule } from './app.module';

async function bootstrap() {
  const app = await NestFactory.create(AppModule, {
    rawBody: true, // この行を追加します
  });
  await app.listen(3000);
}
bootstrap();
NestJS 公式ドキュメントの FAQ に書かれているユースケースがまさに今の状況
One of the most common use-case for having access to the raw request body is performing webhook signature verifications. Usually to perform webhook signature validations the unserialized request body is required to calculate an HMAC hash.
署名を検証する
import { Controller, Post, RawBodyRequest, Req, Res } from '@nestjs/common';
import { createHmac } from 'crypto';
import { Request, Response } from 'express';
import { AppService } from './app.service';

@Controller()
export class AppController {
  constructor(private readonly appService: AppService) {}

  @Post('api/v1/line/webhook')
  onApiV1LineWebhook(
    @Req() req: RawBodyRequest<Request>,
    @Res() res: Response,
  ) {
    const lineSignature = req.headers['x-line-signature'];
    const channelSecret = process.env.CHANNEL_SECRET;
    const requestBody = req.rawBody;
    const lineSignatureVerify = createHmac('SHA256', channelSecret)
      .update(requestBody)
      .digest('base64');

    if (lineSignature !== lineSignatureVerify) {
      res.status(400).send('lineSignature !== lineSignatureVerify');
      return;
    }

    res.status(200).send('OK');
  }
}
npm run test:e2e -- line-webhook --setupFiles dotenv/config
> hello-line-bot@0.0.1 test:e2e
> jest --config ./test/jest-e2e.json

  console.log
    200

      at Object.<anonymous> (line-webhook.e2e-spec.ts:26:13)

  console.log
    OK

      at Object.<anonymous> (line-webhook.e2e-spec.ts:27:13)

 PASS  test/line-webhook.e2e-spec.ts
  LINE Webhook
    ✓ / (GET) (29 ms)

Test Suites: 1 passed, 1 total
Tests:       1 passed, 1 total
Snapshots:   0 total
Time:        1.686 s, estimated 2 s
Ran all test suites matching /line-webhook/i.
わかりにくいがステータスコードが 200 で本文が OK であることから成功していることがわかる
今日はここまで、明日頑張ればメッセージの送受信くらいはできるかな
今日も楽しくやっていこう
LINE Bot SDK
Webhook イベントの TypeScript 型定義があると嬉しいなと思って調べていたら LINE Bot SDK なるものがあることを知った
公式ドキュメントは下記
もしかしてチャネルアクセストークンは学ぶ必要がなかった?笑
勉強になったから良いですが
学ぶ必要があったもの
チャネルアクセストークンは学ぶ必要があった
メッセージの検証は SDK にコードがあるので学ぶ必要はなかった
SDK 公式ドキュメントが Express を対象にしているので NestJS でうまくいかなかったら Express で試してみよう
とはいえそれほど難しいことをやっている訳ではないのでまずは SDK に頼らずに試してみても良いかも
LINE Bot SDK のインストール
npm install @line/bot-sdk --save
TypeScript 型定義は欲しいので結局インストール
validateSignature を使う
SDK の validateSignature の方が crypto.timingSafeEqual が使われていてよりセキュア
import { validateSignature } from '@line/bot-sdk';
import { Controller, Post, RawBodyRequest, Req, Res } from '@nestjs/common';
import { Request, Response } from 'express';
import { AppService } from './app.service';

@Controller()
export class AppController {
  constructor(private readonly appService: AppService) {}

  @Post('api/v1/line/webhook')
  onApiV1LineWebhook(
    @Req() req: RawBodyRequest<Request>,
    @Res() res: Response,
  ) {
    const lineSignature = req.headers['x-line-signature'] as string;
    const channelSecret = process.env.CHANNEL_SECRET;
    const requestBody = req.rawBody;

    if (!validateSignature(requestBody, channelSecret, lineSignature)) {
      res.status(400).send('lineSignature !== lineSignatureVerify');
      return;
    }

    res.status(200).send('OK');
  }
}
とりあえず今のままでも受信はできそう
import { validateSignature, WebhookRequestBody } from '@line/bot-sdk';
import { Controller, Post, RawBodyRequest, Req, Res } from '@nestjs/common';
import { Request, Response } from 'express';
import { AppService } from './app.service';

@Controller()
export class AppController {
  constructor(private readonly appService: AppService) {}

  @Post('api/v1/line/webhook')
  onApiV1LineWebhook(
    @Req() req: RawBodyRequest<Request>,
    @Res() res: Response,
  ) {
    const lineSignature = req.headers['x-line-signature'] as string;
    const channelSecret = process.env.CHANNEL_SECRET;
    const requestBody = req.rawBody;

    if (!validateSignature(requestBody, channelSecret, lineSignature)) {
      res.status(400).send('lineSignature !== lineSignatureVerify');
      return;
    }

    const body = JSON.parse(requestBody.toString()) as WebhookRequestBody;
    console.log(body);

    res.status(200).send('OK');
  }
}
GCP Cloud Run にデプロイする
touch .gcloudignore
/.git/
/dist/
/node_modules/
/test/
/.env

.DS_Store
gcloud meta list-files-for-upload
nest-cli.json
README.md
.gitignore
package-lock.json
package.json
tsconfig.build.json
.prettierrc
.eslintrc.js
tsconfig.json
.gcloudignore
src/main.ts
src/app.service.ts
src/app.module.ts
src/app.controller.spec.ts
src/app.controller.ts
package.json の start スクリプトも変更する、start:prod と同じにする
{
  "scripts": {
    "start": "node dist/main"
  }
}
gcloud run deploy hello-line-bot \
  --source . \
  --platform managed \
  --region asia-northeast1 \
  --allow-unauthenticated
しまった PORT を忘れていた
import { NestFactory } from '@nestjs/core';
import { AppModule } from './app.module';

async function bootstrap() {
  const app = await NestFactory.create(AppModule, {
    rawBody: true,
  });
  await app.listen(process.env.PORT); // この行を変更します
}
bootstrap();
.env に PORT を追加するのを忘れないようにする
gcloud run deploy hello-line-bot \
  --source . \
  --platform managed \
  --region asia-northeast1 \
  --allow-unauthenticated
また失敗、Cloud Build のログを見ると build スクリプトが実行されていない様子だ
ローカルでビルドを再現する方法
brew install buildpacks/tap/pack
pack build --builder=gcr.io/buildpacks/builder hello-line-bot
ローカルでやっても build スクリプトは実行されていない様子
やっと見つけた
どうやら build ではなくて gcp-build ビルドのようだ
{
  "scripts": {
    "gcp-build": "nest build"
  }
}
なぜ変えたと言いたくなる笑
ローカルで pack コマンドを実行した所、成功した様子
Node.js のバージョンが 19 と高いのが気になるがとりあえずそのままにしておく
3 回目の挑戦
gcloud run deploy hello-line-bot \
  --source . \
  --platform managed \
  --region asia-northeast1 \
  --allow-unauthenticated
やっと成功した
GCP の CLI か Web コンソールから CHANNEL_SECRET を設定するのを忘れないようにする
Webhook の設定
LINE Developers コンソールで Webhook の設定を行う
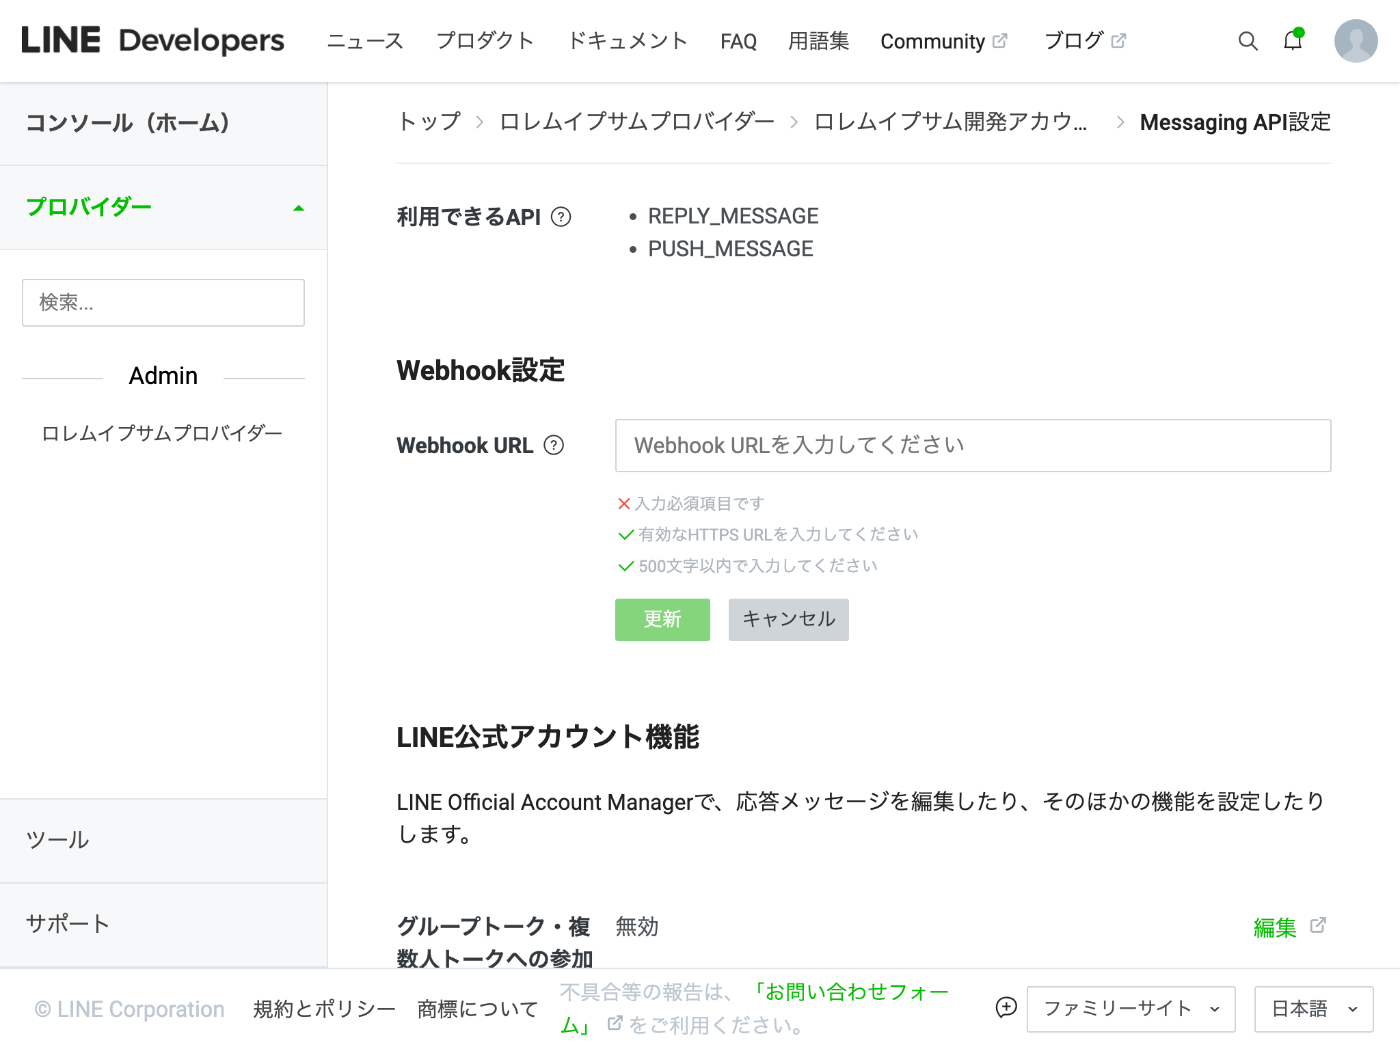
検証ボタンが表示されるので押してみると失敗してしまった
テストコードを使って確認してみる、少しだけ変更する
import { createHmac } from 'crypto';
import fetch from 'node-fetch';

describe('LINE Webhook', () => {
  it('/ (GET)', async () => {
    // 次の行を変更しました
    const targetUrl = process.env.WEBHOOK_URL || 'http://localhost:3000/api/v1/line/webhook';
    const requestBody = JSON.stringify({
      destination: 'U00000000000000000000000000000000',
      events: [],
    });

    const channelSecret = process.env.CHANNEL_SECRET;
    const lineSignature = createHmac('SHA256', channelSecret)
      .update(requestBody)
      .digest('base64');

    const webhookResponse = await fetch(targetUrl, {
      method: 'POST',
      headers: {
        'X-Line-Signature': lineSignature,
        'Content-Type': 'application/json',
      },
      body: requestBody,
    });

    console.log(webhookResponse.status);
    console.log(await webhookResponse.text());
  });
});
WEBHOOK_URL="https://hello-line-bot-xdblopffpq-an.a.run.app/api/v1/line/webhook" \
npm run test:e2e -- line-webhook --setupFiles dotenv/config
> hello-line-bot@0.0.1 test:e2e
> jest --config ./test/jest-e2e.json

  console.log
    200

      at Object.<anonymous> (line-webhook.e2e-spec.ts:26:13)

  console.log
    OK

      at Object.<anonymous> (line-webhook.e2e-spec.ts:27:13)

 PASS  test/line-webhook.e2e-spec.ts
  LINE Webhook
    ✓ / (GET) (206 ms)

Test Suites: 1 passed, 1 total
Tests:       1 passed, 1 total
Snapshots:   0 total
Time:        1.871 s, estimated 3 s
Ran all test suites matching /line-webhook/i.
テストコードの方はうまくいく
試しにもう一回、検証ボタンを押したら今度はうまく行った、なんなんだよ笑

Webhook URL の下に Webhook の利用というスイッチがあるので忘れずに ON にしておく
遂に実機での検証
Messaging API 設定タブに表示されているボットのベーシック ID や QR コードを使って LINE アプリでお友達登録する
「こんにちは」など適当なメッセージを送ってみる
Cloud Run のログでメッセージ表示されているかどうか確認する
確認したら follow イベントと message イベントがしっかり表示されていた、嬉しい
引き続きメッセージ送信
色々なメッセージの種類があるけど主に使いそうなのは次の 2 つ
- 応答メッセージ:ユーザーからのメッセージ送信に対して受動的にメッセージを送信する
- プッシュメッセージ:こちらから能動的にメッセージを送信する
応答メッセージでは replyToken を指定すれば良いので簡単そう
一方、プッシュメッセージではユーザー ID を指定する必要があるので何らかの手段で事前に知っておく必要がある
応答メッセージ
下記コマンドのようなリクエストを送信すれば良いようだ
curl -v -X POST https://api.line.me/v2/bot/message/reply \
-H 'Content-Type: application/json' \
-H 'Authorization: Bearer {channel access token}' \
-d '{
    "replyToken":"nHuyWiB7yP5Zw52FIkcQobQuGDXCTA",
    "messages":[
        {
            "type":"text",
            "text":"Hello, user"
        },
        {
            "type":"text",
            "text":"May I help you?"
        }
    ]
}'
チャネルアクセストークンを取得する準備
npm install --save node-jose
npm install --save-dev @types/node-jose
mkdir src/lib
touch src/lib/line-access-token.ts
import { JWS } from 'node-jose';
import fetch from 'node-fetch';

// LINE Messaging API のチャンネルトークン v2.1 を取得します
// https://developers.line.biz/ja/docs/messaging-api/generate-json-web-token/
export async function getLineAccessToken(
  privateKey: string,
  keyId: string,
  channelId: string,
): Promise<string> {
  // チャネルアクセストークンを取得するための JWT を発行します
  const header = {
    alg: 'RS256',
    typ: 'JWT',
    kid: keyId,
  };

  const payload = {
    iss: channelId,
    sub: channelId,
    aud: 'https://api.line.me/',
    exp: Math.floor(new Date().getTime() / 1000) + 60 * 30,
    token_exp: 60 * 60 * 24 * 30,
  };

  const jwt =
    (await JWS.createSign(
      {
        format: 'compact',
        fields: header,
      },
      JSON.parse(privateKey),
    )
      .update(JSON.stringify(payload))
      .final()) + '';

  // エンドポイントからチャネルアクセストークンを取得します
  const accessTokenUrl = 'https://api.line.me/oauth2/v2.1/token';
  const accessTokenResponse = await fetch(accessTokenUrl, {
    method: 'POST',
    headers: {
      'Content-Type': 'application/x-www-form-urlencoded',
    },
    body: new URLSearchParams({
      grant_type: 'client_credentials',
      client_assertion_type:
        'urn:ietf:params:oauth:client-assertion-type:jwt-bearer',
      client_assertion: jwt,
    }).toString(),
  });

  const accessTokenBody = await accessTokenResponse.json();
  return accessTokenBody.access_token;
}
送信する度に毎回チャネルアクセストークンを取得しようと思っているけど、たくさん発行したらエラーにならないか少し心配
秘密鍵、Key ID、チャネル ID を環境変数に設定する
PORT='3000'
CHANNEL_SECRET='00000000000000000000000000000000'
PRIVATE_KEY='{"alg":"RS256", ... }'
KEY_ID='00000000-0000-0000-0000-000000000000'
CHANNEL_ID='0000000000'
秘密鍵は頑張って 1 行にして設定する
エコーボットを実装する
受信したメッセージをそのまま送信するボットを作ってみる
import { validateSignature, WebhookRequestBody } from '@line/bot-sdk';
import { Controller, Post, RawBodyRequest, Req, Res } from '@nestjs/common';
import { Request, Response } from 'express';
import fetch from 'node-fetch';
import { AppService } from './app.service';
import { getLineAccessToken } from './lib/line-access-token';

@Controller()
export class AppController {
  constructor(private readonly appService: AppService) {}

  @Post('api/v1/line/webhook')
  async onApiV1LineWebhook(
    @Req() req: RawBodyRequest<Request>,
    @Res() res: Response,
  ) {
    const lineSignature = req.headers['x-line-signature'] as string;
    const channelSecret = process.env.CHANNEL_SECRET;
    const requestBody = req.rawBody;

    if (!validateSignature(requestBody, channelSecret, lineSignature)) {
      res.status(400).send('lineSignature !== lineSignatureVerify');
      return;
    }

    const webhookRequest = JSON.parse(
      requestBody.toString(),
    ) as WebhookRequestBody;

    for (const event of webhookRequest.events) {
      if (event.type === 'message' && event.message.type === 'text') {
        const channelAccessToken = await getLineAccessToken(
          process.env.PRIVATE_KEY,
          process.env.KEY_ID,
          process.env.CHANNEL_ID,
        );

        const replyUrl = 'https://api.line.me/v2/bot/message/reply';
        const replyResponse = await fetch(replyUrl, {
          method: 'POST',
          headers: {
            'Content-Type': 'application/json; charset=UTF-8',
            Authorization: `Bearer ${channelAccessToken}`,
          },
          body: JSON.stringify({
            replyToken: event.replyToken,
            messages: [
              {
                type: 'text',
                text: event.message.text,
              },
            ],
          }),
        });

        if (replyResponse.status !== 200) {
          console.warn(await replyResponse.text());
        }
      }
    }

    res.status(200).send('OK');
  }
}
テストコードも少し変更する
import { createHmac } from 'crypto';
import fetch from 'node-fetch';

describe('LINE Webhook', () => {
  it('/ (GET)', async () => {
    const targetUrl =
      process.env.WEBHOOK_URL || 'http://localhost:3000/api/v1/line/webhook';
    const requestBody = JSON.stringify({
      destination: 'U00000000000000000000000000000000',
      events: [
        {
          type: 'message',
          replyToken: 'replyToken',
          message: {
            type: 'text',
            text: 'Hello LINE',
          },
        },
      ],
    });

    const channelSecret = process.env.CHANNEL_SECRET;
    const lineSignature = createHmac('SHA256', channelSecret)
      .update(requestBody)
      .digest('base64');

    const webhookResponse = await fetch(targetUrl, {
      method: 'POST',
      headers: {
        'X-Line-Signature': lineSignature,
        'Content-Type': 'application/json',
      },
      body: requestBody,
    });

    console.log(webhookResponse.status);
    console.log(await webhookResponse.text());
  });
});
npm run test:e2e -- line-webhook --setupFiles dotenv/config
{"message":"Invalid reply token"}
reply token が不正なのでこの実行結果は期待した通り
この状態でデプロイする
毎回コマンドを探すのも大変なので package.json の deploy スクリプトとして登録する
{
  "scripts": {
    "deploy": "gcloud run deploy hello-line-bot --source . --platform managed --region asia-northeast1 --allow-unauthenticated"
  }
}
これで下記を実行するだけで済む
npm run deploy
動作確認
「こんにちは」とメッセージを送信してみたが返ってこない、悲しい
そうだ、環境変数の登録を忘れていた
- PRIVATE_KEY
- KEY_ID
- CHANNEL_ID
今度は「こんにちは」というメッセージが返ってきた、嬉しい
今度はプッシュメッセージを試してみる
プッシュメッセージを送るには宛先ユーザー ID が必要
LINE Developers コンソールや公式アカウントマネージャーで調べれば出てくるかと思ったけどそうでも無さそう
仕方がないので Webhook の方に手を加えてユーザー ID をログに残すようにしてみる
import { validateSignature, WebhookRequestBody } from '@line/bot-sdk';
import { Controller, Post, RawBodyRequest, Req, Res } from '@nestjs/common';
import { Request, Response } from 'express';
import fetch from 'node-fetch';
import { AppService } from './app.service';
import { getLineAccessToken } from './lib/line-access-token';

@Controller()
export class AppController {
  constructor(private readonly appService: AppService) {}

  @Post('api/v1/line/webhook')
  async onApiV1LineWebhook(
    @Req() req: RawBodyRequest<Request>,
    @Res() res: Response,
  ) {
    const lineSignature = req.headers['x-line-signature'] as string;
    const channelSecret = process.env.CHANNEL_SECRET;
    const requestBody = req.rawBody;

    if (!validateSignature(requestBody, channelSecret, lineSignature)) {
      res.status(400).send('lineSignature !== lineSignatureVerify');
      return;
    }

    const webhookRequest = JSON.parse(
      requestBody.toString(),
    ) as WebhookRequestBody;

    // for (const event of webhookRequest.events) {
    //   if (event.type === 'message' && event.message.type === 'text') {
    //     const channelAccessToken = await getLineAccessToken(
    //       process.env.PRIVATE_KEY,
    //       process.env.KEY_ID,
    //       process.env.CHANNEL_ID,
    //     );

    //     const replyUrl = 'https://api.line.me/v2/bot/message/reply';
    //     const replyResponse = await fetch(replyUrl, {
    //       method: 'POST',
    //       headers: {
    //         'Content-Type': 'application/json; charset=UTF-8',
    //         Authorization: `Bearer ${channelAccessToken}`,
    //       },
    //       body: JSON.stringify({
    //         replyToken: event.replyToken,
    //         messages: [
    //           {
    //             type: 'text',
    //             text: event.message.text,
    //           },
    //         ],
    //       }),
    //     });

    //     if (replyResponse.status !== 200) {
    //       console.warn(await replyResponse.text());
    //     }
    //   }
    // }

    console.log(JSON.stringify(webhookRequest));

    res.status(200).send('OK');
  }
}
念のためテスト
npm run test:e2e -- line-webhook --setupFiles dotenv/config
{"destination":"U00000000000000000000000000000000","events":[{"type":"message","replyToken":"replyToken","message":{"type":"text","text":"Hello LINE"}}]}
この状態でデプロイ
npm run deploy
デプロイしている間にテストコードを作成する
touch test/line-push-message.e2e-spec.ts
import fetch from 'node-fetch';
import { getLineAccessToken } from '../src/lib/line-access-token';

describe('LINE Webhook', () => {
  it('/ (GET)', async () => {
    const channelAccessToken = await getLineAccessToken(
      process.env.PRIVATE_KEY,
      process.env.KEY_ID,
      process.env.CHANNEL_ID,
    );

    const pushMessageUrl = 'https://api.line.me/v2/bot/message/push';
    const pushMessageResponse = await fetch(pushMessageUrl, {
      method: 'POST',
      headers: {
        'Content-Type': 'application/json; charset=UTF-8',
        Authorization: `Bearer ${channelAccessToken}`,
      },
      body: JSON.stringify({
        to: process.env.TO,
        messages: [
          {
            type: 'text',
            text: 'プッシュメッセージです',
          },
        ],
      }),
    });

    if (pushMessageResponse.status !== 200) {
      console.warn(await pushMessageResponse.text());
    }
  });
});
ユーザー ID を調べる
デプロイが終わったら例によって「こんにちは」などのメッセージを送信する
Cloud Run のログに Webhook リクエストのログが記録されるので確認する
パスは events[0].source.userId
プッシュメッセージの送信
下記のコマンドを実行する、TO は送信先のユーザー ID
TO=U00000000000000000000000000000000 \
  npm run test:e2e -- line-push-message --setupFiles dotenv/config
LINE アプリでプッシュメッセージが送信されているかどうかを確認する
プッシュメッセージですと表示されれば成功
無事にメッセージの送信と受信ができた
特につまづくことなく(gcp-build くらい)終わることができた
LINE のドキュメントの素晴らしさに感銘を受けた
引き続きアプリ上での LINE アカウントの紐付けについて調べていく
多分 LINE ログインなどを使うのだろう
LINE ID 連携という
LINE アカウントの紐付けは LINE ID 連携と世間では言われるようだ
下記の記事がとてもわかりやすい
LIFF について
LINE ID 連携を行うには LIFF について学ぶ必要がある
LIFF とは LINE Frontend Framework の略
やりたいが時間が足りなそう
あと 30 分では難しそうなので調べるだけにする
Messaging API にもアカウント連携機能がある
どちらを使えば良いか迷う
迷う必要もなかった
Messaging API を使うのが王道
自前のやり方でも実装できるかも知れないが脆弱性を作ってしまうかも知れないのでやめておく
LIFF の必要性
スマートショッピングさんの記事では LIFF を使っているけどこれは無くても実装できる気がする
次回は公式ドキュメントのやり方に従って LINE ID 連携を実装してみようと思う
リプライメッセージは無料
知らなかった、てっきり有料だと思ってた
チャットと Webhook の同時利用
LINE Official Account Manager から設定できる
こうすることで手動対応もできる
プッシュメッセージの上限を使い切ってしまった時などに便利
ユーザーアカウントの連携
まずはリンクトークンを取得する
ソースコードに下記の変更を加える
import { validateSignature, WebhookRequestBody } from '@line/bot-sdk';
import { Controller, Post, RawBodyRequest, Req, Res } from '@nestjs/common';
import { Request, Response } from 'express';
import fetch from 'node-fetch';
import { AppService } from './app.service';
import { getLineAccessToken } from './lib/line-access-token';

@Controller()
export class AppController {
  constructor(private readonly appService: AppService) {}

  @Post('api/v1/line/webhook')
  async onApiV1LineWebhook(
    @Req() req: RawBodyRequest<Request>,
    @Res() res: Response,
  ) {
    // 署名を検証して LINE からのアクセスであることを検証します
    const lineSignature = req.headers['x-line-signature'] as string;
    const channelSecret = process.env.CHANNEL_SECRET;
    const requestBody = req.rawBody;

    if (!validateSignature(requestBody, channelSecret, lineSignature)) {
      res.status(400).send('lineSignature !== lineSignatureVerify');
      return;
    }

    const webhookRequest = JSON.parse(
      requestBody.toString(),
    ) as WebhookRequestBody;

    const channelAccessToken = await getLineAccessToken(
      process.env.PRIVATE_KEY,
      process.env.KEY_ID,
      process.env.CHANNEL_ID,
    );

    for (const event of webhookRequest.events) {
      if (event.type === 'message' && event.message.type === 'text') {
        // 連携トークンを取得します
        const userId = event.source.userId;

        if (!userId) {
          continue;
        }

        const linkTokenUrl = `https://api.line.me/v2/bot/user/${userId}/linkToken`;
        const linkTokenResponse = await fetch(linkTokenUrl, {
          method: 'POST',
          headers: {
            Authorization: `Bearer ${channelAccessToken}`,
          },
        });

        if (linkTokenResponse.status !== 200) {
          console.warn(await linkTokenResponse.text());
          continue;
        }

        const linkToken: string = (await linkTokenResponse.json()).linkToken;

        // ユーザーを連携 URL にリダイレクトします
        const replyUrl = 'https://api.line.me/v2/bot/message/reply';
        const replyResponse = await fetch(replyUrl, {
          method: 'POST',
          headers: {
            'Content-Type': 'application/json; charset=UTF-8',
            Authorization: `Bearer ${channelAccessToken}`,
          },
          body: JSON.stringify({
            replyToken: event.replyToken,
            messages: [
              {
                type: 'template',
                altText: 'Account Link',
                template: {
                  type: 'buttons',
                  text: 'Account Link',
                  actions: [
                    {
                      type: 'uri',
                      label: 'Account Link',
                      uri:
                        process.env.BASE_URL +
                        '/link?' +
                        new URLSearchParams({
                          linkToken: linkToken,
                        }).toString(),
                    },
                  ],
                },
              },
            ],
          }),
        });

        if (replyResponse.status !== 200) {
          console.warn(await replyResponse.text());
        }
      }
    }

    // 送信者のユーザー ID を確認するためコンソール出力しています
    console.log(JSON.stringify(webhookRequest));

    res.status(200).send('OK');
  }
}
.env に BASE_URL を追加する
BASE_URL='http://localhost:3000'
テストコードにも変更を加える
import { createHmac } from 'crypto';
import fetch from 'node-fetch';

describe('LINE Webhook', () => {
  it('/ (GET)', async () => {
    const targetUrl =
      process.env.WEBHOOK_URL || 'http://localhost:3000/api/v1/line/webhook';
    const requestBody = JSON.stringify({
      destination: 'U00000000000000000000000000000000',
      events: [
        {
          type: 'message',
          replyToken: 'replyToken',
          source: {
            userId: process.env.USER_ID || 'U11111111111111111111111111111111',
          },
          message: {
            type: 'text',
            text: 'Hello LINE',
          },
        },
      ],
    });

    const channelSecret = process.env.CHANNEL_SECRET;
    const lineSignature = createHmac('SHA256', channelSecret)
      .update(requestBody)
      .digest('base64');

    const webhookResponse = await fetch(targetUrl, {
      method: 'POST',
      headers: {
        'X-Line-Signature': lineSignature,
        'Content-Type': 'application/json',
      },
      body: requestBody,
    });

    console.log(webhookResponse.status);
    console.log(await webhookResponse.text());
  });
});
とりあえずテスト
npm run test:e2e -- line-webhook --setupFiles dotenv/config
デプロイ
npm run deploy
LINE でメッセージを送ってみるが URL が返ってこない...
ログを確認すると下記のメッセージを発見
A message (messages[0]) in the request body is invalid
ボットから送信するメッセージのフォーマットを確認してみる
        const replyResponse = await fetch(replyUrl, {
          method: 'POST',
          headers: {
            'Content-Type': 'application/json; charset=UTF-8',
            Authorization: `Bearer ${channelAccessToken}`,
          },
          body: JSON.stringify({
            replyToken: event.replyToken,
            messages: [
              {
                type: 'template',
                altText: 'Account Link',
                template: {
                  type: 'buttons',
                  text: 'Account Link',
                  actions: [
                    {
                      type: 'uri',
                      label: 'Account Link',
                      uri:
                        process.env.BASE_URL +
                        '/link?' +
                        new URLSearchParams({
                          linkToken: linkToken,
                        }).toString(),
                    },
                  ],
                },
              },
            ],
          }),
        });
フォーマットは大丈夫そうだ
そうだった、BASE_URL 環境変数を Cloud Run で追加するのを忘れていた
できた様子だが PC 版の LINE だと確認できないのでスマホで確認する必要がある
テンプレートメッセージも良し悪しですね
スマホで確認したら問題なくボタンが表示されていた、良かった
LINEプラットフォームにリダイレクトする
ソースコードの変更、ちなみにリプライメッセージでも link → api/v1/line/link に変更しています
  // nonce を生成してユーザーを LINE プラットフォームにリダイレクトします
  @Get('api/v1/line/link')
  async onLink(@Req() req: RawBodyRequest<Request>, @Res() res: Response) {
    const linkToken = req.query.linkToken as string;
    const nonce = 'nonce-nonce-nonce';
    const redirectUrl =
      'https://access.line.me/dialog/bot/accountLink?' +
      new URLSearchParams({
        linkToken: linkToken,
        nonce: nonce,
      });

    res.redirect(redirectUrl);
  }
テストコードの作成
touch test/line-link.e2e-spec.ts
import { strictEqual } from 'assert';
import fetch from 'node-fetch';

describe('LINE Link', () => {
  it('/ (GET)', async () => {
    const targetUrl =
      process.env.BASE_URL + '/api/v1/line/link?linkToken=linkToken';

    const linkResponse = await fetch(targetUrl, {
      redirect: 'manual',
    });

    strictEqual(linkResponse.status, 302);
    strictEqual(
      linkResponse.headers.get('location'),
      'https://access.line.me/dialog/bot/accountLink?linkToken=linkToken&nonce=nonce-nonce-nonce',
    );
  });
});
テストコードの実行
npm run test:e2e -- line-link --setupFiles dotenv/config
デプロイ
npm run deploy
デプロイしている間は暇なのでお勉強
アカウント連携機能を使う場合は、以下の2点を遵守してください。
- ユーザーに連携解除機能を必ず提供すること
- ユーザーがアカウントを連携するときに、連携解除機能があることを通知すること
たとえば、Messaging APIを使えば、表示するリッチメニューをユーザーごとに変更できます。アカウントを連携していないユーザーにはアカウントを連携するメニューを表示し、アカウントを連携済みのユーザーには連携を解除するメニューを表示すれば、ユーザーにとって使いやすい形でアカウント連携機能を提供できるでしょう。
リッチメニューをユーザーごとに変更できることが書かれている、すごいな、どうやればできるんだろう
それらしいドキュメントを発見した
連携していない場合は連携の案内メッセージ、連携している場合は連携解除の案内メッセージをリプライすることでも対応できそう
お勉強している間にデプロイが終わった
スマホの LINE アプリでもう一度、連携 URL を発行してみる(URL を変更したので)
Account Link ボタンを押すと「LINE とロレムイプサム開発アカウントを連携しました」とのメッセージが表示された、成功して嬉しい
念のため Cloud Run の方でアカウント連携イベントを受信していることをログから確認する
成功していれば events[0].link.result === 'ok' で events[0].link.nonce に nonce が格納されるので、これを元にボットの方で自社アプリのユーザーと LINE のユーザー ID を紐付ける
LINE のユーザー ID は events[0].source.userId に格納されている
nonce を発行時にユーザーと紐付けておく必要がある
おわりに
これにて必要最小限の検証が完了した
LINE プラットフォームはドキュメントもそれ自体もクオリティが素晴らしいと感じた
一旦クローズするが、また調べたいことがあればオープンして続けようと思う
GitHub リポジトリ
MIT ライセンスで公開しましたのでお役に立つようであれば自由にお使いください
同じような内容のスクラップを書かれている方を見つけた
なんか嬉しい。
しかも参考にしてもらえている!ありがとうございます。
Flex メッセージを使うとカレンダーを表示できた
便利な Flex Message Simulator