サーバーサイド Kotlin で Spring Boot の Getting Started をやってみる
このスクラップについて
今後の仕事でサーバーサイド Kotlin を使うかもしれないので今のうちに基本的な使い方を調べておこうと思う。
- Getting Started / Hello World
- REST API の作成
- HTTP リクエストの送信
- JSON エンコード/デコード
- 環境変数ロード
Kotlin に関する過去のスクラップ
実は過去に Kotlin に関する短いスクラップをいくつか書いている。
これらのスクラップを書いたときは Jetpack Compose を使って Android アプリ開発に Kotlin を使おうと思っていた。
今はサーバーサイドで Kotlin を使おうとしている。
Getting Started を探す
Kitlin 公式ドキュメントの関連しそうなページは下記のとおり。
内容は参考になるが具体的な手順は示されていないので別途探す必要がありそう。
技術書籍
日本語の書籍としては下記がある。
無料で読める目次からは下記のキーワードが読み取れる。
- Spring Boot → REST
- MyBatis → ORM
- Ktor → Web フレームワーク
- Exposed → ORM
その他の技術書籍
技術の泉シリーズより。
やはりこちらでも Spring Boot を使っている。
まずは Spring Boot からやっていこう
嬉しいことに日本語版もある。
しかし、ちょっと翻訳に難がありそうなので英語の方を見た方が良いかも。
エディタは何を使えば良い?
やはり IntelliJ IDEA なのかな?
入門!実践!サーバーサイド Kotlin によると VSCode と IntelliJ IDEA のどちらでも良いが初心者のおすすめは IntelliJ IDEA のようだ。
サンプルなのに開発環境のページまで読ませてもらえるのはありがたい、感謝。
IntelliJ IDEA のダウンロード
有料の Ultimate と無料の Community Edition の 2 つがある。
macOS の場合は dmg ファイルをダウンロードする、ファイルサイズは 855 MB とやや大きい。
暇なのでプロジェクトを作成する
下記の 3 つの方法がある。
- Web ページを使用する
- コマンドを実行する
- IntelliJ IDEA を使う(Ultimate 版のみ)
Web ページを使用する場合は https://start.spring.io/ にアクセスする。
コマンドを使用する場合は下記のとおり。
mkdir -p ~/workspace/kotlin/blog && cd ~/workspace/kotlin/blog
curl https://start.spring.io/starter.zip \
  -d language=kotlin \
  -d type=gradle-project-kotlin \
  -d dependencies=web,mustache,jpa,h2,devtools \
  -d packageName=com.example.blog \
  -d name=Blog \
  -o blog.zip
unzip blog.zip
rm -f blog.zip
特にこだわりがなければコマンドの方が楽ちん。
IntelliJ IDEA のインストール
ダウンロードした dmg ファイルを開いて IntelliJ IDEA CE を Applications ディレクトリにドラッグアンドドロップする。
IntelliJ IDEA でプロジェクトを開く
IntelliJ IDEA を起動して Open ボタンを押して ~/workspace/kotlin/blog を開く。
初めてのコーディング
touch src/main/kotlin/com/example/blog/HtmlController.kt
package com.example.blog

import org.springframework.stereotype.Controller
import org.springframework.ui.Model
import org.springframework.ui.set
import org.springframework.web.bind.annotation.GetMapping

@Controller
class HtmlController {

  @GetMapping("/")
  fun blog(model: Model): String {
    model["title"] = "Blog"
    return "blog"
  }
}
VSCode + TypeScript に慣れすぎていてコード補完が効かないのが不安でしょうがない。
Gradle エラー
何やらエラーが出ている。
No matching variant of org.springframework.boot:spring-boot-gradle-plugin:3.0.5 was found. The consumer was configured to find a runtime of a library compatible with Java 8, packaged as a jar, and its dependencies declared externally, as well as attribute 'org.gradle.plugin.api-version' with value '7.6.1' but:
参考になりそう
エラーの原因
下記の記事がとても参考になりそうだった。
Java や Spring Boot のバージョンを変更したら解決できるかも知れない。
今日は時間が来てしまったので次回また試してみよう。
Java のバージョンを上げてみる
Java のバージョンを 17 にしてみる。
brew install openjdk@17
==> Installing openjdk@17
==> Pouring openjdk@17--17.0.6.monterey.bottle.tar.gz
==> Caveats
For the system Java wrappers to find this JDK, symlink it with
  sudo ln -sfn /usr/local/opt/openjdk@17/libexec/openjdk.jdk /Library/Java/JavaVirtualMachines/openjdk-17.jdk

openjdk@17 is keg-only, which means it was not symlinked into /usr/local,
because this is an alternate version of another formula.

If you need to have openjdk@17 first in your PATH, run:
  echo 'export PATH="/usr/local/opt/openjdk@17/bin:$PATH"' >> ~/.zshrc

For compilers to find openjdk@17 you may need to set:
  export CPPFLAGS="-I/usr/local/opt/openjdk@17/include"
==> Summary
🍺  /usr/local/Cellar/openjdk@17/17.0.6: 634 files, 304.8MB
==> Running `brew cleanup openjdk@17`...
Disable this behaviour by setting HOMEBREW_NO_INSTALL_CLEANUP.
Hide these hints with HOMEBREW_NO_ENV_HINTS (see `man brew`).
コンソール出力に従ってシンボリックリンクを作成する。
sudo ln -sfn /usr/local/opt/openjdk@17/libexec/openjdk.jdk /Library/Java/JavaVirtualMachines/openjdk-17.jdk
この時点で java -version を実行すると下記の結果が得られるので大丈夫そう。
openjdk version "17.0.6" 2023-01-17
OpenJDK Runtime Environment Homebrew (build 17.0.6+0)
OpenJDK 64-Bit Server VM Homebrew (build 17.0.6+0, mixed mode, sharing)
念のため PATH も通しておく。
echo 'export PATH="/usr/local/opt/openjdk@17/bin:$PATH"' >> ~/.zshrc
こちらの記事がとてもわかりやすかった。
IntelliJ IDEA 再起動
再起動すると依存関係の解決が開始された様子!
よかった、よかった。
依存関係解決にはかなり時間がかかりそうだ。
IntelliJ IDEA チートシート
公式ドキュメントの関連しそうなページは下記の通り。
わかりやすいチートシートはこちら。
チートシートの日本語版はこちら。
IntelliJ IDEA 依存関係解決が終わった
HtmlController.kt コード補完も効くようになった。
よかった、よかった。
引き続きコーディング
touch src/main/resources/templates/header.mustache
touch src/main/resources/templates/footer.mustache
touch src/main/resources/templates/blog.mustache
<html>
<head>
  <title>{{title}}</title>
</head>
<body>
</body>
</html>
{{> header}}

<h1>{{title}}</h1>

{{> footer}}
Web サーバー起動
BlogApplication.kt を開いて main 関数の左側にある ▶︎ ボタンを押す。
しかし Java のバージョンが古いことによるエラーメッセージが表示されてしまった。
objc[33430]: Class JavaLaunchHelper is implemented in both /Library/Java/JavaVirtualMachines/jdk1.8.0_101.jdk/Contents/Home/bin/java (0x10dcd34c0) and /Library/Java/JavaVirtualMachines/jdk1.8.0_101.jdk/Contents/Home/jre/lib/libinstrument.dylib (0x10de9b4e0). One of the two will be used. Which one is undefined.
Error: A JNI error has occurred, please check your installation and try again
Exception in thread "main" java.lang.UnsupportedClassVersionError: com/example/blog/BlogApplicationKt has been compiled by a more recent version of the Java Runtime (class file version 61.0), this version of the Java Runtime only recognizes class file versions up to 52.0
	at java.lang.ClassLoader.defineClass1(Native Method)
	at java.lang.ClassLoader.defineClass(ClassLoader.java:763)
	at java.security.SecureClassLoader.defineClass(SecureClassLoader.java:142)
	at java.net.URLClassLoader.defineClass(URLClassLoader.java:467)
	at java.net.URLClassLoader.access$100(URLClassLoader.java:73)
	at java.net.URLClassLoader$1.run(URLClassLoader.java:368)
	at java.net.URLClassLoader$1.run(URLClassLoader.java:362)
	at java.security.AccessController.doPrivileged(Native Method)
	at java.net.URLClassLoader.findClass(URLClassLoader.java:361)
	at java.lang.ClassLoader.loadClass(ClassLoader.java:424)
	at sun.misc.Launcher$AppClassLoader.loadClass(Launcher.java:331)
	at java.lang.ClassLoader.loadClass(ClassLoader.java:357)
	at sun.launcher.LauncherHelper.checkAndLoadMain(LauncherHelper.java:495)

Process finished with exit code 1
IntelliJ IDEA で Java バージョン変更
こちらの記事がわかりやすい。
メニュー > File > Project Structure... または Command + ; を押す。
Project Settings > Project > Project SDK で SDK のバージョンを指定できる。
- 1.8
- Kotlin SDK
- openjdk-17.jdk
多分 openjdk-17.jdk を選べば動きそうだが興味本位で Kotlin SDK を指定してみたところダメだった。
サーバーが起動した!
openjdk-17.jdk を指定したら動いた!
http://localhost:8080 にアクセスしてみる。
「Blog」と表示された。
ここまで辿り着くのに 2 時間強くらいかかった。
スクラップ名の変更
最初のタイトルは「サーバーサイド Kotlin について調べる」だった。
実態に鑑みて「サーバーサイド Kotlin で Spring Boot の Getting Started をやってみる」に変更しよう。
ここで終わっても良いが
せっかくなので最後までやってみよう。
JUnit インテグレーションテスト
touch src/test/kotlin/com/example/blog/IntegrationTests.kt
import org.assertj.core.api.AssertionsForClassTypes.assertThat
import org.junit.jupiter.api.Test
import org.springframework.beans.factory.annotation.Autowired
import org.springframework.boot.test.context.SpringBootTest
import org.springframework.boot.test.web.client.TestRestTemplate
import org.springframework.boot.test.web.client.getForEntity
import org.springframework.http.HttpStatus

@SpringBootTest(webEnvironment = SpringBootTest.WebEnvironment.RANDOM_PORT)
class IntegrationTests(@Autowired val restTemplate: TestRestTemplate) {
    @Test
    fun `Assert blog page title, content and status code`() {
        val entity = restTemplate.getForEntity<String>("/")
        assertThat(entity.statusCode).isEqualTo(HttpStatus.OK)
        assertThat(entity.body).contains("<h1>Blog</h1>")
    }
}
IntelliJ IDEA でメソッド名の左に表示される ▶︎ ボタンを押すとテストを実行できる。
実行したところテストに失敗した。
色々調べると下記のエラーメッセージにたどり着いた。
Caused by: java.lang.UnsupportedClassVersionError: IntegrationTests has been compiled by a more recent version of the Java Runtime (class file version 61.0), this version of the Java Runtime only recognizes class file versions up to 52.0
また Java のバージョンが原因のようだ。
初心に帰る
心機一転、復習を兼ねてプロジェクトを作る所からやり直してみよう。
mkdir -p ~/workspace/kotlin/blog2 && cd ~/workspace/kotlin/blog2
curl https://start.spring.io/starter.zip \
  -d language=kotlin \
  -d type=gradle-project-kotlin \
  -d dependencies=web,mustache,jpa,h2,devtools \
  -d packageName=com.example.blog2 \
  -d name=Blog \
  -o blog2.zip
unzip blog2.zip
rm -f blog2.zip
touch src/main/kotlin/com/example/blog2/HtmlController.kt
touch src/main/resources/templates/header.mustache
touch src/main/resources/templates/footer.mustache
touch src/main/resources/templates/blog.mustache
touch src/test/kotlin/com/example/blog2/IntegrationTests.kt
package com.example.blog2

import org.springframework.stereotype.Controller
import org.springframework.ui.Model
import org.springframework.ui.set
import org.springframework.web.bind.annotation.GetMapping

@Controller
class HtmlController {

  @GetMapping("/")
  fun blog(model: Model): String {
    model["title"] = "Blog"
    return "blog"
  }
}
<html>
<head>
  <title>{{title}}</title>
</head>
<body>
</body>
</html>
{{> header}}

<h1>{{title}}</h1>

{{> footer}}
import org.assertj.core.api.AssertionsForClassTypes.assertThat
import org.junit.jupiter.api.Test
import org.springframework.beans.factory.annotation.Autowired
import org.springframework.boot.test.context.SpringBootTest
import org.springframework.boot.test.web.client.TestRestTemplate
import org.springframework.boot.test.web.client.getForEntity
import org.springframework.http.HttpStatus

@SpringBootTest(webEnvironment = SpringBootTest.WebEnvironment.RANDOM_PORT)
class IntegrationTests(@Autowired val restTemplate: TestRestTemplate) {
    @Test
    fun `Assert blog page title, content and status code`() {
        val entity = restTemplate.getForEntity<String>("/")
        assertThat(entity.statusCode).isEqualTo(HttpStatus.OK)
        assertThat(entity.body).contains("<h1>Blog</h1>")
    }
}
エラーメッセージが変わった
Unable to find a @SpringBootConfiguration, you need to use @ContextConfiguration or @SpringBootTest(classes=...) with your test
もしかして冒頭に package が必要?
package com.example.blog2 // この行を追加しました。

import org.assertj.core.api.AssertionsForClassTypes.assertThat
import org.junit.jupiter.api.Test
import org.springframework.beans.factory.annotation.Autowired
import org.springframework.boot.test.context.SpringBootTest
import org.springframework.boot.test.web.client.TestRestTemplate
import org.springframework.boot.test.web.client.getForEntity
import org.springframework.http.HttpStatus

@SpringBootTest(webEnvironment = SpringBootTest.WebEnvironment.RANDOM_PORT)
class IntegrationTests(@Autowired val restTemplate: TestRestTemplate) {
    @Test
    fun `Assert blog page title, content and status code`() {
        val entity = restTemplate.getForEntity<String>("/")
        assertThat(entity.statusCode).isEqualTo(HttpStatus.OK)
        assertThat(entity.body).contains("<h1>Blog</h1>")
    }
}
今度は成功した。
9:57:12: Execution finished ':test --tests "com.example.blog2.IntegrationTests.Assert blog page title, content and status code"'.
要注意
公式ドキュメントに記載されているソースコードでは package や import が省略されているので注意が必要です。
setup() と teardown()
テストケースの実行前後にメソッドを実行するにはまずプロパティファイルを作成する。
mkdir -p src/test/resources
touch src/test/resources/junit-platform.properties
junit.jupiter.testinstance.lifecycle.default = per_class
次にアノテーションを使用して実行したいメソッドを書いていく。
package com.example.blog2

import org.assertj.core.api.AssertionsForClassTypes.assertThat
import org.junit.jupiter.api.AfterAll
import org.junit.jupiter.api.BeforeAll
import org.junit.jupiter.api.Test
import org.springframework.beans.factory.annotation.Autowired
import org.springframework.boot.test.context.SpringBootTest
import org.springframework.boot.test.web.client.TestRestTemplate
import org.springframework.boot.test.web.client.getForEntity
import org.springframework.http.HttpStatus

@SpringBootTest(webEnvironment = SpringBootTest.WebEnvironment.RANDOM_PORT)
class IntegrationTests(@Autowired val restTemplate: TestRestTemplate) {
    @BeforeAll
    fun setup() {
        println(">> Setup")
    }

    @Test
    fun `Assert blog page title, content and status code`() {
        val entity = restTemplate.getForEntity<String>("/")
        assertThat(entity.statusCode).isEqualTo(HttpStatus.OK)
        assertThat(entity.body).contains("<h1>Blog</h1>")
    }

    @AfterAll
    fun teardown() {
        println(">> Tear down")
    }
}
テストを実行したところ実行結果に >> Setup と >> Tear down が含まれていたので実行されている模様。
LocalDateTime + String クラスの拡張
自分も詳しく知らないけど Kotlin では Extensions という機能を使って既存のクラスを拡張できるようだ。
日本語訳はこちら。
この機能を使って LocalDateTime に format メソッドを追加してみる。
touch src/main/kotlin/com/example/blog2/Extensions.kt
package com.example.blog2

import java.time.LocalDateTime
import java.time.format.DateTimeFormatterBuilder
import java.time.temporal.ChronoField
import java.util.*

fun LocalDateTime.format(): String = this.format(englishDateFormatter)

private val daysLookup = (1..31).associate { it.toLong() to getOrdinal(it) }

private val englishDateFormatter = DateTimeFormatterBuilder()
        .appendPattern("yyyy-MM-dd")
        .appendLiteral(" ")
        .appendText(ChronoField.DAY_OF_MONTH, daysLookup)
        .appendLiteral(" ")
        .appendPattern("yyyy")
        .toFormatter((Locale.ENGLISH))

private fun getOrdinal(n: Int) = when {
    n in 11..13 -> "${n}th"
    n % 10 == 1 -> "${n}st"
    n % 10 == 2 -> "${n}nd"
    n % 10 == 3 -> "${n}rd"
    else -> "${n}th"
}

fun String.toSlug() = lowercase(Locale.getDefault())
        .replace("\n", " ")
        .replace("[^a-z\\d\\s]".toRegex(), " ")
        .split(" ")
        .joinToString("-")
        .replace("-+".toRegex(), "-")
手っ取り早く試したい場合は HtmlController.kt に変更を加える。
package com.example.blog2

import org.springframework.stereotype.Controller
import org.springframework.ui.Model
import org.springframework.ui.set
import org.springframework.web.bind.annotation.GetMapping
import java.time.LocalDateTime

@Controller
class HtmlController {

    @GetMapping("/")
    fun blog(model: Model): String {
        model["title"] = LocalDateTime.now().format() + "My Blog".toSlug()
        return "blog"
    }
}
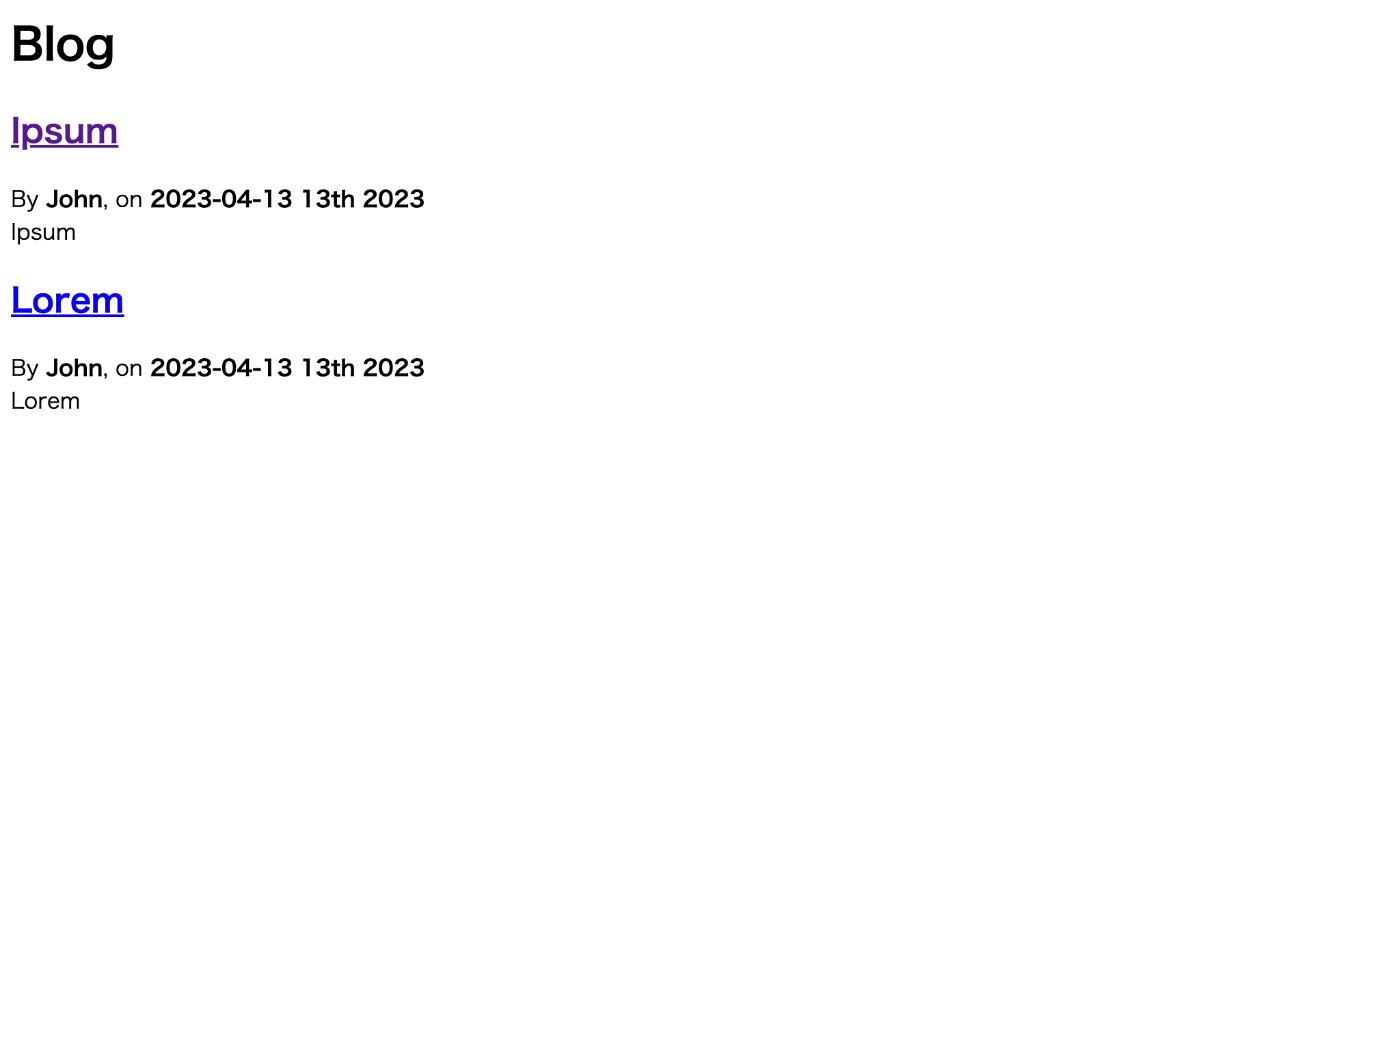
成功すると http://localhost:8080 にアクセスすると 2023-04-12 12th 2023my-blog と表示される。
変更を反映するにはサーバーを再起動する必要があるのでかなり面倒。
ウォッチモードが無いか後から探してみようと思う。
今日はここまで
今日やったことを振り返る。
- Java バージョン 17 インストール
- Web サーバー起動
- JUnit テスト実行
- LocalDateTime + String クラス拡張
今のところ順調に進んでいて良かった。
次回は JPA を使ったデータ永続化の手順を検証してみようと思う。
JPA を使う準備
plugins {
  kotlin("plugin.allopen") version "1.8.0"
}

allOpen {
  annotation("jakarta.persistence.Entity")
  annotation("jakarta.persistence.Embeddable")
  annotation("jakarta.persistence.MappedSuperclass")
}
上記が必要な理由か下記のページに書かれているらしい。
エンティティのコーディング
touch src/main/kotlin/com/example/blog2/Entities.kt
package com.example.blog2

import com.example.blog2.toSlug
import jakarta.persistence.Entity
import jakarta.persistence.GeneratedValue
import jakarta.persistence.Id
import jakarta.persistence.ManyToOne
import java.time.LocalDateTime

@Entity
class Article(
    var title: String,
    var headline: String,
    var content: String,
    @ManyToOne var author: User,
    var slug: String = title.toSlug(),
    var addedAt: LocalDateTime = LocalDateTime.now(),
    @Id @GeneratedValue var id: Long? = null
)

@Entity
class User(
    var login: String,
    var firstname: String,
    var lastname: String,
    var description: String? = null,
    @Id @GeneratedValue var id: Long? = null
)
リポジトリのコーディング
touch src/main/kotlin/com/example/blog2/Repositories.kt
package com.example.blog2

import org.springframework.data.repository.CrudRepository

interface ArticleRepository : CrudRepository<Article, Long> {
    fun findBySlug(slug: String): Article?
    fun findAllByOrderByAddedAtDesc(): Iterable<Article>
}

interface UserRepository : CrudRepository<User, Long> {
    fun findByLogin(login: String): User?
}
テストコードのコーディング
touch src/test/kotlin/com/example/blog2/RepositoriesTests.kt
package com.example.blog2

import org.assertj.core.api.AssertionsForClassTypes.assertThat
import org.junit.jupiter.api.Test
import org.springframework.beans.factory.annotation.Autowired
import org.springframework.boot.test.autoconfigure.orm.jpa.DataJpaTest
import org.springframework.boot.test.autoconfigure.orm.jpa.TestEntityManager
import org.springframework.data.repository.findByIdOrNull

@DataJpaTest
class RepositoriesTests @Autowired constructor(
    val entityManager: TestEntityManager,
    val userRepository: UserRepository,
    val articleRepository: ArticleRepository
) {
    @Test
    fun `When findByIdOrNull then return Article`() {
        val johnDoe = User("johnDoe", "John", "Doe")
        entityManager.persist(johnDoe)
        val article = Article("Lorem", "Lorem", "dolor sit amet", johnDoe)
        entityManager.persist(article)
        entityManager.flush()
        val found = articleRepository.findByIdOrNull(article.id!!)
        assertThat(found).isEqualTo(article)
    }

    @Test
    fun `When findByLogin then return User`() {
        val johnDoe = User("johnDoe", "John", "Doe")
        entityManager.persist(johnDoe)
        entityManager.flush()
        val user = userRepository.findByLogin(johnDoe.login)
        assertThat(user).isEqualTo(johnDoe)
    }
}
テストの実行
テストメソッドの隣の ▶︎ ボタンを押してテストを実行したら下記のエラーメッセージが表示された。
A problem occurred configuring root project 'demo'.
> Could not resolve all files for configuration ':classpath'.
   > Could not resolve org.jetbrains.kotlin:kotlin-gradle-plugin-api:1.7.22.
     Required by:
         project : > org.jetbrains.kotlin.jvm:org.jetbrains.kotlin.jvm.gradle.plugin:1.7.22 > org.jetbrains.kotlin:kotlin-gradle-plugin:1.7.22
         project : > org.jetbrains.kotlin.plugin.jpa:org.jetbrains.kotlin.plugin.jpa.gradle.plugin:1.7.22 > org.jetbrains.kotlin:kotlin-noarg:1.7.22
      > Multiple incompatible variants of org.jetbrains.kotlin:kotlin-gradle-plugin-api:1.8.0 were selected:
           - Variant org.jetbrains.kotlin:kotlin-gradle-plugin-api:1.8.0 variant gradle71RuntimeElements has attributes {org.gradle.category=library, org.gradle.dependency.bundling=external, org.gradle.jvm.environment=standard-jvm, org.gradle.jvm.version=8, org.gradle.libraryelements=jar, org.gradle.plugin.api-version=7.1, org.gradle.status=release, org.gradle.usage=java-runtime}
           - Variant org.jetbrains.kotlin:kotlin-gradle-plugin-api:1.8.0 variant gradle76RuntimeElements has attributes {org.gradle.category=library, org.gradle.dependency.bundling=external, org.gradle.jvm.environment=standard-jvm, org.gradle.jvm.version=8, org.gradle.libraryelements=jar, org.gradle.plugin.api-version=7.6, org.gradle.status=release, org.gradle.usage=java-runtime}

* Try:
> Run with --stacktrace option to get the stack trace.
> Run with --info or --debug option to get more log output.
> Run with --scan to get full insights.
Web サーバーも起動できない
昨日まで動いていた BlogApplication.kt の main メソッドも起動できなくなっていた。
したがってテストコードに固有の問題では無さそうだ。
今日開始する時に昨日の再現性の確認から始めれば良かったな。
build.gradle.kts を元に戻したら起動できた
build.gradle.kts に追加した部分をコメントアウトした。
import org.jetbrains.kotlin.gradle.tasks.KotlinCompile

plugins {
	id("org.springframework.boot") version "3.0.5"
	id("io.spring.dependency-management") version "1.1.0"
	kotlin("jvm") version "1.7.22"
	kotlin("plugin.spring") version "1.7.22"
	kotlin("plugin.jpa") version "1.7.22"
//	kotlin("plugin.allopen") version "1.8.0"
}

group = "com.example"
version = "0.0.1-SNAPSHOT"
java.sourceCompatibility = JavaVersion.VERSION_17

repositories {
	mavenCentral()
}

dependencies {
	implementation("org.springframework.boot:spring-boot-starter-data-jpa")
	implementation("org.springframework.boot:spring-boot-starter-mustache")
	implementation("org.springframework.boot:spring-boot-starter-web")
	implementation("com.fasterxml.jackson.module:jackson-module-kotlin")
	implementation("org.jetbrains.kotlin:kotlin-reflect")
	developmentOnly("org.springframework.boot:spring-boot-devtools")
	runtimeOnly("com.h2database:h2")
	testImplementation("org.springframework.boot:spring-boot-starter-test")
}

tasks.withType<KotlinCompile> {
	kotlinOptions {
		freeCompilerArgs = listOf("-Xjsr305=strict")
		jvmTarget = "17"
	}
}

tasks.withType<Test> {
	useJUnitPlatform()
}

//allOpen {
//	annotation("jakarta.persistence.Entity")
//	annotation("jakarta.persistence.Embeddable")
//	annotation("jakarta.persistence.MappedSuperclass")
//}
allopen プラグイン
build.gradle.kts で "plugin.allopen" だけ追加して Web サーバーを再起動したら失敗した。
plugins {
	kotlin("plugin.allopen") version "1.8.0"
}
原因はこの 1 行にあると思われる。
allopen プラグインとは何か
指定したアノテーションを使った時に open キーワードを省略できるようになるようだ。
open キーワードとは何か
クラスのメソッドはデフォルトではオーバーライドできないみたいなので open キーワードを使うことでオーバーライドできるようになるようだ。
allopen か all-open か
IntelliJ IDEA に allopen じゃなくて all-open ではないですかと提案されるが実際に all-open にすると起動できなくなる。
allopen のバージョンに何を指定すれば良いか
plugin.spring や plugin.jpa に合わせて 1.7.22 を指定してみたら Web サーバーは起動した。
テスト再実行
再実行したらテストは起動した様子だが別のエラーが発生した。
Syntax error in SQL statement "insert into [*]user (description, firstname, lastname, login, id) values (?, ?, ?, ?, ?)"; expected "identifier"; SQL statement:
insert into user (description, firstname, lastname, login, id) values (?, ?, ?, ?, ?) [42001-214]
user が予約語のようだ
下記の記事からヒントをいただいた。
テーブル名などをクオートする
src/main/resources/application.properties に下記の内容を設定する。
spring.jpa.properties.hibernate.globally_quoted_identifiers=true
spring.jpa.properties.hibernate.globally_quoted_identifiers_skip_column_definitions = true
テスト成功!
コンソールに SQL 文が出力される。
...
Hibernate: drop table if exists "article" cascade
Hibernate: drop table if exists "user" cascade
Hibernate: drop sequence if exists "article_seq"
Hibernate: drop sequence if exists "user_seq"
Hibernate: create sequence "article_seq" start with 1 increment by 50
Hibernate: create sequence "user_seq" start with 1 increment by 50
Hibernate: create table "article" ("id" bigint not null, "added_at" timestamp(6), "content" varchar(255), "headline" varchar(255), "slug" varchar(255), "title" varchar(255), "author_id" bigint, primary key ("id"))
Hibernate: create table "user" ("id" bigint not null, "description" varchar(255), "firstname" varchar(255), "lastname" varchar(255), "login" varchar(255), primary key ("id"))
Hibernate: alter table if exists "article" add constraint "FKfhk3yc24nq2uawud4m6pd89q2" foreign key ("author_id") references "user"
...
Hibernate: select next value for "user_seq"
Hibernate: select next value for "article_seq"
Hibernate: insert into "user" ("description", "firstname", "lastname", "login", "id") values (?, ?, ?, ?, ?)
Hibernate: insert into "article" ("added_at", "author_id", "content", "headline", "slug", "title", "id") values (?, ?, ?, ?, ?, ?, ?)
Hibernate: select next value for "user_seq"
Hibernate: insert into "user" ("description", "firstname", "lastname", "login", "id") values (?, ?, ?, ?, ?)
Hibernate: select u1_0."id",u1_0."description",u1_0."firstname",u1_0."lastname",u1_0."login" from "user" u1_0 where u1_0."login"=?
Hibernate: drop table if exists "article" cascade
Hibernate: drop table if exists "user" cascade
Hibernate: drop sequence if exists "article_seq"
Hibernate: drop sequence if exists "user_seq"
...
テーブル名などがしっかりクオートされている。
疑問
データベースからデータを持ってくる処理などは一切書いていないのに動いているのが不思議。
よくわからないが findBySlug などメソッド名から自動的にコードが生成されているのだろうか?
あとデータは実際にどこに保存されているのだろう。
エラーメッセージに H2 という単語があったので、もしかしたら H2 という RDB が使われているのかも知れない。
テンプレートのコーディング
{{> header}}

<h1>{{title}}</h1>

<div class="articles">

  {{#articles}}
    <section>
      <header class="article-header">
        <h2 class="article-title"><a href="/article/{{slug}}">{{title}}</a></h2>
        <div class="article-meta">By <strong>{{author.firstname}}</strong>, on <strong>{{addedAt}}</strong></div>
      </header>
      <div class="article-description">
        {{headline}}
      </div>
    </section>
  {{/articles}}
</div>

{{> footer}}
Emmet を使う
IntelliJ IDEA に提案された通り Handlebars/Mustache プラグインをインストールしたら Emmet を使えるようになった。
さらにテンプレートのコーディング
touch src/main/resources/templates/article.mustache
{{> header}}

<section class="article">
    <header class="article-header">
        <h1 class="article-title">{{article.title}}</h1>
        <p class="article-meta">
            By <strong>{{article.author.firstname}}</strong>,
            on <strong>{{article.addedAt}}}</strong>
        </p>

        <div class="article-description">
            {{article.headline}}

            {{article.content}}
        </div>
    </header>
</section>

{{> footer}}
コントローラーのコーディング
package com.example.blog2

import org.springframework.http.HttpStatus
import org.springframework.stereotype.Controller
import org.springframework.ui.Model
import org.springframework.ui.set
import org.springframework.web.bind.annotation.GetMapping
import org.springframework.web.bind.annotation.PathVariable
import org.springframework.web.server.ResponseStatusException
import java.time.LocalDateTime

@Controller
class HtmlController(private val repository: ArticleRepository) {

    @GetMapping("/")
    fun blog(model: Model): String {
        model["title"] = "Blog"
        model["articles"] = repository.findAllByOrderByAddedAtDesc().map { it.render() }
        return "blog"
    }

    @GetMapping("/article/{slug}")
    fun article(@PathVariable slug: String, model: Model): String {
        val article = repository
            .findBySlug(slug)
            ?.render()
            ?: throw ResponseStatusException(HttpStatus.NOT_FOUND, "This article does not exist")

        model["title"] = article.title
        model["article"] = article
        return "article"
    }

    fun Article.render() = RenderedArticle(
        slug,
        title,
        headline,
        content,
        author,
        addedAt.format(),
    )

    data class RenderedArticle(
        val slug: String,
        val title: String,
        val headline: String,
        val content: String,
        val author: User,
        val addedAt: String
    )
}
コンフィグレーションのコーディング
touch src/main/kotlin/com/example/blog2/BlogConfiguration.kt
package com.example.blog2

import org.springframework.boot.ApplicationRunner
import org.springframework.context.annotation.Bean
import org.springframework.context.annotation.Configuration

@Configuration
class BlogConfiguration {
    @Bean
    fun databaseInitializer(userRepository: UserRepository, articleRepository: ArticleRepository) = ApplicationRunner {
        val johnDoe = userRepository.save(User("johnDoe", "John", "Doe"))

        articleRepository.save(Article(
            title = "Lorem",
            headline = "Lorem",
            content = "dolor sit amet",
            author = johnDoe
        ))

        articleRepository.save(Article(
            title = "Ipsum",
            headline = "Ipsum",
            content = "dolor sit amet",
            author = johnDoe
        ))
    }
}
テストコードのコーディング
package com.example.blog2

import org.assertj.core.api.AssertionsForClassTypes.assertThat
import org.junit.jupiter.api.AfterAll
import org.junit.jupiter.api.BeforeAll
import org.junit.jupiter.api.Test
import org.springframework.beans.factory.annotation.Autowired
import org.springframework.boot.test.context.SpringBootTest
import org.springframework.boot.test.web.client.TestRestTemplate
import org.springframework.boot.test.web.client.getForEntity
import org.springframework.http.HttpStatus

@SpringBootTest(webEnvironment = SpringBootTest.WebEnvironment.RANDOM_PORT)
class IntegrationTests(@Autowired val restTemplate: TestRestTemplate) {
    @BeforeAll
    fun setup() {
        println(">> Setup")
    }

    @Test
    fun `Assert blog page title, content and status code`() {
        println(">> Assert Blog page title, content and status code")
        val entity = restTemplate.getForEntity<String>("/")
        assertThat(entity.statusCode).isEqualTo(HttpStatus.OK)
        assertThat(entity.body).contains("<h1>Blog</h1>", "Lorem")
    }

    @Test
    fun `Assert article page title, content and status code`() {
        println(">> Assert article page title, content and status code")
        val title = "Lorem"
        val entity = restTemplate.getForEntity<String>("/article/${title.toSlug()}")
        assertThat(entity.statusCode).isEqualTo(HttpStatus.OK)
        assertThat(entity.body).contains(title, "Lorem", "dolor sit amet")
    }

    @AfterAll
    fun teardown() {
        println(">> Tear down")
    }
}
テストクラスの ▶︎ ボタンを押してテストを実行したら成功した。
REST API の追加
HttpControllers.kt に下記の内容を追記する。
@RestController
@RequestMapping("/api/article")
class ArticleController(private val repository: ArticleRepository) {
    @GetMapping("/")
    fun findAll() = repository.findAllByOrderByAddedAtDesc()

    @GetMapping("/{slug}")
    fun findOne(@PathVariable slug: String) =
        repository.findBySlug(slug) ?: throw ResponseStatusException(HttpStatus.NOT_FOUND, "This article does not exist")
}

@RestController
@RequestMapping("/api/user")
class UserController(private val repository: UserRepository) {
    @GetMapping("/")
    fun findAll() = repository.findAll()

    @GetMapping("/{login}")
    fun findOne(@PathVariable login: String) =
        repository.findByLogin(login) ?: throw ResponseStatusException(HttpStatus.NOT_FOUND, "This user does not exist")
}
動作確認
この時点で http://localhost:8080/api/article/ や http://localhost:8080/api/user/ にアクセスしてみる。
[
  {
    "title": "Ipsum",
    "headline": "Ipsum",
    "content": "dolor sit amet",
    "author": {
      "login": "johnDoe",
      "firstname": "John",
      "lastname": "Doe",
      "description": null,
      "id": 1
    },
    "slug": "ipsum",
    "addedAt": "2023-04-13T11:00:50.797998",
    "id": 2
  },
  {
    "title": "Lorem",
    "headline": "Lorem",
    "content": "dolor sit amet",
    "author": {
      "login": "johnDoe",
      "firstname": "John",
      "lastname": "Doe",
      "description": null,
      "id": 1
    },
    "slug": "lorem",
    "addedAt": "2023-04-13T11:00:50.794377",
    "id": 1
  }
]
[
  {
    "login": "johnDoe",
    "firstname": "John",
    "lastname": "Doe",
    "description": null,
    "id": 1
  }
]
何もしていないのに JSON で出力されるのはすごいけどブラックボックスすぎて少し怖い。
文字列とかバイナリを返したい場合はどうすれば良いんだろう。
URL に注意
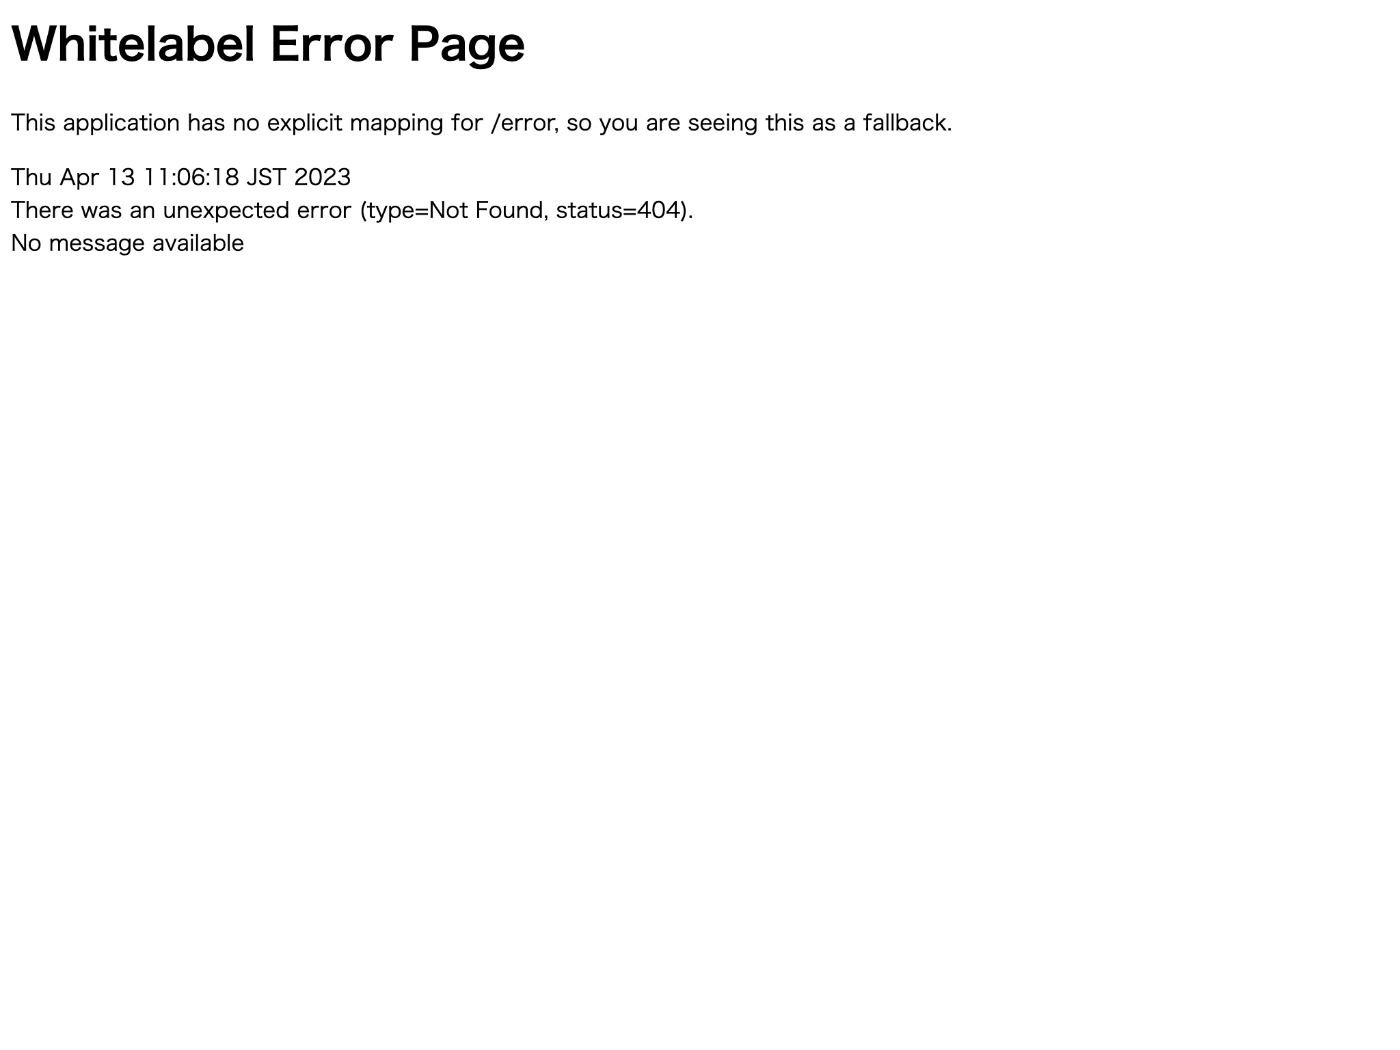
http://localhost:8080/api/article や http://localhost:8080/api/user のように末尾のスラッシュがないとエラーページが表示されるので注意が必要です。

エラーページ
API テスト準備
build.gradle.kts の dependencies に下記を追記する。
testImplementation("org.springframework.boot:spring-boot-starter-test") {
  exclude(module = "mockito-core")
}
testImplementation("org.junit.jupiter:junit-jupiter-api")
testRuntimeOnly("org.junit.jupiter:junit-jupiter-engine")
testImplementation("com.ninja-squad:springmockk:4.0.2")
testImplementation("org.springframework.boot:spring-boot-starter-test") については既に含まれているのでコメントアウトした方が良いかもしれない。
springmockk のバージョンは最新は 4.0.2 のようなのでこちらも合わせておく。
テストコードのコーディング(途中)
touch src/test/kotlin/com/example/blog2/HttpControllersTests.kt
package com.example.blog2

import org.junit.jupiter.api.Test
import org.springframework.beans.factory.annotation.Autowired
import org.springframework.boot.test.autoconfigure.web.servlet.WebMvcTest
import org.springframework.http.MediaType
import org.springframework.test.web.servlet.MockMvc

@WebMvcTest
class HttpControllersTests(@Autowired val mockMvc: MockMvc) {
    @MockkBean
    lateinit var userRepository: UserRepository

    @MockkBean
    lateinit var articleRepository: ArticleRepository

    @Test
    fun `List articles`() {
        val johnDoe = User("johnDoe", "John", "Doe")
        val lorem5Article = Article("Lorem", "Lorem", "dolor sit amet", johnDoe)
        val ipsumArticle = Article("Ipsum", "Ipsum", "dolor sit amet", johnDoe)
        every { articleRepository.findAllByOrderByAddedAtDesc() } returns listOf(lorem5Article, ipsumArticle)
        mockMvc.perform(get("/api/article/").accept(MediaType.APPLICATION_JSON))
    }
}
この時点で MockkBean, every, get の自動読み込みができないので何かがおかしい。
今日は時間が来てしまったのでここまで
MockkBean が読み込めない問題は根深そう。
一旦クローズ
他に優先して調べることができたので一旦クローズする。
サーバーサイド Kotlin はまだまだ情報が少ないので本格的に使用するにはかなりの覚悟が必要そうな感じがした。
Getting Started についてもつまづきポイントというか初見殺しが多く、Java で Spring Boot を使用した経験がない人にはかなり辛いのではないかと思う。
一方、Kotlin は Java との相互運用性があり、Java 資産を活用できることや JVM で運用できることはとても魅力的に感じた。
プログラミング言語としての Kotlin も現代的な機能を多く備えており、Java と比べて表現力が高いので上手に使いこなせれば効率的に進められるのではないかと思う。
Java よりも Kotlin の方が書いていて楽しいので開発のモチベーション的にもメリットがある。
今回の調査を通じて Kotlin にますます興味を持てたので今後も機会を見つけてキャッチアップを続けていきたい。
まとめ
- Java / Kotlin の Web アプリ開発フレームワークのデファクトスタンダードは Spring Boot らしい。
- エディタには IntelliJ IDEA がおすすめ。
- プロジェクトを作成するには spring initializr という Web ページを使用する。
- Spring Boot 3.0.5 を使うためには Java バージョンを 8 → 17 に上げる必要がある。
- Java のバージョンを上げるには OpenJDK v17 などをインストールする。
- IntelliJ IDEA のキーボードショートカットを学ぶにはチートシートがおすすめ。
- IntelliJ IDEA で Java バージョンを変更するには Project Structure モーダルを使う。
- 途中で Java バージョンを変えると不具合につながるので注意する。
- 冒頭の
packageを忘れがちなので注意する。 - テストコードで setup() / teardown() をするには junit-platform.properties ファイル作成が必要になる。
- Kotlin では Extensions 機能を使って既存クラスを拡張できる。
- JPA を使うとデータを永続化できる。
- JPA を使うには build.gradle.kts で allOpen を設定する必要がある。
- JPA ではテーブルごとに Entity / Repository を定義する。
- Repository ではメソッド名が規約(例:findBySlug)に従っていると実装が自動生成される。
- allOpen プラグインを使うと指定したアノテーションを使った時に
openキーワードを省略できる。 -
openキーワードを使うとサブクラスでメソッドなどをオーバーライドできるようになる。 - allopen プラグインのバージョンは jvm バージョンに合わせる必要がある。
- JPA が生成する SQL に
Userなどの予約語が含まれるとエラーになる。 - src/main/resources/application.properties に設定を加えるとクオートされるようになる。
- IntelliJ IDEA で Handlebars/Mustache プラグインをインストールすると Emmet が使えるようになる。
- コントローラーで GetMapping アノテーションを使うと GET エンドポイントを作成できる。
- コンフィグレーションを使用するとサーバー起動時にデータベースにレコードを挿入できる。
- RestController アノテーションを使うと REST エンドポイントを作成できる。
- MockkBean でハマったが多分 Gradle ツールウィンドウでリロードすれば使えるようになる。
おわりに
Getting Started にしてはかなりハマり所が多くて上級者向けだと感じた。
まったく Spring Boot を知らない状態でいきなり Kotlin で始めたのも悪かったかも知れない。
面倒だけどまずは Java で Spring Boot に入門し、それから Kotlin で Spring Boot に入門した方が遠いようで近道かも知れない。
ただ Kotlin に慣れると Java が辛いので悩ましいところ。
今回は Java 17 を使ったが Java 8 を使いたいというニーズは根強そうなので Spring Boot 3 系ではなく 2 系を次は学んでみたい。
Spring Initializr を見たところ 2 系の最新バージョンは 2.7.11 はなのかな?
Spring Boot 自体は結構わかりやすいので良かった。
ただ JPA データ永続化の部分で何も書かなくても魔法のようにデータの読み書きができてしまったことはすごいと思ったと共に不安に感じた。
どういうしくみで動いているんだろう?
Spring Boot の学習リソースとしては書籍がたくさんあるのでありがたい反面、選択肢が多くて迷ってしまう。
Zenn でも先人たちが本を書いている。
結局 Spring Boot のガイドやリファレンスドキュメントを読んだ方が良いかもしれない。
2 系を使いたいが 3 系の方が情報量は多そう。

