Unity + ROS でロボットアームのシミュレーションを動かしてみる
このスクラップについて
このスクラップでは Unity + ROS を使ってロボットアームのシミュレーションを実行する手順をまとめていく。
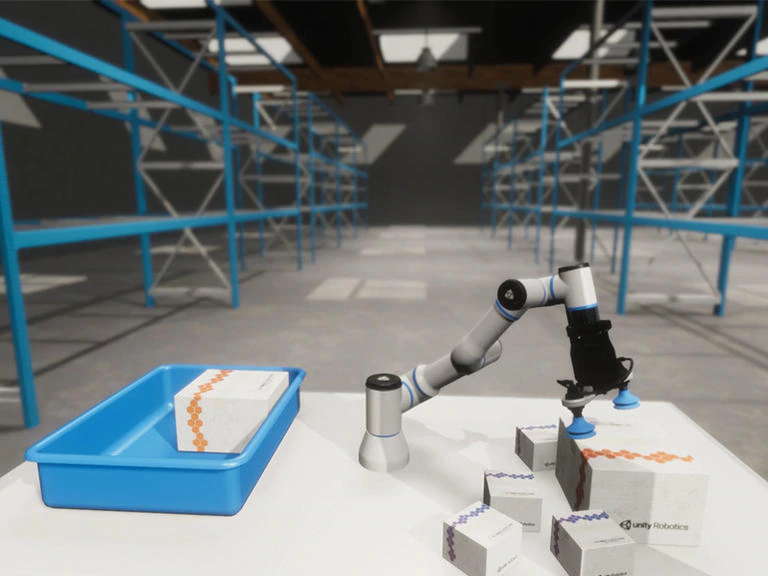
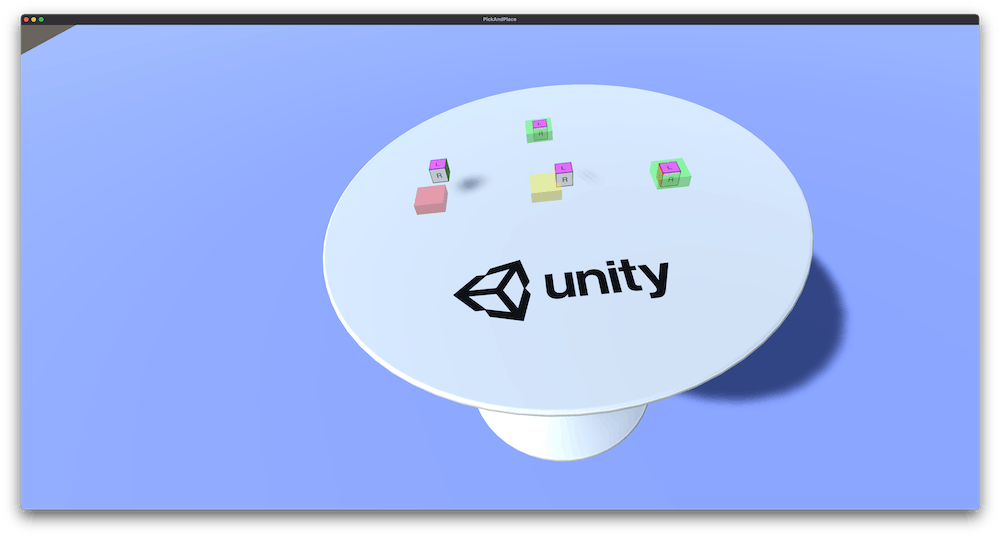
最終的には下記の画像のようなものが表示されれば嬉しい。
参考になりそうなリンクは下記の通り。
さて何から手を付けよう
とりあえず https://github.com/Unity-Technologies/Unity-Robotics-Hub/blob/main/tutorials/pick_and_place/README.md のピックアンドプレースのチュートリアルからやっていこうかな。
GitHub リポジトリのクローン
git clone --recurse-submodules https://github.com/Unity-Technologies/Unity-Robotics-Hub.git
cd Unity-Robotics-Hub
ROS ワークスペースの作成
Docker を使うかマニュアルかの 2 つの選択肢がある。
簡単なのは Docker だと思うのでまずは Docker で進めていく。
下記のコマンドを実行して Docker イメージをビルドする。
cd tutorials/pick_and_place
git submodule update --init --recursive
docker build -t unity-robotics:pick-and-place -f docker/Dockerfile .
ROS ワークスペースの起動
docker run -it --rm -p 10000:10000 unity-robotics:pick-and-place /bin/bash
ROS ワークスペースは何に使うのだろう?
単純に何かをビルドするために使うだけなら良いのだけど。
以上で Part 0: ROS Setup が終わった
次は Part 1: Create Unity scene with imported URDF
Unity 2020.3.11f1 (LTS) のインストール
Unity Hub を起動して Installs > Official Releases からダウンロードする。
Unity 2020.3.11f1 (LTS) が見つからない場合は下記でも良い。
- Unity 2020.3: 2020.3.10f1 or later
- Unity 2021.1: 2021.1.8f1 or later
- Unity 2021.2: 2021.2.a16 or later
今回は Unity 2020.3.42f1 LTS をダウンロードする。
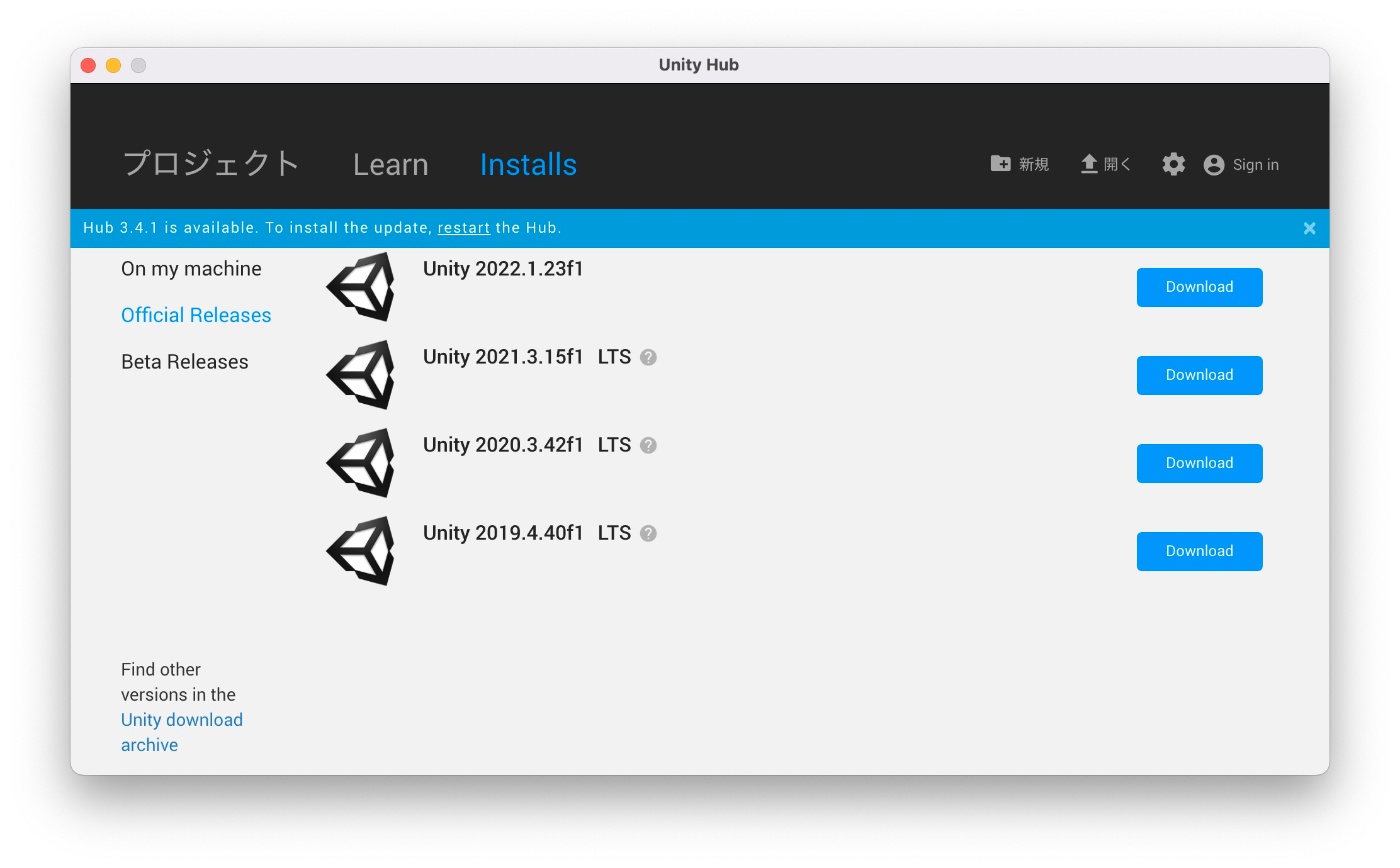
Platforms のオプションで WebGL Build Support を追加する。
18 GB もあるのでダウンロードが完了するのにしばらくかかりそう。
ゆっくり待とう。
スリープするとダウンロードが失敗する
ダウンロード中に何か別の仕事をする必要があるみたいだ。
やっとダウンロードが終わった
30 分くらいかかったようだ。
インストールもなかなか長い
わからないけど 20 分くらいかかっている?
エラーメッセージ
モジュールのインストールが失敗しましたみたいなメッセージが表示されているが何なのだろう。
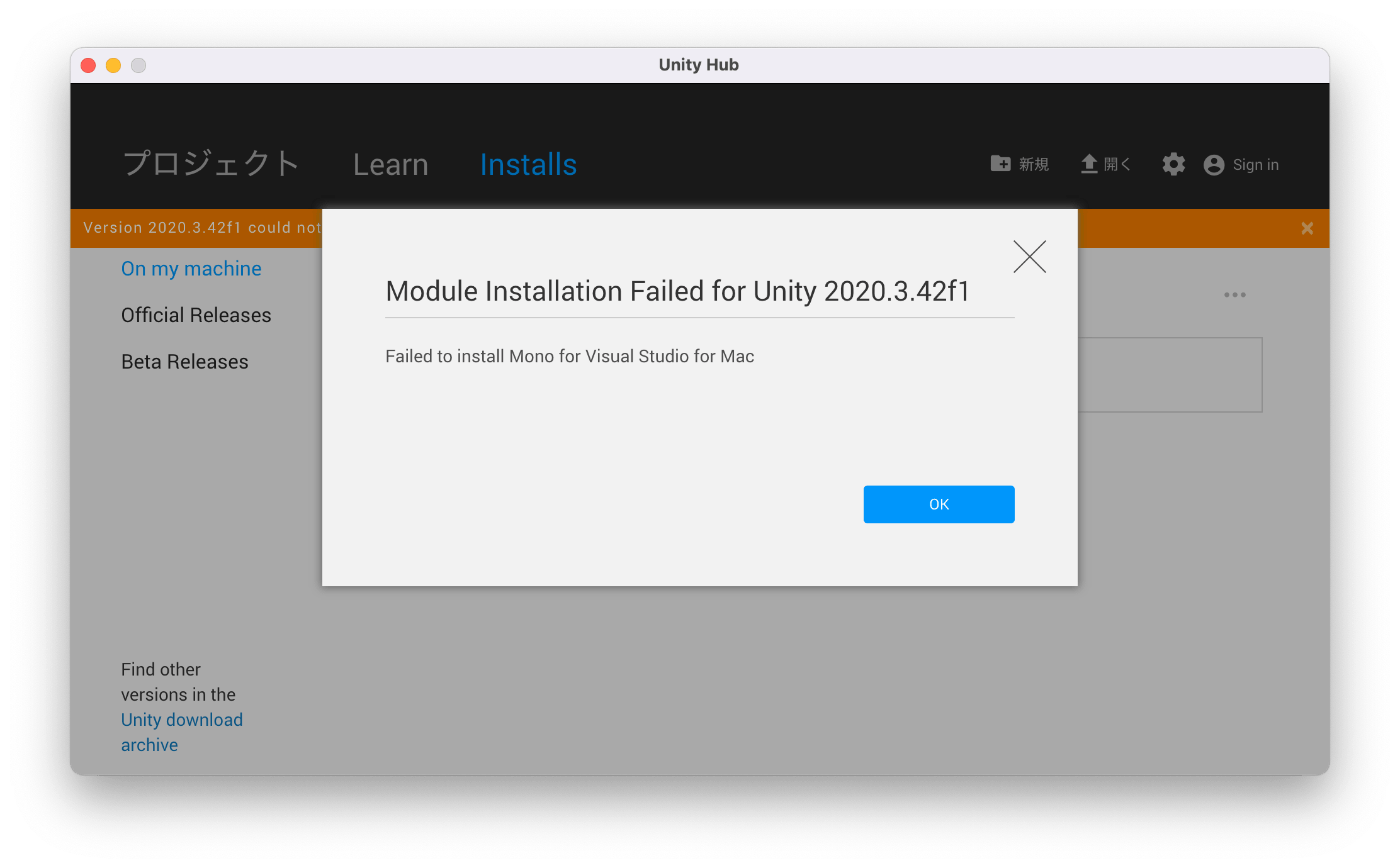
もしかして Unity Hub が古い?
後から問題になるようであれば Unity Hub 自体を再インストールした方が良いかも。
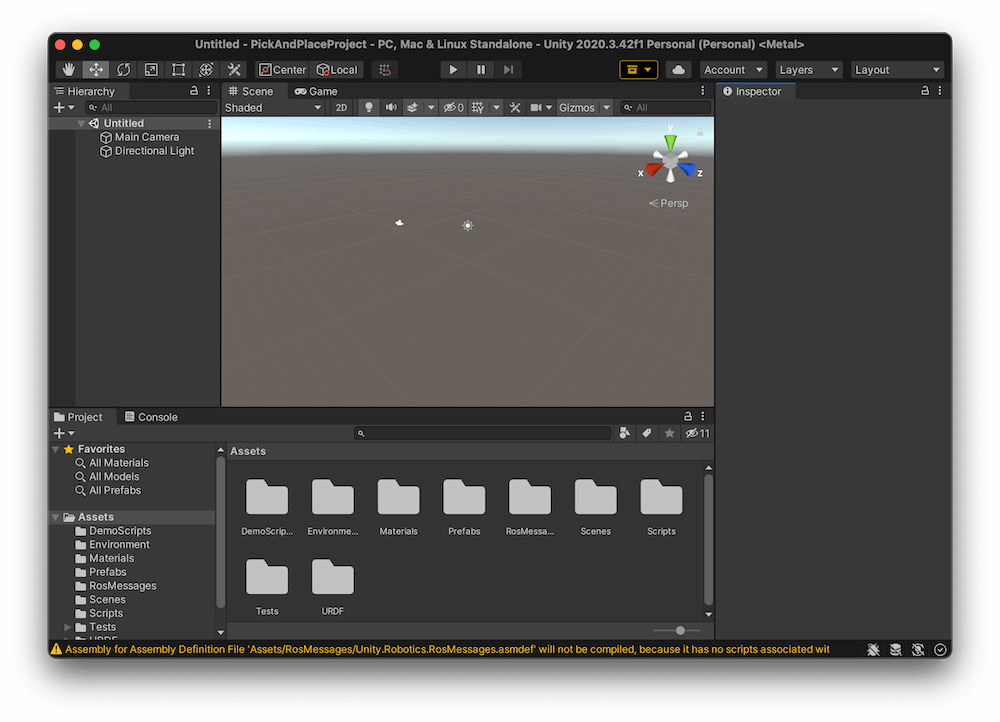
プロジェクトを開く
Unity Hub のプロジェクトタブからプロジェクトを開く。
開くプロジェクトは Unity-Robotics-Hub/tutorials/pick_and_place/PickAndPlaceProject です。
何かメッセージが出たけど無事にプロジェクトを開くことができた。
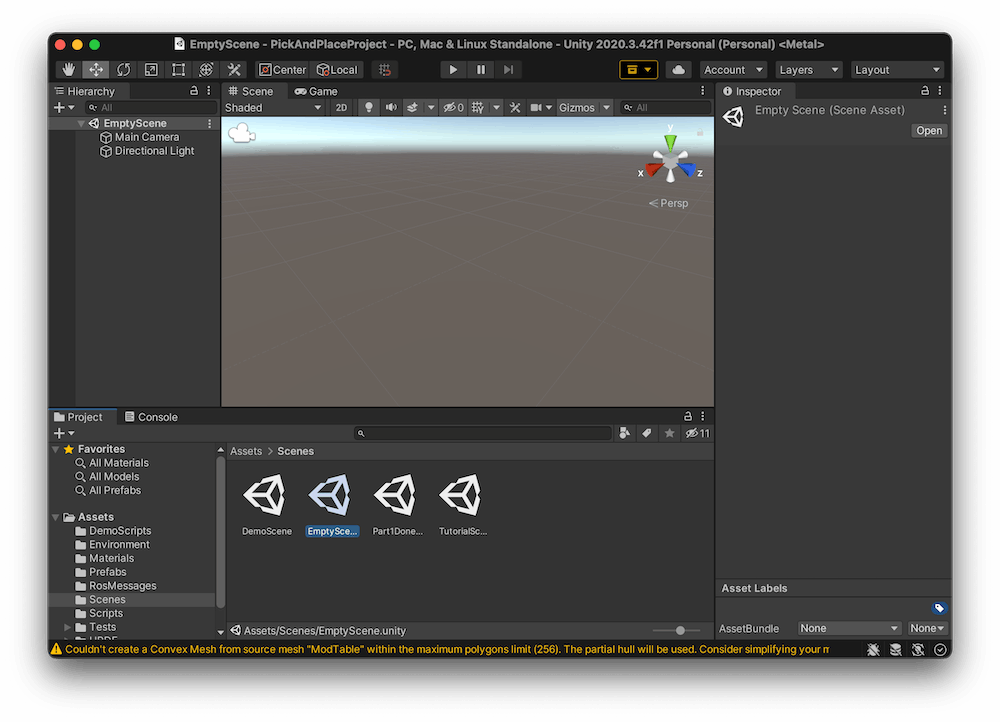
EmptyScene の選択
Assets > Scenes から EmptyScene をダブルクリックする。
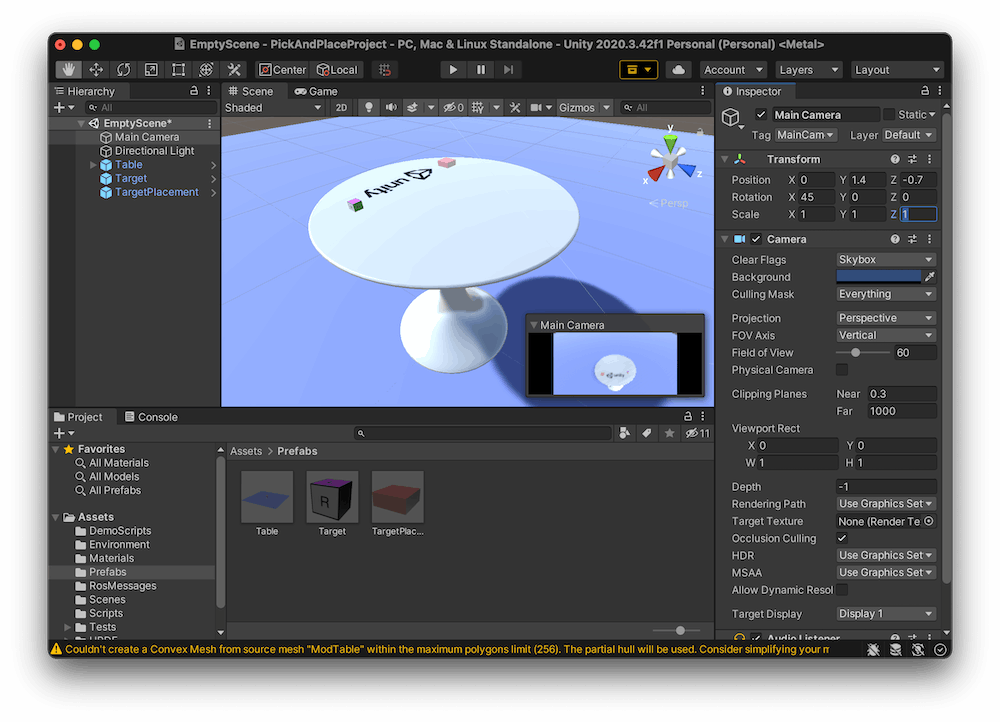
テーブルの追加
Assets > Prefabs から Table を選択して Hierarchy ウィンドウにドラッグ&ドロップする。
Target と TargetPlacement についても同様にドラッグ&ドロップする。

メインカメラの設定
Hierarchy ウィンドウから Main Camera を選択して Transform を下図のように入力する。
Quick Setup
次に URDF-Importer というものを使うらしいがこのプロジェクトには URDF-Importer だが既に入っている。
自分のプロジェクトに追加する場合は Quick Setup を読んで追加してくださいと書いている。
Note: Presumably when you opened this project, the Package Manager automatically checked out and built the URDF-Importer package for you. You can double-check this now by looking for Packages/URDF-Importer in the Project window or by opening the Package Manager window. See the Quick Setup steps for adding this package to your own project.
チュートリアルを始める前に Quick Setup の手順が必要なのかなと心配だったが必要ないみたいだ。
Solver Type の確認
Edit > Project Settings > Pyhisics から Solver Type の設定が Temporal Gauss Seidel になっていることを確認する。

Solver Type とは何か気になったので調べたら下記のページを見つけた。
このソルバーは、より良い収束と高質量比のより良い処理を提供し、貫通を修正するときに導入されるエネルギーを最小限に抑え、ジョイントのオーバーストレッチに対する抵抗力を改善します。これは通常、デフォルトのソルバーでシミュレーション中に不安定な動作が発生した場合に役立ちます。
よくわからないけどシミュレーションが安定するようだ。
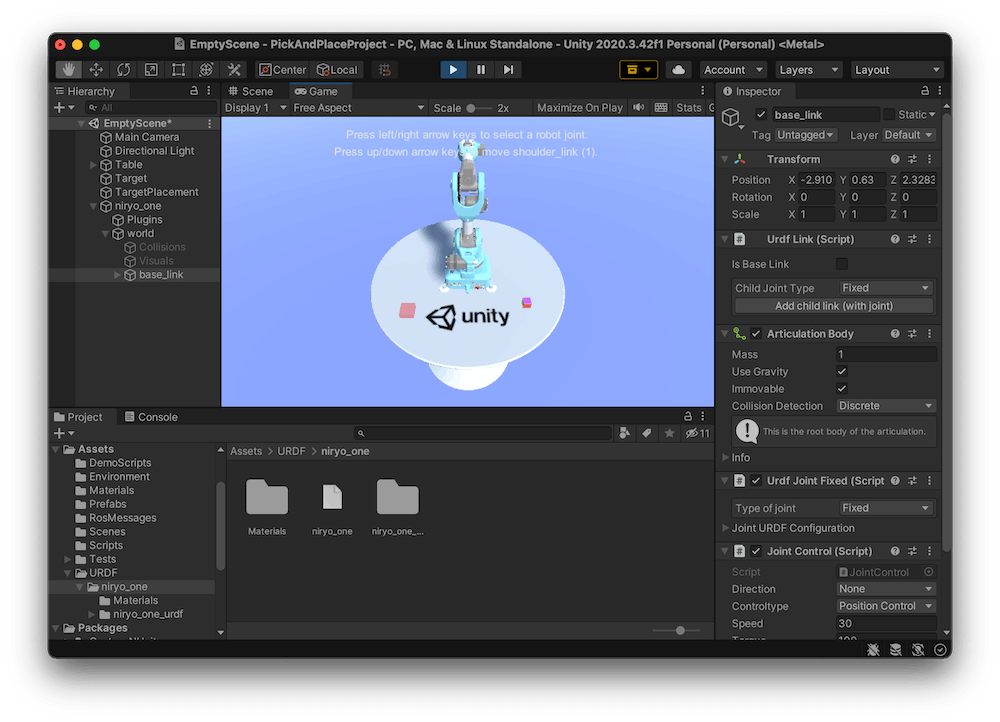
ロボットのインポート
Assets ウィンドウで URDF > niryo_one > niryo_one.urdf をクリックしてからメニュー > Assets > Import Robot from Selected URDF クリックする。
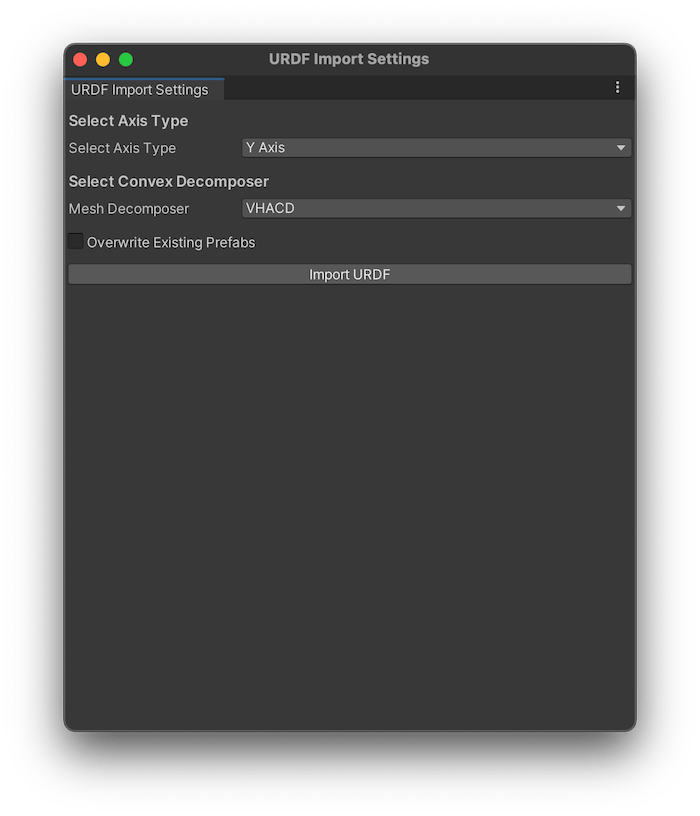
URDF Import Settings ダイアログが表示されたら特に変更せずに Import URDF ボタンを押す。
なんかロボットアームらしきモノが読み込まれた、感動。
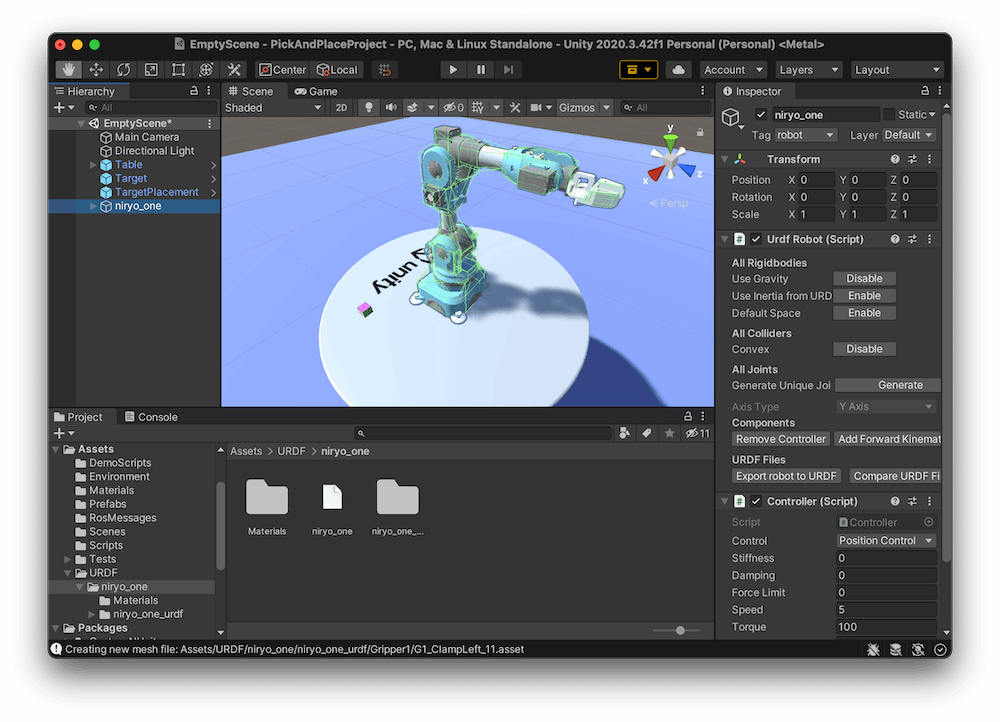
ロボットアームのパラメータ設定
Hierarchy ウィンドウで niryo_one を選択してから Inspector ウィンドウで Controller のパラメーターを下図のように設定する。
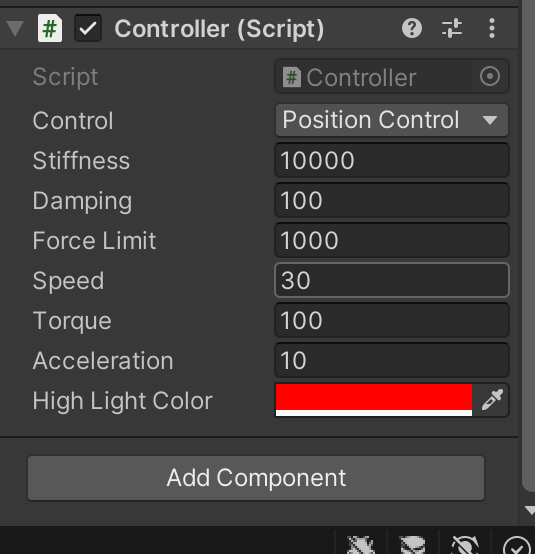
それぞれのパラメーターが何を意味するのかについては下記を読んでくださいとのこと。
それにしても丁寧なチュートリアルだ
さすが Unity
ベースリンクを不動にする
Hierarchy ウィンドウで niryo_one を展開して world > base_link をクリックしてから Inspector ウィンドウで Immovable にチェックを入れる。

これで Play ボタンを押すと動くらしい
動かないと思ったら左右キーで動かす部分を選択してから上下キーで動かせた。
テーブルも貫通したりもしない。
アームがターゲットに当たると転がっていく。
すごい!
これが Web で動かせたら面白いが...
File > Build Settings から WebGL に Switch Platform してビルドしようとしたができない。
そもそも Mac 用にビルドするとビルドはできるがアームは表示されない。
道のりは遠そう。
参考になりそうな記事
npaka さんの note がとても参考になりそう。
次回
次は Pick-and-Place Tutorial: Part 2 から開始する。
WebGL で動かすのは難しいのかな
このまま続けたいけど
WebGL ビルドができないのであれば目的を果たすのは難しいかも知れない。
一旦クローズして別の方向性を探ってみよう。
何かに使えそう