Auth0 で Looks like something went wrong! と表示されたので対応する
このスクラップについて
Auth0 でログインした時に下記のエラーメッセージが表示されるようになってしまった。

このスクラップではエラーメッセージが表示されなくするまでの過程を記録していきたい。
現象の確認
Auth0 のアカウントもテナントも複数利用しているがログインできるものとできないものがある。
まずはこれらを整理してみよう。
アカウント L
テナント d (US-3 / Development)
- メルアドログイン:成功
- Google ログイン:成功
テナント a (JP-1 / Development)
- メルアドログイン:成功
- Google ログイン:失敗
テナント h (JP-1 / Development)
- メルアドログイン:成功
- Google ログイン:失敗
アカウント E
テナント s (JP-1 / Development)
- Google ログイン:失敗
テナント p (JP-1 / Production)
- Google ログイン:失敗
まとめ
JP-1 で Google ログインに失敗している。
警告メッセージ
どのテナントでも下記の警告が表示されている。
You are using Auth0 development keys which are only intended for use in development and testing. This connection (google-oauth2) should be configured with your own Development Keys to enable the consent page to show your logo instead of Auth0's. AUTH0 DEVELOPMENT KEYS SHOULD NOT BE USED ON PRODUCTION ENVIRONMENTS. To learn more about Development Keys please refer to https://auth0.com/docs/connections/social/devkeys.
Auth0 Development keys を使わないようにしたら状況が改善するかも知れない。
下記の URL にアクセスして設定方法を調べてみようと思う。
というか Development はともかく Production ではしっかり設定をしておいてください、過去の僕よ。
セットアップガイド
Test Social Connections with Auth0 Developer Keys のページには制約などは書いてあるが設定方法は書かれていない。
ドキュメントページもあるかも知れないがダッシュボードからも操作手順がわかるかも知れない。
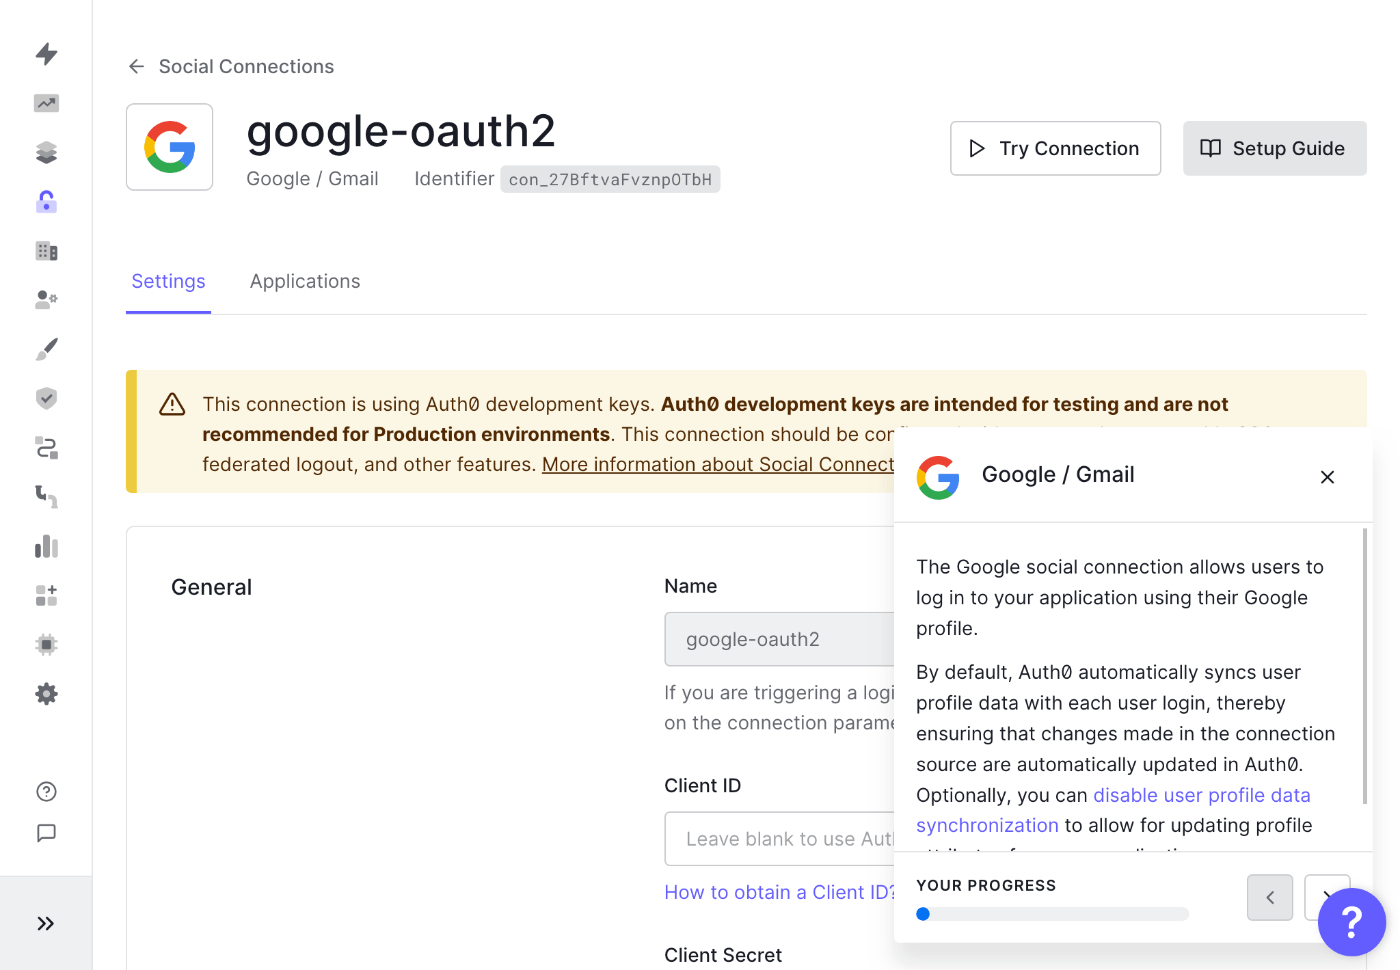
右上の Setup Guide ボタンを表示すると右下に説明が表示される
設定手順
画面が小さくて読みにくいので引用する。
Create Google credentials
Configure your OAuth consent screen and create credentials in the Google Developer Console using Google's Setting up OAuth 2.0 documentation. During this process, Google will generate a Client ID and Client Secret for your application; make note of these.
While setting up your OAuth consent screen, use the following settings:
- User Type: Select External.
- Application Type: Select Public.
- Authorized domains: auth0.com
If your application requests sensitive OAuth scopes or uses a custom image, Google will limit it to 100 logins until the OAuth consent screen is verified. Verification can take several days.
Note: a custom image includes uploading a logo file following the Google setup instructions. This file will not be able to be removed later, and will trigger verification.
To learn more about sensitive scopes, see Google's OAuth 2.0 Scopes for Google APIs documentation. To pass verification you will need to prove ownership of all Authorized domains you specify on Google's OAuth consent screen. If you're using custom domains, use your custom domain instead of auth0.com.
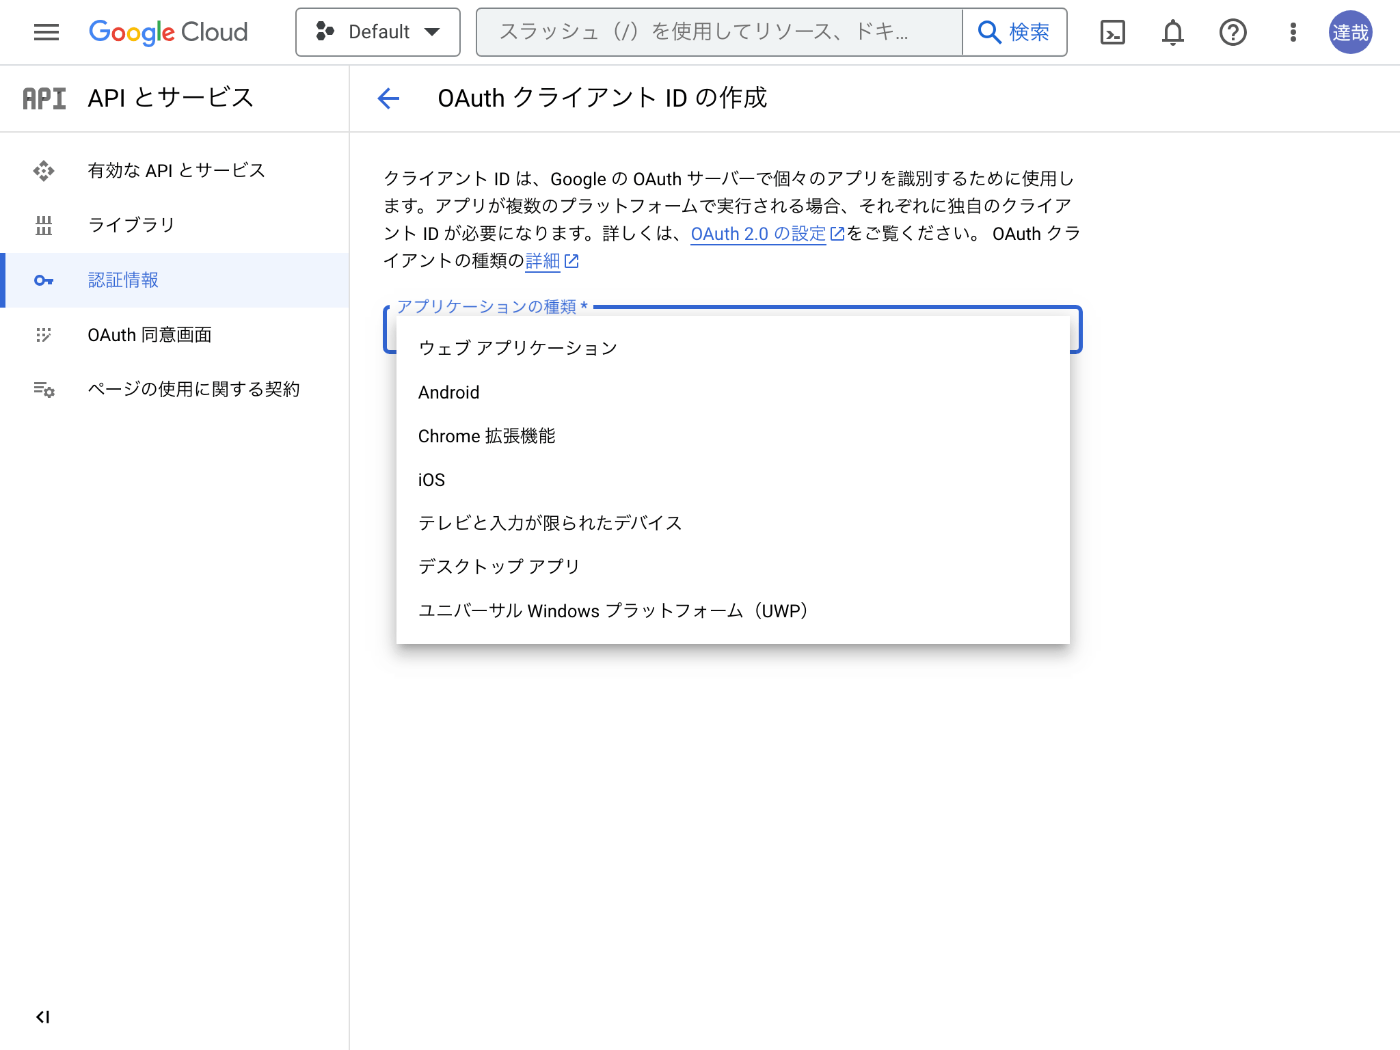
While setting up your credentials, use the following settings:
- Application type: Web application
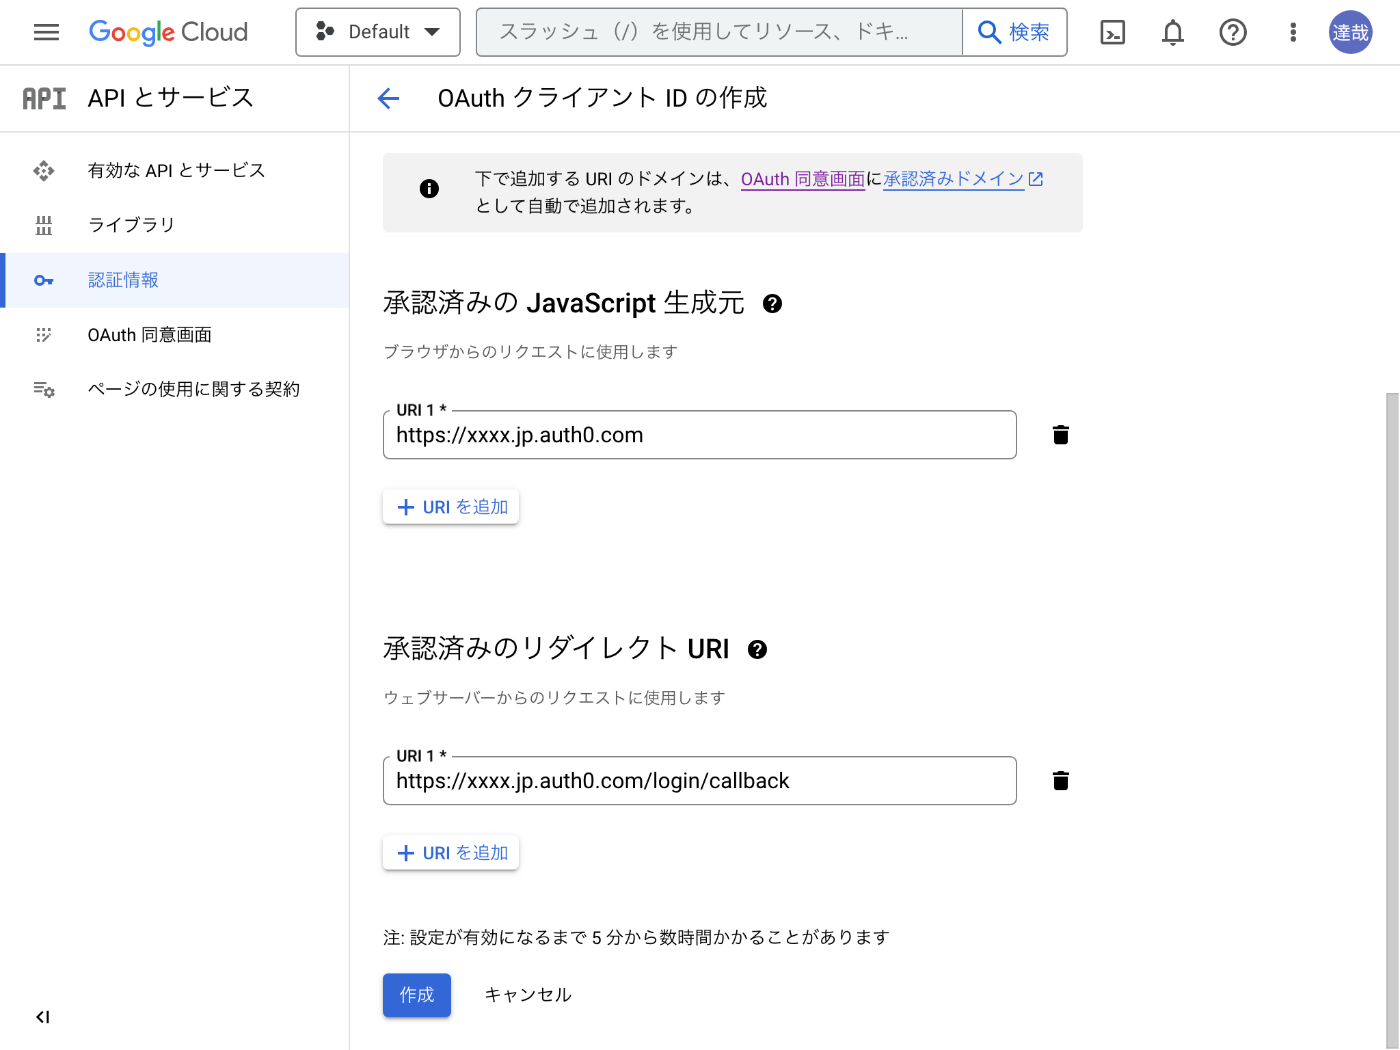
- Authorized JavaScript origins: https://YOUR_DOMAIN
- Authorized redirect URIs: https://YOUR_DOMAIN/login/callback
Find your Auth0 domain name
If your Auth0 domain name is not shown above and you are not using our custom domains feature, your domain name is your tenant name, your regional subdomain (unless your tenant is in the US region and was created before June 2020), plus.auth0.com. For example, if your tenant name were exampleco-enterprises, your Auth0 domain name would be exampleco-enterprises.us.auth0.com and your redirect URI would be https://exampleco-enterprises.us.auth0.com/login/callback. (If your tenant is in the US and was created before June 2020, then your domain name would be https://exampleco-enterprises.auth0.com.)
If you are using custom domains, your redirect URI will have the following format: https://<YOUR CUSTOM DOMAIN>/login/callback.
下記に具体的な認証情報の作成方法が書かれている。
やってみる
まずは https://console.developers.google.com/apis/credentials にアクセスして認証情報を作成する。

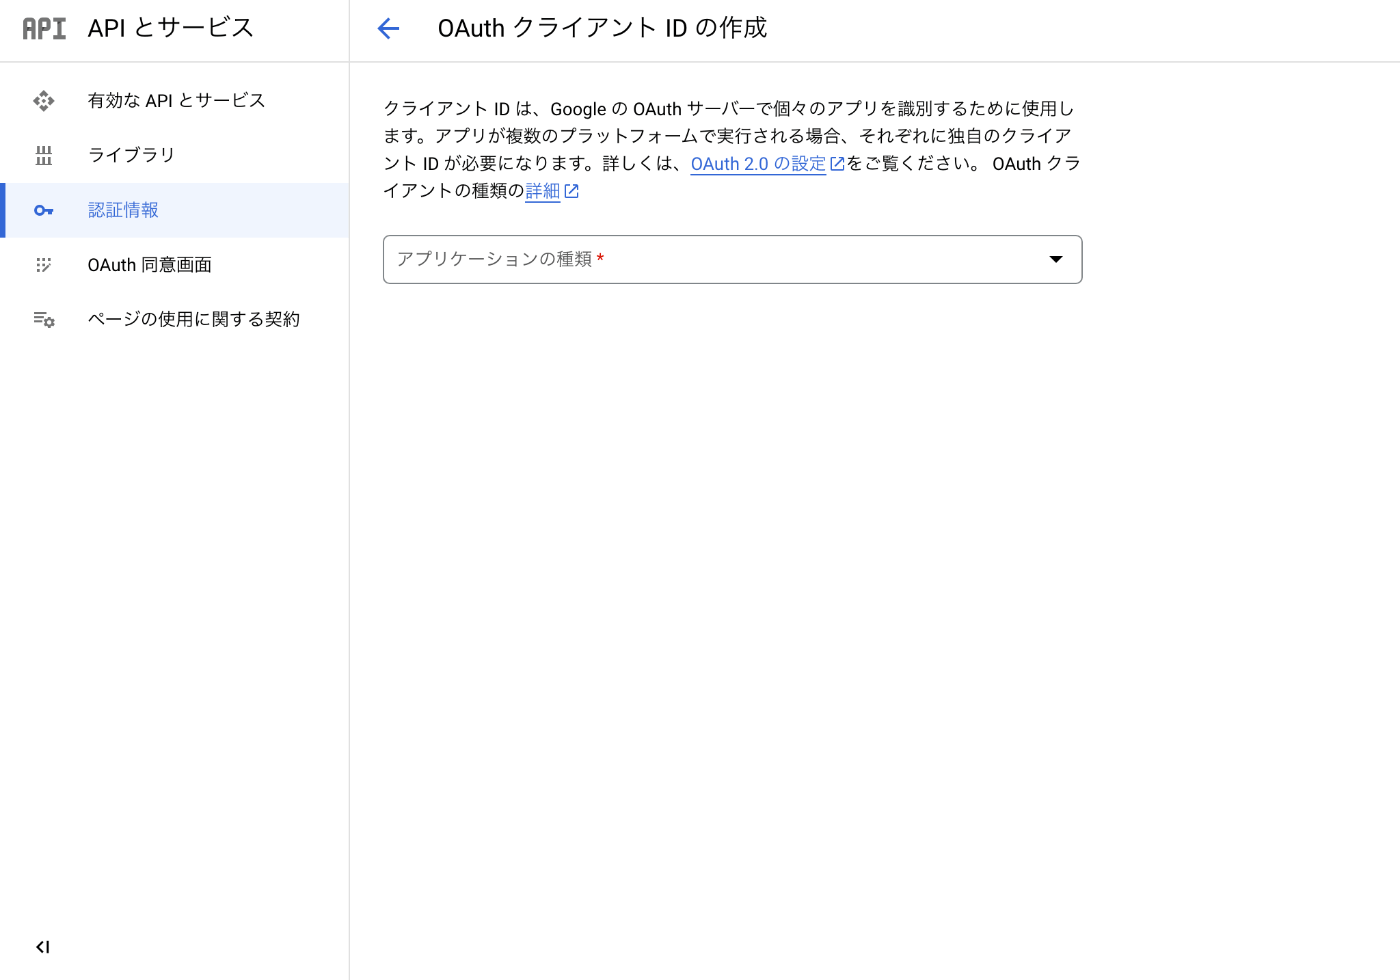
OAuth クライアント ID を選ぶ
ウェブアプリケーションを選ぶ
URL はアプリケーションの詳細ページなどから確認できる
作成が完了するとクライアント ID とクライアントシークレットが表示されるのでコピー&ペーストする。

入力したら保存ボタンを押すのを忘れないようにする
続いて OAuth 認証画面
僕の方ではすでに完了しているので割愛するが下記を設定すれば良さそう。
- User Type: Select External.
- Application Type: Select Public.
- Authorized domains: auth0.com
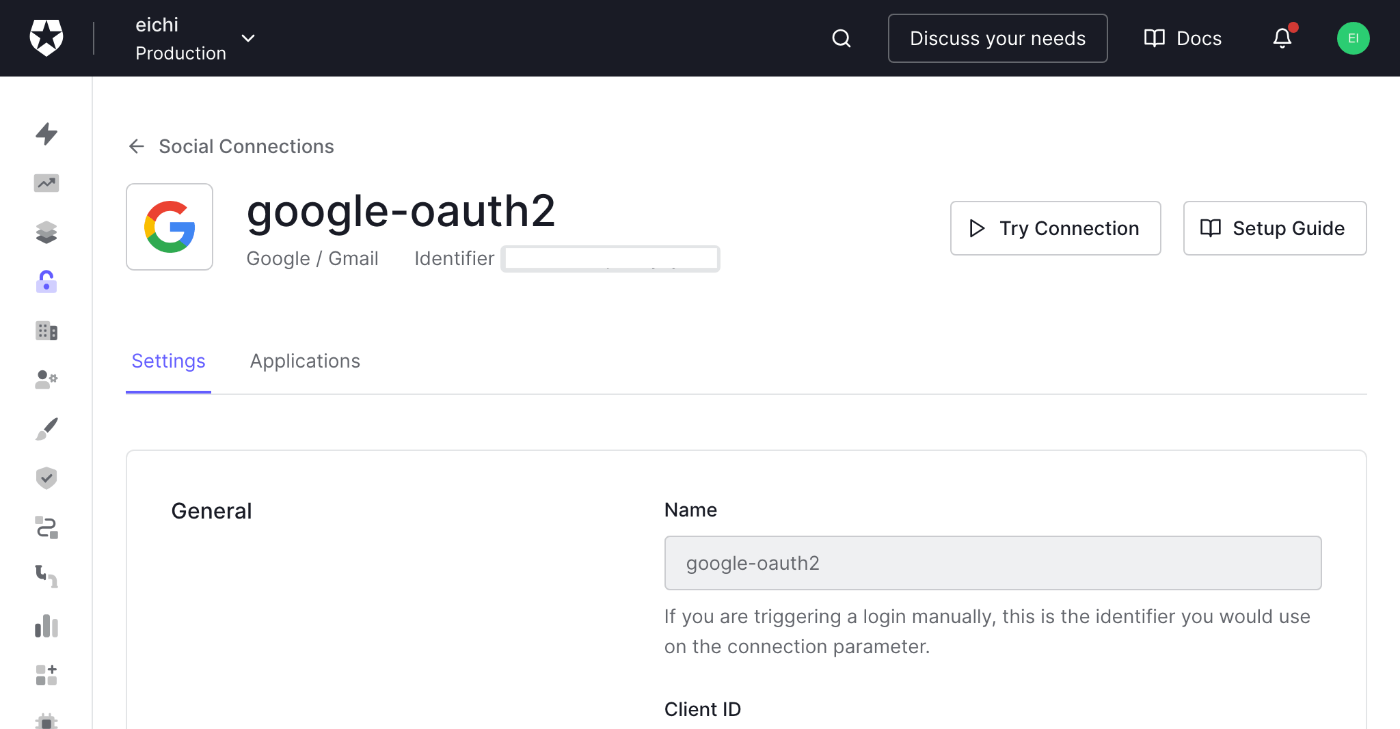
ログインできた!
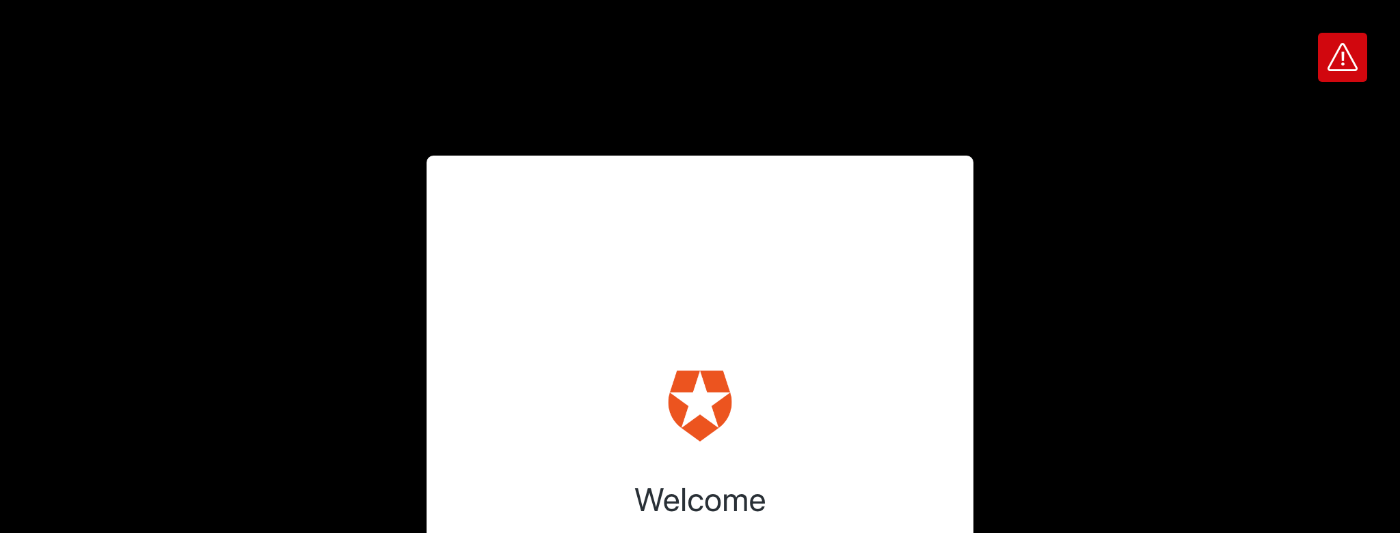
ついでに右上にあった警告ボタンも消えた!(この画像は消える前の様子)
根本的な原因
おそらく Auth0 によるメンテナンスが影響しているのだろう。
別アカウントで OAuth 同意画面を作成してみる

最初に OAuth 同意画面を作成する必要があるようだ
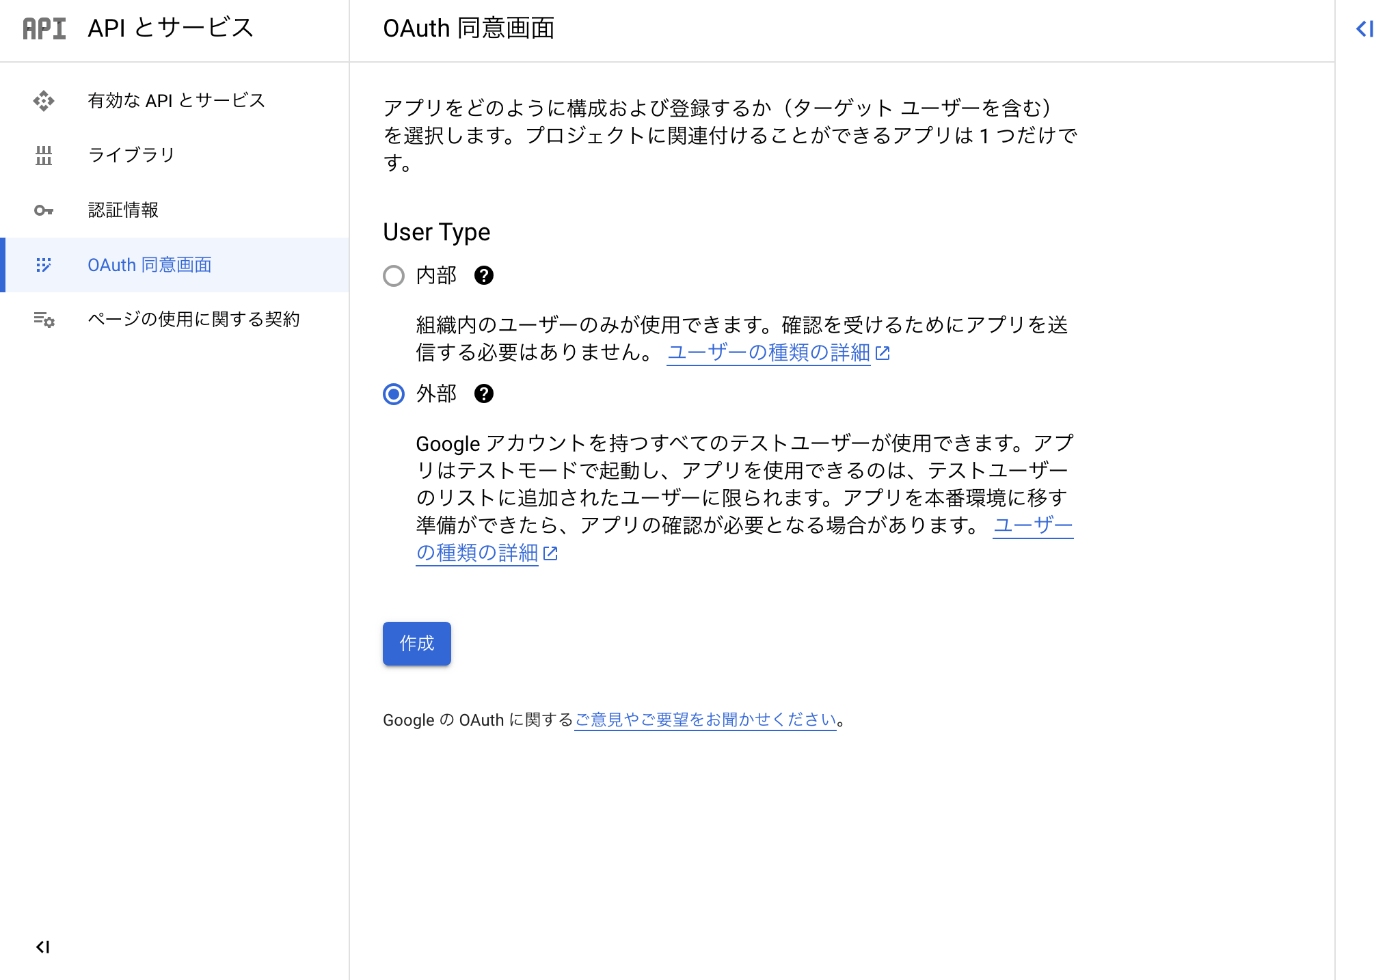
「外部」を選んでから「作成」ボタンを押す
アプリの情報などを入力する

承認済みドメインとして auth0.com を入力する
デベロッパーの連絡先情報についても入力する必要があるようだ。
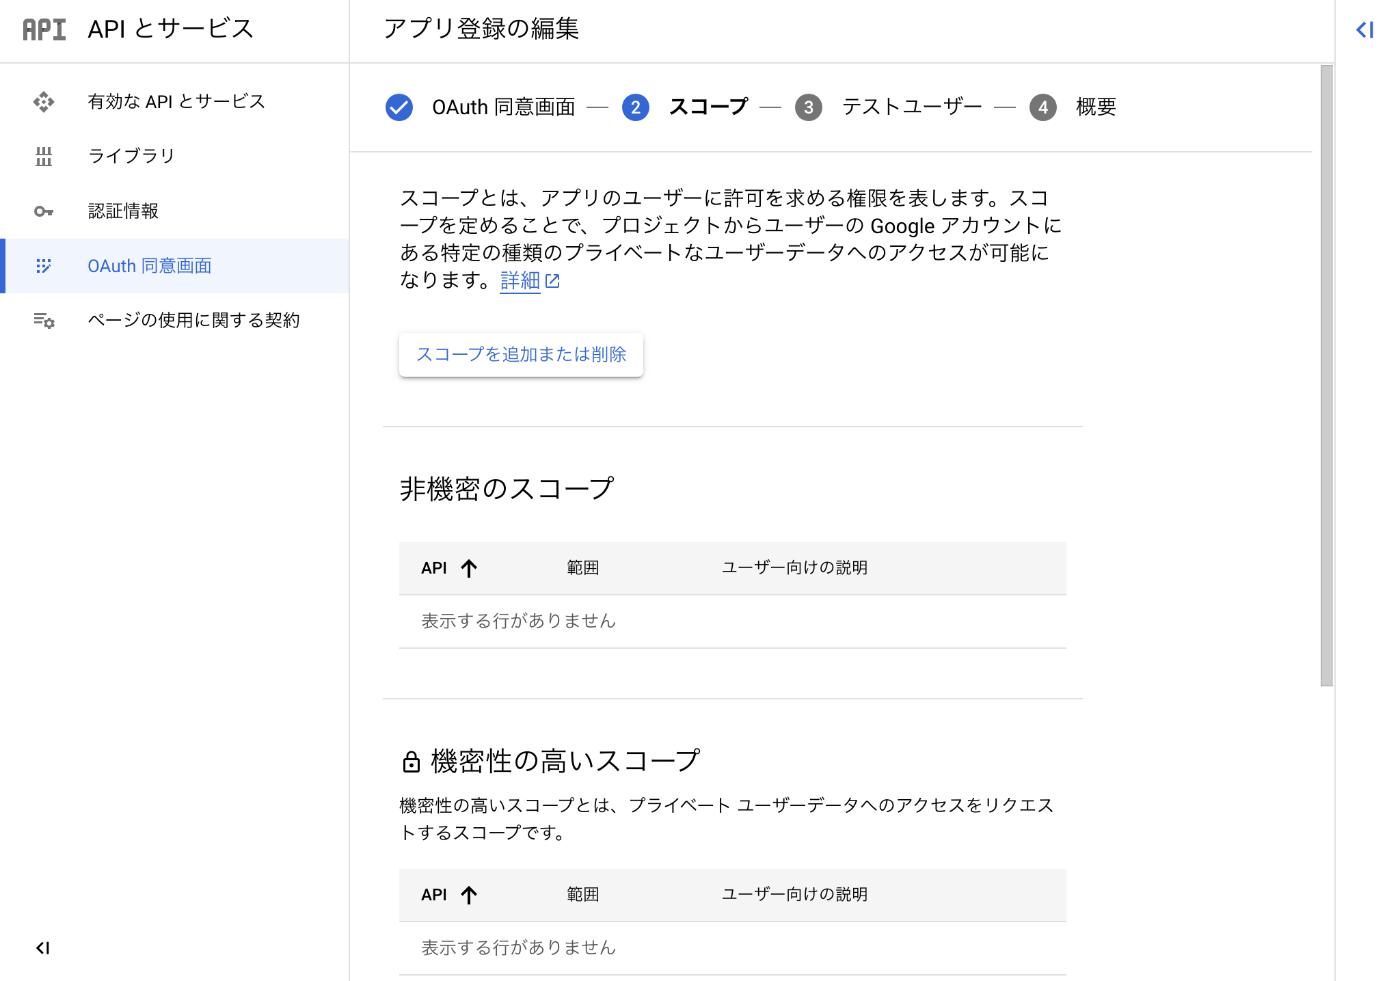
スコープには何を設定すれば良いんだろう?
スコープは空欄のままとした。
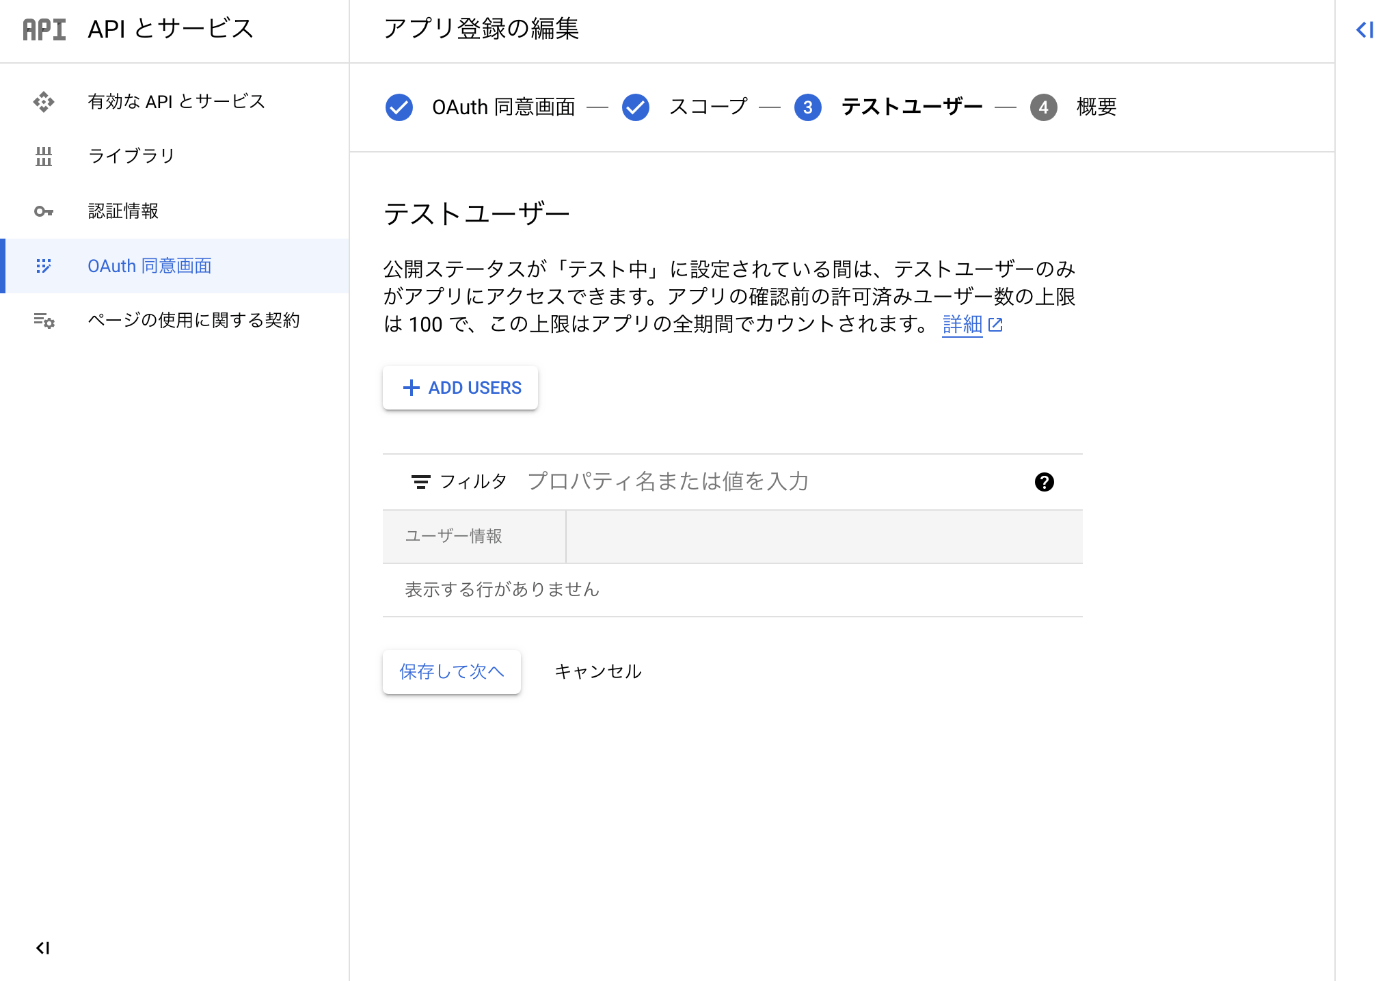
テストユーザーにはテストで使用するユーザーのメールアドレスを入力する
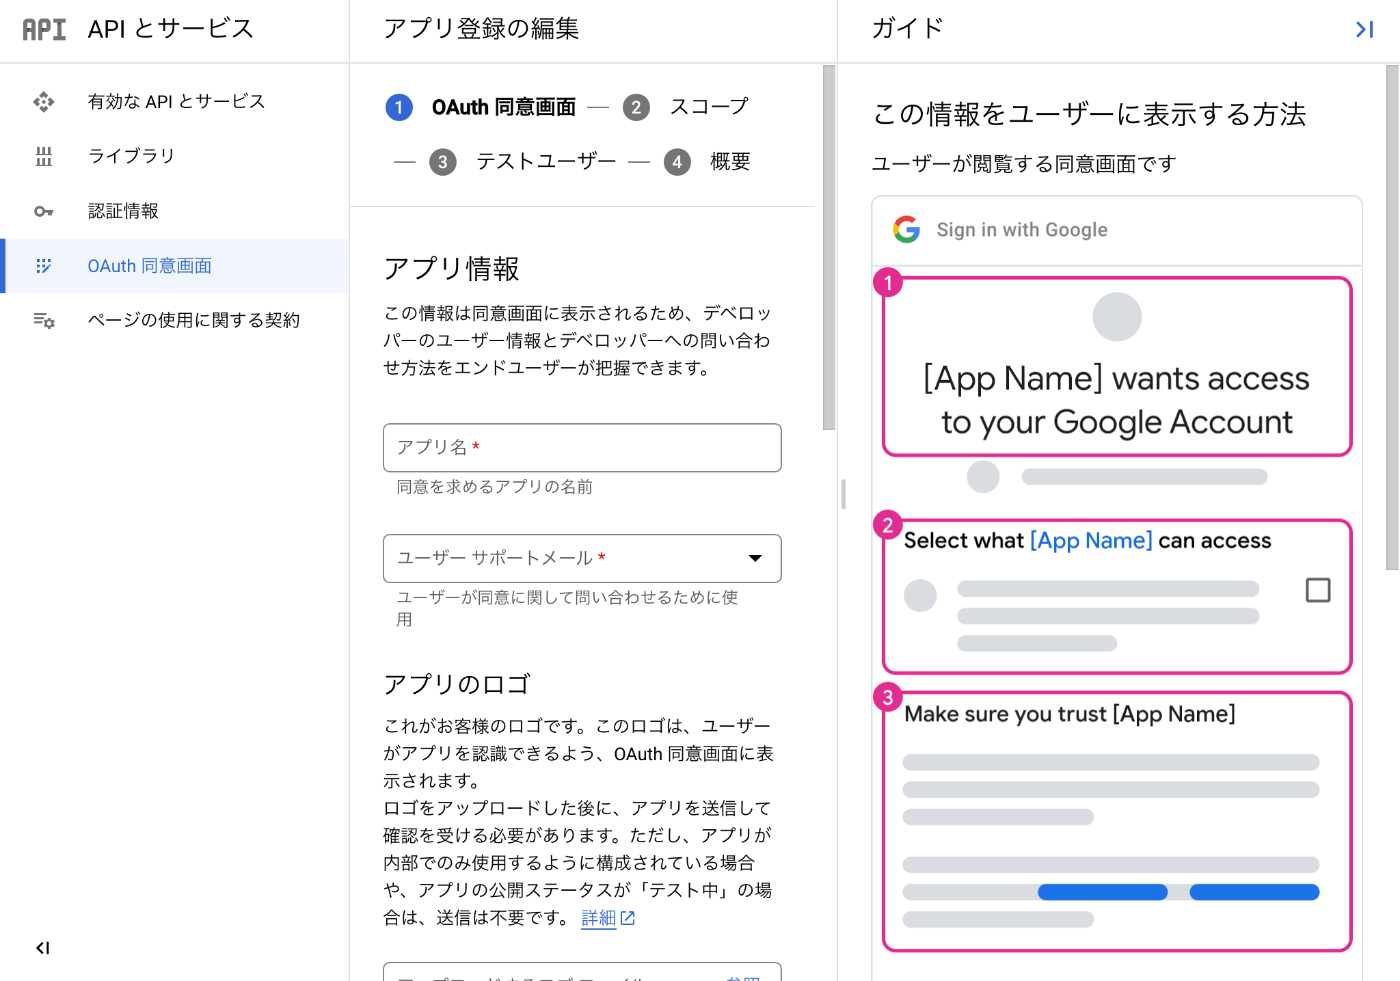
OAuth 同意画面の作成が完了して概要ページが表示される。
同意画面ができると OAuth クライアント ID を作成できるようになる
残りの手順については前述の通りなので割愛する。
動作確認
「Try Connection」ボタンを押す

ログインすると「It works」と表示される
ただメールアドレスが表示されないのが気になる。
Auth0 マーケットプレイスページ
手順説明がこちらにも掲載されていた。
気になるところ
アプリを公開しておらず、スコープに何も設定していないのに使用することができる。

「アプリを公開」ボタンを押すと公開できるのだろうけど
他の記事を見ても特別なことはやっていなそうなのでまずはこのままにしておこう。
おわりに
無事に解決できて良かった。
本番環境で Google ログインを使用する時にはサボらずにクライアント ID とクライアントシークレットを発行しようという良い教訓になった。
おそらく Auth0 のメンテナンス期間が終了したらまた使えるようになるのだろう。
このスクラップが同じ現象に悩んでいる人の役に立てば幸いです。