Vite&TailwindでUIライブラリを簡単に作成し、npmへpublishするまでの流れ
先日、弊社内でハッカソンのイベントがありました。私のチームでは社内UIライブラリの構築を行いましたので、そこで得た知見を残し、共有します。
本記事ではReact用のuiライブラリをnpmにpublishするまでのざっくりとした流れを紹介します。
環境
- MacBook Pro
- Apple M1
- node.js
- 18.16.0
- npm
- 8.19.1
- vite
- 4.4.5
- React
- 18.2.0
- Storybook
- 7.5.2
- TailwindCSS
- 3.3.5
成果物
手順
Viteプロジェクト作成
まず、Viteを使用して以下のコマンドでプロジェクトを作成します。
npm create vite@latest
実行後、プロジェクト名、フレームワーク、言語の選択肢が表示されます。
今回はReact、TypeScript + SWCを選択しています。
✔ Project name: … vite-project
✔ Select a framework: › React
✔ Select a variant: › TypeScript + SWC
次に、依存関係をインストールします。
npm install
ローカルサーバーを立ち上げて、適切に開けることが確認できたらOKです。
npm run dev

関連ライブラリ導入
必要なライブラリをインストールしていきます。
今回はTailwindCSSを用いてスタイリングを行うため、以下のコマンドでそちらをインストールしていきます。
npm install -D tailwindcss postcss autoprefixer
npx tailwindcss init -p
tailwind.config.jsが追加されるので、そちらにtailwindの設定を上書きしていきます。
/** @type {import('tailwindcss').Config} */
export default {
    //tailwindを適用するファイルのパス
  content: [
    "./src/**/*.{js,ts,jsx,tsx}",
  ],
  theme: {
    extend: {},
  },
  plugins: [],
  corePlugins: {
    //Tailwind独自のGlobal Styleを無効化
    preflight: false,
  },
  //Utiliti Classのprefixを変更
  prefix: 'otsuka-'
}
次に、src直下のindex.cssのスタイルを全て消し、以下の内容に変更します。
@tailwind base;
@tailwind components;
@tailwind utilities;
Storybookを使用してUIカタログを構築するためそちらのインストールを行います。
npx storybook init --builder @storybook/builder-vite
classNameの設定にClsxを使うためそちらもinstallします
npm install clsx
以上でライブラリのインストールは完了です。最後に、不要なファイル・フォルダを削除しておきます。
src/
├── App.tsx
├── App.css
├── main.tsx
├── stories/
├── assets/
コンポーネント実装
では、UIコンポーネントの実装に移っていきます。
今回はButtonを例に進めます。
varitant propsを用いて、スタイルを切り替えることができるコンポーネントを作成しています。
import { FC, ButtonHTMLAttributes } from "react";
import cn from "clsx";
import styles from "./index.module.css";

export interface ButtonProps extends ButtonHTMLAttributes<HTMLButtonElement> {
  variant?: "primary" | "secondary" | "tertiary";
}

export const Button: FC<ButtonProps> = ({
  variant = "primary",
  children,
  className,
  ...props
}) => {
  const rootClassName = cn(styles.root, styles[variant], className);
  return (
    <button className={rootClassName} {...props}>
      {children}
    </button>
  );
};
.root {
  @apply otsuka-text-white otsuka-px-4 otsuka-py-3 otsuka-rounded otsuka-font-bold otsuka-uppercase otsuka-text-sm otsuka-outline-none otsuka-transition otsuka-duration-200 otsuka-border-none;
}
.primary {
  @apply otsuka-bg-blue-500;
}
.primary:hover {
  @apply otsuka-bg-blue-700;
}
.secondary {
  @apply otsuka-bg-gray-500;
}
.secondary:hover {
  @apply otsuka-bg-gray-700;
}
.tertiary {
  @apply otsuka-bg-red-500;
}
.tertiary:hover {
  @apply otsuka-bg-red-700;
}
作成したコンポーネントを、src直下から読み込めるようにします。
export * from './lib/Button'
tsconfig.tsを変更します。今回はCSS Moduleを採用していますので、TypescriptでCSSファイルを適切にimportできるようにするための設定を行います。
declare module '*.css';
{
  "include": ["src/lib", "./declaration.d.ts"],
}
以上で簡単なコンポーネントの実装は完了です。
StoryBookでカタログの作成
次に、動作確認のためStoryBookを用いて作成したButtonに対するUIカタログを作成します。
UIカタログとは、Web開発で使用しているコンポーネントを一覧表示するツールのことです。作成したコンポーネントをブラウザから簡単に閲覧することができます。
今回はそのUIカタログの作成で最も有名なStorybookを使っていきます。
事前準備としてはライブラリ導入の手順で完了していますので、早速実装していきます。
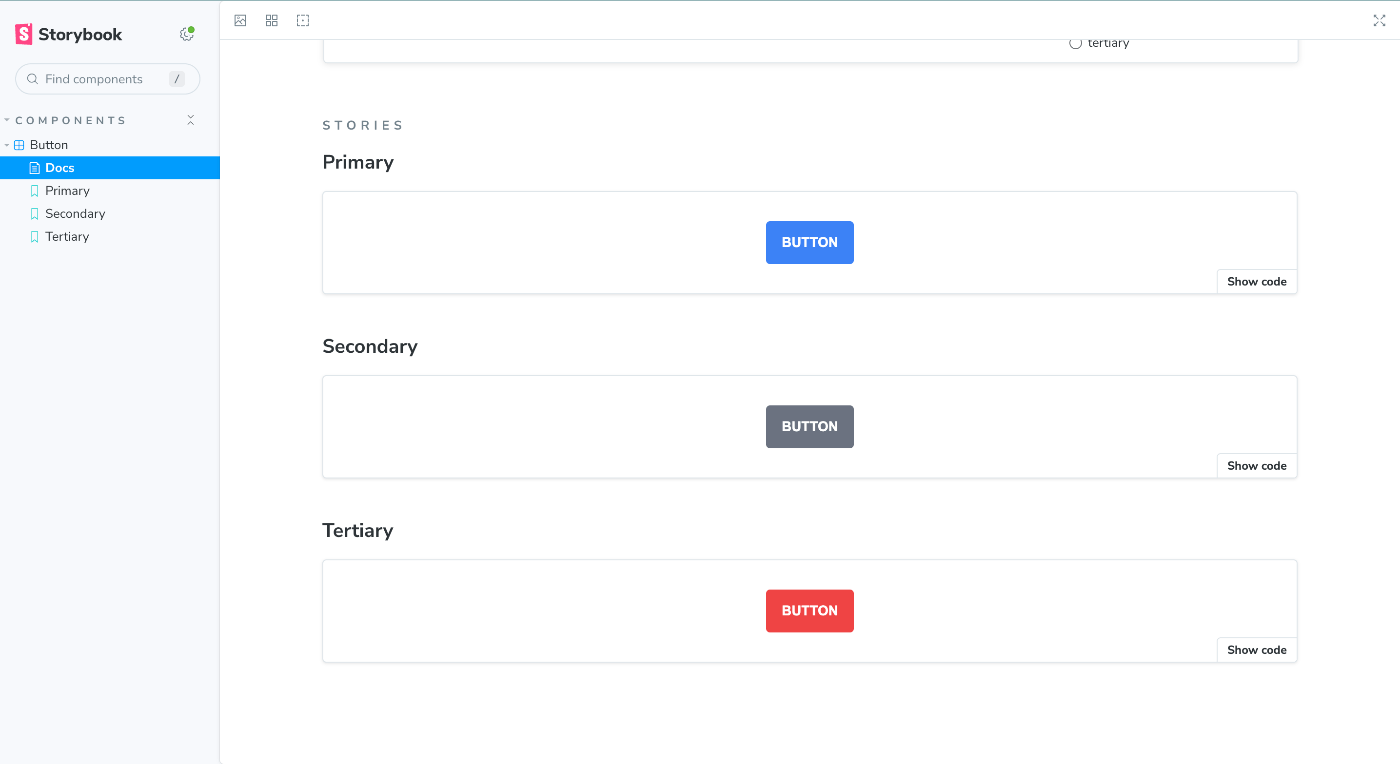
今回は用意した3つのStoryのUIカタログを作成しています。
import type { Meta, StoryObj } from "@storybook/react";
import {Button} from "../lib/Button";

// More on how to set up stories at: https://storybook.js.org/docs/react/writing-stories/introduction#default-export
const meta = {
  title: "components/Button",
  component: Button,
  parameters: {
    // Optional parameter to center the component in the Canvas. More info: https://storybook.js.org/docs/react/configure/story-layout
    layout: "centered",
  },
  // This component will have an automatically generated Autodocs entry: https://storybook.js.org/docs/react/writing-docs/autodocs
  tags: ["autodocs"],
} satisfies Meta<typeof Button>;

export default meta;
type Story = StoryObj<typeof meta>;

// More on writing stories with args: https://storybook.js.org/docs/react/writing-stories/args

//VariantがPrimaryの場合のStory
export const Primary: Story = {
  args: {
    children: "Button",
    variant: "primary",
  },
};

//VariantがSecondaryの場合のStory
export const Secondary: Story = {
  args: {
    children: "Button",
    variant: "secondary",
  },
};

//VariantがTertiaryの場合のStory
export const Tertiary: Story = {
  args: {
    children: "Button",
    variant: "tertiary",
  },
};
実装後、以下のコマンドから、Storybookのサーバーを立ち上げます。
npm run storybook
サーバーが立ち上がり、それぞれのVariantに応じたカタログが表示されていることが確認できたらOKです。

npmへpublishする
次に実装したコンポーネントをnpmへpublishしていきます。
今回はViteのライブラリモードを使用しています。こちらはViteを用いてライブラリ作成する際にスムーズに進めることができる機能です。
こちらの機能を使用するため、Viteの設定ファイルを変更します。
import { defineConfig } from 'vite'
import react from '@vitejs/plugin-react-swc'

import { resolve } from 'path'
// https://vitejs.dev/config/
export default defineConfig({
  plugins: [react()],
  //ライブラリモード用の記述
  build: {
    lib: {
      entry: resolve(__dirname, 'src/index.ts'),
      name: 'index',
      fileName: 'index',
    },
  },
})
entryのpathに、ライブラリ化したい対象のファイルをExportしておく必要があります。
次に、Typescriptの型定義用のファイルを出力時に含めるようにするための設定を行います。
{
  "compilerOptions": {
+  "emitDeclarationOnly": true,
+  "declaration": true,
+  "declarationDir": "./dist",
-  "noEmit": true,
   }
 }
以下のコマンドからビルドし、適切にファイルが生成されていることを確認できたらOKです。
npm run build
dist/
├── index.d.ts
├── index.js
├── index.umd.cjs
├── style.css
package.jsonに、ライブラリとしての基本情報を記載していきます。nameやauthorなどは適宜変更していただく必要があります。
{
+ "name": "vite-tailwind-lib-test-otsuka",
+ "description": "テスト用Uiライブラリ",
+ "author": "Otsuka",
+ "license": "MIT",
+ "files": ["dist"],
+ "main": "./dist/index.umd.cjs",
+ "types": "./dist/index.d.ts",
+ "module": "./dist/index.js",
+ "exports": {
+   ".": {
+     "import": "./dist/index.js",
+     "require": "./dist/index.umd.cjs"
+   },
+   "./dist/style.css": "./dist/style.css"
+ },
- "private": true,
}
使用者がすぐに使い始めることができるように、README.mdファイルを書き換えます。最低限、インストール手順と簡単な使い方を記載しておくと良いです。
# UIライブラリ-テスト用

Vite&TailwindCSSで作成したUIライブラリのテスト用リポジトリです。

## Install

npm install vite-tailwind-lib-test-otsuka

## Usage

import { Button } from 'vite-tailwind-lib-test-otsuka'
import 'vite-tailwind-lib-test-otsuka/dist/style.css'

const App = () => {
  return (
    <div>
      <Button>Button</Button>
    </div>
  )
}
npmへpublishしていきます。
npmのアカウントが必要になるため、以下のリンクから作成しておきます。
コンソールに戻り、以下のコマンドを用いて作成したnpmアカウントへログインします。
npm login
npmレジストリへpublishします。
npm publish
次に、npmの自分自身のライブラリのページへアクセスし追加されているか確認します。
以下のようにpublishしたライブラリの情報が適切に表示されていたらOKです。

使用できるか確認
最後に他のアプリから使用できるか確認していきます。
任意のReactアプリを構築し、ライブラリ側で作成したREADME.mdの手順に沿って設定を進めます。
以下のようにStorybookで確認したような形でButtonが意図通りに表示されていたら終了です。お疲れ様でした!

参考
Discussion