Gazebo: 自作stl modelの作り方と表示方法
海洋ロボコンをやっている人です。
今回は、Gazeboシミュレーターで使える自作のstlモデルの作り方と、その表示方法についてまとめました。
Gazeboはじめましての方のお力添えになれば幸いです。
Gazebo 自作stl modelの作り方と表示方法
gazebo表示用のモデルをつくる
まずはCADソフトでモデルを以下の形式で準備してください。
- xxxxx.stl
- xxxxx.dae
今回は0.5m四方のmeasurementというCADファイルをstl, dae準備しました。

.daeとして色データも反映させたい場合は、こちらの記事を参考にしてください。
.gazebo/model下にパッケージをつくる
続いて、model用のパッケージを作成していきます。
隠しファイルに ./gazebo/models というフォルダがあるので、show Hidden Filesよりフォルダを見えるようにすると良いと思います。

続いて、ターミナルを開き
cd .gazebo/models/
mkdir measurement && cd measurement
touch model.sdf model.config && mkdir meshes
と必要なファイル、フォルダを作成します。

meshes下には先ほど作成した.stlや.daeをコピーしておきましょう。
そしたら、まずはmodel.sdfを編集していきます。
この.sdfファイル内で.stlを読み込むことができます。
<?xml version="1.0" ?>
<sdf version="1.6">
  <model name="measurement">
    <static>true</static>
    <link name="link">
      <collision name="collision">
        <geometry>
          <mesh>
            <scale>0.001 0.001 0.001</scale>
            <uri>model://measurement/meshes/measurement.stl</uri>
          </mesh>
        </geometry>
        <surface>
          <friction>
            <ode>
              <mu>1.2</mu>
              <mu2>1.2</mu2>
            </ode>
          </friction>
        </surface>
      </collision>
      <visual name="visual">
        <geometry>
          <mesh>
            <scale>0.001 0.001 0.001</scale>
            <uri>model://measurement/meshes/measurement.dae</uri>
          </mesh>
        </geometry>
      </visual>
    </link>
  </model>
</sdf>
続いて、model.configも編集します。
configファイルで、上記のsdfファイル等を指定します。
<?xml version="1.0"?>

<model>
  <name>measurement</name>
  <version>1.0</version>
  <sdf version="1.6">model.sdf</sdf>

  <author>
    <name>xxxxx</name>
    <email>xxxxx</email>
  </author>

  <description>
    The measurement block.
  </description>
</model>
これで準備完了です。
launchファイルでGazeboに表示する
Gazeboに表示する方法は多様にありますが、今回はROSパッケージを用いて、xxx.launch.py経由で表示してみましょう。
まずはワークスペース内に新しくパッケージを作成します。
続いて、今回必要なフォルダの作成と使用しないフォルダは削除しておきます。
cd ~/xxx_ws/src
ros2 pkg create --build-type ament_cmake gazebo_world
cd ./gazebo_worlds/ && sudo rm -r include src
mkdir world launch
その後worldsフォルダ下にdisplay_stl.worldファイルを作成し、
<?xml version="1.0" ?>
<sdf version="1.5">
  <world name="default">

    <include>
      <uri>model://ground_plane</uri>
    </include>

    <include>
      <uri>model://sun</uri>
    </include>

    <include>
      <name>measurement</name>
      <uri>model://measurement</uri>
      <static>true</static>
      <pose>0.25 -0.3 0 0 0 0</pose>
    </include>

  </world>
</sdf>
同様にlaunchフォルダ下にlaucnhファイルを作成し、Gazebo表示用のプログラムを記述します。
from ament_index_python.packages import get_package_share_directory

from launch import LaunchDescription
from launch.actions import IncludeLaunchDescription
from launch.launch_description_sources import PythonLaunchDescriptionSource
from launch_ros.substitutions import FindPackageShare
import os

def generate_launch_description():
    # Constants for paths to different files and folders
    gazebo_pkg_name = 'gazebo_world'
    world_file_path = 'worlds/display_stl.world'

    gazebo_pkg_share = FindPackageShare(package=gazebo_pkg_name).find(gazebo_pkg_name)
    world_path = os.path.join(gazebo_pkg_share, world_file_path)

    gazebo = IncludeLaunchDescription(
        PythonLaunchDescriptionSource([os.path.join(
            get_package_share_directory('gazebo_ros'), 'launch'), '/gazebo.launch.py']),
            launch_arguments={'world': world_path}.items(),
    )

    nodes = [
        gazebo,
    ]

    return LaunchDescription(nodes)
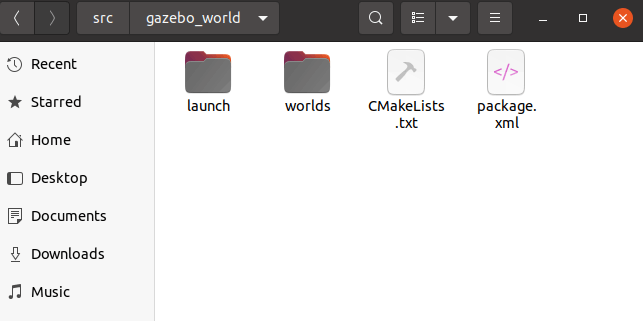
CMakeLists.txtにフォルダの依存関係も記載しておきましょう。
+install(DIRECTORY
+  launch
+  worlds
+  DESTINATION share/${PROJECT_NAME}/
+)
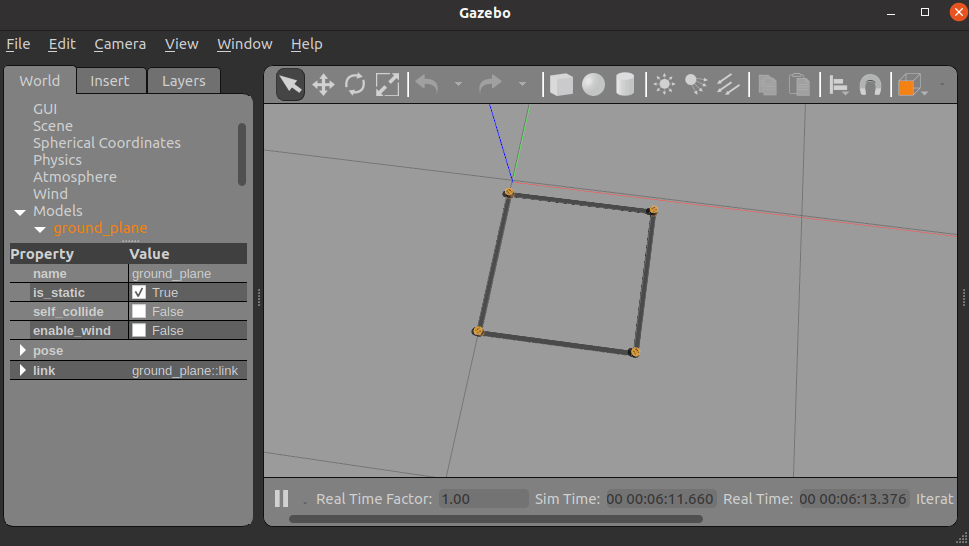
ここまでできたら、ビルドしたあとに
ros2 launch gazebo_world gazebo_world.launch.py
で確認してみましょう。
無事、Gazebo内に表示されていれば完了です。
以上。
Discussion