CDK for Terraform 入門
想定読者
- HCL以外を使ってTerraformを利用したい方
- CDK for Terraformが気になるけどよくわかっていない方
- HCP TerraformでCDK for Terraformを使ってみたい方
CDK for Terraform
CDK for Terraformは、汎用プログラミング言語を使って Terraform コードを生成するための仕組みです。
私個人としては HCL も十分わかりやすいと思いますが、とはいえ慣れ親しんだ言語があればそれを使ってTerraformも使いたいというニーズも当然あるかと思います。
そんな願いを多分叶えてくれるのがCDK for Terraformです。
CDK for Terraform を試してみる
一旦動かす
取り急ぎ簡単に動かしてみます。
1. インストール
npmかbrewで簡単に入れられます。パッケージ名ちょっと違うのがややこしいですが。
npm install --global cdktf-cli@latest
or
brew install cdktf
2. 初期化
インストールが終わったら、次に初期化を行います。
--templateの引数として、組み込みのテンプレートか、必要に応じてカスタムテンプレートを用意することもできます。
組み込みのテンプレートとしては、以下の5種類が利用できますが、ここでは python を利用します。
typescriptpythonc#javago
途中色々聞かれますが、適当に答えておきましょう。
➜ cdktf init --template=python
? Project Name cdktf-demo
? Project Description A simple getting started project for cdktf.
? Would you like to use Terraform Cloud? no
? Do you want to send crash reports to the CDKTF team? Refer to
https://developer.hashicorp.com/terraform/cdktf/create-and-deploy/configuration-file#enable-crash-reporting-for-the-cli for more information no
Note: You can always add providers using 'cdktf provider add' later on
? What providers do you want to use?

Creating a virtualenv for this project
Pipfile: /Users/taromurata/git-repos/fat-demo/cdk-terraform/Pipfile
Using /Users/taromurata/.pyenv/versions/3.13.2/bin/python33.13.2 to create virtualenv...
⠇ Creating virtual environment...created virtual environment CPython3.13.2.final.0-64 in 518ms

~~~~~
中略
~~~~~
Use Providers:

  You can add prebuilt providers (if available) or locally generated ones using the add command:

  cdktf provider add "aws@~>3.0" null kreuzwerker/docker

  You can find all prebuilt providers on PyPI: https://pypi.org/user/cdktf-team/
  You can also install these providers directly through pipenv:

  pipenv install cdktf-cdktf-provider-aws
  pipenv install cdktf-cdktf-provider-google
  pipenv install cdktf-cdktf-provider-azurerm
  pipenv install cdktf-cdktf-provider-docker
  pipenv install cdktf-cdktf-provider-github
  pipenv install cdktf-cdktf-provider-null

  You can also build any module or provider locally. Learn more: https://cdk.tf/modules-and-providers

========================================================================================================
これで準備完了です。
3. 生成されたファイルの確認
初期化処理を python で実行すると、こんな感じにファイルが生成されているかと思います。
➜ ls
Pipfile       Pipfile.lock  cdktf.json    help          main-test.py  main.py*
3-1. help
その名の通り、コマンドに -h を渡した時にでも表示されそうなヘルプ情報が書き込まれています。
一度も cdktf を使ったことがない場合には、眺めてみると良いかと思います。
3-2. cdktf.json
cdktf.json は、利用するモジュールやプロバイダーを定義するためのファイルです。
ここでは、CDK for Terraformの動きを見たいだけなので、特になにも考えずに利用できる random providerを利用したいので、以下のように terraformProviders を修正します。
{
  "language": "python",
  "app": "pipenv run python main.py",
  "projectId": "55854f20-9f58-4da1-a039-78865907c857",
  "sendCrashReports": "false",
  "terraformProviders": [
    "hashicorp/random@~>3.7.2"
  ],
  "terraformModules": [],
  "codeMakerOutput": "imports",
  "context": {

  }
}
修正後、 cdktf get コマンドを実行すると、利用する言語ごとに必要なファイル(CDK constructs)生成されます。
➜ cdktf get
Generated python constructs in the output directory: imports
3-3. main.py
初期状態では以下のようになっています。
この # define resources here にresourceを追加していきます。
#!/usr/bin/env python
from constructs import Construct
from cdktf import App, TerraformStack


class MyStack(TerraformStack):
    def __init__(self, scope: Construct, id: str):
        super().__init__(scope, id)

        # define resources here


app = App()
MyStack(app, "cdk-terraform")

app.synth()
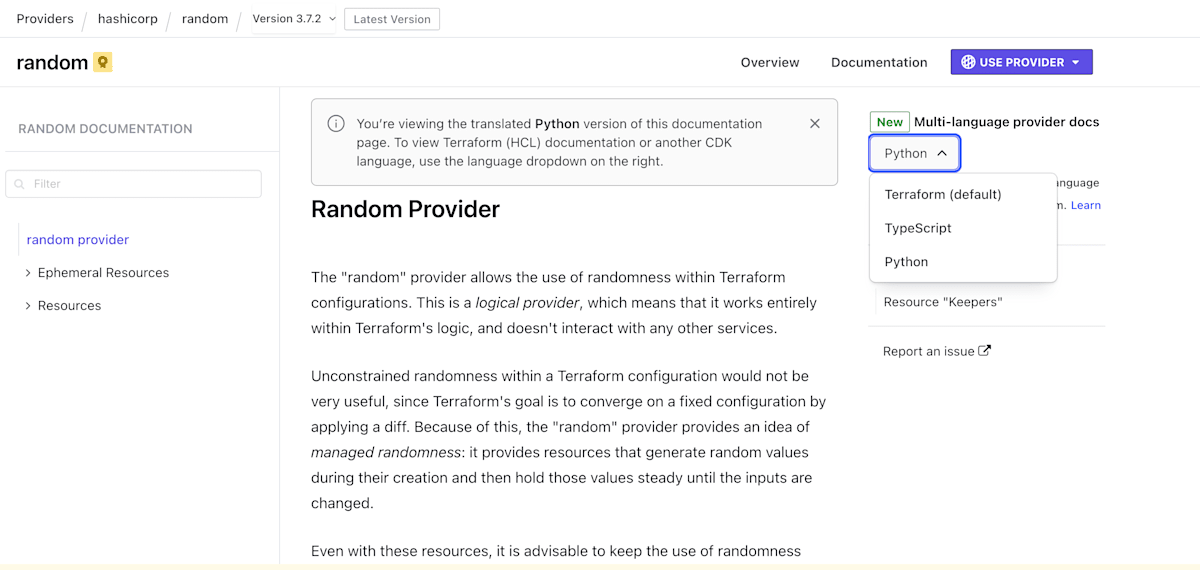
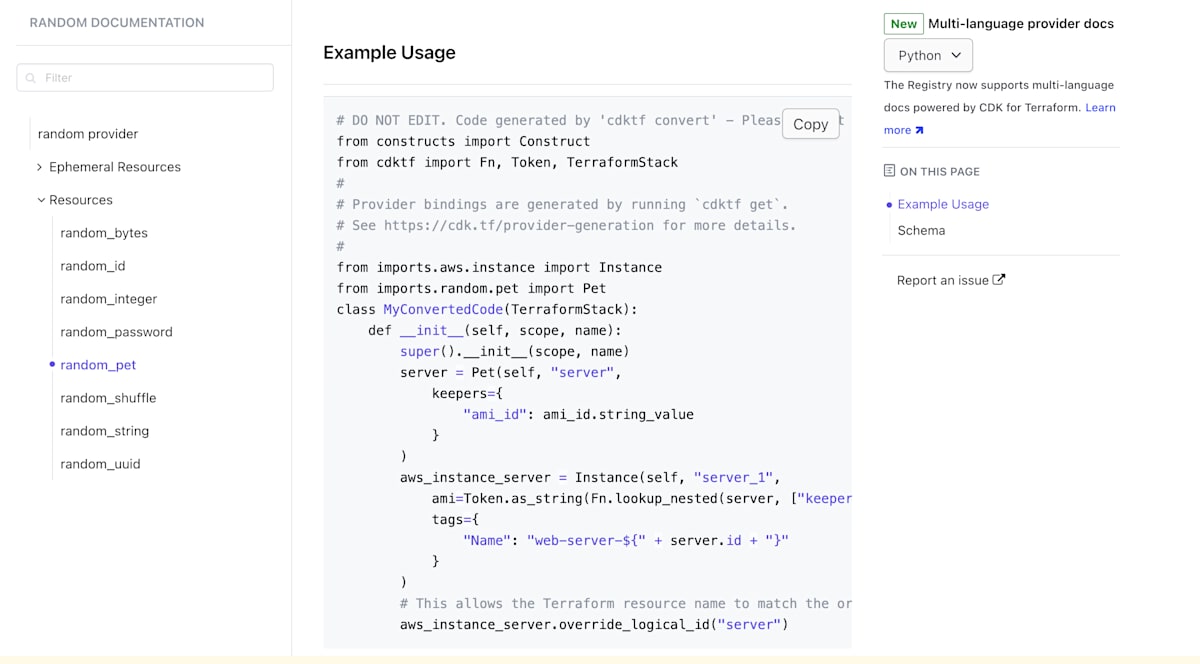
Terraform Registryのドキュメントで、言語切り替えによってpython版のサンプルを表示させることもできるので、これを参考にします。
#!/usr/bin/env python
from constructs import Construct
from cdktf import App, TerraformStack

from imports.random.provider import RandomProvider
from imports.random.pet import Pet

class MyStack(TerraformStack):
    def __init__(self, scope: Construct, id: str):
        super().__init__(scope, id)

        RandomProvider(self, "random")

        # define resources here
        random_pet_1 = Pet(self, "random_pet_1")


app = App()
MyStack(app, "cdk-terraform")

app.synth()
4. 実行
準備ができたら実行してみましょう。
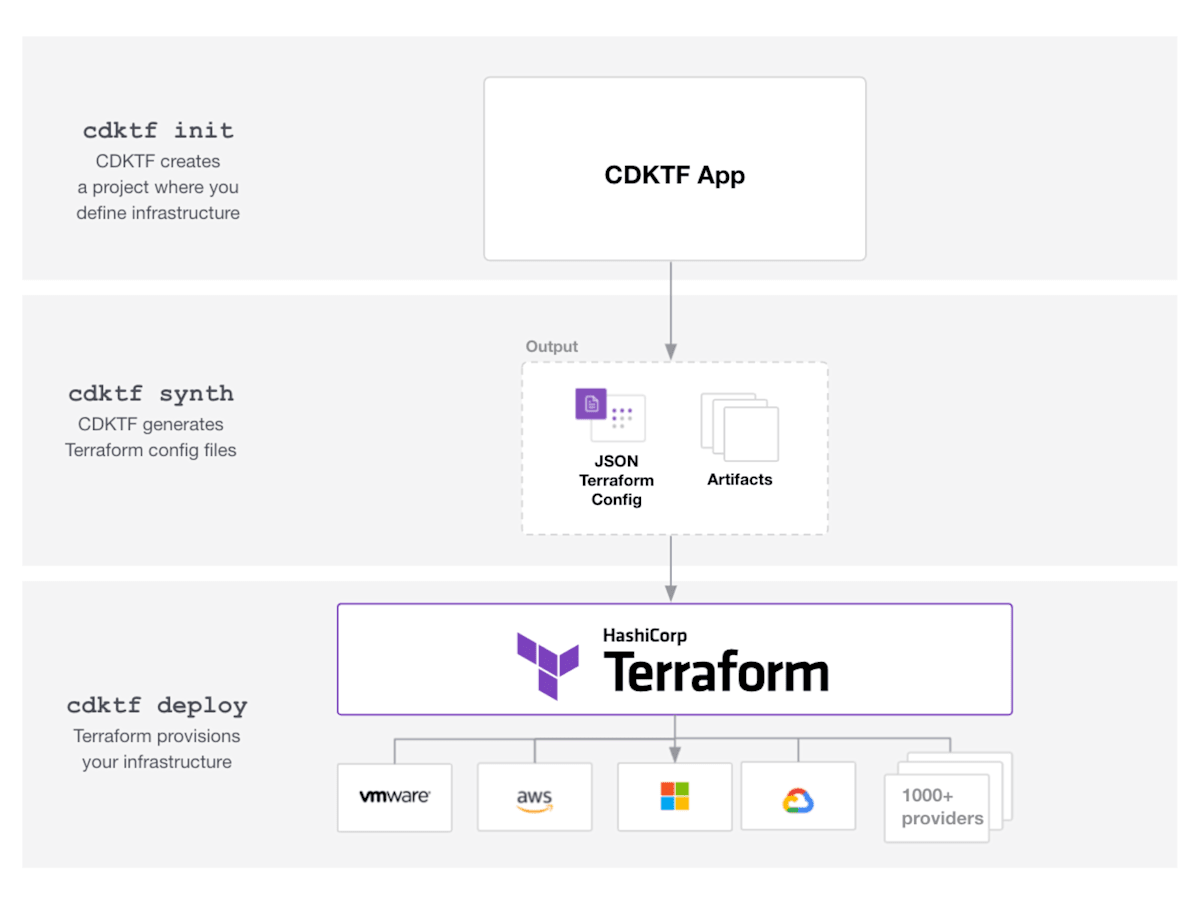
CDK for Terraformの実行の方法として、直接 cdktf からデプロイする方法と、json形式のterraformコードを生成して通常のterraform経由でデプロイする方法の二つがあります。
と、言いましたが、直接やるパターンでも結局のところ似たようなルートをたどります。
deployしてみます。
➜ cdktf deploy

⠙  Synthesizing

cdk-terraform  Initializing the backend...
cdk-terraform
               Successfully configured the backend "local"! Terraform will automatically
               use this backend unless the backend configuration changes.
cdk-terraform  Initializing provider plugins...
               - Finding hashicorp/random versions matching "3.7.2"...
cdk-terraform  - Installing hashicorp/random v3.7.2...
cdk-terraform  - Installed hashicorp/random v3.7.2 (signed by HashiCorp)
               Terraform has created a lock file .terraform.lock.hcl to record the provider
               selections it made above. Include this file in your version control repository
               so that Terraform can guarantee to make the same selections by default when
               you run "terraform init" in the future.
cdk-terraform  Terraform has been successfully initialized!

               You may now begin working with Terraform. Try running "terraform plan" to see
               any changes that are required for your infrastructure. All Terraform commands
               should now work.

               If you ever set or change modules or backend configuration for Terraform,
               rerun this command to reinitialize your working directory. If you forget, other
               commands will detect it and remind you to do so if necessary.
cdk-terraform  - Fetching hashicorp/random 3.7.2 for linux_amd64...
cdk-terraform  - Retrieved hashicorp/random 3.7.2 for linux_amd64 (signed by HashiCorp)
               - Obtained hashicorp/random checksums for linux_amd64; Additional checksums for this platform are now tracked
in the lock file
cdk-terraform  Success! Terraform has updated the lock file.

               Review the changes in .terraform.lock.hcl and then commit to your
               version control system to retain the new checksums.
cdk-terraform  Terraform used the selected providers to generate the following execution plan.
               Resource actions are indicated with the following symbols:
cdk-terraform  + create

               Terraform will perform the following actions:

                 # random_pet.random_pet_1 (random_pet_1) will be created
                 + resource "random_pet" "random_pet_1" {
                     + id        = (known after apply)
                     + length    = 2
                     + separator = "-"
                   }

               Plan: 1 to add, 0 to change, 0 to destroy.

               Do you want to perform these actions?
                 Terraform will perform the actions described above.
                 Only 'yes' will be accepted to approve.
cdk-terraform  Enter a value: yes
cdk-terraform  random_pet.random_pet_1: Creating...
cdk-terraform  random_pet.random_pet_1: Creation complete after 0s [id=flowing-aphid]
cdk-terraform
               Apply complete! Resources: 1 added, 0 changed, 0 destroyed.

No outputs found.
途中みたことのあるような気のする箇所もありますね。👀
完了すると、 cdktf.out ディレクトリの中に生成された JSONのTerraform コードと、Local backendにしているので手元に *.tfstate ファイルが見えてくるかなと思います。
また、cdktf synth で --hcl オプションを使えば json の代わりに hcl 形式の Terraform コードを生成することもできます。
terraform {
  required_providers {
    random = {
      version = "3.7.2"
      source  = "hashicorp/random"
    }
  }
  backend "local" {
    path = "/Users/taromurata/git-repos/fat-demo/cdk-terraform/terraform.cdk-terraform.tfstate"
  }


}

provider "random" {
}
resource "random_pet" "random_pet_1" {
}
HCP Terraformと組み合わせて使ってみる
Localでの実行はここまでの通りですが、せっかくなのでHCP Terraformと組み合わせて使ってみます。
HCP Terraformと組み合わせて利用する際には、まず、HCP Terraformへのログインが必要です。通常の terraform コマンド利用時と同じですね。
➜ cdktf login

cdktf has successfully configured Terraform Cloud credentials!

Welcome tarohcp!
次に、CloudBackendなどの設定を追加します。
#!/usr/bin/env python
from constructs import Construct
from cdktf import App, TerraformStack, CloudBackend, NamedCloudWorkspace

from imports.random.provider import RandomProvider
from imports.random.pet import Pet

class MyStack(TerraformStack):
    def __init__(self, scope: Construct, id: str):
        super().__init__(scope, id)

        # configure the random provider
        RandomProvider(self, "random")

        # define resources here
        random_pet_1 = Pet(self, "random_pet_1")


app = App()
stack = MyStack(app, "cdk-terraform")
CloudBackend(stack,
             hostname="app.terraform.io",
             organization="<HCP Org name>",
             workspaces=NamedCloudWorkspace("cdk-terraform"))

app.synth()
あとは deploy するだけです。
先ほどLocalで実行したstateが残っているので、 --migrate-state=true としてこれを HCP Terraform に移します。
➜ cdktf deploy --migrate-state=true

⠋  Synthesizing


cdk-terraform  Initializing HCP Terraform...
cdk-terraform  Migrating from backend "local" to HCP Terraform.
cdk-terraform  Do you wish to proceed?
                 As part of migrating to HCP Terraform, Terraform can optionally copy
                 your current workspace state to the configured HCP Terraform workspace.

                 Answer "yes" to copy the latest state snapshot to the configured
                 HCP Terraform workspace.

                 Answer "no" to ignore the existing state and just activate the configured
                 HCP Terraform workspace with its existing state, if any.

                 Should Terraform migrate your existing state?

                 Enter a value:
cdk-terraform  yes
~~~
中略
~~~

No outputs found.
ちゃんとHCP Terraform上でも実行を確認することができます。
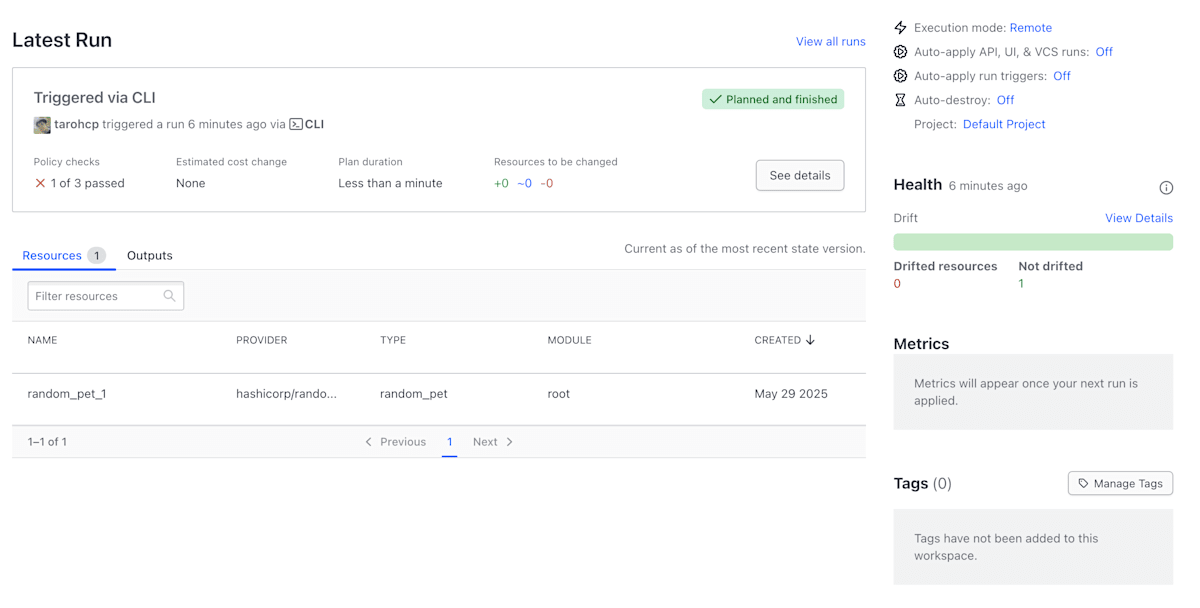
いつも通り、policy checkやhealth checkなどの各種HCP Terraform機能も活用することができていることがわかるかなと思います。
また、ここではHCP TerraformのCLI-driven Runによる動作になりますが、もちろん cdktf synth --hcl したコードをVCSにコミットし、VCS-driven Run形式でのHCP Terraform利用も可能です。
まとめ
いかがでしたでしょうか?
駆け足になりましたが、そんな方法もあるのかということがなんとなくでもご理解いただけましたら幸いです。
Discussion