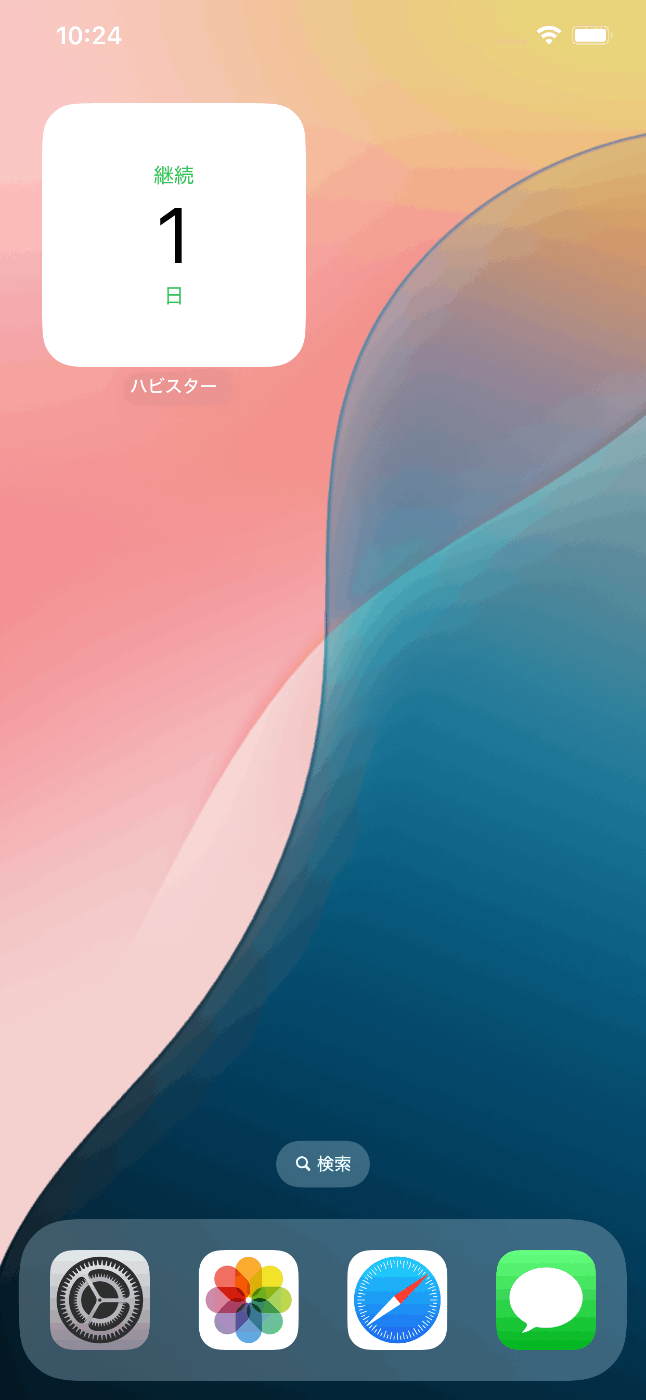
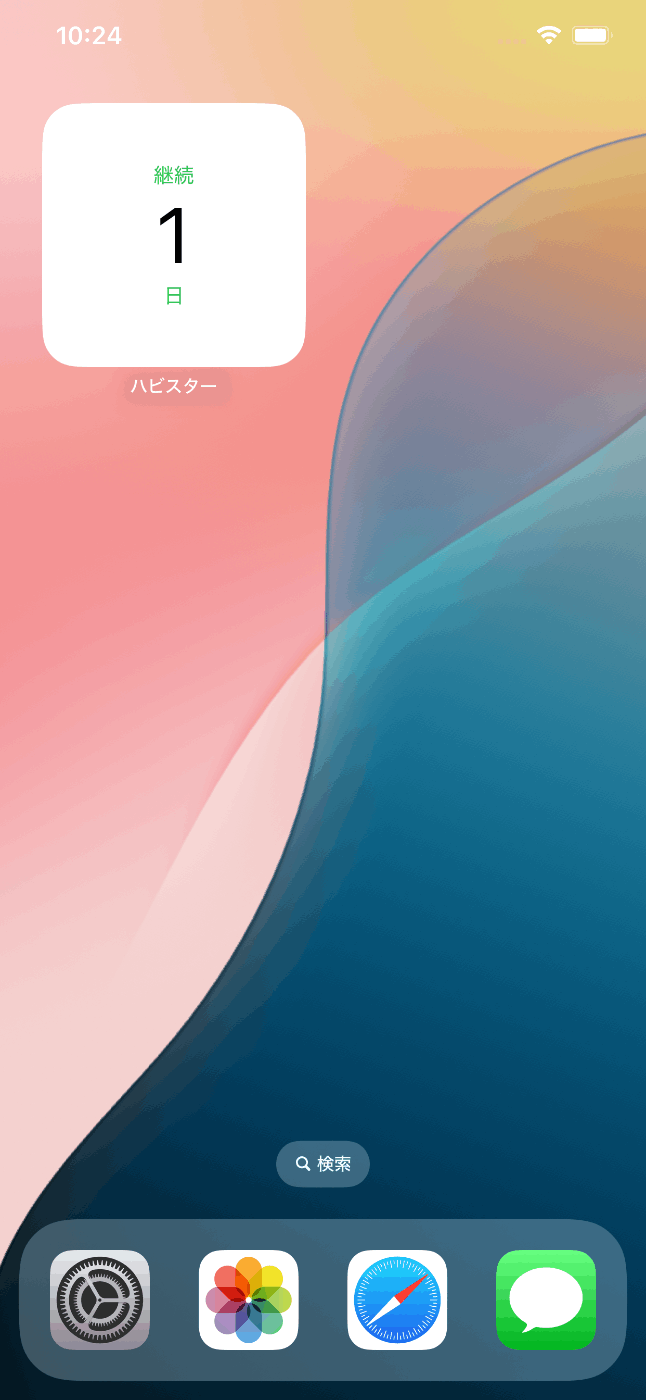
FlutterでHomeWidgetを表示させる
Flutterでhome_widgetというプラグインを使用してiOSとAndroidでHomeWidgetを表示させたので備忘録として残しておきます。


home_widgetプラグインをインストール
pubspec.yaml ファイルに home_widgetを追加
iOS
Xcodeでアプリにウィジェットを追加
以下のサイトを参考にXcodeでアプリにWidget Extension(Widget拡張機能)を追加します
Widgetの設定をする
プロジェクト/ios配下にあるhabit_appディレクトリ(開発中アプリの名前)にWidgetを定義するswiftファイルを作成します。
更新される継続日数を表示するようにしました。
struct Provider: IntentTimelineProvider {
    // ウィジェットがデータを読み込む前に表示するプレースホルダーエントリを提供するためのメソッド
    func placeholder(in context: Context) -> SimpleEntry {
        SimpleEntry(date: Date(), configuration: ConfigurationIntent(), currentState: 0)
    }

    // ウィジェットが表示するスナップショットエントリを提供するためのメソッド
    // ウィジェットギャラリーでウィジェットを表示する際や、ウィジェットが初めて表示される際に使用
    func getSnapshot(for configuration: ConfigurationIntent, in context: Context, completion: @escaping (SimpleEntry) -> ()) {
        let data = UserDefaults.init(suiteName:appGroupID)
        let currentState = data?.integer(forKey:  "currentState") ?? 0
        let entry = SimpleEntry(date: Date(), configuration: configuration, currentState: currentState)
        completion(entry)
    }

    // ウィジェットが表示するタイムラインエントリのシーケンスを提供するためのメソッド
    // ウィジェットが表示するエントリのシーケンスを指定し、それらのエントリがいつ表示されるかを制御する
    func getTimeline(for configuration: ConfigurationIntent, in context: Context, completion: @escaping (Timeline<Entry>) -> ()) {
        let data: UserDefaults? = UserDefaults.init(suiteName: appGroupID)
        let currentState = data?.integer(forKey: "currentState") ?? 0
        // 現在の日時とUserDefaultsから取得した現在の状態を使用してエントリを作成
        let entry = SimpleEntry(date: Date(), configuration: configuration, currentState: currentState)

        // アプリのデータに従って更新されるタイムラインを作成
        let timeline = Timeline(entries: [entry], policy: .never)
        completion(timeline)
    }
}

struct SimpleEntry: TimelineEntry {
    let date: Date
    let configuration: ConfigurationIntent
    let currentState: Int
}

// 見た目を定義するためのビュー
struct habit_appEntryView : View {
    var entry: Provider.Entry

    var body: some View {
        // 背景を白に設定
        ZStack {
            Color.white
            VStack {
                Text("継続").font(.system(size: 14)).foregroundColor(Color.green)
                Text("\(entry.currentState)").font(.system(size: 50)).foregroundColor(Color.black)
                Text("日").font(.system(size: 14)).foregroundColor(Color.green)
            }

        }
    }
}

struct habit_app: Widget {
    //ウィジェットを識別する文字列。ユーザーが選択する識別子であり、ウィジェットが表す内容をわかりやすく説明するもの
    let kind: String = "habit_app"

    var body: some WidgetConfiguration {
        // ユーザーが構成可能なプロパティをウィジェットが含む
        IntentConfiguration(kind: kind, intent: ConfigurationIntent.self, provider: Provider()) { entry in
            habit_appEntryView(entry: entry)
        }
        .configurationDisplayName("My Widget")
        .description("This is an example widget.")
    }
}

struct habit_app_Previews: PreviewProvider {
    static var previews: some View {
        habit_appEntryView(entry: SimpleEntry(date: Date(), configuration: ConfigurationIntent(),currentState: 0))
            .previewContext(WidgetPreviewContext(family: .systemSmall))
    }
}
AppとWidget間でデータを同期
App Groupsを使用して、AppとWidget間でデータを同期します。App Groupsを使用するには有料のApple Developer Accountが必要だったので、Apple Developer Programに年間登録しました。
Xcodeを開いて設定します。こちらを参考
iOSの場合、HomeWidget.setAppGroupId('YOUR_GROUP_ID')を呼び出す必要があります。これを行わないと、アプリとウィジェット間でデータを共有できず、saveWidgetDataとgetWidgetDataの呼び出しはエラーを返します。
void main() async {
  WidgetsFlutterBinding.ensureInitialized();
  // Firebase を初期化
  await Firebase.initializeApp(
    options: DefaultFirebaseOptions.currentPlatform,
  );

  //アプリとウィジェット間でデータを共有するためのグループIDを設定
  HomeWidget.setAppGroupId(GlobalConst.appGroupID);
  runApp(
    const ProviderScope(
      child: HabitApp(),
    ),
  );
}
あとはHomeWidget.saveWidgetDataを使用してWidgetで扱うデータを保存します。currentStateという名前で継続日数habit.current_streakを保存しています。
try {
    //iOSでの継続日数を保存するための処理
    Future.wait([
      // Widgetで扱うデータを保存
      HomeWidget.saveWidgetData<int>(
          'currentState', habit.current_streak),
    ]);

  } on PlatformException catch (exception) {
    print(exception);
  }

  try {
    // iOSのWidgetの処理は「iOSName」→「name」の順で探す。
    HomeWidget.updateWidget(
      iOSName: 'habit_app',
      androidName: 'HomeWidgetGlanceReceiver',
    );
  } on PlatformException catch (exception) {
    print(exception);
  }

Android
とりあえずhome_widgetドキュメントの通りに進めました。途中KotlinとGradleとjavaのバージョンが古くてかなり手こずりましたがなんとか表示させました。
android/app/src/main/res/xmlにhome_widget.xmlファイルを作ります。
AndroidのWidgetサイズは1セルあたり48dpなのでその倍数に設定すると良さそうでした。
<appwidget-provider xmlns:android="http://schemas.android.com/apk/res/android"
    android:initialLayout="@layout/widget_layout"
    android:minHeight="48dp"
    android:minWidth="48dp"
    android:updatePeriodMillis="86400000"
    android:previewImage="@drawable/example_appwidget_preview"
    android:resizeMode="horizontal|vertical"
    android:widgetCategory="home_screen">
</appwidget-provider>
android/app/src/mainのAndroidManifest.xmlに追加。resourceには先程作成したxmlファイル名を設定します。receiver android:nameは後で使用します。
<receiver android:name="HomeWidgetGlanceReceiver"
            android:exported="false">
            <intent-filter>
                <action android:name="android.appwidget.action.APPWIDGET_UPDATE" />
            </intent-filter>
            <meta-data
                android:name="android.appwidget.provider"
                android:resource="@xml/home_widget"/>
        </receiver>
今回はandroid/app/src/main/kotlin/com/example/habit_app/MainActivity.ktにレイアウトを定義しました
class MainActivity: FlutterActivity() {
}
class HomeWidgetGlanceReceiver : HomeWidgetGlanceWidgetReceiver<HomeWidgetGlanceAppWidget>() {
    override val glanceAppWidget = HomeWidgetGlanceAppWidget()
}

class HomeWidgetGlanceAppWidget : GlanceAppWidget(){
    override val stateDefinition = HomeWidgetGlanceStateDefinition()

    override suspend fun provideGlance(context: Context, id: GlanceId) {
        provideContent {
            GlanceContent(context, currentState())
        }
    }

}


@Composable
private fun GlanceContent(context: Context, currentState: HomeWidgetGlanceState) {
    val streak = currentState.preferences.getInt("currentState", 0) // デフォルト値は 0

    Column(
        modifier = GlanceModifier.run {
            fillMaxSize()
                .background(ColorProvider(Color.White)) // 背景を白に設定
                .padding(8.dp)
        },
        horizontalAlignment = Alignment.CenterHorizontally,  // 中央揃え
        verticalAlignment = Alignment.CenterVertically
    ) {
        // "継続"のテキスト
        Text(
            text = "継続",
            style = TextStyle(
                color = ColorProvider(Color.Green),  // テキストカラーを緑に設定
                fontSize = 14.sp                   // フォントサイズ14sp
            )
        )

        // 継続日数
        Text(
            text = "$streak",
            style = TextStyle(
                color = ColorProvider(Color.Black), // フォントカラーを黒に設定
                fontSize = 30.sp                   // フォントサイズ50sp
            ),

        )

        // "日"のテキスト
        Text(
            text = "日",
            style = TextStyle(
                color = ColorProvider(Color.Green),  // テキストカラーを緑に設定
                fontSize = 14.sp                   // フォントサイズ14sp
            )
        )
    }
}
HomeWidgetGlanceWidgetReceiverを継承したクラス名でFlutter側から更新をかけます。なので「HomeWidgetGlanceReceiver」をFlutter側で使用しました
HomeWidget.updateWidget(
  iOSName: 'habit_app',
  androidName: 'HomeWidgetGlanceReceiver',
);

参考にしたサイト


Discussion