Twitterで流れてきたChatGPT APIを利用した英会話ロボットを再現したい
こんにちわ。tamamu79です。
なにかとChatGPTが話題ですよね。たまたまこちらのツイートを見かけた時にビビっ!ときました。
これなら英会話気軽に始められるやん!!
そこで、たまたま使い道に困っていたラズパイが余っていたので初めて電気工作をしてみました。
その時に、参考にした記事や考えたことを覚えているうちに記載していきます。
前提として、
- ラズパイには raspbian OSをインストール済み
- SSHで接続したことがある
- Pythonであまり実装したことがない人→私です
- 基本的にChatGPTさんに随時聞いたりしていました。
- ただ、出力されたコードはそのままでは使えないので検証→修正が必要です。
そして、こちらが先日ツイートした私が作った英会話ロボットさんです。
物理的に必要なものを以下に記載します。
- Rasbperry Pi 4 Model B (8GB) Amazonで当時一万弱
- Rasbperry Pi キット 3000円弱
- HC-SR04(超音波距離センサー) 500円
- USBマイク 700円
- スピーカーは100均で300円くらいUSBで接続できるものです。
- 近くにあったので数店舗100均走って探し回りました。
- キャンドゥーで買ったと思います。
他
- OpenAI APIにアカウント登録です。

開発環境
- MacOSからSSHで接続
マイクで音声を入力する、スピーカーで音声を出力する時に参考とした記事はこちらです
超音波距離センサー
音声認識
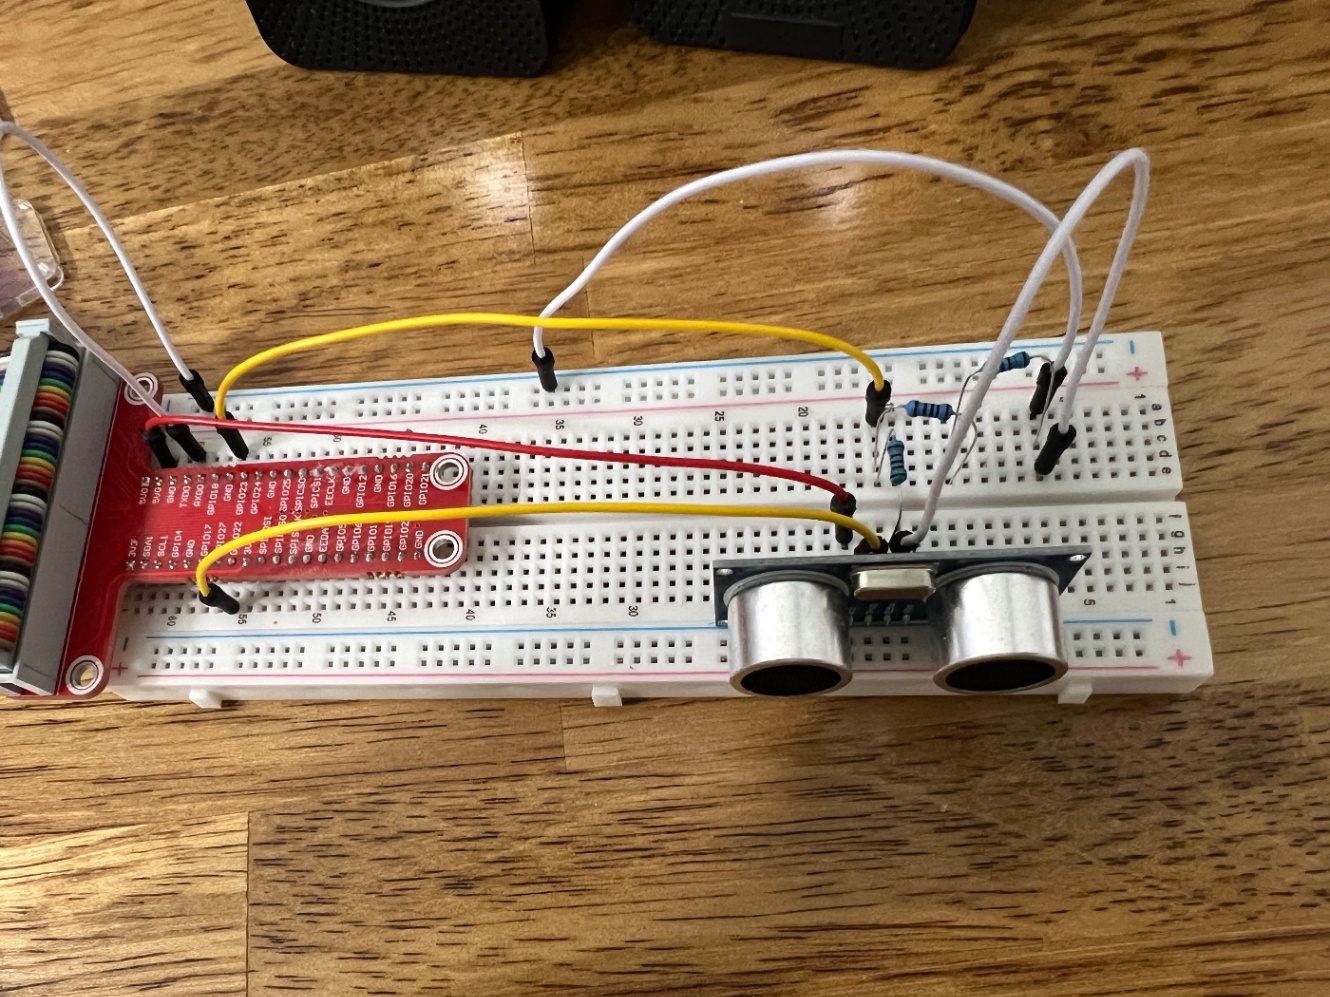
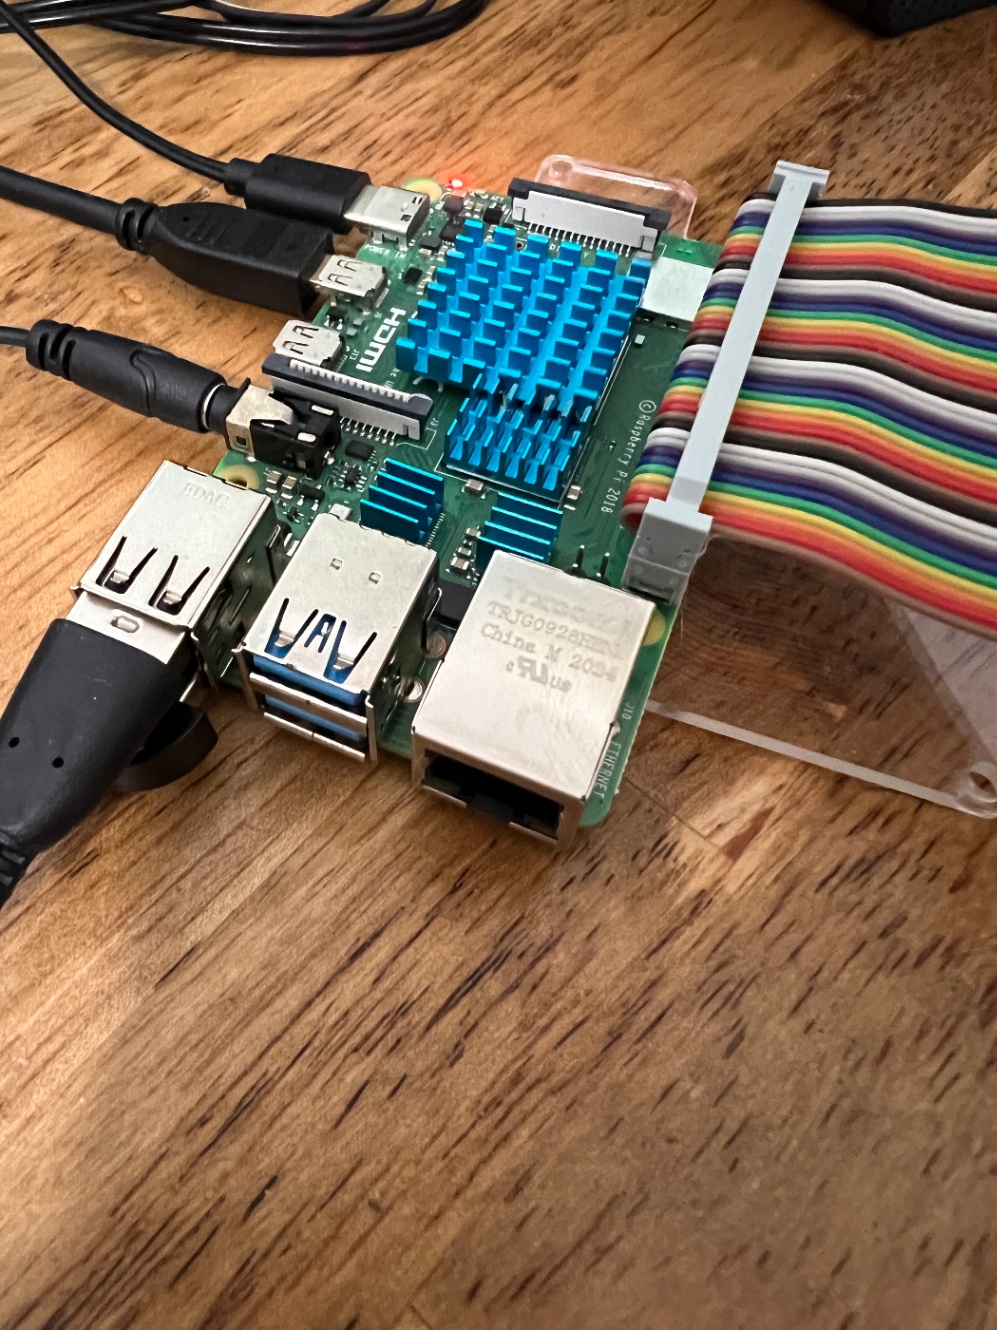
こちらが実際に出来上がった全体図になります。
剥き出しなので埃被りそうです。


SSHに関してVS CodeからSSHでラズパイと通信していました。
以下使った拡張機能
- Remote - SSH
- VS Code上で開発できて便利です。
- 途中までターミナルでSSH接続していて、vimで編集していました←きつかた
- Python
- 開いているファイルをデバッグするため
- ターミナル上で直実行でもよいです。
コード実行の流れです。
- 超音波距離センサーで近づのを検知
- 英会話ロボットが話しかけてくれる
- 録音になり話しかける
- それについて英会話ロボットが返答
- 2~4を繰り返す
- 2秒くらい無音なら会話終了
- 再度1からスタート
音声を録音するコードです
audio_recorder.py
import pyaudio
import wave
import audioop
import time

class AudioRecorder:
    def __init__(self):
        self.CHUNK = 4096
        self.FORMAT = pyaudio.paInt16
        self.CHANNELS = 1
        self.RATE = 44100
        self.THRESHOLD = 1200
        self.SILENT_CHUNKS = 3 * self.RATE / self.CHUNK  # 3秒間無音が続いたら終了

        self.audio = pyaudio.PyAudio()
        self.frames = []

    def start_recording(self):
        stream = self.audio.open(format=self.FORMAT, channels=self.CHANNELS,
                                rate=self.RATE, input=True,
                                frames_per_buffer=self.CHUNK)

        print("録音開始")

        # 録音開始時間を保存
        start_time = time.time()

        silent_chunks = 0
        while True:
            data = stream.read(self.CHUNK)
            rms = audioop.rms(data, 2)
            if rms < self.THRESHOLD:
                silent_chunks += 1
                if silent_chunks > self.SILENT_CHUNKS:
                    break
            else:
                silent_chunks = 0
            self.frames.append(data)

        # 録音終了時間を保存
        end_time = time.time()

        stream.stop_stream()
        stream.close()
        self.audio.terminate()

        # 録音時間を表示する
        print(f"Recorded {end_time - start_time:.2f} seconds.")

    def save_recording(self, file_path):
        wf = wave.open(file_path, 'wb')
        wf.setnchannels(self.CHANNELS)
        wf.setsampwidth(self.audio.get_sample_size(self.FORMAT))
        wf.setframerate(self.RATE)
        wf.writeframes(b''.join(self.frames))
        wf.close()
音声を再生するコードです
player.py
import wave
import pyaudio

class WavePlayer:
    def __init__(self, file_path):
        self.file_path = file_path
        self.wave_file = wave.open(self.file_path, 'rb')
        self.audio = None
        self.stream = None

    def play(self):
        chunk = 1024
        data = self.wave_file.readframes(chunk)

        self.audio = pyaudio.PyAudio()

        self.stream = self.audio.open(
            format=self.audio.get_format_from_width(self.wave_file.getsampwidth()),
            channels=self.wave_file.getnchannels(),
            rate=self.wave_file.getframerate(),
            output=True
        )

        while data:
            self.stream.write(data)
            data = self.wave_file.readframes(chunk)

        self.stream.stop_stream()
        self.stream.close()
        self.wave_file.rewind()

    def play_sync(self):
        self.play()
        self.audio.terminate()
ビープ音を鳴らす再生するコードです
beep_sound_player.py
import numpy as np
from pydub import AudioSegment
from pydub.playback import play


class BeepSoundPlayer:
    def __init__(self, sample_rate=44100, freq=220, duration=0.2):
        self.sample_rate = sample_rate
        self.freq = freq
        self.duration = duration
        self.beep = self._generate_beep_sound()

    def _generate_beep_sound(self):
        # 正弦波を生成
        t = np.arange(0, self.duration, 1 / self.sample_rate)
        sine_wave = np.sin(2 * np.pi * self.freq * t) * (2 ** 15 - 1)
        sine_wave = sine_wave.astype(np.int16)

        # 正弦波をAudioSegmentオブジェクトに変換
        beep = AudioSegment(
            sine_wave.tobytes(),
            frame_rate=self.sample_rate,
            sample_width=sine_wave.dtype.itemsize,
            channels=1
        )
        return beep

    def play_beep_sound(self):
        play(self.beep)


# テストコード
if __name__ == '__main__':
    player = BeepSoundPlayer()
    player.play_beep_sound()
OpenAI APIとやりとりするコードです
chat_api.py
import openai
from dotenv import load_dotenv
import os

class ChatAPI:
    def __init__(self, api_key, context):
        openai.api_key = api_key
        self.context = context

    def send_message(self, message):
        # ChatGPTの応答を会話コンテキストに追加
        self.context.append({
            'role': 'assistant',
            'content': message
        })

        # ユーザーのメッセージを会話コンテキストに追加
        self.context.append({
            'role': 'user',
            'content': message
        })

        # ChatGPT APIにリクエストを送信
        response = self._openai_completion()

        # レスポンスから返答を取得
        reply = response.choices[0].message['content']

        # ChatGPTの応答を会話コンテキストに追加
        self.context.append({
            'role': 'assistant',
            'content': reply
        })

        return reply

    def _openai_completion(self):
        response = openai.ChatCompletion.create(
            model="gpt-3.5-turbo",
            messages=self.context,
            max_tokens=100,
            temperature=0.8,
            n=1,
            stop=None
        )

        return response

if __name__ == '__main__':
    load_dotenv()
    # OPENAI_API_KEY環境変数からAPIキーを取得
    api_key = os.getenv('OPENAI_API_KEY')

    system_content = '''
        #Instructions :
        You are an American professional English teacher.
        Please chat with me under the following constraints.

        #Constraints:

        I am a beginner in English.
        You can choose the topic for our conversation.
        We will take turns writing one sentence at a time.
        If you notice any grammatical errors in my sentences, please correct them and explain why you made the correction.
        Please respond in 100 words or less.
        '''

    system_context =  {
        "role": "system",
        "content": system_content
        }

    # テスト用の会話コンテキスト
    conversation_context = [system_context]

    # ChatAPIオブジェクトの作成
    conversation = ChatAPI(api_key, context=conversation_context)

    # 1回目の処理かどうかを判別するフラグ
    is_first_interaction = True

    # メッセージの送信と返答の表示
    while True:
        if is_first_interaction:
            # 1回目の処理の場合の応答
            response = conversation.send_message("Hello")
            is_first_interaction = False
        else:
            user_input = input('User: ')
            # 会話が終了したらコンテキストをクリアして会話を続ける
            if user_input.lower() == 'exit':
                conversation_context.clear()
                conversation_context.append(system_context)
                continue

            response = conversation.send_message(user_input)
        print('Assistant:', response)
超音波センサーで距離を測定するコードです
distance_sensor.py
import RPi.GPIO as GPIO
import time
import sys

class UltrasonicSensor:
    def __init__(self, trig_pin, echo_pin):
        self.trig_pin = trig_pin
        self.echo_pin = echo_pin

        GPIO.setwarnings(False)
        GPIO.setmode(GPIO.BCM)
        GPIO.setup(self.trig_pin, GPIO.OUT)
        GPIO.setup(self.echo_pin, GPIO.IN)

    def read_distance(self):
        GPIO.output(self.trig_pin, GPIO.HIGH)
        time.sleep(0.00001)
        GPIO.output(self.trig_pin, GPIO.LOW)

        while GPIO.input(self.echo_pin) == GPIO.LOW:
            sig_off = time.time()
        while GPIO.input(self.echo_pin) == GPIO.HIGH:
            sig_on = time.time()

        duration = sig_on - sig_off
        distance = duration * 34000 / 2

        return distance

    def continuous_distance_reading(self):
        while True:
            try:
                cm = self.read_distance()
                print("distance=", int(cm), "cm")
                if cm > 2 and cm < 50:
                    return True
                time.sleep(1)

            except KeyboardInterrupt:
                GPIO.cleanup()
                sys.exit()

# クラスのインスタンス化と連続した距離の読み取り
if __name__ == "__main__":
    trig_pin = 27
    echo_pin = 18

    sensor = UltrasonicSensor(trig_pin, echo_pin)

    isTrue = sensor.continuous_distance_reading()
    if isTrue == True:
        print('Yes')
音声ファイルをテキストにするコードです
注意点
speech_recognitionパッケージは入力テキストの言語に合わせてパラメータlanguageを設定しないとうまく動作しないです。
speech_to_text.py
import speech_recognition as sr

class SpeechRecognizer:
    def __init__(self, audio_file, language):
        self.audio_file = audio_file
        self.language = language
        self.recognizer = sr.Recognizer()

    def recognize_speech(self):
        with sr.AudioFile(self.audio_file) as source:
            audio = self.recognizer.record(source)
            voice_text = self.recognizer.recognize_google(audio,language=self.language)
            return voice_text
テキストを音声ファイルにするコードです
注意点
gTTSパッケージは音声ファイルの言語に合わせてパラメータlangを設定しないとうまく動作しないです。
tts.py
from pydub import AudioSegment
from pydub.playback import play
from gtts import gTTS

class AudioPlayer:
    def play_audio(self, file_path):
        audio = AudioSegment.from_file(file_path)
        play(audio)

    def text_to_speech(self, text, language):
        tts = gTTS(text, lang=language)
        tts.save('test1.wav')
        self.play_audio('test1.wav')


if __name__ == '__main__':
    text = "Hey everyone, I wanted to share an exciting update on our latest mobile app development project. We've been working hard to enhance the user experience and optimize performance. In the upcoming release, we're introducing a sleek new user interface with intuitive navigation, making it easier for our users to access key features. We've also implemented advanced caching techniques to improve loading times and reduce data usage. Additionally, we've integrated robust security measures, ensuring that user data is protected at all times. Our team has been conducting thorough testing across various devices and platforms to ensure compatibility and seamless operation. We're really excited about the progress we've made, and we can't wait to launch the updated app. Stay tuned for more updates!"
    language = "en"
    player = AudioPlayer()
    player.text_to_speech(text, language)
最後に、今までのコードを呼び出す処理です
無理やりやってる感満載なので、あくまでこんな感じで書いていると目を細めてみてください。👴
特に会話を一旦終了させるところが、、、。
main.py
from beep_sound_player.beep_sound_player import BeepSoundPlayer
from distance_sensor.distance_sensor import UltrasonicSensor
from text_to_speech.tts import AudioPlayer
from chat_api.chat_api import ChatAPI
from audio_recorder.audio_recorder import AudioRecorder
from dotenv import load_dotenv
from speech_to_text.speech_to_text import SpeechRecognizer
import os
import sys
import speech_recognition as sr

def greenPrint(text):
    print('\033[32m' + text + '\033[0m')  # 緑のテキストを出力

def redPrint(text):
    print('\033[31m' + text + '\033[0m')  # 赤いテキストを出力

def bluePrint(text):
    print('\033[34m' + text + '\033[0m')  # 青いテキストを出力

if __name__ == '__main__':
    load_dotenv()
    trig_pin = 27
    echo_pin = 18
    sensor = UltrasonicSensor(trig_pin, echo_pin)
    audioPlayer = AudioPlayer()
    beepPlayer = BeepSoundPlayer()
    # OPENAI_API_KEY環境変数からAPIキーを取得
    api_key = os.getenv('OPENAI_API_KEY')
    os.environ["PYGAME_HIDE_SUPPORT_PROMPT"] = "hide"
    sys.stderr = open(os.devnull, "w")

    system_content = '''
        #Instructions :
        You are an American professional English teacher.
        Please chat with me under the following constraints.

        #Constraints:

        I am a beginner in English.
        You can choose the topic for our conversation.
        We will take turns writing one sentence at a time.
        If you notice any grammatical errors in my sentences, please correct them and explain why you made the correction.
        Please respond in 100 words or less.
        '''

    system_context =  {
        "role": "system",
        "content": system_content
        }

    # テスト用の会話コンテキスト
    conversation_context = [system_context]

    # ChatAPIオブジェクトの作成
    conversation = ChatAPI(api_key, context=conversation_context)

    # 1回目の処理かどうかを判別するフラグ
    is_first_interaction = True

    is_detected = False

    # メッセージの送信と返答の表示
    while True:
        if not is_detected:
            is_detected = sensor.continuous_distance_reading()
            continue
        if is_first_interaction:
            # 1回目の処理の場合の応答
            response = conversation.send_message("Hello")
            is_first_interaction = False
        else:
            # AudioRecorderのインスタンスを作成
            recorder = AudioRecorder()

            # 録音開始
            recorder.start_recording()

            # 録音をファイルに保存
            recorder.save_recording('output.wav')

            # SpeechRecognizerのインスタンスを作成
            recognizer = SpeechRecognizer('output.wav','en-US') # 'ja-JP' 'en-US'

            try:
                # 音声をテキストに変換
                user_input = recognizer.recognize_speech()
                bluePrint(user_input)

            except sr.RequestError as e:
                response = conversation.send_message('I don\'t want to talk today, so let\'s talk again next time.')
                greenPrint('Assistant: ' + response)
                language = 'en' # 'ja' 'en'
                audioPlayer.text_to_speech(response, language)
                # speech_recognition.RequestError の例外をキャッチする場合の処理
                redPrint("音声認識のリクエストエラーが発生しました:", e)
                conversation_context.clear()
                conversation_context.append(system_context)
                is_first_interaction = True
                is_detected = False
                continue
            except sr.UnknownValueError:

                response = conversation.send_message('I don\'t want to talk today, so let\'s talk again next time.')
                greenPrint('Assistant: ' + response)
                language = 'en' # 'ja' 'en'
                audioPlayer.text_to_speech(response, language)
                # speech_recognition.UnknownValueError の例外をキャッチする場合の処理
                redPrint("音声認識で不明な値が検出されました")
                conversation_context.clear()
                conversation_context.append(system_context)
                is_first_interaction = True
                is_detected = False
                continue

            # 会話が終了したらコンテキストをクリアして会話を続ける
            if user_input.lower() == 'exit':
                conversation_context.clear()
                conversation_context.append(system_context)
                is_first_interaction = True
                continue

            response = conversation.send_message(user_input)
        greenPrint('Assistant: ' + response)
        language = 'en' # 'ja' 'en'
        audioPlayer.text_to_speech(response, language)
        beepPlayer.play_beep_sound()
最後にどう実行するかというと1か2どちらかで実行できます
- VS CodeのPython拡張機能で、開いているファイルをデバッグ実行
- ターミナルで
python3 main.py実行
以上で、実装するまでの道のりを記載しました。
皆さんもぜひトライしてみて、うまくいったら教えてください。
英会話できるようになったので、英会話学習に勤しみたいと思います。
というより、言葉が出てこないのですぐに会話が強制終了してしまうためどうしたものか?と考えております。
ではでは。
補足
ターミナルでpython3 main.py実行するとき
2>/dev/nullをオプションでつけてpython3 main.py 2>/dev/nullを実行すると、
ALSAのワーニングみたいなのが消えてすっきりします。