MAMPの設定方法まとめ:バーチャルホストやデバッグ方法など
以下の環境で設定した方法になります。バージョンによって差異があるかもしれません。
- MacBook Pro M2 2022
- macOS Monterey 12.6
- MAMP 6.8
理解しきれていないところもあるので、いいやり方や不明点などあればコメントいただけると嬉しいです。
ダウンロードする
「macOS 11+ & Apple M1/M2 CPU」をダウンロードしてインストールします。
MAMPの基本設定
MAMPを開いたら「Preferences」を押します。
Ports
「80 & 3306」を押してから「OK」で選択します。
デフォルトではhttp://localhost:8888/にアクセスしますが、この設定でhttt://localhost/からアクセスできるようになります。
その他
それ以外はとくに変更の必要はありませんでした。
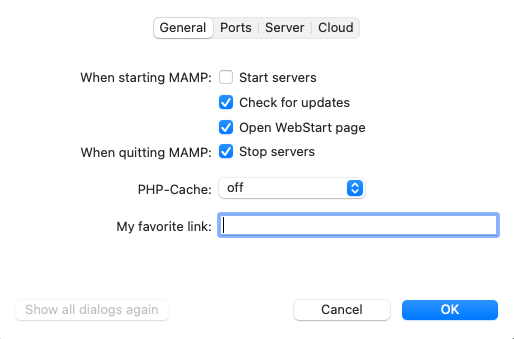
設定のキャプチャだけ共有しておきます。


初期動作確認
「Start」を押すとhttp://localhost/MAMP/?language=English が開きます。これは閉じてしまって大丈夫です。
http://localhost/index.phpを開くと以下のような表示になります。

これは/Applications/MAMP/htdocs/index.phpの内容になります。
/Applications/MAMP/htdocs/index.phpをコピーしてtest.phpを作成、中身は以下に書き換えてください。
<?php
    echo "MAMPの設定が完了しました!";
?>
http://localhost/test.phpを開くと、「MAMPの設定が完了しました!」とテキストが表示されているはずです。
これで/Applications/MAMP/htdocs/にあるファイルは正常に動いているのが確認できました。
バーチャルホストを設定する
/Applications/MAMP/htdocs/のファイルを表示できるようになりましたが、複数の環境を置くとhttp://localhost/foo/index.htmlやhttp://localhost/bar/index.htmlを参照する状態になってしまい、ルート相対パスが正常に読み込めなくなってしまいます。
ここではバーチャルホストを設定して、以下のようなURLでアクセスできるようにします。
- localhost:
http://localhost:8001/ - IPアドレス:
http://xxx.xxx.x.xx:8001/ - ドメイン:
http://foo.local:8001/
httpd.confでバーチャルホストの基本設定をする
バーチャルホストを有効にする
FinderでCommand + Shift + Gを押して/Applications/MAMP/conf/apache/httpd.confを検索します。
httpd.confを開いて、Virtual hostsを検索すると以下のような箇所があります。
# Virtual hosts
#Include /Applications/MAMP/conf/apache/extra/httpd-vhosts.conf
#を外してコメントアウトするとバーチャルホストが有効になります。
# Virtual hosts
Include /Applications/MAMP/conf/apache/extra/httpd-vhosts.conf
SSIを有効にする
AddOutputFilterを検索すると以下のような箇所があります。
# Filters allow you to process content before it is sent to the client.
    #
    # To parse .shtml files for server-side includes (SSI):
    # (You will also need to add "Includes" to the "Options" directive.)
    #
    #AddType text/html .shtml
    #AddOutputFilter INCLUDES .shtml
#AddType text/html .shtml と#AddOutputFilter INCLUDES .shtmlをコメントアウトします。
AddOutputFilter INCLUDES以降に追加した拡張子がSSIの対象になります。ネストした場合でもインクルード可能です。
# Filters allow you to process content before it is sent to the client.
    #
    # To parse .shtml files for server-side includes (SSI):
    # (You will also need to add "Includes" to the "Options" directive.)
    #
    AddType text/html .shtml
    AddOutputFilter INCLUDES .shtml .html .php .ssi
.htaccsessの設定を上書きできるようにする
Options Indexes FollowSymLinksを検索すると以下のような箇所があります。
# Each directory to which Apache has access can be configured with respect
# to which services and features are allowed and/or disabled in that
# directory (and its subdirectories).
#
# First, we configure the "default" to be a very restrictive set of
# features.
#
<Directory />
    Options Indexes FollowSymLinks
    AllowOverride None
</Directory>
AllowOverride Allにすると.htaccsessの設定を上書きできるようになります。
<Directory />
    Options Indexes FollowSymLinks
    AllowOverride All
</Directory>
Options Indexes FollowSymLinks ExecCGI IncludesのようにExecCGI Includesを追加する方法もあるそうです。挙動の差は不明。
IPアドレスを設定する
#Listen 12.34.56.78:80を検索すると以下のような箇所があります。
#
# Listen: Allows you to bind Apache to specific IP addresses and/or
# ports, instead of the default. See also the <VirtualHost>
# directive.
#
# Change this to Listen on specific IP addresses as shown below to
# prevent Apache from glomming onto all bound IP addresses.
#
#Listen 12.34.56.78:80
Listen 80
Listen 80の下にListen IPアドレスの形式で追加します。
ポート(:80)の記述がないとMAMP起動時にエラーが起こるので注意してください。
Listen 80
Listen xxx.xxx.x.xx:80
httpd-vhosts.confでサイトを設定する
FinderでCommand + Shift + Gを押して/Applications/MAMP/conf/apache/extra/httpd-vhosts.confを検索します。
ファイルを開いて以下をコメントアウトします(将来的に非推奨になるようです)。
NameVirtualHost *:80
ファイル内にあるexampleはコメントアウト、または削除しておきます。
以下のようにサイト固有の情報を設定します。
# 案件名
# http://localhost:8001/
# http://IPアドレス:8001/
# http://案件名.local:8001/
Listen 8001
<VirtualHost *:8001>
    DocumentRoot "/Applications/MAMP/htdocs/案件ディレクトリ"
    ServerName 案件名.local
    ErrorLog "logs/案件名"
    <Directory "/Applications/MAMP/htdocs/案件ディレクトリ">
        AllowOverride All
    </Directory>
</VirtualHost>
-
8001:環境ごとに重複しない値を割り振ります(Listenも同様) -
DocumentRoot:表示したいディレクトリを指定します -
ServerName:ドメインを設定します -
ErrorLog:エラーログを出力します(ここでは/Applications/MAMP/logs/案件名) -
Directory:DocumentRootと同じ -
AllowOverride All:.htaccessを上書きできるようにします(httpd.confに記載済みであれば不要?)
Hostsを設定する
Hostsに設定を追加してServerNameが機能するようにします。
127.0.0.1はループバックアドレスと呼ばれる、自分自身を表す特別なIPアドレスです。
127.0.0.1 案件名.local
127.0.0.1 案件名2.local
設定ファイルに問題がないか確認する
以下のコマンドを実行するとMAMPの設定ファイルに問題がないか検証してくれます。
sudo /Applications/MAMP/Library/bin/apachectl configtest
/Applications/MAMP/htdocs/以外でファイルを変更できるようにする
Intel版のMacでは/Applications/MAMP/htdocs/以外にファイルを置いてもMAMPで参照できたのですが、M2のMac出はうまく動作しないようです。
代替案としてシンボリックリンクを使えば、案件ごとにファイルを管理・変更できます。
たとえば以下のようにすれば、MAMP内にあるディレクトリをProject/案件名/developmentディレクトリから参照できます。
ln -s /Applications/MAMP/htdocs/ディレクトリ名 /Users/ユーザー名/Documents/Project/案件名/development
/Applications/MAMP/htdocs/にシンボリックリンクを置いても正常に動作しないので、参照するファイル本体はMAMP内に置いておく必要があります。
その他の設定
HTMLファイル内でPHPを動かす
たとえば以下のようにHTMLファイルの中でPHPのインクルードをしたい場合です。
<?php include($_SERVER["DOCUMENT_ROOT"] . "/ssi/common/header.html"); ?>
Finderでcommand +shift + Gを押して/Applications/MAMP/conf/apache/httpd.confを検索します。
138行目あたりに以下のような文字列があります。
AddType application/x-httpd-php .php .phtml
拡張子に.htmlを追加します。
AddType application/x-httpd-php .php .phtml .html
MAMPを再起動してからサーバーを立ちあげるとPHPのインクルードが使えるようになります。
Shif_JISの文字化け対応
Shift_JISのファイルを開くと文字化けしてしまいます。
バーチャルホストごとにデフォルトの文字コードを設定していきます。
command + shift + Gで/Applications/MAMP/bin/phpを検索します。
使用しているPHPのバージョンのフォルダに/conf/php.iniがあるので開きます。
default_charsetを検索、以下のように変更します。
default_charset = ""
httpd-vhosts.confの設定に文字コードの設定を追加します。
AddDefaultCharset UTF-8
AddDefaultCharset shift_jis
httpd-vhosts.confにAddDefaultCharsetを追加します。
Listen 8001
<VirtualHost *:8001>
    DocumentRoot "/Applications/MAMP/htdocs/案件ディレクトリ"
    AddDefaultCharset shift_jis
    ServerName 案件名.local
    ErrorLog "logs/案件名"
    <Directory "/Applications/MAMP/htdocs/案件ディレクトリ">
        AllowOverride All
    </Directory>
</VirtualHost>
Discussion