リアルタイムチャットをサクッと簡単に作りたい
AWSのAppSync使う
$ sudo python -m pip install awscli --ignore-installed six

$ aws -v
=> 使えないらしい

$ aws help
IAMでユーザー作った
サンプルだからAdministratorAccessで
$ aws configure --profile chat-sample
AWS Access Key ID [None]: xxxxxxxxxxxxxxxxxxx
AWS Secret Access Key [None]: xxxxxxxxxxxxxxxxxxxxxxxxxxxxx
Default region name [None]: ap-northeast-1
Default output format [None]: json
$ mkdir chat-sample && cd chat-sample
$ sudo amplify init
Note: It is recommended to run this command from the root of your app directory
? Enter a name for the project chatsample
The following configuration will be applied:

Project information
| Name: chatsample
| Environment: dev
| Default editor: Visual Studio Code
| App type: javascript
| Javascript framework: none
| Source Directory Path: src
| Distribution Directory Path: dist
| Build Command: npm run-script build
| Start Command: npm run-script start

? Initialize the project with the above configuration? Yes
Using default provider  awscloudformation
? Select the authentication method you want to use: AWS profile

For more information on AWS Profiles, see:
https://docs.aws.amazon.com/cli/latest/userguide/cli-configure-profiles.html

? Please choose the profile you want to use chat-sample
🛑 User: arn:aws:iam::0000000000:user/xxxxxxxxxxxx is not authorized to perform: amplify:CreateApp on resource: arn:aws:amplify:ap-northeast-1:0000000000:apps/*

Resolution: Please report this issue at https://github.com/aws-amplify/amplify-cli/issues and include the project identifier from: 'amplify diagnose --send-report'
アラー
ググったらこれ出てきた
でもAdministratorAccessで全てに対してフルアクセスなはずなのに権限エラー出てるから多分権限以前の話ぽそう
$ sudo amplify configure

Resolution: Please report this issue at https://github.com/aws-amplify/amplify-cli/issues and include the project identifier from: 'amplify diagnose --send-report'

Follow these steps to set up access to your AWS account:

Sign in to your AWS administrator account:
https://console.aws.amazon.com/
Press Enter to continue
^[[A
Specify the AWS Region
? region:  ap-northeast-1
Specify the username of the new IAM user:
? user name:  xxxxxxxxxxxx
Complete the user creation using the AWS console
https://console.aws.amazon.com/iam/home?region=ap-northeast-1#/users$new?step=final&accessKey&userNames=SampleChatUser&permissionType=policies&policies=arn:aws:iam::aws:policy%2FAdministratorAccess-Amplify
Press Enter to continue

Enter the access key of the newly created user:
? accessKeyId:  ********************
? secretAccessKey:  ****************************************
This would update/create the AWS Profile in your local machine
? Profile Name:  default

Successfully set up the new user.
リージョンか管理画面へのアクセス許可設定が原因ぽそう
sudo amplify configure実行して
- ap-northeast-1指定(
https://console.aws.amazon.com/iam/home?region=ap-northeast-1 <= これ?) - 管理画面へのアクセス許可
でユーザー作ったらいけた
なんにせよユーザーの作成方法に問題があった模様
$ sudo amplify init
Password:
Note: It is recommended to run this command from the root of your app directory
? Enter a name for the project chatsample
The following configuration will be applied:

Project information
| Name: chatsample
| Environment: dev
| Default editor: Visual Studio Code
| App type: javascript
| Javascript framework: none
| Source Directory Path: src
| Distribution Directory Path: dist
| Build Command: npm run-script build
| Start Command: npm run-script start

? Initialize the project with the above configuration? Yes
Using default provider  awscloudformation
? Select the authentication method you want to use: AWS profile

For more information on AWS Profiles, see:
https://docs.aws.amazon.com/cli/latest/userguide/cli-configure-profiles.html

? Please choose the profile you want to use default
Adding backend environment dev to AWS Amplify app: xxxxxxxxxxxx

Deployment completed.
Deployed root stack chatsample [ =====================================
	amplify-chatsample-dev-xxxxxx  AWS::CloudFormation::Stack     CREATE_
	DeploymentBucket               AWS::S3::Bucket                CREATE_
	UnauthRole                     AWS::IAM::Role                 CREATE_
	AuthRole                       AWS::IAM::Role                 CREATE_

✔ Help improve Amplify CLI by sharing non sensitive configurations on failures (y/N) · yes

Deployment bucket fetched.
✔ Initialized provider successfully.
✅ Initialized your environment successfully.

Your project has been successfully initialized and connected to the cloud!

Some next steps:
"amplify status" will show you what you've added already and if it's locally configured or deployed
"amplify add <category>" will allow you to add features like user login or a backend API
"amplify push" will build all your local backend resources and provision it in the cloud
"amplify console" to open the Amplify Console and view your project status
"amplify publish" will build all your local backend and frontend resources (if you have hosting category added) and provision it in the cloud

Pro tip:
Try "amplify add api" to create a backend API and then "amplify push" to deploy everything
$ sudo amplify add api
Password:
? Select from one of the below mentioned services: GraphQL
? Here is the GraphQL API that we will create. Select a setting to edit or conti
nue Continue
? Choose a schema template: Single object with fields (e.g., “Todo” with ID, nam
e, description)

⚠️  WARNING: your GraphQL API currently allows public create, read, update, and delete access to all models via an API Key. To configure PRODUCTION-READY authorization rules, review: https://docs.amplify.aws/cli/graphql/authorization-rules

✅ GraphQL schema compiled successfully.

Edit your schema at /Users/xxxxxxx/xxxxxx/chat-sample/amplify/backend/api/chatsample/schema.graphql or place .graphql files in a directory at /Users/xxxxxxx/xxxxxxx/chat-sample/amplify/backend/api/chatsample/schema
✔ Do you want to edit the schema now? (Y/n) · no
✅ Successfully added resource chatsample locally

✅ Some next steps:
"amplify push" will build all your local backend resources and provision it in the cloud
"amplify publish" will build all your local backend and frontend resources (if you have hosting category added) and provision it in the cloud
お〜
GraphQL触るの2年ぶりくらい
$ sudo amplify push
Password:
⠏ Building resource api/chatsample
⚠️  WARNING: your GraphQL API currently allows public create, read, update, and delete access to all models via an API Key. To configure PRODUCTION-READY authorization rules, review: https://docs.amplify.aws/cli/graphql/authorization-rules

✅ GraphQL schema compiled successfully.

Edit your schema at /Users/xxxxxxxx/xxxxxxxx/chat-sample/amplify/backend/api/chatsample/schema.graphql or place .graphql files in a directory at /Users/xxxxxxxx/xxxxxxxx/chat-sample/amplify/backend/api/chatsample/schema
✔ Successfully pulled backend environment dev from the cloud.
⠋ Building resource api/chatsample
⚠️  WARNING: your GraphQL API currently allows public create, read, update, and delete access to all models via an API Key. To configure PRODUCTION-READY authorization rules, review: https://docs.amplify.aws/cli/graphql/authorization-rules

✅ GraphQL schema compiled successfully.

Edit your schema at /Users/xxxxxxxx/xxxxxxxx/chat-sample/amplify/backend/api/chatsample/schema.graphql or place .graphql files in a directory at /Users/xxxxxxxx/xxxxxxxx/chat-sample/amplify/backend/api/chatsample/schema

    Current Environment: dev

┌──────────┬───────────────┬───────────┬───────────────────┐
│ Category │ Resource name │ Operation │ Provider plugin   │
├──────────┼───────────────┼───────────┼───────────────────┤
│ Api      │ chatsample    │ Create    │ awscloudformation │
└──────────┴───────────────┴───────────┴───────────────────┘
? Are you sure you want to continue? Yes

⚠️  WARNING: your GraphQL API currently allows public create, read, update, and delete access to all models via an API Key. To configure PRODUCTION-READY authorization rules, review: https://docs.amplify.aws/cli/graphql/authorization-rules

✅ GraphQL schema compiled successfully.

Edit your schema at /Users/xxxxxxxx/xxxxxxxx/chat-sample/amplify/backend/api/chatsample/schema.graphql or place .graphql files in a directory at /Users/xxxxxxxx/xxxxxxxx/chat-sample/amplify/backend/api/chatsample/schema
⠸ Building resource api/chatsample
⚠️  WARNING: your GraphQL API currently allows public create, read, update, and delete access to all models via an API Key. To configure PRODUCTION-READY authorization rules, review: https://docs.amplify.aws/cli/graphql/authorization-rules

✅ GraphQL schema compiled successfully.

Edit your schema at /Users/xxxxxxxx/xxxxxxxx/chat-sample/amplify/backend/api/chatsample/schema.graphql or place .graphql files in a directory at /Users/xxxxxxxx/xxxxxxxx/chat-sample/amplify/backend/api/chatsample/schema
? Do you want to generate code for your newly created GraphQL API Yes
? Choose the code generation language target typescript
? Enter the file name pattern of graphql queries, mutations and subscriptions src/graphql/**/*.ts
? Do you want to generate/update all possible GraphQL operations - queries, mutations and subscriptions Yes
? Enter maximum statement depth [increase from default if your schema is deeply nested] 2
? Enter the file name for the generated code src/API.ts
お〜〜〜〜〜〜〜
デプロイ待機児童と化したんだわ
Deployment completedなんだわ
Deployment completed.
Deployed root stack chatsample [ ======================================== ] 2/2
	amplify-chatsample-dev-xxxxxx  AWS::CloudFormation::Stack     UPDATE_COMPLETE                Wed Oct 19 2022 22:29:21
	apichatsample                  AWS::CloudFormation::Stack     CREATE_COMPLETE                Wed Oct 19 2022 22:29:18
Deployed api chatsample [ ======================================== ] 6/6
	GraphQLAPI                     AWS::AppSync::GraphQLApi       CREATE_COMPLETE                Wed Oct 19 2022 22:25:55
	GraphQLAPINONEDS95A13CF0       AWS::AppSync::DataSource       CREATE_COMPLETE                Wed Oct 19 2022 22:25:59
	GraphQLAPIDefaultApiKey215A6D… AWS::AppSync::ApiKey           CREATE_COMPLETE                Wed Oct 19 2022 22:25:59
	GraphQLAPITransformerSchema3C… AWS::AppSync::GraphQLSchema    CREATE_COMPLETE                Wed Oct 19 2022 22:27:00
	Todo                           AWS::CloudFormation::Stack     CREATE_COMPLETE                Wed Oct 19 2022 22:28:38
	CustomResourcesjson            AWS::CloudFormation::Stack     CREATE_COMPLETE                Wed Oct 19 2022 22:28:52

✔ Generated GraphQL operations successfully and saved at src/graphql
✔ Code generated successfully and saved in file src/API.ts

GraphQL endpoint: https://xxxxxxxxxxxxxxxxxx.appsync-api.ap-northeast-1.amazonaws.com/graphql
GraphQL API KEY: xxxxxxxxxxxxxxxxxxxxxxxx

GraphQL transformer version: 2

Browserslist: caniuse-lite is outdated. Please run:
  npx browserslist@latest --update-db
  Why you should do it regularly: https://github.com/browserslist/browserslist#browsers-data-updating
お〜
お〜〜〜〜〜〜〜

お〜

既存のToDoモデルは潰してチャットメッセージモデルにする
+ type ChatMessage @model {
+   id: ID!
+  message: String!
+ }
$ sudo amplify push

🛑 An error occurred during the push operation:
Removing a model from the GraphQL schema will also remove the underlying DynamoDB table.
This update will remove table(s) [TodoTable]
ALL EXISTING DATA IN THESE TABLES WILL BE LOST!
If this is intended, rerun the command with '--allow-destructive-graphql-schema-updates'.
既存データ消えるからオプションつけろとのこと
$ sudo amplify push --allow-destructive-graphql-schema-updates

⠴ Building resource api/chatsample✅ GraphQL schema compiled successfully.
$ sudo amplify codegen models
Password:

⚠️  WARNING: your GraphQL API currently allows public create, read, update, and delete access to all models via an API Key. To configure PRODUCTION-READY authorization rules, review: https://docs.amplify.aws/cli/graphql/authorization-rules

✅ GraphQL schema compiled successfully.

Edit your schema at /Users/xxxxxxxx/xxxxxxxx/chat-sample/amplify/backend/api/chatsample/schema.graphql or place .graphql files in a directory at /Users/xxxxxxxx/xxxxxxxx/chat-sample/amplify/backend/api/chatsample/schema
Successfully generated models. Generated models can be found in /Users/xxxxxxxx/xxxxxxxx/chat-sample/src
自動で型生成してくれた、助かる
できた、コマンド叩いてスキーマ書いてコマンド叩いてちょっとコード書くだけでめっちゃ簡単だった
すばら👏👏
フロント、Next使ったからデプロイはVercelにしたい感isある
サクッといけそうであれば下記もやる夫
- 認証
- 画像と動画
dayjsのfromNow()で「xx分前」「xx日前」みたいな表示したいんだがなぜか効かないので一旦formatだけ
- スタイル当てた
- ボタンをアイコンにした
- なぜかダークモードも適用した
いい感じ
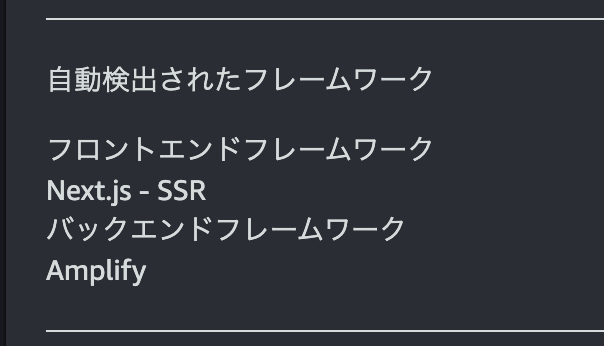
お〜〜〜〜〜〜〜自動検出!!感動!!
めう……
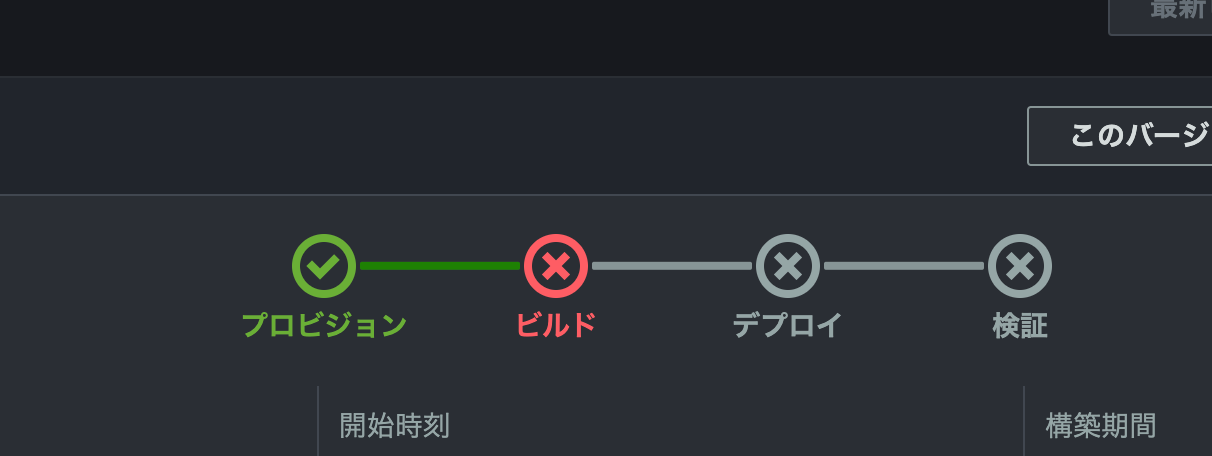
ローカルでビルドしても通るのにAmplifyのConsoleではError: The "target" property is no longer supported in next.config.js.になるな
targetなんか入ってないのに
Amplifyのビルド時にcatでnext.cobfig見てみる
やっぱないんだけどなぁ(ポリポリ
2022-10-23T11:51:42.003Z [INFO]: # Executing command: cat next.config.js && npm run build
2022-10-23T11:51:42.003Z [INFO]: /** @type {import('next').NextConfig} */
                                 const nextConfig = {
                                 reactStrictMode: true,
                                 swcMinify: true,
                                 }
これぽそう
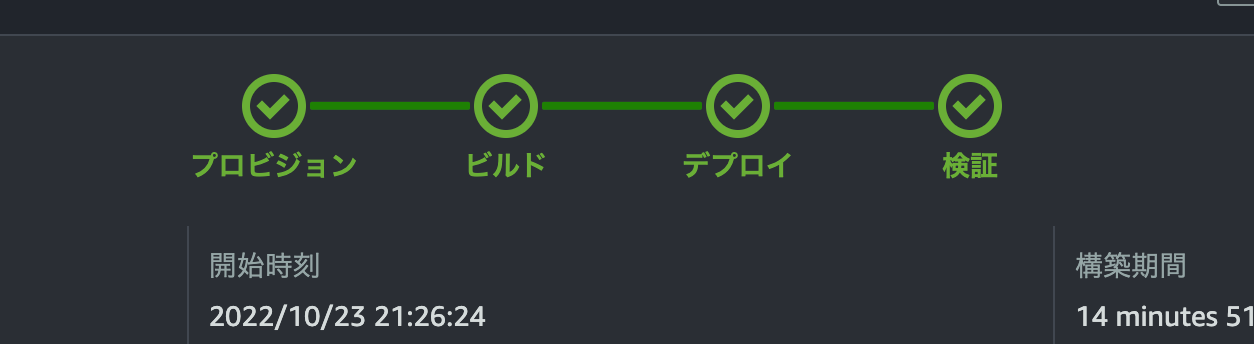
お〜、通った👏👏
アニメーションよきよき
ユーザー認証と画像投稿完了