パスキーの普及も進んできましたね。
私のWindows11でもWindows Helloを使ったりAndroid/iOS端末を使ったローミングができたりととても便利で簡単です。
ニンテンドーアカウントでもパスキーによるログインが可能になりました。もちろん設定しましたよね。
Railsでもパスキーを組み込む方法がいろいろと説明されています。
私はdeviseを使うことが多いので、devise-passkeysを触ってみたのですが、use passkeys instead of passwordsとある通りパスワードに替えてパスキーを使うためのもので、私のやりたい、これまでのパスワード(や各種ソーシャルログイン)はそのままに、パスキー『でも』ログインできるようにするにはマッチしないように感じたのと、そもそもの仕組みを理解するためにまずは自分で実装してみることにしました。
成果物
Render.comの無料プランに置いています。
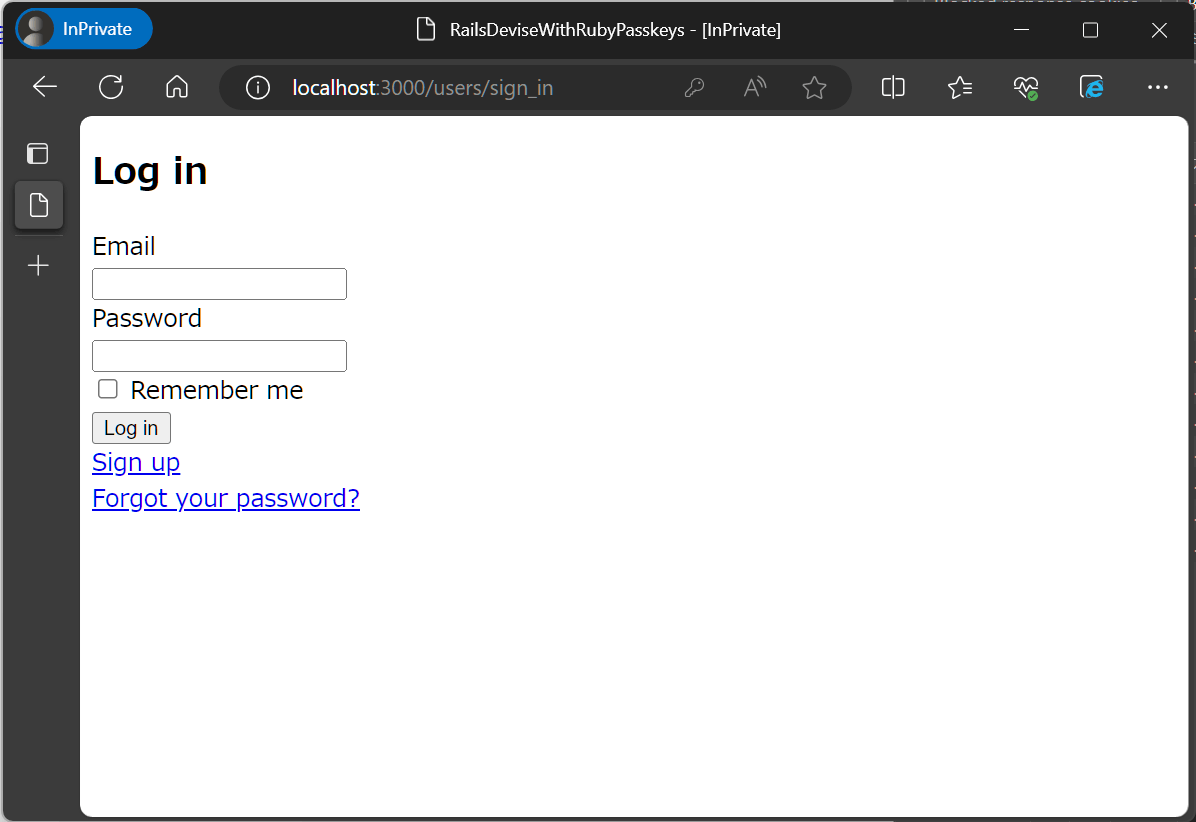
パスワードログイン
従来通りのログイン方法も使用できます。
パスキーの登録
| 1. パスキーの作成 | 2. 登録完了 |
|---|---|
 |
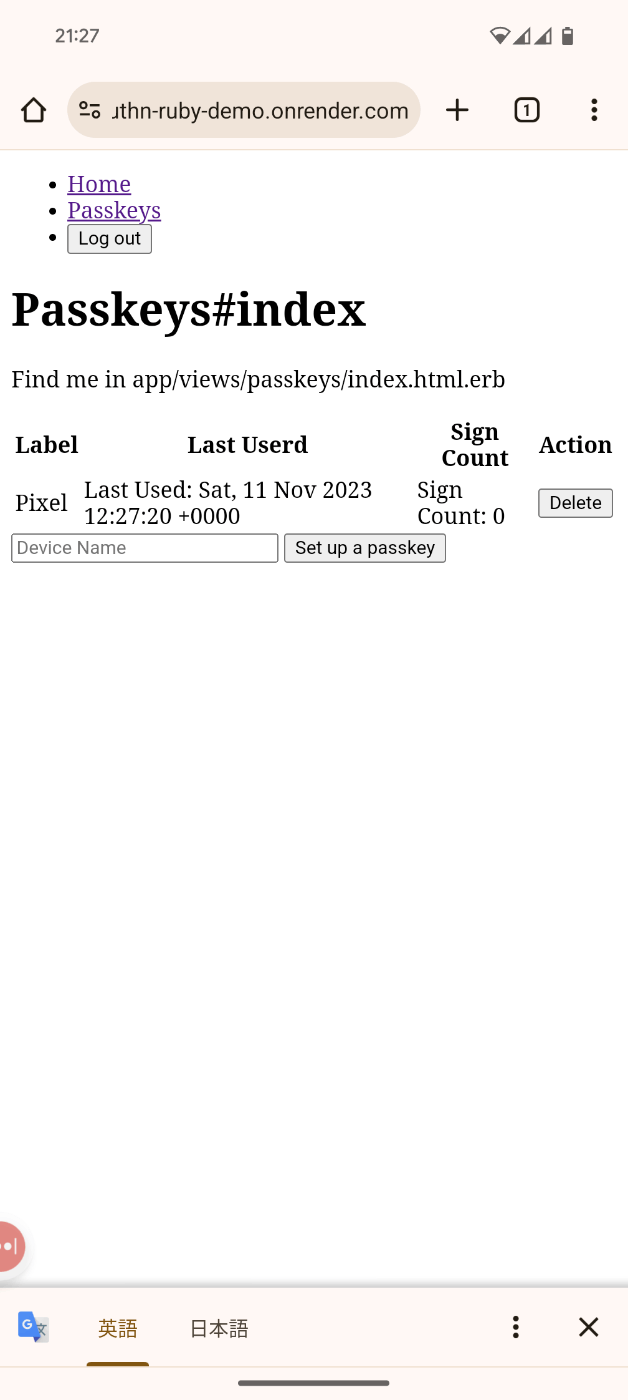 |
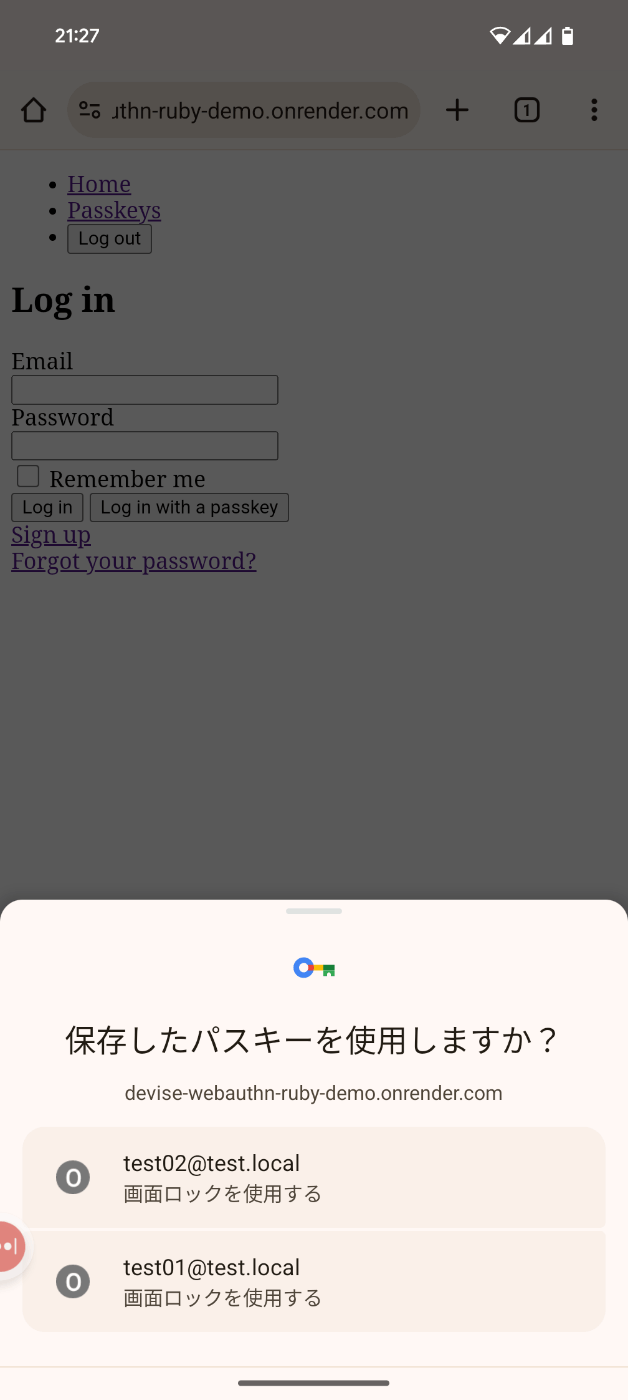
パスキーでログイン
対応デバイスでならWebAuthn Autofillでこのサイトで作成したパスキーを選択するUIを表示し、選択するだけでログインできます。
 |
 |
Windows 11からAndroidで作成したパスキーを使ってログイン(ローミング)
Windows 11ではWindows Helloも使えますが、Androidですでに登録していればAndroidを使ってログインできます。
| Windows側 | Android側 |
|---|---|
 |
 |
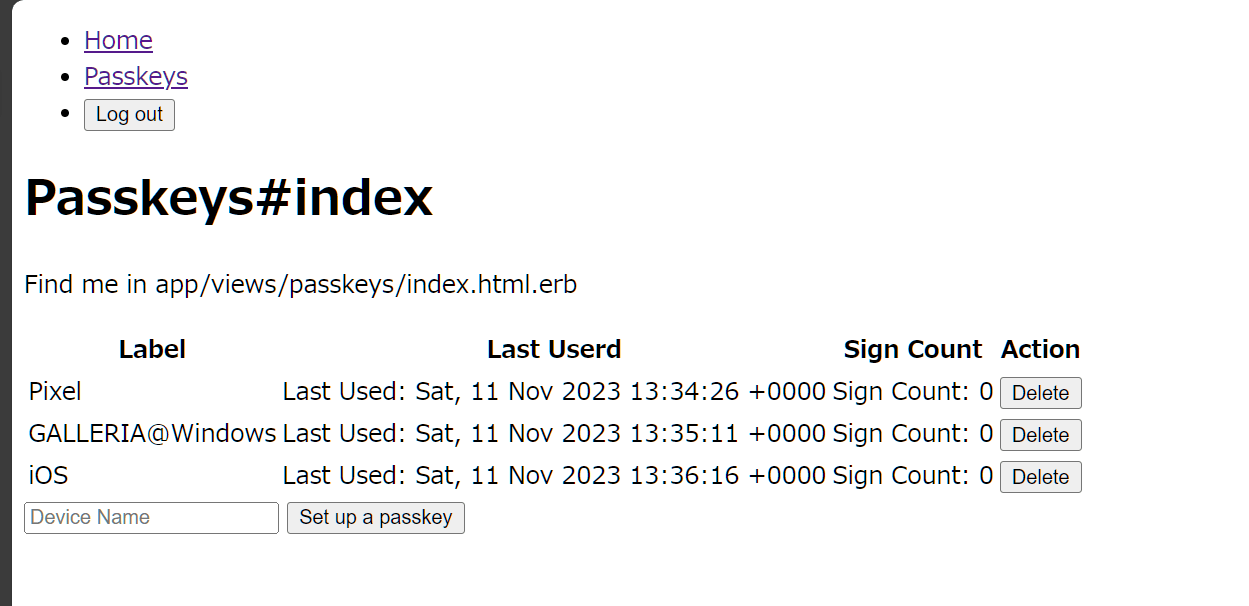
複数のキーを登録できる
たとえばWindows/Android/iOSそれぞれの端末にパスキーを作成することで、どの端末だけでもログインできるし、それぞれの端末からほかの端末を使ってログインすることもできます。
パスキー関係の用語整理
まず理解のため用語を整理しておきます。
ざっくりとした私の理解は以下の通りです。
パスキー
FIDO2を使って認証し、認証に必要な鍵を複数端末間で同期する仕組み。
たとえばAppleの場合、iCloudキーチェインでパスワードと同じように端末間で共有される。
FIDO2
WebAuthn + CTAP で構成された、プラットホーム認証器または外部(またはローミング)認証器を使って、パスワードレス、2要素および多要素の認証を実現する認証技術。
WebAuthn
WebAuthnはブラウザから認証器を使用するためのブラウザAPI。
認証器
鍵ペアを使ってユーザー認証をするための機器。
Windows Hello、Apple FaceID、Androidの指紋認証などの組み込みのものをプラットホーム認証器、YubiKeyなどの取り外し可能なものを外部認証器と呼ぶ。WindowsからCTAP2でAndroid指紋認証を使う場合は、WindowsからみてAndroid指紋認証器はローミング認証器。
CTAP
認証器を持たないデバイスでもWebAuthnを使えるようにするための外部認証器との通信プロトコル。
CTAP1 (FIDO U2F)
FIDO U2Fデバイスを二要素認証器として使うための仕様。
CTAP2
外部認証器をパスワードレス、多要素・二要素認証に使うための仕様。
パスキー(WebAuthn)ログインのためにWebアプリに実装するもの
実装に取りかかる前に、何を実装する必要があるのか整理しておきます。
パスキーの登録
クライアントサイド実装
- JavaScriptで、サーバー(Relying Party(RP):証明書利用者)に資格情報作成オプションの生成を依頼
- 受け取った作成オプションをWebAuthnの
navigator.credentials.create()に渡し、認証器から公開鍵などの応答を受け取る - 応答をサーバーに送る
サーバサイド実装
- クライアントからの求めに応じて、ログイン中ユーザーを識別するための情報を含む資格情報作成オプションを生成する
- クライアントから受け取った認証器からの応答を検証して、正当なものなら応答に含まれる公開鍵をログイン中のユーザーと紐付けて保存する
パスキーによるログイン
クライアントサイド実装
- JavaScriptで、サーバーに資格情報取得オプションの生成を依頼
- 受け取った取得オプションをWebAuthnの
navigator.credentials.get()に渡し、認証器の秘密鍵を使って電子署名をしてもらい、応答を受け取る - 応答をサーバーに送る
サーバサイド実装
- クライアントからの求めに応じて、資格情報取得オプションを生成する
- クライアントから受け取った認証器からの応答を検証して、正当なものなら使用した鍵に対応するユーザーを識別し、ログイン処理を継続する
オートフィルの対応
クライアントサイド実装
- ログインフォームの入力欄に
autocomplete="webauthn"を追加 - ページロード時に WebAuthn と Conditional Mediation(条件付き仲介?)が利用可能か調べ、利用可能ならサーバーに資格情報取得オプションの生成を依頼
- 受け取った取得オプションをWebAuthnの
navigator.credentials.get()に渡し待機する(ユーザーがパスキーを選択すると、応答が返ってくる) - 応答をサーバーに送る
ライブラリ
@github/webauthn-json
WebAuthn APIそのままではバイナリデータを扱う必要があるなど使いづらいので、扱いやすくするためのJavaScriptライブラリを使用します。
webauthn-ruby
資格情報作成・取得オプションの生成、応答の検証などRubyでRPを実装するために必要な機能が揃っている素晴らしいgemです。
実装手順
0. Deviseのセットアップ
$ rails new rails-devise-webauthn-demo -d postgresql -a propshaft
$ bundle add devise
$ rails g devise:install
$ rails g devise User
$ rails db:migrate
$ rails g controller MyPages show
config.action_mailer.default_url_options = { host: 'localhost', port: 3000 }
authenticate :user do
  root "my_pages#show"
end
<p>Hello, <%= current_user.email %></p>
 |
 |
 |
1. パスキーを登録できるようにする
 |
 |
パスキー保存先のモデルを作成
WebAuthnの公開鍵を保存する Passkey モデルと、公開鍵とDeviseの Userを紐付けるユーザーハンドルとして使う webauthn_id を追加します。
webauthn_id は users テーブルに追加する方が一般的だと思いますが、私は nullable なカラムを増やしたくなかったので、テーブルを分けました。
bundle exec rails g model WebauthnUser user:references webauthn_id:string
bundle exec rails g model Passkey webauthn_user:references label:string external_id:string public_key:string sign_count:integer last_used_at:datetime
bundle exec rails db:migrate
class CreateWebauthnUsers < ActiveRecord::Migration[7.1]
  def change
    create_table :webauthn_users do |t|
      t.references :user, null: false, foreign_key: true, index: { unique: true }
      t.string :webauthn_id, null: false, index: { unique: true }

      t.timestamps
    end
  end
end
class CreatePasskeys < ActiveRecord::Migration[7.1]
  def change
    create_table :passkeys do |t|
      t.references :webauthn_user, null: false, foreign_key: true
      t.string :label, null: false
      t.string :external_id, null: false
      t.string :public_key, null: false
      t.integer :sign_count, default: 0, null: false
      t.datetime :last_used_at, null: false

      t.timestamps

      t.index [:webauthn_user_id, :external_id], unique: true
    end
  end
end
class User < ApplicationRecord
  # Include default devise modules. Others available are:
  # :confirmable, :lockable, :timeoutable, :trackable and :omniauthable
  devise :database_authenticatable, :registerable,
         :recoverable, :rememberable, :validatable

  # 以下を追加
  has_one :webauthn_user, dependent: :destroy
  delegate :passkeys, to: :webauthn_user, allow_nil: true
end
class WebauthnUser < ApplicationRecord
  belongs_to :user
  has_many :passkeys, dependent: :destroy
  validates :webauthn_id, presence: true, uniqueness: true
end
class Passkey < ApplicationRecord
  belongs_to :webauthn_user

  validates :label, presence: true
  validates :external_id, presence: true, uniqueness: { scope: :webauthn_user_id }
  validates :public_key, presence: true
  validates :sign_count, presence: true, numericality: { only_integer: true, greater_than_or_equal_to: 0 }
  validates :last_used_at, presence: true
end
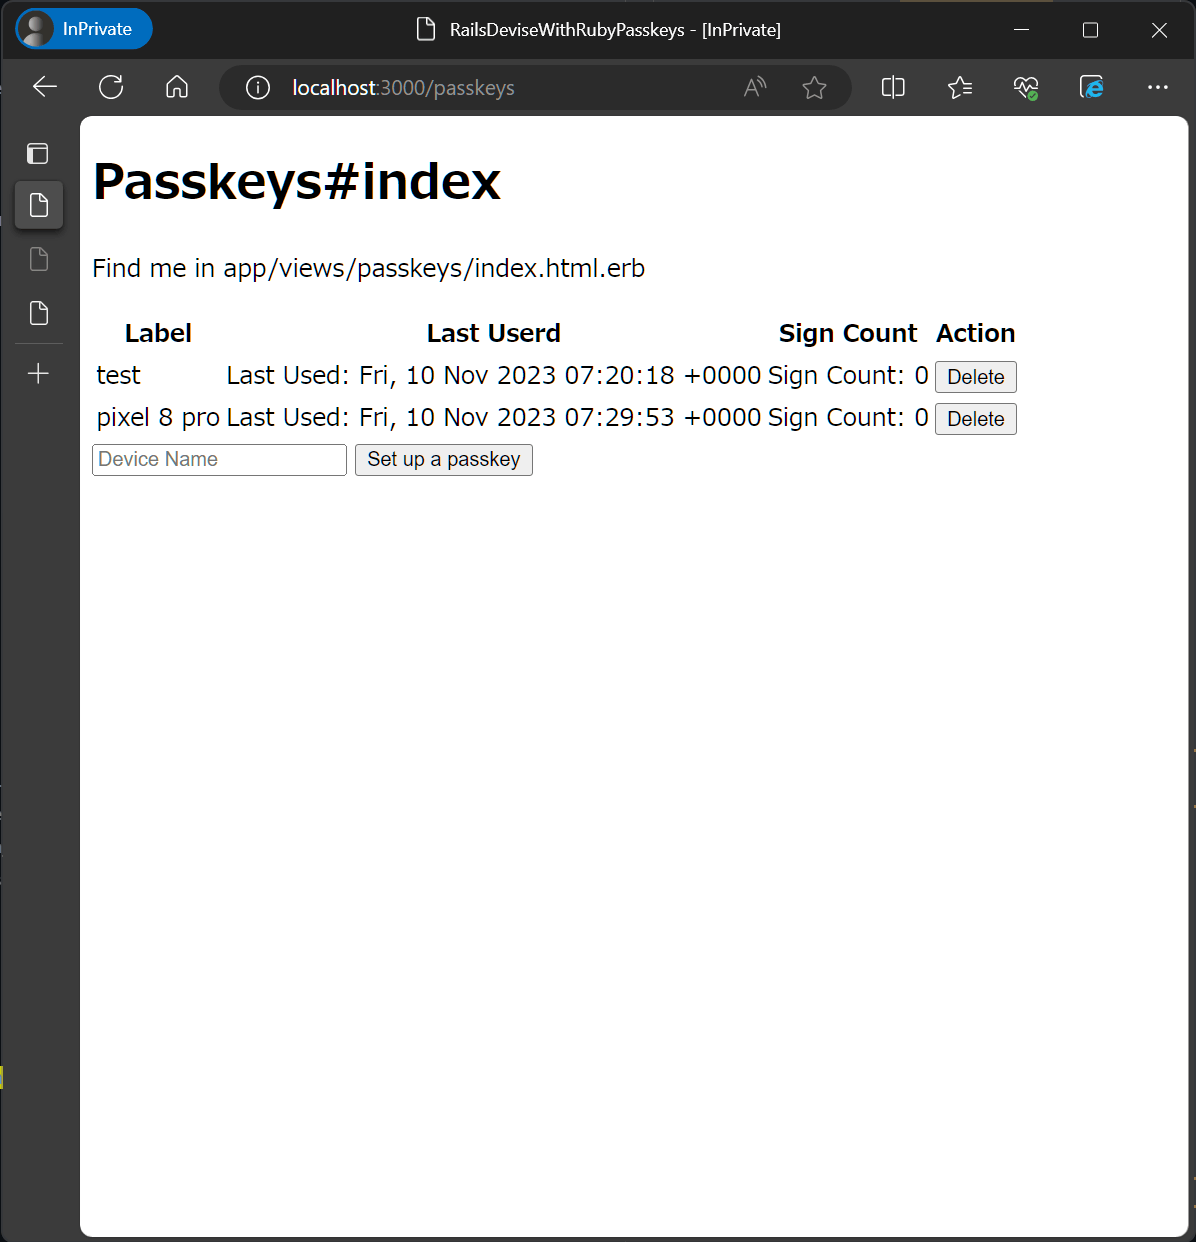
パスキー一覧画面を作成
$ rails g controller Passkeys index
  authenticate :user do
    root "my_pages#show"
    resources :passkeys, only: [:index, :create, :destroy]  # 追加
  end
class PasskeysController < ApplicationController
  def index
    @passkeys = current_user.passkeys
  end

  def create
    raise NotImplementedError.new("TODO")
  end

  def destroy
    @passkey = current_user.passkeys.find(params[:id])
    @passkey.destroy
    redirect_to passkeys_path
  end
end
<h1>MyPages#show</h1>
<p>Find me in app/views/my_pages/show.html.erb</p>
<p>Hello, <%= current_user.email %></p>

<!-- リンク追加 -->
<p><%= link_to 'Passkeys', passkeys_path %></p>
<h1>Passkeys#index</h1>
<p>Find me in app/views/passkeys/index.html.erb</p>

<% if @passkeys.present? %>
  <table>
    <thead>
      <tr>
        <th>Label</th>
        <th>Last Userd</th>
        <th>Sign Count</th>
        <th>Action</th>
      </tr>
    </thead>
    <tbody>
    <% @passkeys.each do |passkey| %>
      <tr>
        <td><%= passkey.label || '(no name)' %></td>
        <td>Last Used: <%= passkey.last_used_at ? l(passkey.last_used_at) : 'Never' %></td>
        <td>Sign Count: <%= passkey.sign_count %></td>
        <td><%= button_to 'Delete', passkey, method: :delete %></td>
      </tr>
    <% end %>
    </tbody>
  </table>
<% else %>
  <p>No passkeys found.</p>
<% end %>
パスキー登録
サーバーサイド
WebAuthnのサーバーサイド(RP)実装には webauthn-ruby gem を使います。
$ bundle add webauthn
RPの設定を作成します。
これにより webauthn-ruby 規定の WebAuthn::RelyingParty ( WebAuthn.configuration.relying_party ) のオプションを指定できるので、都度 WebAuthn::RelyingParty.new して設定する必要がなくなります。
WebAuthn.configure do |config|
  # This value needs to match `window.location.origin` evaluated by
  # the User Agent during registration and authentication ceremonies.
  config.origin = "http://localhost:3000"

  # Relying Party name for display purposes
  config.rp_name = "Rails Devise Webauthn Demo"

  # Optionally configure a client timeout hint, in milliseconds.
  # This hint specifies how long the browser should wait for any
  # interaction with the user.
  # This hint may be overridden by the browser.
  # https://www.w3.org/TR/webauthn/#dom-publickeycredentialcreationoptions-timeout
  # config.credential_options_timeout = 120_000

  # You can optionally specify a different Relying Party ID
  # (https://www.w3.org/TR/webauthn/#relying-party-identifier)
  # if it differs from the default one.
  #
  # In this case the default would be "auth.example.com", but you can set it to
  # the suffix "example.com"
  #
  # config.rp_id = "example.com"

  # Configure preferred binary-to-text encoding scheme. This should match the encoding scheme
  # used in your client-side (user agent) code before sending the credential to the server.
  # Supported values: `:base64url` (default), `:base64` or `false` to disable all encoding.
  #
  # config.encoding = :base64url

  # Possible values: "ES256", "ES384", "ES512", "PS256", "PS384", "PS512", "RS256", "RS384", "RS512", "RS1"
  # Default: ["ES256", "PS256", "RS256"]
  #
  # config.algorithms << "ES384"
end
クライアントからの要求に対して資格情報作成オプションを作成するcontrollerを作成します。
$ rails g controller Passkeys::CreationOptions
  authenticate :user do
    root "my_pages#show"
    resources :passkeys, only: [:index, :create, :destroy] do
      collection do
        resources :creation_options, only: [:create], module: :passkeys  # 追加
      end
    end
  end
class Passkeys::CreationOptionsController < ApplicationController
  # See https://github.com/cedarcode/webauthn-ruby#options-for-create
  # https://www.w3.org/TR/webauthn/#dictdef-publickeycredentialcreationoptions
  def create
    passkey_params = params.require(:passkey).permit(:label)

    creation_options = WebAuthn::Credential.options_for_create(
      user: { id: find_or_create_webauthn_id, name: current_user.email, display_name: passkey_params[:label] },
      exclude: current_user.passkeys.pluck(:external_id), # 登録済みの鍵は除外する。
      authenticator_selection: {
        resident_key: "required", # 2023年11月現在、Android Chrome でパスキーを使うには residentKey が必須
        require_resident_key: true,
        user_verification: "required" # 認証器でのユーザー認証を要求する
      }
    )

    session[:current_webauthn_registration_challenge] = creation_options.challenge

    render json: creation_options
  end

  private

  def find_or_create_webauthn_id
    return current_user.webauthn_user.webauthn_id if current_user.webauthn_user

    current_user.create_webauthn_user(webauthn_id: WebAuthn.generate_user_id).webauthn_id
  end
end
クライアントから認証器の応答を受け取り、公開鍵を登録するアクションを書きます。
これは POST /passkeys とします。
  def create
    passkey_params = params.require(:passkey).permit(:label, :credential)
    stored_registration_challenge = session[:current_webauthn_registration_challenge]
    parsed_credential = JSON.parse(passkey_params[:credential]) rescue nil
    webauthn_credential = WebAuthn::Credential.from_create(parsed_credential)
    webauthn_credential.verify(stored_registration_challenge, user_verification: true) # 検証失敗したら `WebAuthn::VerificationError` が発生するので、実際に使うときはエラーハンドリングを考える

    current_user.passkeys.create!(
      label: passkey_params[:label],
      external_id: webauthn_credential.id,
      public_key: webauthn_credential.public_key,
      sign_count: webauthn_credential.sign_count,
      last_used_at: Time.current
    )

    redirect_to passkeys_path
  end
クライアントサイド
今回JavaScriptは importmap-rails と stimulus で実装することにしたのでその初期設定
$ rails importmap:install
$ rails stimulus:install
WebAuthn APIをそのままは使いづらいということで、 @github/webauthn-json を使います。
$ ./bin/importmap pin @github/webauthn-json/browser-ponyfill
# Pin npm packages by running ./bin/importmap

pin "application", preload: true
pin "@hotwired/stimulus", to: "stimulus.min.js", preload: true
pin "@hotwired/stimulus-loading", to: "stimulus-loading.js", preload: true
pin_all_from "app/javascript/controllers", under: "controllers"
pin "@github/webauthn-json/browser-ponyfill", to: "https://ga.jspm.io/npm:@github/webauthn-json@2.1.1/dist/esm/webauthn-json.browser-ponyfill.js"
<h1>Passkeys#index</h1>
<p>Find me in app/views/passkeys/index.html.erb</p>

(中略)

<!-- 追記 -->
<%= render 'new_form' %>
<%= tag.div data: {
   controller: "new-passkey",
   "new-passkey-creation-options-url-value": creation_options_path
 } do %>
  <%= form_with url: passkeys_path, model: Passkey.new, method: :post, data: {
    'new-passkey-target': 'form',
    action: 'new-passkey#submit',
  } do |f| %>
    <%= f.hidden_field :credential, data: { 'new-passkey-target': 'credentialField' } %>
    <%= f.text_field :label, placeholder: 'Device Name', required: true %>
    <%= f.submit 'Set up a passkey' %>
  <% end %>
<% end %>
フォームのサブミットボタンを押すと、
- フォームの内容(鍵の名前)をサーバーに送信し、資格情報作成オプションJSONを取得する。資格情報作成オプションの displayName に鍵の名前を使いたかったのでフォームの内容を送信したが、これはなくてもよい。
- 資格情報作成オプションJSONが得られたら、 webauthn-json を使って WebAuthn API 経由で認証器に渡す。
- (ここでブラウザ上のポップアップが表示され、パスキーの作成が案内される)
- 認証器から応答が返され(Promiseが解決され)たら、応答をサーバーに送り、公開鍵を登録する。
import { Controller } from "@hotwired/stimulus";
import {
  create,
  parseCreationOptionsFromJSON
} from "@github/webauthn-json/browser-ponyfill";

export default class extends Controller {
  static targets = ["form", "credentialField"];
  static values = {
    creationOptionsUrl: String
  };

  submit(event) {
    event.preventDefault();

    const data = new FormData(this.formTarget);
    data.delete('_method');

    fetch(this.creationOptionsUrlValue, {
      method: "POST",
      headers: {
        "X-CSRF-Token": document.querySelector('meta[name="csrf-token"]').content,
        "Accept": "application/json",
      },
      body: data
    })
      .then(response => response.json())
      .then(async creationOption => {
        console.log(creationOption);
        // ここに成功時の処理を書く
        const credentialCreationOptions = parseCreationOptionsFromJSON({ publicKey: creationOption });
        const credentialCreationResponse = await create(credentialCreationOptions);
        this.credentialFieldTarget.value = JSON.stringify(credentialCreationResponse);
        this.formTarget.submit();
      })
      .catch(error => {
        console.error(error);
        // ここにエラー時の処理を書く
      });
  }
}
2. パスキーでログインできるようにする
認証の方法はいくつか考えられますが、今回はDeviseのログイン機能をカスタマイズして次のようにします。
- メールアドレスを入力して『パスキーでログイン』をクリック
- サーバーにメールアドレスから候補となる公開鍵IDの一覧を含む資格情報取得オプションを作成依頼
- (ユーザーがパスキーを選択)
- 認証器からの応答をログインフォームに含めてPOST
- 応答を検証して問題なければログイン継続
Deviseのカスタマイズ準備
カスタマイズのため、appディレクトリ内にcontrollerとviewを生成します。
$ rails g devise:views users -v sessions
$ rails g devise:controllers users
サーバーサイド
資格情報取得オプションを作成するためのcontrollerを作成します。
$ rails g controller Passkeys::RequestOptions
Rails.application.routes.draw do
  # cotrollers: を追加
  devise_for :users, controllers: { sessions: 'users/sessions' }

  # 省略

  # 追加
  # 資格情報取得オプションはログインなしでアクセスできる必要があるので、authorizeの外に書きます
  scope :passkeys do
    resources :request_options, only: [:create], module: :passkeys
  end
class Passkeys::RequestOptionsController < ApplicationController
  def create
    user_params = params.require(:user).permit(:email)
    user = User.find_by!(email: user_params[:email])

    # https://www.w3.org/TR/webauthn/#dictionary-assertion-options
    request_options = WebAuthn::Credential.options_for_get(
      user_verification: "required",  # ユーザー認証を要求する
      allow: user.passkeys&.pluck(:external_id),  # メールアドレスからユーザーが特定し、登録済みのパスキーで絞り込む
    )

    session[:current_webauthn_authentication_challenge] = request_options.challenge

    render json: request_options
  end
end
Deviseのログイン(セッション作成)をオーバーライドして、パスキーの場合はパスワードログインを迂回して進めるようにします。
Deviseとしてはストラテジーを作成するのが正しいと思いますが、今回は簡単にWebAuthnを理解したいので、素朴な方法で実装します。
class Users::SessionsController < Devise::SessionsController
  # POST /resource/sign_in
  def create
    if authrized_passkey.present?
      self.resource = authrized_passkey.webauthn_user.user
      set_flash_message!(:notice, :signed_in)
      sign_in(resource_name, resource)
      authrized_passkey.update!(last_used_at: Time.current)
      yield resource if block_given?
      respond_with resource, location: after_sign_in_path_for(resource)
    else
      super
    end
  end

  private

  def authrized_passkey
    return @authrized_passkey if defined?(@authrized_passkey)

    passkey_params = params.require(:passkey).permit(:credential)
    parsed_credential = JSON.parse(passkey_params[:credential]) rescue nil
    return @authrized_passkey = nil unless parsed_credential

    webauthn_credential = WebAuthn::Credential.from_get(parsed_credential)
    passkey = Passkey.find_by(external_id: webauthn_credential.id)
    return @authrized_passkey = nil unless passkey

    stored_authentication_challenge = session[:current_webauthn_authentication_challenge]

    verified = webauthn_credential.verify(
      stored_authentication_challenge,
      public_key: passkey.public_key,
      sign_count: passkey.sign_count,
      user_verification: "required"
    )

    @authrized_passkey = verified ? passkey : nil
  end
end
クライアントサイド
ログイン画面を変更して、『Log in with a passkey』ボタンを押すとパスキーを使うようにします。
<h2>Log in</h2>

<%= tag.div data: { controller: 'authorize-passkey', 'authorize-passkey-request-options-url-value': request_options_path } do %>

  <%= form_for(resource, as: resource_name, url: session_path(resource_name), data: { 'authorize-passkey-target': 'form' }) do |f| %>
    <div class="field">
      <%= f.label :email %><br />
      <%= f.email_field :email, autofocus: true, autocomplete: "email" %>
    </div>

    <div class="field">
      <%= f.label :password %><br />
      <%= f.password_field :password, autocomplete: "current-password" %>
    </div>

    <% if devise_mapping.rememberable? %>
      <div class="field">
        <%= f.check_box :remember_me %>
        <%= f.label :remember_me %>
      </div>
    <% end %>

    <%= hidden_field_tag "passkey[credential]", nil, data: { 'authorize-passkey-target': 'credentialField' } %>

    <div class="actions">
      <%= f.submit "Log in" %>
      <%= f.button "Log in with a passkey", data: { action: "authorize-passkey#signInWithPasskey" } %>
    </div>
  <% end %>

<% end %>

<%= render "users/shared/links" %>
import { Controller } from "@hotwired/stimulus";
import {
  get,
  parseRequestOptionsFromJSON
} from "@github/webauthn-json/browser-ponyfill";

export default class extends Controller {
  static targets = ["form", "credentialField"];
  static values = {
    requestOptionsUrl: String
  };

  signInWithPasskey(event) {
    event.preventDefault();
    this.getChallengeAndSubmitCredential();
  }

  getChallengeAndSubmitCredential() {
    const data = new FormData(this.formTarget);
    data.delete('_method');

    fetch(this.requestOptionsUrlValue, {
      method: "POST",
      headers: {
        "X-CSRF-Token": document.querySelector('meta[name="csrf-token"]').content,
        "Accept": "application/json",
      },
      body: data
    })
      .then(response => response.json())
      .then(async requestOption => {
        console.log(requestOption);
        // ここに成功時の処理を書く
        const credentialRequestOptions = parseRequestOptionsFromJSON({ publicKey: requestOption });
        const credentialRequestResponse = await get(credentialRequestOptions);
        this.credentialFieldTarget.value = JSON.stringify(credentialRequestResponse);
        this.formTarget.submit();
      })
      .catch(error => {
        console.error(error);
        // ここにエラー時の処理を書く
      });
  }
}
3. オートフィルに対応させる
ログインフォームにfocusがあたったとき、パスキーがあれば選択してそのままログイン、なければ通常のログイン、のように既存の動作を変えず、パスキーの使い勝手を向上させることができます。
オートフィルの場合、ページロード時にフォームへの入力はなしに資格情報取得オプションを作成する必要があるので、controllerを修正します。
class Passkeys::RequestOptionsController < ApplicationController
  def create
    user_params = params.require(:user).permit(:email)
    user = User.find_by(email: user_params[:email])

    request_options = WebAuthn::Credential.options_for_get(
      user_verification: "required",  # ユーザー認証を要求する
      allow: user ? user.passkeys.pluck(:external_id) : nil,  # メールアドレスからユーザーが特定できれば、登録済みのパスキーで絞り込む
    )
ログインフォームのログイン名入力欄に autocomplete="webauthn" を追加します。
    <!-- 省略 -->
    <div class="field">
      <%= f.label :email %><br />
      <%= f.email_field :email, autofocus: true, autocomplete: "email webauthn" %>
    </div>
    <!-- 省略 -->
ページロード時に WebAuthn と Conditional Mediation(条件付き仲介?)が利用可能か調べ、利用可能ならサーバーに資格情報取得オプションの生成を依頼するようにします。
受け取った取得オプションをWebAuthnの get メソッドに渡すと Promise が得られ、ユーザーがパスキーを選択すると認証器からの応答が得られます。
import { Controller } from "@hotwired/stimulus";
import {
  supported,
  get,
  parseRequestOptionsFromJSON
} from "@github/webauthn-json/browser-ponyfill";

export default class extends Controller {
  // 省略

  async formTargetConnected(element) {
    // Check if the browser supports WebAuthn.
    if (supported()) {
      if (PublicKeyCredential.isConditionalMediationAvailable) {
        // Check if the browser supports conditional mediation.
        // https://developer.mozilla.org/en-US/docs/Web/API/PublicKeyCredential/isConditionalMediationAvailable
        const isCMA = await PublicKeyCredential.isConditionalMediationAvailable();
        if (isCMA) {
          console.log("CMA is available");
          this.getChallengeAndSubmitCredential(isCMA);
        } else {
          console.log("CMA is not available");
        }
      } else {
        console.log("CMA is not supported");
      }
    } else {
      console.log("WebAuthn is not supported");
    }
  }

  // 省略

  getChallengeAndSubmitCredential(isCMA) { // 引数を追加
    // 省略
        const credentialRequestOptions = parseRequestOptionsFromJSON({ publicKey: requestOption });
        if (isCMA) {
	  // Conditional Mediation の場合は "conditional" を指定する
	  // https://w3c.github.io/webappsec-credential-management/#mediation-requirements
          credentialRequestOptions['mediation'] = 'conditional';
        }
        const credentialRequestResponse = await get(credentialRequestOptions);
    // 省略
  }
まとめ
順序立てて実装してみることで、WebAuthnの使い方を理解でき、パスキーログインを組み込むことができました。特に Conditional Mediationを使ったオートフィルは、パスワードマネージャーと同様の使い勝手で体験が良いです。
今後普及が進むと思いますので、今のうちに触って感覚をつかんでおきたいところです。

Discussion