GitHub Actionsの導入方法
GitHub Actionsとは?
GitHub Actions は、ビルド、テスト、デプロイのパイプラインを自動化できる継続的インテグレーションと継続的デリバリー (CI/CD) のプラットフォームです。 リポジトリに対するすべての pull request をビルドしてテストしたり、マージされた pull request を運用環境にデプロイしたりするワークフローを作成できます。
GitHub Actions は、DevOps であるだけでなく、リポジトリで他のイベントが発生したときにワークフローを実行できます。 たとえば、リポジトリで新しい issue が作成されるたびに、適切なラベルを自動的に追加するワークフローを実行できます。
GitHub では、ワークフローを実行するための Linux、Windows、macOS 仮想マシンが提供されます。また、自身のデータセンターまたはクラウド インフラストラクチャで独自のセルフホスト ランナーをホストすることもできます。
ワークフローのファイルを作成する
導入したいプロジェクトの .git がある階層に .github/workflows/github-actions.ymlを作成する。
※github-actions.ymlは拡張子が .yml であればなんでも良い。
作成したgithub-actions.ymlに下記コードを貼り付ける。
name: GitHub Actions Demo
run-name: ${{ github.actor }} is testing out GitHub Actions 🚀
on: [push]
jobs:
  Explore-GitHub-Actions:
    runs-on: ubuntu-latest
    steps:
      - run: echo "🎉 The job was automatically triggered by a ${{ github.event_name }} event."
      - run: echo "🐧 This job is now running on a ${{ runner.os }} server hosted by GitHub!"
      - run: echo "🔎 The name of your branch is ${{ github.ref }} and your repository is ${{ github.repository }}."
      - name: Check out repository code
        uses: actions/checkout@v4
      - run: echo "💡 The ${{ github.repository }} repository has been cloned to the runner."
      - run: echo "🖥️ The workflow is now ready to test your code on the runner."
      - name: List files in the repository
        run: |
          ls ${{ github.workspace }}
      - run: echo "🍏 This job's status is ${{ job.status }}."
実際に動かしてみる
- 変更をコミットし、リモートにpushする
- githubのプロジェクトページへ遷移する
- Actions タブをクリックする
- 手順1のコミットIDと同じものをクリックする
-
Explore-GitHub-Actionsをクリックする
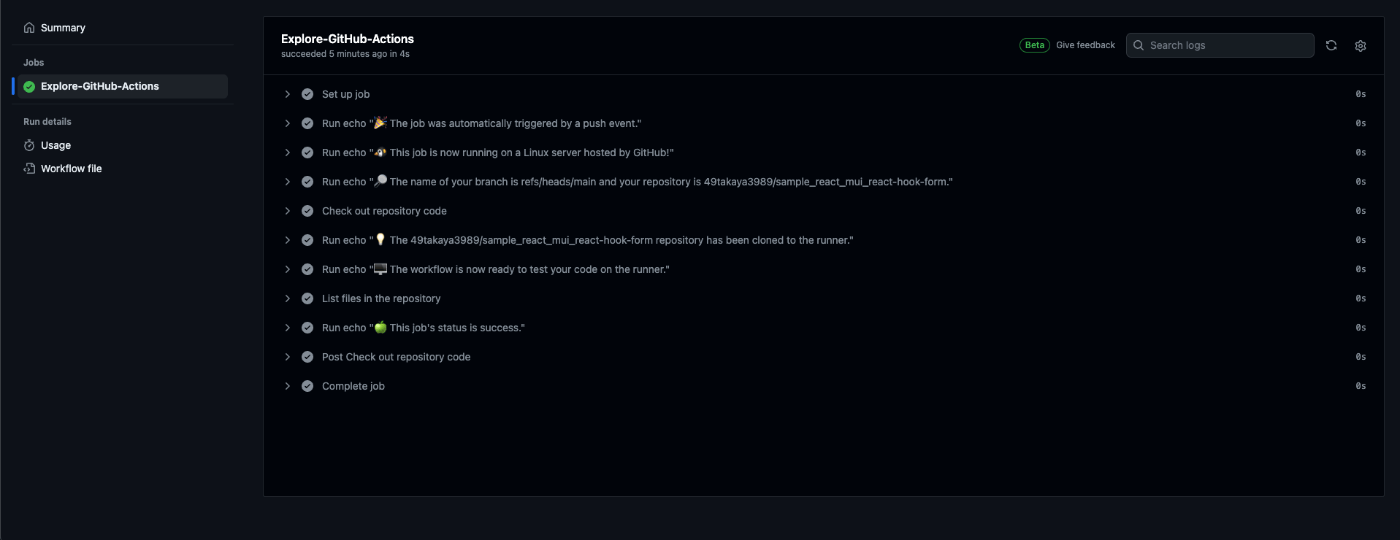
下記添付画像のような表示になっていれば成功

(応用)eslintを走らせる
reviewdogを入れた状態で、走らせてみる。
デフォルトの eslint のみ検証したいのであれば、公式で紹介されている下記コード。
name: reviewdog
on: [pull_request]
jobs:
  eslint:
    name: runner / eslint
    runs-on: ubuntu-latest
    permissions:
      contents: read
      pull-requests: write
    steps:
      - uses: actions/checkout@v4
      - uses: reviewdog/action-eslint@v1
        with:
          github_token: ${{ secrets.GITHUB_TOKEN }}
          reporter: github-pr-review # Change reporter.
          eslint_flags: "src/"
もし、プロジェクトで独自に組んだ lint を効かせたいのであれば少し工夫が必要。
name: GitHub Actions # ワークフローの名前
on:
  pull_request:
    types: [opened, reopened, synchronize] # opened: PRを作成, reopened:PRをCloseからOpenに変更, synchronize: PRを更新
jobs:
  eslint:
    name: eslint
    runs-on: ubuntu-latest # ジョブを実行する環境
    permissions:
      contents: read
      pull-requests: write
    steps: #ジョブ内で実行されるステップ
    - name: Checkout code
      uses: actions/checkout@v4

    - name: Set up Node.js
      uses: actions/setup-node@v3
      with:
        node-version: '20.9.0'

    - name: Install Dependencies
      run: npm install

    - name: Initialize Reviewdog
      uses: reviewdog/action-setup@v1
      with:
        reviewdog_version: latest

    - name: Run reviewdog
      run: |
        reviewdog -runners=eslint -reporter=github-pr-check -filter-mode=file
      env:
        REVIEWDOG_GITHUB_API_TOKEN: ${{ secrets.REVIEWDOG_GITHUB_API_TOKEN }}
package.json と同じ階層に.reviewdog.ymlを作成し、下記コードを貼り付ける。
runner:
  eslint:
    cmd: npm run --silent lint --config ./.eslintrc.cjs
    format: eslint
push してエラーにならなければ成功!
以上!
Discussion