React + ReduxアプリケーションのエラーをSentryでトラッキングする
はじめに
今回紹介するコードの完成形はこちら↓
開発環境
@reduxjs/toolkit: ^2.1.0
@sentry/react: ^7.100.1
react: ^18.2.0
react-dom: ^18.2.0
react-redux: ^9.1.0
Sentryとは
Sentry は、開発者がコード関連の問題を特定して修正するのに役立つソフトウェア監視ツールです。 Sentry は、エラー追跡からパフォーマンス監視まで、コードレベルの可観測性を提供し、問題の診断を容易にし、アプリケーション コードの健全性について継続的に学習できるようにします。
Sentryでプロジェクトを作成
- アカウント登録する
- プロジェクトを作成する
アカウント登録する
公式docsへアクセスし、アカウント登録をする
プロジェクトを作成する
Create Projectからプロジェクト作成を行う。
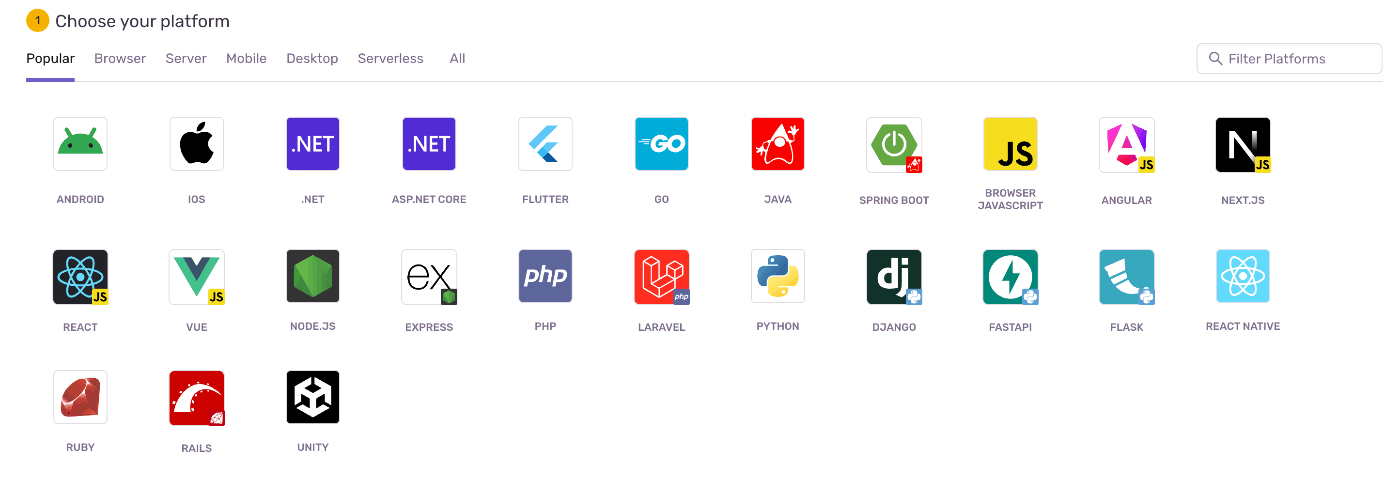
最初に言語・フレームワークを選択する画面でReactを選択する。

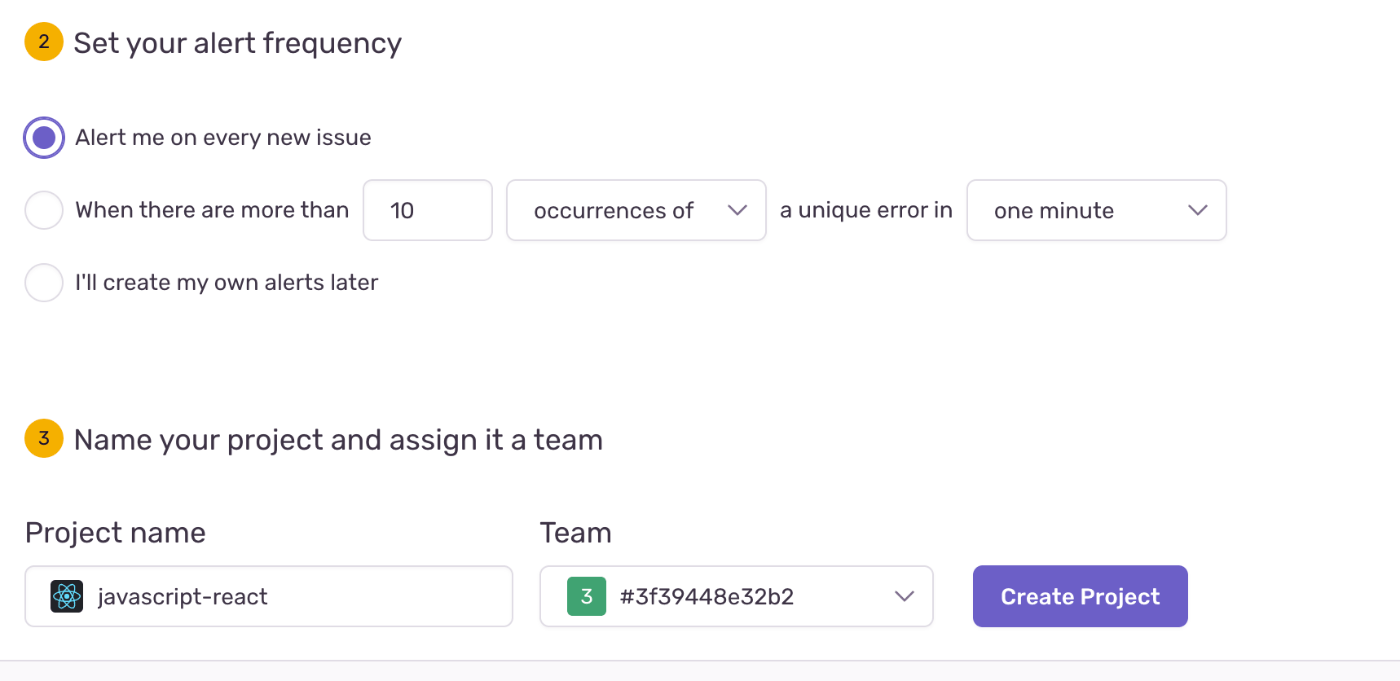
Set your alert frequencyとName your project and assign it a teamは任意のものを選択する。
今回は、下記のように設定。

Reactの環境開発を構築
↓こちらを参照
reduxでstoreを構築
- パッケージをインストトール
- store を作成する
- redux を react に繋げる
- UI で store の値を呼び出す
パッケージをインストトール
npm install @reduxjs/toolkit react-redux
store を作成する
今回は簡易的なカウンターアプリの構成にする。
counterSlice.ts
import { createSlice, PayloadAction } from '@reduxjs/toolkit';

interface CounterState {
  value: number;
}

const initialState: CounterState = {
  value: 0,
};

export const counterSlice = createSlice({
  name: 'counter',
  initialState,
  reducers: {
    incremented: state => {
      state.value += 1;
    },
    decremented: state => {
      state.value -= 1;
    },
    incrementedByAmount: (state, action: PayloadAction<number>) => {
      state.value += action.payload;
    },
  },
});

export const { incremented, decremented, incrementedByAmount } = counterSlice.actions;
export default counterSlice.reducer;
store.ts
import { configureStore } from '@reduxjs/toolkit'
import counterReducer from '../features/counter/counterSlice'

export const store = configureStore({
  reducer: {
    counter: counterReducer
  }
})

// RootState型の定義
export type RootState = ReturnType<typeof store.getState>;

// AppDispatch型の定義
export type AppDispatch = typeof store.dispatch;
redux を react に繋げる
下記のように<Provider>で囲んであげるだけで完了
ReactDOM.createRoot(document.getElementById('root')!).render(
  <React.StrictMode>
-    <App />
+    <Provider store={store}>
+      <App />
+    </Provider>
  </React.StrictMode>,
)
UI で store の値を呼び出す
今回、useSelectorやuseDispatchの説明、および使い方の正しさなどに関しては省略します。
import React from 'react';
import { useSelector, useDispatch } from 'react-redux';
import { RootState } from './store';
import { decremented, incremented, incrementedByAmount } from './counterSlice';

const App: React.FC = () => {
  // Reduxストアからカウンターの値を取得
  const counterValue = useSelector((st: RootState) => st.counter.value);
  const dispatch = useDispatch();

  return (
    <div>
      <h2>Counter</h2>
      <div>
        <button className='btn' onClick={() => dispatch(decremented())}>-</button>
        <span className='num'>{counterValue}</span>
        <button className='btn' onClick={() => dispatch(incremented())}>+</button>
      </div>
      <div>
        <button onClick={() => dispatch(incrementedByAmount(5))}>+5</button>
      </div>
    </div>
  );
};

export default App;
下記画像のように表示されていれば、確認完了!
※スタイルは見やすいようにデフォルトから少しいじってます。

SentryのSDKなどを実装
- 必要なパッケージをインストール
- SDKの設置
- エラーを引き起こすコードを準備
- redux の情報を送るための設定
必要なパッケージをインストール
npm install --save @sentry/react
SDKの設置
SentryのConfig設定はライフサイクルのなるべく早い段階で行う必要があるため、src/main.tsxに記載する。
各項目の詳しい説明に関しては、公式docsを確認。
import React from 'react'
import ReactDOM from 'react-dom/client'
import App from './App.tsx'
import { Provider } from 'react-redux'
import { store } from './store.ts'
import './index.css'
import * as Sentry from "@sentry/react";

Sentry.init({
  dsn: <your_dns>,
  integrations: [
    Sentry.browserTracingIntegration(),
    Sentry.replayIntegration({
      maskAllText: false, // ユーザーのプライバシーを保護するためにテキストをマスクするかどうか
      blockAllMedia: false, // パフォーマンスやプライバシーの理由からメディアコンテンツをブロックするかどうか
    }),
  ],

  // パフォーマンスモニタリング
  tracesSampleRate: 1.0, // アプリケーションで発生するトランザクションのうち、どれだけの割合をトレースする割合

  // 'tracePropagationTargets'で、分散トレーシングを有効にするURL
  tracePropagationTargets: ["localhost", /^https:\/\/yourserver\.io\/api/], // 分散トレーシングを適用するURLパターン

  // セッションリプレイ
  replaysSessionSampleRate: 0.1, // セッションリプレイを行うセッションの割合
  replaysOnErrorSampleRate: 1.0, // エラーが発生した場合のセッションリプレイのサンプルレートを指定
});

ReactDOM.createRoot(document.getElementById('root')!).render(
  <React.StrictMode>
    <Provider store={store}>
      <App />
    </Provider>
  </React.StrictMode>,
)
エラーを引き起こすコードを準備
設定が正常にできているか確認するために、エラーを引き落とすダミーボタンを追加する。
import React from 'react';
import { useSelector, useDispatch } from 'react-redux';
import { RootState } from './store';
import { decremented, incremented, incrementedByAmount } from './counterSlice';

const App: React.FC = () => {
  ...

  return (
    <div>
      <h2>Counter</h2>
      <div>
        <button className='btn' onClick={() => dispatch(decremented())}>-</button>
        <span className='num'>{counterValue}</span>
        <button className='btn' onClick={() => dispatch(incremented())}>+</button>
      </div>
      <div>
        <button onClick={() => dispatch(incrementedByAmount(5))}>+5</button>
      </div>

+      <button onClick={() => methodDoesNotExist()}>Break the world</button>
    </div>
  );
};

export default App;
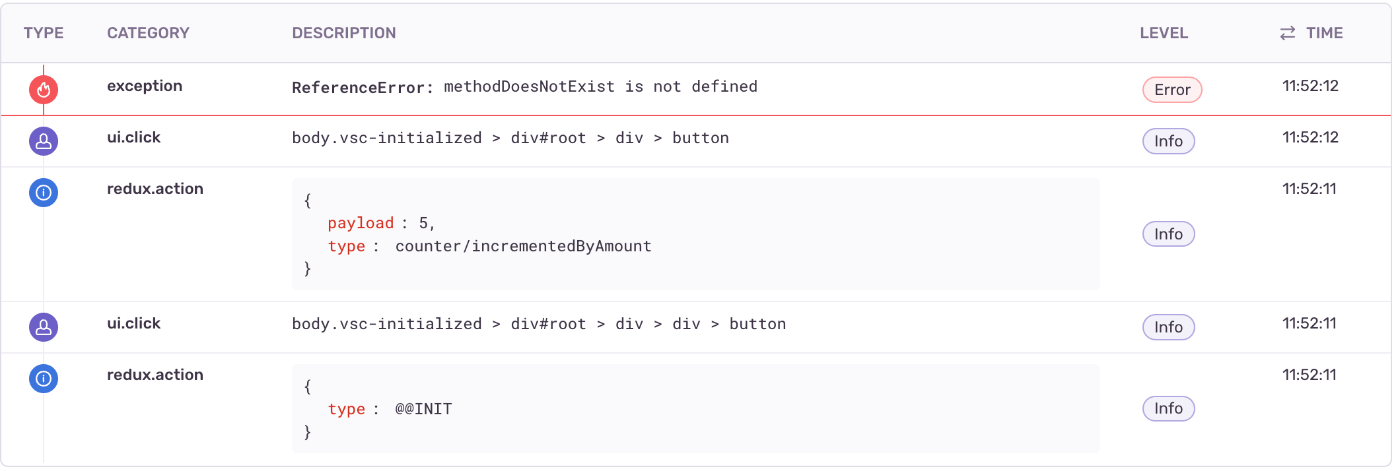
追加した、Break the worldをクリックして、下記画像のように、sentryにエラーが通知されていれば成功。
※通信環境などによっては、sentryへのエラー通知に時間がかかる場合がある

redux の情報を送るための設定
上記までの設定だと、action typeやstoreの情報をsentryで確認することができない。
エラー再現に役立ちそうなaction typeやstoreを、sentryでも確認できるように、こちらで作成した store に修正を加える。
import { Action, AnyAction, configureStore } from '@reduxjs/toolkit';
import counterReducer from './counterSlice';
import { createReduxEnhancer } from '@sentry/react';

type StateType = ReturnType<typeof counterReducer>;

// sentryへ送信する action と state を定義
const sentryReduxEnhancer = createReduxEnhancer({
  actionTransformer: (action: Action | AnyAction) => action,
  stateTransformer: (state: StateType) => state,
});

export const store = configureStore({
  ...
  enhancers: (getDefaultEnhancers) => getDefaultEnhancers().concat(sentryReduxEnhancer),
});

...
再度、Break the worldをクリックして、エラー詳細画面のbreadcrumbsにredux.actionが表示されるようになっていれば成功。

以上!


Discussion