Lima で Docker を使う on Mac
はじめに
2021 年 9 月に Docker Desktop の有料化が発表されました。
個人利用やスモールビジネスであれば引き続き Docker Desktop を利用可能ですが、
選択肢の 1 つとして Lima を利用した Docker を検証してみます。
環境
- Intel Mac
- limactl 0.7.4
- Docker 20.10.11
- Docker Compose 2.1.1
Lima とは
自動ファイル共有、ポート転送、コンテナ化をサポートした macOS 上で Linux 仮想マシンを作成・起動するツールです。
Docker Desktop for Mac のアンインストール
Docker Desktop for Mac がインストールされている場合は、Lima を利用した Docker CLI に切り替えるため下記ドキュメントを参考にアンインストールします。
Lima と Docker をインストールする
Homebrew 経由で Lima と Docker をインストールします。
brew install lima docker
Lima の設定ファイルを作成する
Docker の example が提供されているので docker.yaml を作成します。
# Example to use Docker instead of containerd & nerdctl
# $ limactl start ./docker.yaml
# $ limactl shell docker docker run -it -v $HOME:$HOME --rm alpine

# To run `docker` on the host (assumes docker-cli is installed):
# $ export DOCKER_HOST=unix://$HOME/docker.sock
# $ docker ...

# This example requires Lima v0.7.3 or later
images:
  # Hint: run `limactl prune` to invalidate the "current" cache
  - location: "https://cloud-images.ubuntu.com/impish/current/impish-server-cloudimg-amd64.img"
    arch: "x86_64"
  - location: "https://cloud-images.ubuntu.com/impish/current/impish-server-cloudimg-arm64.img"
    arch: "aarch64"
mounts:
  - location: "~"
    writable: false
  - location: "/tmp/lima"
    writable: true
ssh:
  localPort: 60006
  # Load ~/.ssh/*.pub in addition to $LIMA_HOME/_config/user.pub , for allowing DOCKER_HOST=ssh:// .
  # This option is enabled by default.
  # If you have an insecure key under ~/.ssh, do not use this option.
  loadDotSSHPubKeys: true
# containerd is managed by Docker, not by Lima, so the values are set to false here.
containerd:
  system: false
  user: false
provision:
  - mode: system
    script: |
      #!/bin/bash
      set -eux -o pipefail
      command -v docker >/dev/null 2>&1 && exit 0
      export DEBIAN_FRONTEND=noninteractive
      curl -fsSL https://get.docker.com | sh
      # NOTE: you may remove the lines below, if you prefer to use rootful docker, not rootless
      systemctl disable --now docker
      apt-get install -y uidmap dbus-user-session
  - mode: user
    script: |
      #!/bin/bash
      set -eux -o pipefail
      systemctl --user start dbus
      dockerd-rootless-setuptool.sh install
      docker context use rootless
probes:
  - script: |
      #!/bin/bash
      set -eux -o pipefail
      if ! timeout 30s bash -c "until command -v docker >/dev/null 2>&1; do sleep 3; done"; then
        echo >&2 "docker is not installed yet"
        exit 1
      fi
      if ! timeout 30s bash -c "until pgrep rootlesskit; do sleep 3; done"; then
        echo >&2 "rootlesskit (used by rootless docker) is not running"
        exit 1
      fi
    hint: See "/var/log/cloud-init-output.log". in the guest
portForwards:
  - guestSocket: "/run/user/{{.UID}}/docker.sock"
    hostSocket: "{{.Home}}/docker.sock"
仮想マシンを起動する
作成した設定ファイルを元に仮想マシンを起動します。
インスタンス名は YAML ファイル名がそのままインスタンス名になります。
limactl start ./docker.yaml
? Creating an instance "docker" Proceed with the default configuration
INFO[0019] Attempting to download the image from "https://cloud-images.ubuntu.com/impish/current/impish-server-cloudimg-amd64.img"  digest=
541.94 MiB / 541.94 MiB [-----------------------------------] 100.00% 7.33 MiB/s
INFO[0096] Downloaded image from "https://cloud-images.ubuntu.com/impish/current/impish-server-cloudimg-amd64.img"
INFO[0103] [hostagent] Starting QEMU (hint: to watch the boot progress, see "/Users/takasp/.lima/docker/serial.log")
INFO[0103] SSH Local Port: 60006
INFO[0103] [hostagent] Waiting for the essential requirement 1 of 5: "ssh"
INFO[0131] [hostagent] Waiting for the essential requirement 1 of 5: "ssh"
INFO[0132] [hostagent] The essential requirement 1 of 5 is satisfied
INFO[0132] [hostagent] Waiting for the essential requirement 2 of 5: "user session is ready for ssh"
INFO[0147] [hostagent] Waiting for the essential requirement 2 of 5: "user session is ready for ssh"
INFO[0147] [hostagent] The essential requirement 2 of 5 is satisfied
INFO[0147] [hostagent] Waiting for the essential requirement 3 of 5: "sshfs binary to be installed"
INFO[0171] [hostagent] The essential requirement 3 of 5 is satisfied
INFO[0171] [hostagent] Waiting for the essential requirement 4 of 5: "/etc/fuse.conf to contain \"user_allow_other\""
INFO[0174] [hostagent] The essential requirement 4 of 5 is satisfied
INFO[0174] [hostagent] Waiting for the essential requirement 5 of 5: "the guest agent to be running"
INFO[0175] [hostagent] The essential requirement 5 of 5 is satisfied
INFO[0175] [hostagent] Mounting "/Users/takasp"
INFO[0175] [hostagent] Mounting "/tmp/lima"
INFO[0175] [hostagent] Waiting for the optional requirement 1 of 1: "user probe 1/1"
INFO[0175] [hostagent] Forwarding "/run/user/501/docker.sock" (guest) to "/Users/takasp/docker.sock" (host)
INFO[0175] [hostagent] Forwarding "/run/lima-guestagent.sock" (guest) to "/Users/takasp/.lima/docker/ga.sock" (host)
INFO[0175] [hostagent] Not forwarding TCP [::]:22
INFO[0175] [hostagent] Not forwarding TCP 127.0.0.53:53
INFO[0175] [hostagent] Not forwarding TCP 0.0.0.0:22
INFO[0215] [hostagent] Waiting for the optional requirement 1 of 1: "user probe 1/1"
INFO[0233] [hostagent] The optional requirement 1 of 1 is satisfied
INFO[0233] [hostagent] Waiting for the final requirement 1 of 1: "boot scripts must have finished"
INFO[0236] [hostagent] The final requirement 1 of 1 is satisfied
INFO[0236] READY. Run `limactl shell docker` to open the shell.
下記コマンドで Lima が管理するインスタンスが確認できます。
$ limactl list
NAME      STATUS     SSH                ARCH      CPUS    MEMORY    DISK      DIR
docker    Running    127.0.0.1:60006    x86_64    4       4GiB      100GiB    /Users/takasp/.lima/docker
デフォルトでは下記スペックでインスタンスが作成されます。
- CPU: 4 cores
- Memory: 4 GiB
- Disk: 100 GiB
調整したい場合は下記のように設定ファイルに記載することでスペックを変更できます。
cpus: 2
memory: "2GiB"
disk: "10GiB"
仮想マシンを起動したら下記コマンドで仮想マシンに入ることができます。
limactl shell docker
仮想マシンに入ると Docker がインストールされていることが分かります。
exit コマンドで仮想マシンから抜けることができます。
takasp@lima-docker:/Users/takasp/dev/src/github.com/takasp/lima-docker-example$ docker --version
Docker version 20.10.11, build dea9396
takasp@lima-docker:/Users/takasp/dev/src/github.com/takasp/lima-docker-example$ exit
logout
ローカルマシンから Docker を利用する
Docker を利用するため毎回仮想マシンに入るのは大変なのでローカルマシンから Docker を利用できるように設定します。
docker.yaml に例が記載されていますが、Lima で構築した Docker のソケットがホームディレクトリ配下にポート転送されているためホストの向き先を変更します。
この設定は .bashrc や .zshrc に記載しておきます。
export DOCKER_HOST=unix://$HOME/docker.sock
この状態で nginx を起動してみます。
docker run --name nginx -d -p 8080:80 nginx
まずローカルマシンから nginx が起動できていることが確認できます。
$ docker ps -a
CONTAINER ID   IMAGE     COMMAND                  CREATED          STATUS          PORTS                                   NAMES
9eae3bbae70c   nginx     "/docker-entrypoint.…"   56 seconds ago   Up 56 seconds   0.0.0.0:8080->80/tcp, :::8080->80/tcp   nginx
Lima 上のインスタンスに入り、同じコマンドを打っても nginx が起動できているのでローカルマシンからの実行によって Docker を操作できているということが分かりました。
$ limactl shell docker
takasp@lima-docker:/Users/takasp/dev/src/github.com/takasp/lima-docker-example$ docker ps -a
CONTAINER ID   IMAGE     COMMAND                  CREATED              STATUS              PORTS                                   NAMES
9eae3bbae70c   nginx     "/docker-entrypoint.…"   About a minute ago   Up About a minute   0.0.0.0:8080->80/tcp, :::8080->80/tcp   nginx
takasp@lima-docker:/Users/takasp/dev/src/github.com/takasp/lima-docker-example$ exit
logout
Docker Compose v2 のインストール
実際に Docker を利用するにあたって Docker Compose を利用するケースもあるので Docker Compose v2 をインストールしてみます。
Docker Desktop を利用していればインストールされていますが、Homebrew 経由ではインストールされないため別途対応が必要です。
Linux のインストール手順を参考にバイナリをダウンロードしてインストールします。
mkdir -p ~/.docker/cli-plugins/
curl -SL https://github.com/docker/compose/releases/download/v2.1.1/docker-compose-darwin-x86_64 -o ~/.docker/cli-plugins/docker-compose
chmod +x ~/.docker/cli-plugins/docker-compose
docker compose version
インストールができたところで WordPress のサンプルを起動してみます。
下記リンクより docker-compose.yml を作成します。
version: "3.9"

services:
  db:
    image: mysql:5.7
    volumes:
      - db_data:/var/lib/mysql
    restart: always
    environment:
      MYSQL_ROOT_PASSWORD: somewordpress
      MYSQL_DATABASE: wordpress
      MYSQL_USER: wordpress
      MYSQL_PASSWORD: wordpress

  wordpress:
    depends_on:
      - db
    image: wordpress:latest
    volumes:
      - wordpress_data:/var/www/html
    ports:
      - "8000:80"
    restart: always
    environment:
      WORDPRESS_DB_HOST: db:3306
      WORDPRESS_DB_USER: wordpress
      WORDPRESS_DB_PASSWORD: wordpress
      WORDPRESS_DB_NAME: wordpress
volumes:
  db_data: {}
  wordpress_data: {}
下記コマンドで起動すると WordPress が起動します。
docker compose up -d
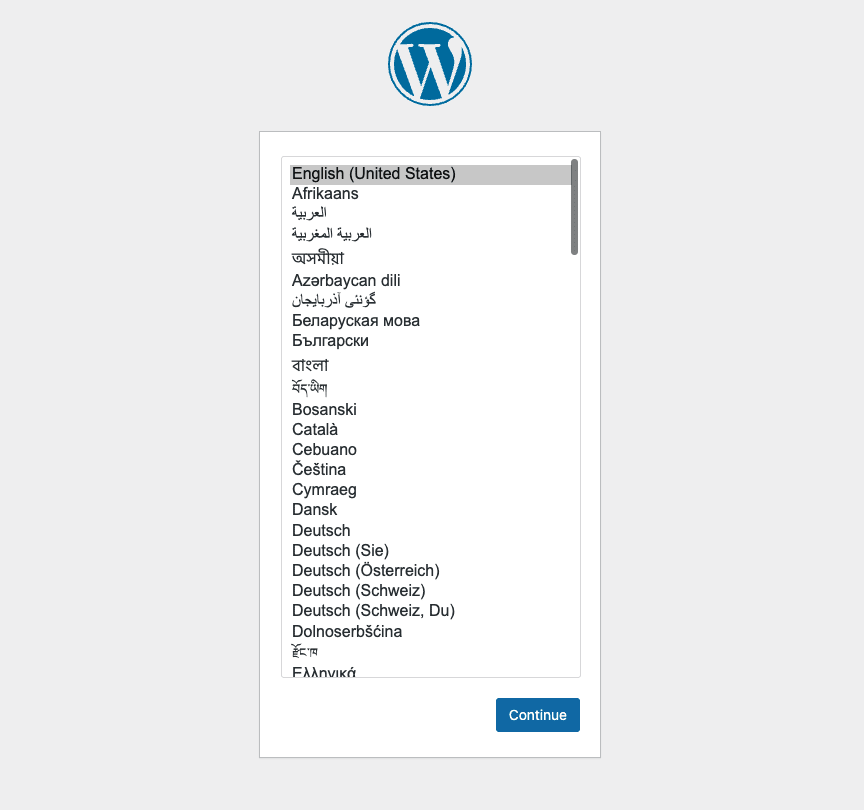
ブラウザで localhost:8000 にアクセスすると WordPress の初期画面が表示されることを確認できます。
さいごに
簡単ですが、Lima を利用した場合の Docker を試してみました。
全ての利用パターンにおいて Docker Desktop を置き換えることができるかは分かりませんが、
普通に利用する分には遜色なく、設定ファイルを用意すれば簡単に起動できる印象を受けました。
1 つの選択肢として試してみるのも良いのではないでしょうか。
参考
Lima: Linux virtual machines (on macOS, in most cases)
Docker Desktop 無しで Docker を使う with lima on Mac
Docker Desktopが有料化へ、ただし250人未満かつ年間売り上げ1000万ドル(約11億円)未満の組織や個人やオープンソースプロジェクトでは引き続き無料で利用可能
Discussion