ソラカメで撮影した画像をwordpressで作成したwebサイトにスライドバーで時刻を選んで表示する!
やりたいこと
ソラカメで撮影した画像をwordpressで作成したwebサイトにスライドバーで時刻を選んで表示する!
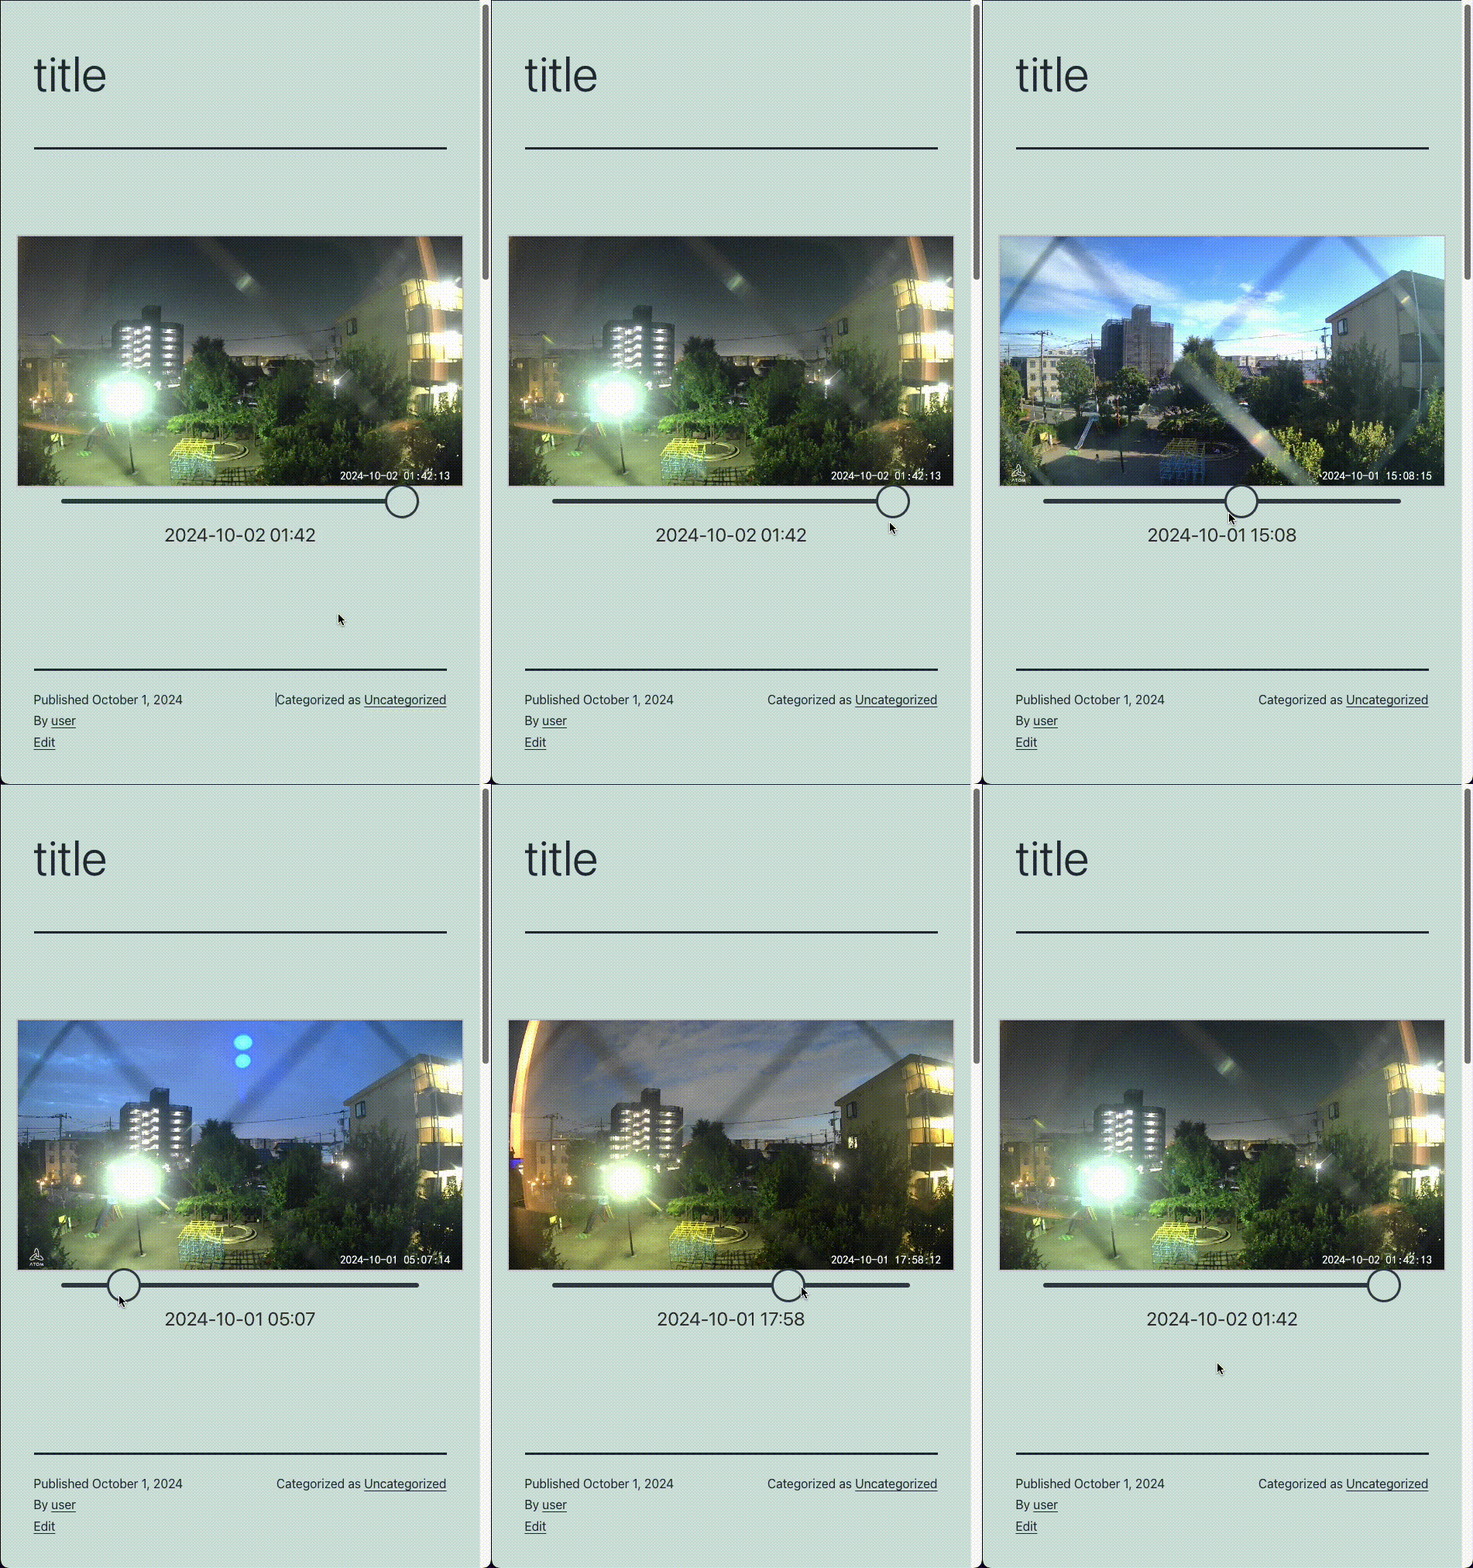
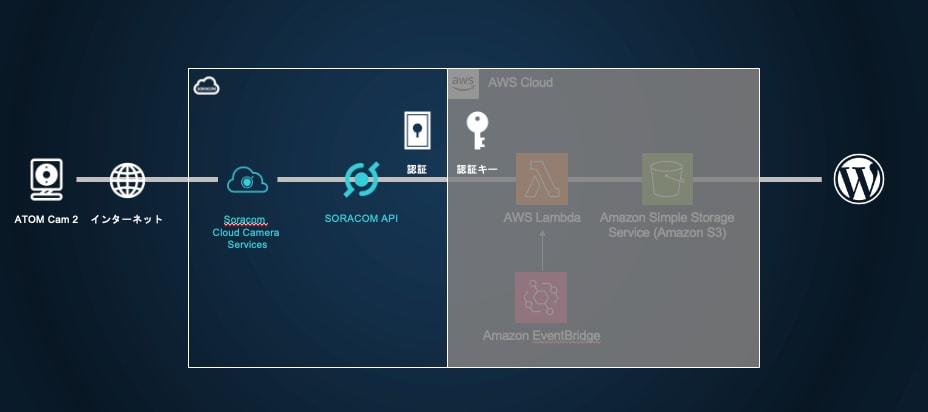
構成はこんな感じ
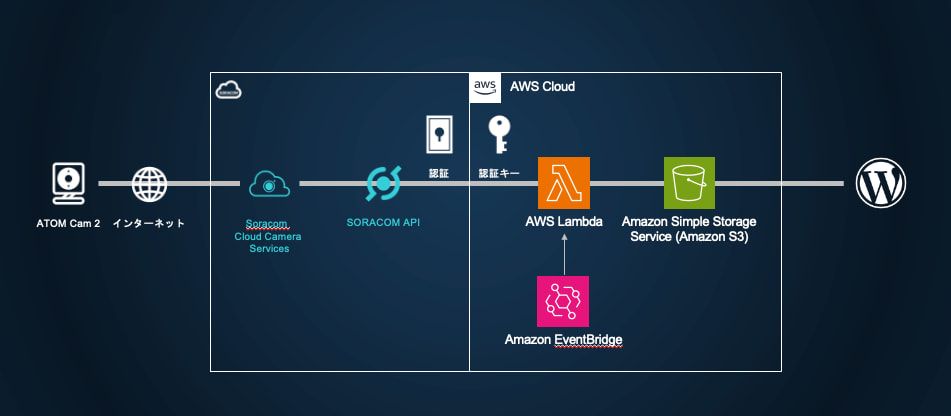
準備
必要なもの
- SORACOM アカウント
- ソラカメ関連
- ソラカメ(AtomCam2)
- Wifi環境
- ソラカメライセンス(常時録画ライセンス 7日間プラン)
ソラカメが初めての方はこちら(購入から設置まで)!
SORACOMのアカウント作成など
カバレッジタイプはJPで。
ソラカメの購入〜セットアップまで
実は最近はソラカメのセットアップにアプリを使わなくても良くなっていたりする。
ソラカメの設置
設置に関する知見はここにたくさん溜まっています。
- AWSアカウント
- Wordpressの環境
カメラチェック
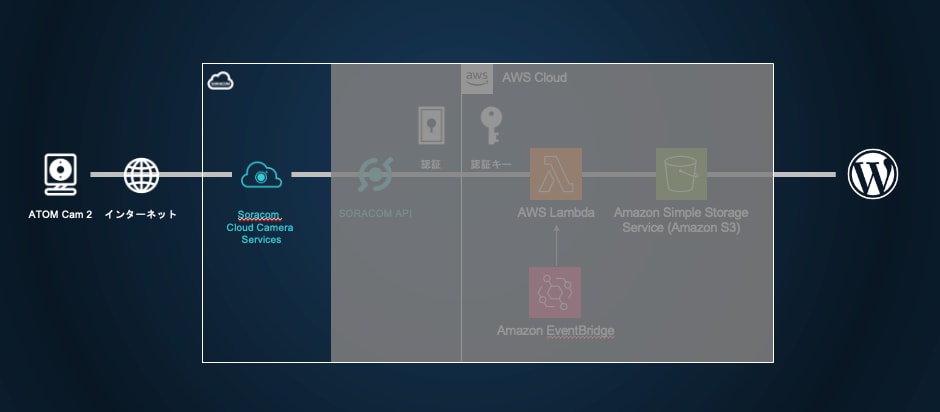
何はともあれ、カメラが正常に動作しているか確認しましょう。
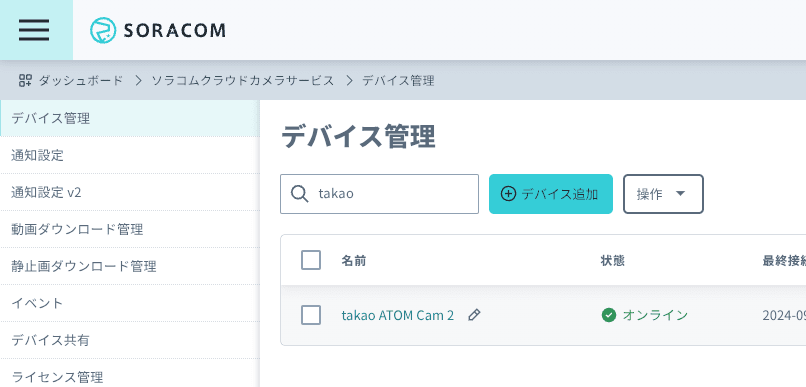
「ソラコムクラウドカメラサービス」 -> 「デバイス管理」
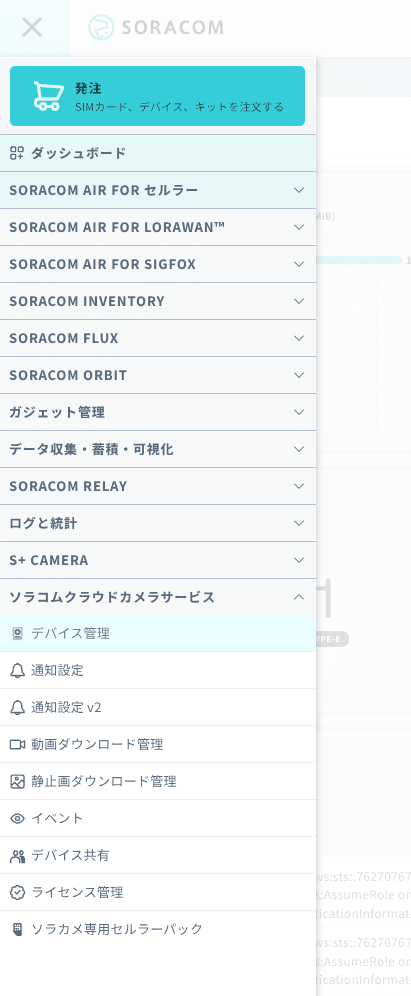
デバイスの一覧表示で、先ほど登録したカメラがオンラインになっていることを確認します。
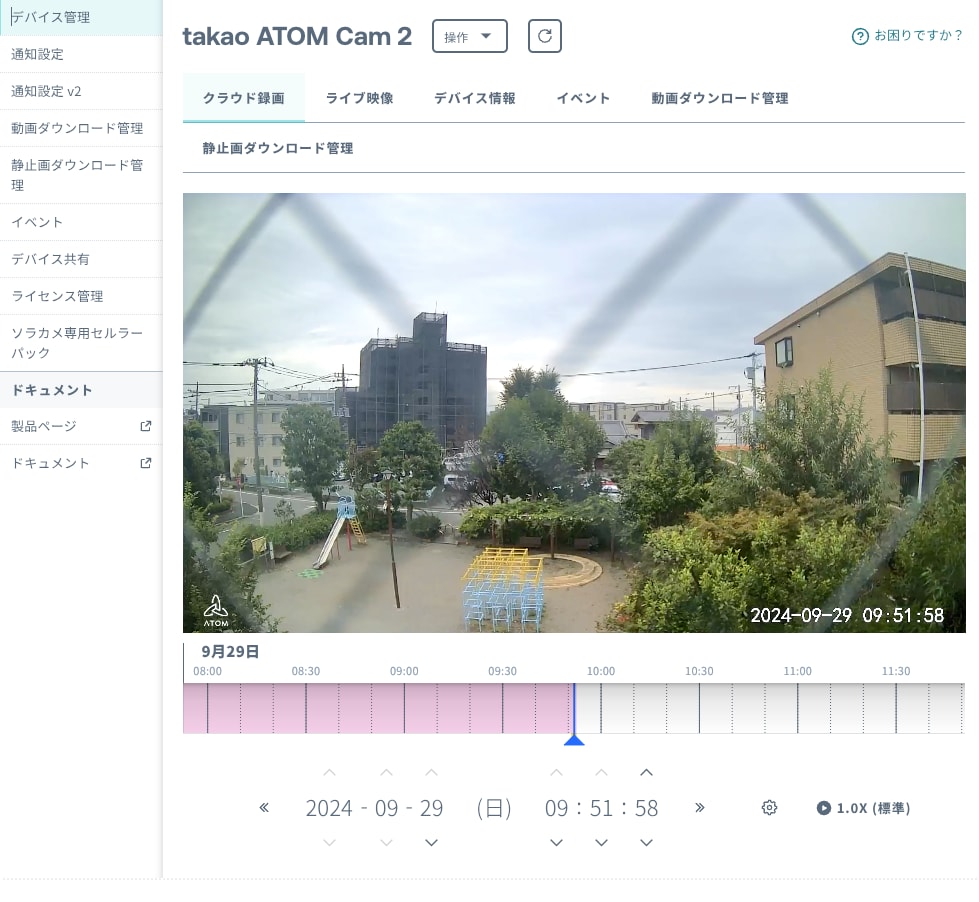
さらに、カメラの名前をクリックすると、カメラの映像が表示されます。
SORACOM APIキーを発行する
ソラカメの録画データから画像を取得するために、SORACOM APIを利用します。
APIを利用するためには、APIキーを発行する必要がありますので、以下の手順でAPIキーを発行しましょう。
-
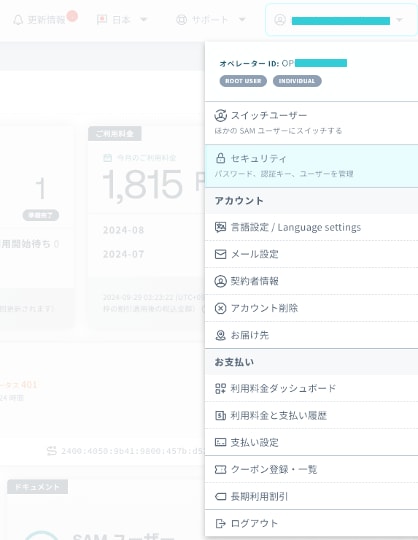
右上のログインしているユーザー名(ルートユーザーであればメールアドレス、SAMユーザーであればSAMユーザー名)をクリックして出てくるメニューから、「セキュリティ」をクリック
-
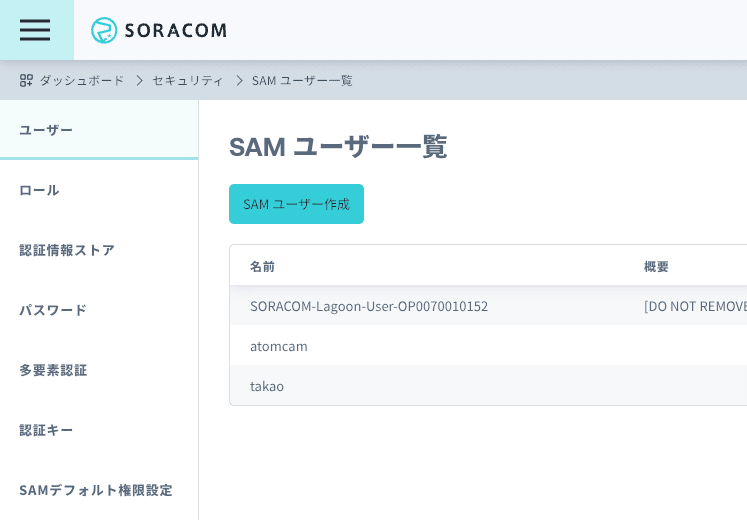
「ユーザー」タブで「SAMユーザー作成」をクリック
-
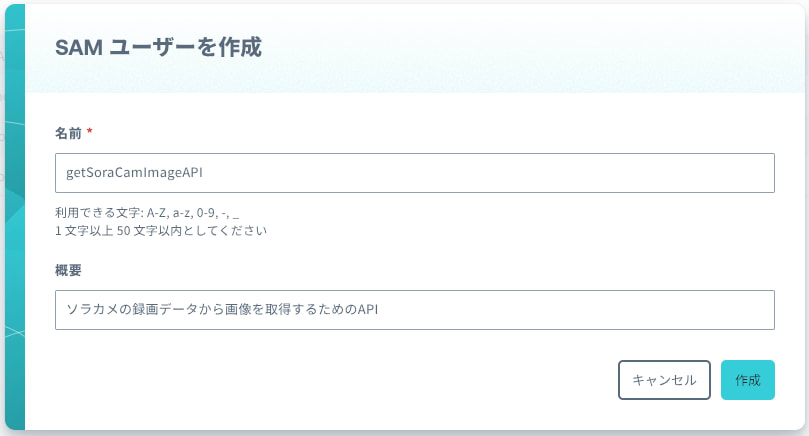
後で見たときに何をするためのSAMユーザーかわかるように名前をつけます。必要に応じて概要にも記載して「作成」をクリックします。
-
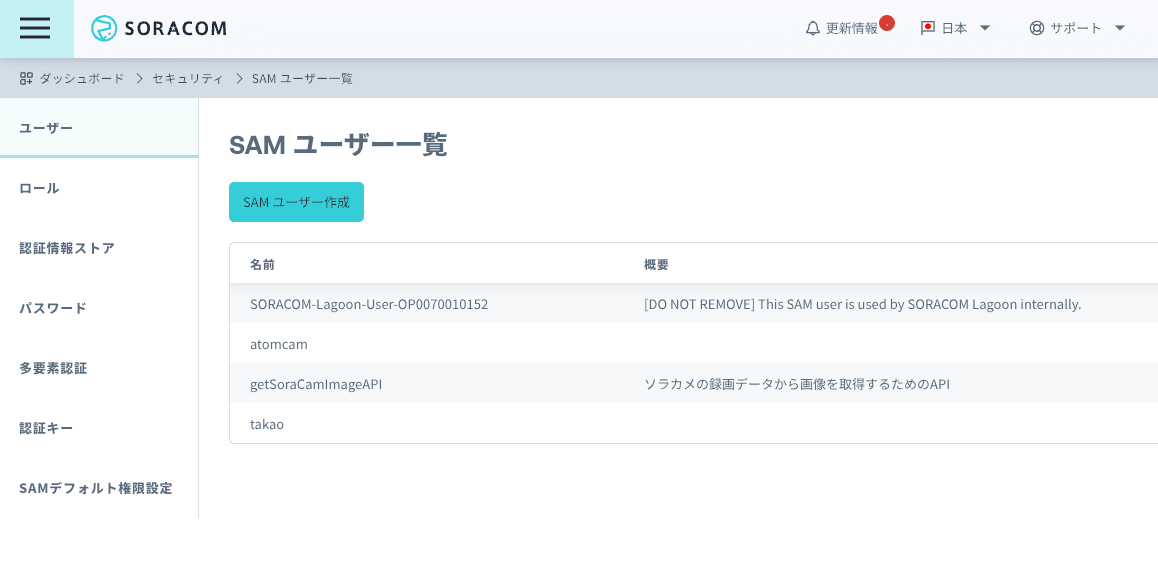
作ったSAMユーザーが一覧に表示されていることを確認して、名前をクリックします。
-
権限を設定します。
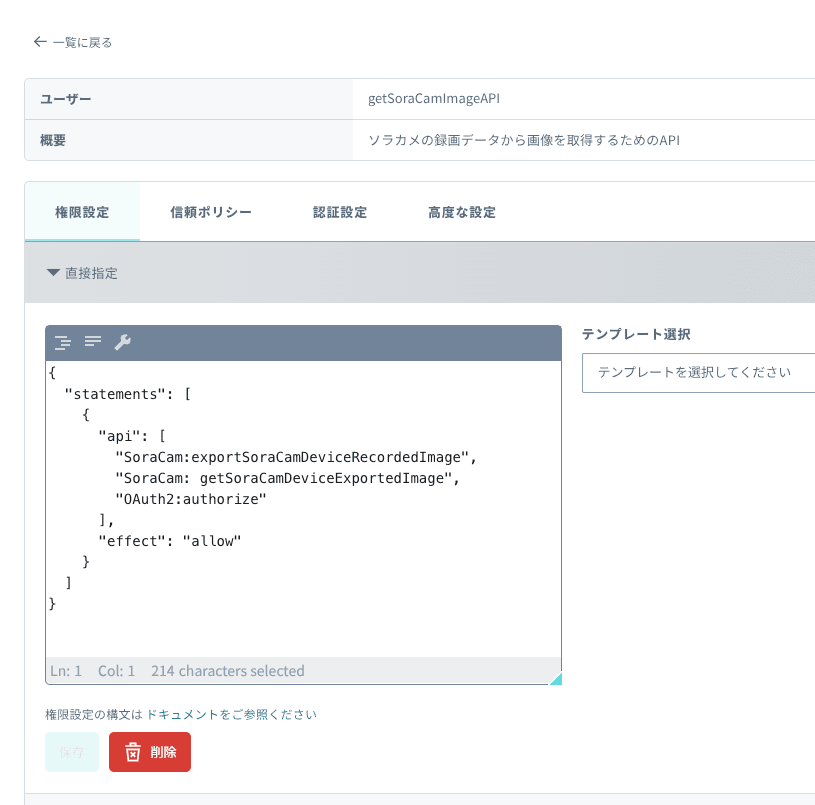
直接指定で以下をコピペしてください。{ "statements": [ { "api": [ "SoraCam:exportSoraCamDeviceRecordedImage", "SoraCam:getSoraCamDeviceExportedImage", "OAuth2:authorize" ], "effect": "allow" } ] } -
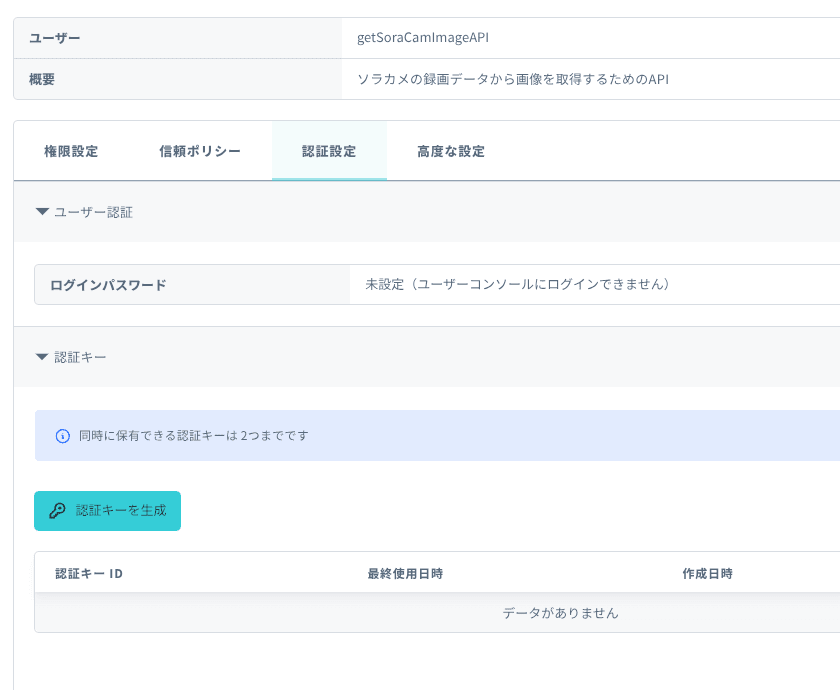
「認証設定」のタブに移り、「認証キーを生成」作成します。
-
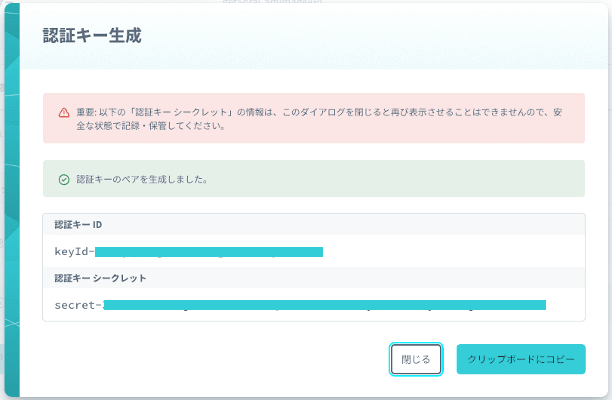
生成された認証キーをメモ帳などにコピーして保存しておきます。
画面を閉じてしまうと再度表示されないので注意してください。
S3のバケットを作成する

ソラカメの録画データから取得した画像を保存するためのS3バケットを作成します。
-
AWSマネジメントコンソールにログインし、S3を開きます。

-
「バケットを作成」をクリックします。

-
バケットタイプ:汎用、バケット名:任意の名前(例:soracam-image-bucket等。世界に一つだけの特別なオンリーワンの名前)を設定

-
オブジェクト所有者:ACL無効、「パブリックアクセスをすべてブロック」のチェックボックスを外し、warningのチェックボックスをいれます。

-
その他の項目はデフォルトのままにして「バケットを作成」をクリックします。

-
作成したバケットをクリックし、バケットのプロパティを確認します。


-
画像を保存しておくための「live-camera」フォルダを作成します。


「フォルダの作成」をクリックします。

-
バケットのプロパティの「アクセス許可」タブをクリックし、バケットポリシーの編集ボタンをクリックします。

-
パケットポリシーをポリシーの編集欄に以下のように設定します。

以下のJSONをコピペして、バケット名の部分を設定したものに書き換えましょう。{ "Version": "2012-10-17", "Statement": [ { "Effect": "Allow", "Principal": "*", "Action": "s3:GetObject", "Resource": "arn:aws:s3:::世界に一つだけのバケット名/live-camera/*" } ] }保存して閉じます。
Lambda関数を作成する
SORACOM APIの認証を行い、ソラカメの録画データから画像を取得し、S3に保存するLambda関数を作成します。

ソラカメの録画データから画像を取得するためのLambda関数を作成します。
-
AWSマネジメントコンソールにログインし、Lambdaを開きます。
-
「関数の作成」をクリックします。

-
「一から作成」を選択、「関数名」を入力し、「ランタイム」は「Python 3.12」アーキテクチャは「arm」を選択し、「関数の作成」をクリックします。

-
関数のページに遷移したら、

-
「コードソース」に以下のコードをコピペします。
import json import os import time import datetime import urllib.request import urllib.parse import boto3 # 環境変数の取得 AUTH_KEY_ID = os.environ['authKeyId'] AUTH_KEY = os.environ['authKey'] DEVICE_ID = os.environ['device_id'] S3_BUCKET = 'takao-soracam-images' S3_FOLDER = 'live-camera' def lambda_handler(event, context): try: # 1. 認証してAPIキーとトークンを取得する auth_response = authenticate() api_key = auth_response['apiKey'] api_token = auth_response['token'] # 2. 画像のエクスポートをリクエストする export_id = request_image_export(api_key, api_token) # 3. エクスポートの進捗を確認する image_url = check_export_status(api_key, api_token, export_id) # 4. S3に画像を保存する save_image_to_s3(image_url) return { 'statusCode': 200, 'body': json.dumps('Image successfully saved to S3') } except Exception as e: return { 'statusCode': 500, 'body': json.dumps(f'Error: {str(e)}') } # 認証を行い、APIキーとトークンを取得 def authenticate(): url = 'https://api.soracom.io/v1/auth' headers = { 'Content-Type': 'application/json' } data = json.dumps({ 'authKeyId': AUTH_KEY_ID, 'authKey': AUTH_KEY }).encode('utf-8') req = urllib.request.Request(url, headers=headers, data=data, method='POST') with urllib.request.urlopen(req) as response: if response.status != 200: raise Exception(f'Authentication failed: {response.status}') return json.loads(response.read().decode('utf-8')) # 画像エクスポートをリクエストする def request_image_export(api_key, api_token): url = f'https://api.soracom.io/v1/sora_cam/devices/{DEVICE_ID}/images/exports' headers = { 'Content-Type': 'application/json', 'X-Soracom-API-Key': api_key, 'X-Soracom-Token': api_token } current_time = int(time.time() * 1000) # 現在のUNIXタイムスタンプ(ミリ秒) data = json.dumps({'time': current_time}).encode('utf-8') req = urllib.request.Request(url, headers=headers, data=data, method='POST') with urllib.request.urlopen(req) as response: if response.status != 200: raise Exception(f'Image export request failed: {response.status}') export_response = json.loads(response.read().decode('utf-8')) return export_response['exportId'] # エクスポートの進捗を確認する def check_export_status(api_key, api_token, export_id): url = f'https://api.soracom.io/v1/sora_cam/devices/{DEVICE_ID}/images/exports/{export_id}' headers = { 'Content-Type': 'application/json', 'X-Soracom-API-Key': api_key, 'X-Soracom-Token': api_token } retry_intervals = [1, 2, 4] # リトライの間隔 for interval in retry_intervals: req = urllib.request.Request(url, headers=headers, method='GET') with urllib.request.urlopen(req) as response: if response.status != 200: raise Exception(f'Check export status failed: {response.status}') status_response = json.loads(response.read().decode('utf-8')) # エクスポートが完了した場合はURLを返す if status_response['status'] == 'completed': return status_response['url'] # エクスポートが完了していない場合はリトライ time.sleep(interval) raise Exception('Image export not completed within allowed retries') # 画像をS3に保存する def save_image_to_s3(image_url): # 画像データを取得 req = urllib.request.Request(image_url, method='GET') with urllib.request.urlopen(req) as response: if response.status != 200: raise Exception(f'Failed to download image: {response.status}') image_data = response.read() # S3オブジェクト名を作成 (JST時刻) jst = datetime.timezone(datetime.timedelta(hours=9)) current_time = datetime.datetime.now(jst) object_name = current_time.strftime('%Y%m%d_%H%M.jpg') # S3に画像をアップロード s3_client = boto3.client('s3') s3_client.put_object( Bucket=S3_BUCKET, Key=f'{S3_FOLDER}/{object_name}', Body=image_data, ContentType='image/jpeg' ) -
環境変数を設定します。
設定タブをクリックし、「環境変数」をクリックした後、「編集」をクリックして以下の環境変数を設定します。

- authKeyId: 先ほど発行したSORACOM APIキーのID
- authKey: 先ほど発行したSORACOM APIキー
- device_id: ソラカメのデバイスID

-
入力したら、「保存」をクリックします。
-
「一般設定」タブをクリックし、「編集」をクリックして、タイムアウトを20秒に設定します。

-
「アクセス権限」タブをクリックし、「ロール名」をクリックして、ロールの編集画面に遷移します。

-
「許可を追加」をクリックし、「インラインポリシーを作成」をクリックします。

-
「JSON」をクリックし、以下のポリシーをコピペして「ポリシーの作成」をクリックします。
{
    "Version": "2012-10-17",
    "Statement": [
        {
            "Effect": "Allow",
            "Action": "s3:PutObject",
            "Resource": "arn:aws:s3:::世界に一つだけのバケット名/live-camera/*"
        }
    ]
}
-
「ポリシーの作成」をクリックします。

-
「Deploy」をクリックして、Lambda関数をデプロイします。
-
「Test」をクリックして、適切なイベント名を入力してテストイベントを保存します。
(イベントJSONは編集不要です。)

-
「呼び出す」をクリックして、Lambda関数が正常に動作するか確認します。
以下のような表示が出てれば成功です。

画像をS3に保存するLambda関数を定期実行するEventBridgeルールを作成する
定期的にSORACOM APIを呼び出して画像を取得し、S3に保存するためのEventBridgeルールを作成します。
ついにすべての準備が整います。

-
関数のページから、「トリガーを追加」をクリックします。

-
「トリガーの追加」画面で、「イベントソースの選択」をクリックし、「Event Bridge(CloudWatch Events)」を選択します。

-
「新規ルールの作成」を選択し、「ルール名」を入力し、「スケジュール式」を入力し追加します。
例:rate(1 minute)(1分ごとに実行)


wordpressに画像を表示する
-
wordpressの管理画面にログインし、「プラグイン(Plugins)」をクリックし、「新規プラグインを追加(Add New Plugin)」をクリックします。

-
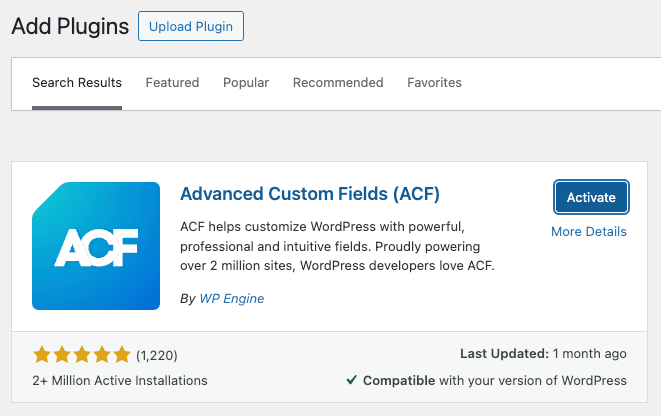
「プラグインの追加」画面で以下の3つのプラグインを検索してインストールします。
-
Custom Post Type UI

-
Advanced Custom Fields
-
Insert Headers and Footers

-
-
WordPressテーマのfunctions.phpを編集します。「外観/Appearnce」から「テーマファイルエディタ」を選択します。
-
右側の「テーマファイル/Theme Files」からfunctions.phpを選択します。

-
末尾に以下のコードを追加します。
function live_camera_slider_shortcode() { ob_start(); ?> <style> #image-slider { display: flex; flex-direction: column; /* 縦方向に配置 */ align-items: center; /* 中央に配置 */ justify-content: center; /* 縦方向の中央に配置 */ width: 100%; /* コンテナの幅を100%に */ max-width: 800px; /* 最大幅を設定して中央に */ margin: 0 auto; /* 水平方向の中央揃え */ padding: 20px; /* 内側の余白を調整 */ } #snapshot-image { width: 100%; /* 画像の横幅をコンテナの幅に合わせる */ max-width: 800px; /* 画像の最大幅を設定 */ border: 2px solid #ccc; /* 画像の境界線を設定 */ margin-bottom: 15px; /* 画像下部の余白を設定 */ } #time-range { width: 80%; /* スライダーの幅 */ margin-bottom: 15px; /* スライダー下部の余白を設定 */ } #timestamp-display { font-size: 1.2em; /* 日時表示のフォントサイズ */ color: #333; /* 日時表示の文字色 */ margin-top: 5px; /* 日時表示の上部マージン */ } </style> <div id="image-slider"> <img id="snapshot-image" src="" alt="Live Camera Snapshot" /> <input type="range" id="time-range" min="0" value="0" step="1" /> <p id="timestamp-display"></p> </div> <script> document.addEventListener("DOMContentLoaded", function() { const timeRange = document.getElementById('time-range'); const snapshotImage = document.getElementById('snapshot-image'); const timestampDisplay = document.getElementById('timestamp-display'); const bucketName = "世界に一つだけのバケット名"; const baseUrl = `https://${bucketName}.s3-ap-northeast-1.amazonaws.com/live-camera/`; // 現在の時刻を取得(システム時刻としてJSTを想定) const now = new Date(); // JSTの24時間前を計算 const jstStartTime = new Date(now.getTime() - 24 * 60 * 60 * 1000); // 24時間前 // JSTの現在時刻を計算 const jstEndTime = now; // 現在時刻そのまま // JSTの24時間前から現在時刻までの差を分で計算 const elapsedMinutes = Math.floor((jstEndTime - jstStartTime) / 60000); // シークバーの最大値を現在時刻までに設定 timeRange.max = elapsedMinutes; timeRange.value = elapsedMinutes; // シークバーを現在時刻に設定 function updateImage() { const minutes = parseInt(timeRange.value, 10); // JSTの24時間前からシークバーの値分の時間を加算 const selectedDate = new Date(jstStartTime.getTime() + minutes * 60000); // JSTの日付と時間をフォーマット(YYYYMMDD_HHMM) const formattedTimestamp = selectedDate.getFullYear() + ("0" + (selectedDate.getMonth() + 1)).slice(-2) + ("0" + selectedDate.getDate()).slice(-2) + "_" + ("0" + selectedDate.getHours()).slice(-2) + ("0" + selectedDate.getMinutes()).slice(-2); // 画像のURLを生成 const imageUrl = `${baseUrl}${formattedTimestamp}.jpg`; // 画像のURLと日時を表示に更新 snapshotImage.src = imageUrl; timestampDisplay.textContent = selectedDate.getFullYear() + '-' + ("0" + (selectedDate.getMonth() + 1)).slice(-2) + '-' + ("0" + selectedDate.getDate()).slice(-2) + ' ' + ("0" + selectedDate.getHours()).slice(-2) + ':' + ("0" + selectedDate.getMinutes()).slice(-2); } timeRange.addEventListener('input', updateImage); updateImage(); // 初期ロード時に画像を表示 }); </script> <?php return ob_get_clean(); } add_shortcode('live_camera_slider', 'live_camera_slider_shortcode'); -
「ファイルを更新/Update File」をクリックします。

-
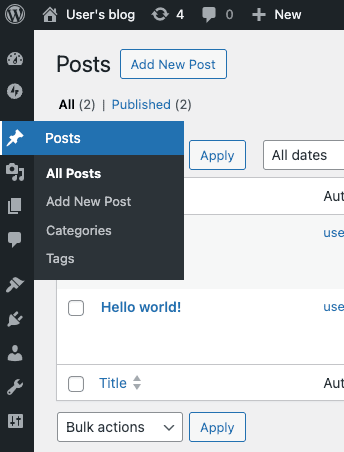
「投稿/Posts」をクリックし、「新規投稿を追加/Add New Post」をクリックします。
-
投稿のタイトルを入力し、本文に以下の
[live_camera_slider]というショートコードを入力します。

-
「公開/Publish」をクリックして、投稿を公開します。

-
投稿を表示するページにアクセスして、画像が表示されることを確認します。

Discussion