React Native / Expo
expoは簡単だが限られた範囲での開発となる。react-native-cliは制限は無くどんなニーズにも対応
-
React Native + Expoで1年以上運用したCTOが集まってみた 前編 - KitchHike Tech Blog
- Expo SDK
- Native レイヤーを触れない代わりに楽
- ビルド速い
- QR コードでアプリを配布できる
- Native レイヤーを触れない代わりに楽
- ExpoKit
- Native レイヤーを触れる
- ビルドには Xcode,AndroidStudio 必要?
- Expo SDK で不要なものを削れる
- すでに deprecated. 今は base workflow
- ExpoKit に移行した理由
- サードパーティのアナリティクス系SDKを Expo がサポートしていなかった
- Expo に元から入っているのは Amplitude
- そこからデータをエクスポートして BigQuery に入れる、とか
- Push通知の機能を作り込みたくなった
- Intercom も使えないことはないが、相性が良くない
- アプリ内課金系も使えない
- サードパーティのアナリティクス系SDKを Expo がサポートしていなかった
- 今は expo eject することで bare workflow に移行できる
- Expo SDK
-
React Native + Expoで1年以上運用したCTOが集まってみた 後編 - KitchHike Tech Blog
-
クラウドでビルド、実行、ストア申請まで出来る(ストア申請は有料)
-
プッシュ通知も対応
-
React Native をバンドルしているので、React Native のアップデート地獄(3ヶ月に1回、破壊的更新があるらしい)に付き合わなくていい
-
開発に Xcode/Android Studio 不要
-
開発ビルドを QR コードで配布できる
-
OTA できる(審査を通さず勝手にアップデート)
-
ネイティブは触れないが、
- いつでも Eject して、ネイティブ機能を利用できる状態に移行可能(bare workflow)
- SDK に一般的な機能はサポート済み
-
おそらく、広告系 SDK 入れろという圧力が高まったら、bare workflow に移行する必要がある
-
調べてる限りは、ネイティブでつらいところをかなり軽減してくれそう。特に、プッシュ通知のテストできるのはありがたい…
-
最近、有料プランで EAS というのを始めたみたいなので、こちらも調べてみる https://blog.expo.io/expo-application-services-eas-build-and-submit-fc1d1476aa2e
-
$29/monthって破格 -
EAS buid ネイティブコードもクラウドでビルドできる(!)。Adhoc provisioning でチーム内配布が楽にできる。必要なコードのみ含めることでアプリのサイズを小さく
-
EAS Submit クラウドからストア申請w 開発者がやることは CLI コマンド一発だけ
-
開発ロードマップ カンバンで管理 https://expo.canny.io/
Expo
- とりあえず Introduction to Expo - Expo Documentation の Quick start を進める
Conceptual Overview
-
Workflows
- Expo でのアプリ開発にはふたつのアプローチがある
- Workflow comparison
-
managed workflow
- JavaScript/TypeScript のみで開発できる
- クラウドでのビルド、OTA。Xcode/Android Studio 不要
- ネイティブの機能には Expo SDK 経由でアクセス
- もちろん、ネイティブ開発と比較して色々と制限がある
- Limitations - Expo Documentation
- プッシュ通知は Expo 提供のもののみ
- iOS 10+ / Android 5+
- 13歳以下のみターゲットのアプリは開発できない
- 制限がアプリ開発の障壁になってきたら、いつでも base workflow に移行できる
-
bare workflow
- ネイティブ開発と同等の自由度
- Expo SDK のほとんどの機能は使える
- ビルドと JSON による設定は未サポート
- ビルドのサポートは対応予定。多分、EAS build のこと
- Expo (managed) で開発はじめて、ネイティブ必要になったら Expo (bare) に移行しつつ EAS 正式版を待つ感じかな
Mac. MacBook Air (M1) で試す
expo-cli
$ npm install --global expo-cli
Watchman (ファイルの変更を通知するやつ)
$ brew update
$ brew install watchman
Expo プロジェクトを yarn run すると HTTP Server が起動。アプリをブラウザで起動または QR コードで iOS/Android で起動できる。デバイスで起動するときは
- 事前に Expo Client アプリをインストール
- QR コードから Expo Client を開くと LAN から HTTP サーバを探してアプリ起動
アカウント登録すれば、開発中のアプリを遠隔の人でも試せるようになるのかな?
-
ファイルを編集すると、即座にブラウザにもデバイスにも反映される
-
Snack という Web ベースのエディタもあり、そこからデバイスで実行できるのもすごい https://snack.expo.io/
-
QR コードからデバイスで実行していると
console.logの出力が出ない。ログインしていないと駄目? -
(Swift しか知らないけど)ネイティブは今のところクロージャによるコールバックなので、TypeScript/JS で async/await が使えるのは最高
-
Expo での Auth0 利用例 https://github.com/expo/examples/tree/master/with-auth0
-
Sentry もサポート済み https://docs.expo.io/guides/using-sentry/
-
Firebase も web SDK なら managed workflow で使える。ただし、web SDK は Firebase Analytics と電話番号による認証をサポートしていない。その場合は bare workflow で native SDK を使う https://docs.expo.io/guides/setup-native-firebase/
-
もちろん、テストは Jest で書けるし、多分、React Testing Library も使える。CI/CD もサポートされてる(普通に expo を yarn install して、みたいなフロー)
-
React Native製アプリのクオリティを上げるために工夫した事 | by TAKUYA | 週休7日で働きたい
- NativeBase が良さそう
-
React Nativeの実は使ってはダメなライブラリ素晴らしいライブラリ(随時更新) - Qiita
- unstaged-next はどうだろう...。やはり、Redux を使っておきたい気持ち
- 規模や使い捨てかどうかにもよる
-
Introduction - UI toolkit - Shoutem Developers
- 最近、プラットフォーム化したみたい
- Wordpress for Mobile app サクッと見た目の整ったアプリを作るには良さそう(ちゃんと動けば...)
- React Native のこれまでとこれから 2019年11月編 - KitchHike Tech Blog
Image を画面一杯に表示
Image コンポーネントを使い flex プロパティを指定
  backgroundImage: {
    flex: 1,
    resizeMode: "center",
  },
または ImageBackground コンポーネントで width, height 指定
  backgroundImage: {
    width: "100%",
    height: "100%",
    resizeMode: "center",
  },
TailwindCSS を React Native で使いたい
NativeBase をオススメしているところが多いが、公式サイトを見た感じ、あまり良い印象を持たなかった。
- クオリティが高くない気がする…。
- サイト自体も…
- スクリーンショットの解像度の問題もある
- Expo の Snack が動いていない。SDK のバージョンに追従していない
TailwindCSS を使いたい。可能にするためのリポジトリがふたつある
-
TVke/react-native-tailwindcss: A react-native style system based on TailwindCSS
- Why? | react-native-tailwindcss は動機として理解できた
- vadimdemedes/tailwind-rn: 🦎 Use Tailwind CSS in React Native projects
後者 (tailwind-rn) の方がスターも多く、メンテナンスも割とされてる感じ。クラス名が空白区切りの文字列で指定されるので型チェックが効かないのが不満だが、以下のようなアイデアがある。これは良さげ。
react-native-tailwindcss では以下のようなパフォーマンス低下の指摘があるが、もしかすると、これは tailwind-rn でも同様かも?
-
Tailwindcss performance issue. · Issue #58 · TVke/react-native-tailwindcss
-
tailwind-rnではtailwind(...)関数は単純なオブジェクトを返すので大丈夫
-
TailwindCSS 2.0 への対応はまだ
React Native で Integration Test を書く
- フロントエンドでTDDを実践する(理論編) - Qiita
-
Testing JavaScript をやってみたら学びがあって良かった話 - Adwaysエンジニアブログ
-
Kent C. Dodds
- PayPal のエンジニア
-
Kent C. Dodds
別の React プロジェクトで React Testing Library を使っているので、React Native でもこれを使いたい。
Expo で React Testing Library
Testing with Jest - Expo Documentation を参考にしつつ進める。
$ npm i jest jest-expo ts-jest ts-node @types/jest react-test-renderer @types/react-test-renderer --save-dev
package.json
"scripts": {
  ...
  "test": "jest"
},
"jest": {
  "preset": "jest-expo"
}
Jest の設定は複雑なので、package.json(記述力の低い JSON)で書くよりは TypeScript で書きたい。jest.config.ts を作る。ts-node がインストールされていれば使えるはず? Jest 26.6.0 から。
TypeScript による設定がサポートされているのは Jest 26.6.0 から。ts-node が必要。jest-expo が依存している Jest のバージョンは古い (25.x) ので、上の通り別途 jest もインストールすること。
import { Config } from "@jest/types";

// By default, all files inside `node_modules` are not transformed. But some 3rd party
// modules are published as untranspiled, Jest will not understand the code in these modules.
// To overcome this, exclude these modules in the ignore pattern.
const untranspiledModulePatterns = [
  "(jest-)?react-native",
  "react-clone-referenced-element",
  "@react-native-community",
  "expo(nent)?",
  "@expo(nent)?/.*",
  "react-navigation",
  "@react-navigation/.*",
  "@unimodules/.*",
  "unimodules",
  "sentry-expo",
  "native-base",
  "@sentry/.*",
];

const config: Config.InitialOptions = {
  verbose: true,
  preset: "jest-expo",
  transformIgnorePatterns: [
    `node_modules/(?!${untranspiledModulePatterns.join("|")})`,
  ],
};

export default config;
- Jest はデフォルトで
node_modules/以下をトランスパイル対象から外す- しかし、React Native のライブラリはトランスパイルされずに配布されているものがあるので、それらを
transformIgnorePatternsで対象にするように
- しかし、React Native のライブラリはトランスパイルされずに配布されているものがあるので、それらを
- 正規表現 - JavaScript | MDN
-
x(?!y)否定先読み。xにyが続かない場合にマッチする - こういう長い正規表現は Perl のようにコメントをつけて書きたいが、残念ながら
/x修飾子は使えない
import React from "react";
import renderer from "react-test-renderer";
import App from "./App";

describe("<App />", () => {
  it("has 1 child", () => {
    const tree = renderer.create(<App />).toTree();
    expect(tree.children.length).toBe(1);
  });
});
jest-expo が依存している Jest のバージョンが古いため、node_modules/.bin が古い方で上書きされている。これだと npx が古い方を実行してしまうため、苦肉の策として path 指定で実行する(これは Jest-Expo に PR を送った方が良さそう)
./node_modules/jest/bin/jest.js --config jest.config.ts
しかし、これを実行してみると、以下のようなエラーで失敗する :thinking:
 FAIL  ./App.test.tsx
  <App />
    ✕ has 1 child (46 ms)

  ● <App /> › has 1 child

    Element type is invalid: expected a string (for built-in components) or a class/function (for composite components) but got: object.

      at createFiberFromTypeAndProps (node_modules/react-test-renderer/cjs/react-test-renderer.development.js:16180:21)
      at createFiberFromElement (node_modules/react-test-renderer/cjs/react-test-renderer.development.js:16208:15)
      at reconcileSingleElement (node_modules/react-test-renderer/cjs/react-test-renderer.development.js:5358:23)
      at reconcileChildFibers (node_modules/react-test-renderer/cjs/react-test-renderer.development.js:5418:35)
      at reconcileChildren (node_modules/react-test-renderer/cjs/react-test-renderer.development.js:7991:28)
      at updateHostRoot (node_modules/react-test-renderer/cjs/react-test-renderer.development.js:8547:5)
      at beginWork (node_modules/react-test-renderer/cjs/react-test-renderer.development.js:9994:14)
      at performUnitOfWork (node_modules/react-test-renderer/cjs/react-test-renderer.development.js:13800:12)
      at workLoopSync (node_modules/react-test-renderer/cjs/react-test-renderer.development.js:13728:5)
      at renderRootSync (node_modules/react-test-renderer/cjs/react-test-renderer.development.js:13691:7)

  console.error
    Warning: React.createElement: type is invalid -- expected a string (for built-in components) or a class/function (for composite components) but got: object.

       5 | describe("<App />", () => {
       6 |   it("has 1 child", () => {
    >  7 |     const tree = renderer.create(<App />).toTree();
         |                                  ^
       8 |     expect(tree.children.length).toBe(1);
       9 |   });
      10 | });

      at printWarning (node_modules/react/cjs/react.development.js:315:30)
      at error (node_modules/react/cjs/react.development.js:287:5)
      at Object.createElementWithValidation [as createElement] (node_modules/react/cjs/react.development.js:1788:7)
      at Object.<anonymous> (App.test.tsx:7:34)

Test Suites: 1 failed, 1 total
Tests:       1 failed, 1 total
Snapshots:   0 total
Time:        0.559 s, estimated 2 s
R
Stackoverflow でも同様の質問があるが、解決はしていないようだ。
実行時に App を console.log で見てみると、確かに、以下のようなオブジェクトになっていた。
{
  expo: {
    name: 'my-app',
    slug: 'my-app',
    version: '1.0.0',
    orientation: 'portrait',
    icon: './assets/icon.png',
    splash: {
      image: './assets/splash.png',
      resizeMode: 'contain',
      backgroundColor: '#000000'
    },
    updates: { fallbackToCacheTimeout: 0 },
    assetBundlePatterns: [ '**/*' ],
    ios: { supportsTablet: true },
    android: { adaptiveIcon: [Object] },
    web: { favicon: './assets/favicon.png' }
  }
}
解決: Jest がモジュールを import するときに .json が優先されるようになっていた。同じディレクトリに app.json があるので、そちらが先に読み込まれていた。Jest の moduleFileExtensions で指定することで解決した。
moduleFileExtensions: ["ts", "tsx", "js", "jsx"],
ここまでで、とりあえずは Jest が動いたので、次は React Testing Library を使うようにする。
npm i --save-dev @testing-library/react-native @testing-library/jest-native
preset: "react-native" はきっと jest-expo がいい感じにしてくれていると信じて、setupFilesAfterEnv だけ指定する。
{
  "setupFilesAfterEnv": ["@testing-library/jest-native/extend-expect"]
}
React Native Testing Library の Public API には
- screen はない
- waitFor とかがあるから、少し古い?
- ByRole とかでもオプションが指定できなかったり、本家とは微妙に違う
Tailwind CSS のクラス名が覚えられない
便利
- Tailwind CSS Cheat Sheet
- TypeScript でいい感じに補完が効けば、と思ってたけどチートシートで十分かもしれない。
Expo with Auth0
examples/with-auth0 at master · expo/examples を動かしてみる。
- Expo による Auth0 のサンプル
- Web application flow を使うようだ。まあ、In-App は廃止だろうし...
- ただ、callback URL が
auth.expo.ioなのが気になる- Expo のドメインで漏洩の危険はないのか?
- というか、こんな汎用的なドメイン使うんだ
-
AuthSession
- Web application flow を扱うパッケージ
- デフォルトで OAuth 2.0 の PKCE を使う
- なので、secret は不要
- Web ブラウザを開く(Cookie はシステムと共有)
- Auth0 からリダイレクトで戻ってきたときのハンドリング
- ログイン失敗した時のハンドリング
-
Universal Link について
-
myapp://のような deep link だとメールなどで送るとリンクされない
-
-
auth.expo.ioはリダイレクト先の管理を楽にしてくれる- Expo アプリはさまざまな URL でホストされる
- セキュリティ
- https://docs.expo.io/versions/latest/sdk/auth-session/#security-considerations
- access_token を直接返すようには設定しない
- 間にプロキシ入るから?
- 代わりに one time token を受け取る
- それを自分の Server に送り、Server 側で秘密鍵を使って、IdP に access token をリクエストする
- Web application flow を扱うパッケージ
Install
$ expo install expo-auth-session expo-random
あとは examples/with-auth0 at master · expo/examples を参考に実装していく。
const useProxy = Platform.select({ web: false, default: true });
const redirectUri = AuthSession.makeRedirectUri({ useProxy });
web だと http://localhost:19006/ になるので、Auth0 側で追加しておく必要がある...が、それだけでは動かない(要調査)
Discovery document は OIDC Discovery で取得できる。
AuthSession.fetchDiscoveryAsync("https://myapp.us.auth0.com");
コールバックで code だけを受け取って、PKCE でトークンを受け取るには以下のような感じ
const exchangeCode = async function exchangeCode(
  code: string,
  codeVerifier: string,
  discoveryDocument: AuthSession.DiscoveryDocument
) {
  const token = await AuthSession.exchangeCodeAsync(
    {
      code: code,
      clientId: auth0ClientId,
      redirectUri,
      extraParams: {
        code_verifier: codeVerifier,
      },
    },
    discoveryDocument
  );

  //...
};
Expo で暗号論的擬似乱数 (CSPRNG)
expo-random で乱数生成できる。
expo-auth-session の PKCE モジュールでの実装を見てみる。
export async function generateRandomAsync(size: number): Promise<string> {
  const buffer = new Uint8Array(size);
  // TODO(Bacon): Change this to be sync in the future when Expo unimodules support sync methods
  await getRandomValuesAsync(buffer);
  return convertBufferToString(buffer);
}
getRandomValuesAsync は同期 API もあるので、そちらを使うので良さそう。
convertBufferToString() の実装
const CHARSET = 'ABCDEFGHIJKLMNOPQRSTUVWXYZabcdefghijklmnopqrstuvwxyz0123456789';

function convertBufferToString(buffer: Uint8Array): string {
  const state: string[] = [];
  for (let i = 0; i < buffer.byteLength; i += 1) {
    const index = buffer[i] % CHARSET.length;
    state.push(CHARSET[index]);
  }
  return state.join('');
}
0-255 の整数値を 62 文字の ASCII 文字に剰余で変換しているので、そのぶんエントロピー値は低下する。同じ文字セットを使いながらエントロピーを下げない符号化には Base62 を使うことができる。JS の実装も探せばあるだろう。ビットコインで使われている Base58 の方がメジャーかもしれない。
もちろん、他の Base 符号化でもいい。Base58 も Base62 も RFC にあるわけではないので、素直に Base64 を使うべきかもしれない。
さて、どうやって変換するか。Node.js の Buffer には base64 に変換するオプション があるが、Expo では使えない。素直に npm パッケージを使いたいが、なかなかいいのがない...。
- 依存ライブラリがないこと
- テストされていること
- UInt8Array を入力にできること
number や string を受け取るものはいっぱいある。32bit 整数なら UInt8Array から安全に変換できる。また、Node.js に依存しているものも多く、そのままでは Expo で使えない。[1]
base58 のように number を変換するものであれば、DataView を使って変換はできるが、JavaScript の数値(64bit 浮動小数点)を超えるデータを扱えないし、ランダムな値の大小で文字列の長さが変わってしまう。
const bytes = Random.getRandomBytes(8);
const view = new DataView(bytes.buffer);
const u1 = view.getUint32(0);
const u2 = view.getUint32(4);
return base58.int_to_base58(u1) + base58.int_to_base58(u2);
最終的には Jest-Expo でも Random と Crypto が動いてほしい で書いたような実装になった。
nonce
3.1.2.1. Authentication Request
nonce
OPTIONAL. String value used to associate a Client session with an ID Token, and to mitigate replay attacks. The value is passed through unmodified from the Authentication Request to the ID Token. Sufficient entropy MUST be present in the
noncevalues used to prevent attackers from guessing values. For implementation notes, see Section 15.5.2.
15.5.2. Nonce Implementation Notes
The
nonceparameter value needs to include per-session state and be unguessable to attackers. One method to achieve this for Web Server Clients is to store a cryptographically random value as an HttpOnly session cookie and use a cryptographic hash of the value as thenonceparameter. In that case, thenoncein the returned ID Token is compared to the hash of the session cookie to detect ID Token replay by third parties. A related method applicable to JavaScript Clients is to store the cryptographically random value in HTML5 local storage and use a cryptographic hash of this value.
暗号論的擬似乱数を生成し、暗号論的ハッシュ関数で得た文字列を使う
Expo の JS Engine JavaScript Environment - Expo Documentation
eslint-plugin-import - npm を導入しようとしたが、
import { Alert, Image, ImageBackground, Platform, Text, TouchableOpacity, View } from 'react-native';
react-native の import でエラーになって駄目だった。
JWT 検証
Expo のサンプルでも使われている Auth0 の jwtDecode は JWT の検証はしない
Auth0 の SDK では当然検証はしているが、Expo 用の SDK はない(Base workflow にすれば React Native 用の SDK が使える)
AuthSession.useAutoDiscovery() がエラーで終了する
const discoveryDocument = AuthSession.useAutoDiscovery('https://my-app.us.auth0.com/');
エラー
[Unhandled promise rejection: SyntaxError: JSON Parse error: Unexpected identifier "Not"]
* [native code]:null in parse
- node_modules/react-native/node_modules/promise/setimmediate/core.js:37:13 in tryCallOne
- node_modules/react-native/node_modules/promise/setimmediate/core.js:123:24 in setImmediate$argument_0
- node_modules/react-native/Libraries/Core/Timers/JSTimers.js:130:14 in _callTimer
- node_modules/react-native/Libraries/Core/Timers/JSTimers.js:181:14 in _callImmediatesPass
- node_modules/react-native/Libraries/Core/Timers/JSTimers.js:441:30 in callImmediates
- node_modules/react-native/Libraries/BatchedBridge/MessageQueue.js:387:6 in __callImmediates
- node_modules/react-native/Libraries/BatchedBridge/MessageQueue.js:135:6 in __guard$argument_0
- node_modules/react-native/Libraries/BatchedBridge/MessageQueue.js:364:10 in __guard
- node_modules/react-native/Libraries/BatchedBridge/MessageQueue.js:134:4 in flushedQueue
* [native code]:null in flushedQueue
* [native code]:null in invokeCallbackAndReturnFlushedQueue
原因は、well known document のパスがスラッシュが重複して https://my-app.us.auth0.com//.well-known/openid-configuration になってしまい、Not Found だった。
Expo のエントリーポイントを変更する
Jest
言われてみれば当然だが、ネイティブ実装の Expo モジュールは Jest で動かない
Using expo-crypto in test with Jest returns undefined · Issue #6512 · expo/expo
また、jest.mock(...) の中では外部の変数を参照できない。
こちらの記事でで mock の実装について書いた。
- 画像は .png にすること
- JPEG から PNG の変換はそのままやると容量が肥大化することがあるので、何らかのソフトで減色など最適化してから変換した方がいい
Routing & Navigation - Expo Documentation
- react-navigation が推奨されているが、そもそも Expo が提供しているので安心できる
- Opening a full-screen modal | React Navigation Modal は Navigation が別になるので、Navigation をネストする必要がある。
- ネストするとヘッダーが二重になるので、headerShown オプションで隠す
NativeBase
- 2.4.1 からは web もサポート
- 2.0 からコンポーネントを最小限の変更で theme 化できるようにしたいらしい
- 外部に公開するときは Look & Feel をサービスのトンマナに合わせる必要があるので、これは嬉しい
Install
$ expo install native-base expo-font
- Issues とか見ると、ちゃんとメンテされてるのか不安になる。ただ、直近でもリリースはされているので、単に手が回っていないだけだと思われる?
- 最近閉じられた PR を見ていると、v3 のマージしかない...
- レイアウトに GeekyAnts/react-native-easy-grid: Easy React Native Layout & Grid for the Dumb を使うようにドキュメントが書かれているけど、Flexbox や CSS Grid の時代に新しいグリッドシステムを使いたくはない。
- コードを読んだ感じ、View の薄いラッパーという感じ
- メンテもされていないような...
- 他のコンポーネントがこれらに依存しているわけでもなさそう。View + Flexbox を使うのでいいのではないか。
- Icon のみの丸ボタンを作ろうとしても上手くはいかない。
-
Customize · NativeBase
- カスタマイズの方法は提供されている
- ただ、必要な関数などが一部
index.d.tsから漏れている
他に興味があるもの(Expo では使えないかも)
- Headless UI
- Fluent UI
- Magnus UI Chakra UI に影響を受けた UI framework. コンポーネントごとのクオリティの差がある気がする。
React TableにみられるHeadless UIなライブラリ | blog.mahoroi.com Headless UI という考え方面白い。たしかに、UI の振る舞いを React Hook にすれば、React Native でも使いやすそう。
NativeBase 3 について
Firebase Analytics
Expo での Firebase 利用について Using Firebase - Expo Documentation
- Firebase JS SDK は Expo で使える
- ただし、JS SDK は一部の機能しか提供していない
- 要するにネイティブ向けの機能はない。そりゃそうだ
- Analytics だけは expo-firebase-analytics でサポートしてる
- それ以外を使いたければ、Bare workflow へ Go!
使いたい機能
-
Firebase Crashlytics
-
Firebase Crashlytics スタートガイド
- 当然、JS SDK は提供されていない
-
Error Handling - Expo Documentation
- Expo の Managed Workflow で意味があるのは JS のエラーなので、Sentry を使え
-
Firebase Crashlytics スタートガイド
-
Remote Config
- これは Expo の OTA で一部実現できる
- 再公開せずにアプリを更新はできる
- ただし、サーバ側の設定で動的に外観を変更するようなことは出来ないかも
- Google Analytics との連携もできなそう
- Firebase JS SDK で Remote Config がベータ版でサポートされているので使えるかもしれない
- これは Expo の OTA で一部実現できる
- Google Analytics for Firebase
全く期待してなかったけど、Expo でもネットの接続状況や SSID を取得できるのか NetInfo - Expo Documentation
- BSSID もほしい
- 取れるっぽいな https://github.com/react-native-netinfo/react-native-netinfo
React Navigation でヘッダーの戻るボタンをカスタマイズ
モーダルでは「<」アイコンを非表示にしたい。
<RootStack.Screen
  name="Friends"
  component={MemberListScreen}
  options={{
    headerBackTitle: 'Close',
    // For left padding
    headerBackImage: () => <Box w={4}></Box>
  }}
/>
Tab navigation | React Navigation のサンプル通り、カスタマイズをしていくと、
<Tab.Navigator
  ...
  tabBarOptions={{
    activeTintColor: 'tomato',
    inactiveTintColor: 'gray'
  }}>
  <Tab.Screen name="Main" component={MainStackScreen} />
  <Tab.Screen name="Settings" component={SettingsScreen} />
</Tab.Navigator>
color に "tomato" を指定すると、以下のエラーが出る。
JSON value '{
    100 = "#f4f4f5";
    200 = "#e4e4e7";
    300 = "#d4d4d8";
    400 = "#a1a1aa";
    50 = "#fafafa";
    500 = "#71717a";
    600 = "#52525b";
    700 = "#3f3f46";
    800 = "#27272a";
    900 = "#18181b";
}' of type NSMutableDictionary cannot be converted to a UIColor. Expected an iOS semantic color or dynamic appearance aware color.

+[ABI40_0_0RCTConvert UIColor:]
    ABI40_0_0RCTConvert.m:902
-[ABI40_0_0RNSVGSvgViewManager set_tintColor:forView:withDefaultView:]
-[ABI40_0_0RCTComponentData callCustomSetter:onView:withProp:isShadowView:]
__58-[ABI40_0_0RCTComponentData createPropBlock:isShadowView:]_block_invoke_2
__46-[ABI40_0_0RCTComponentData setProps:forView:]_block_invoke
__NSDICTIONARY_IS_CALLING_OUT_TO_A_BLOCK__
-[__NSDictionaryM enumerateKeysAndObjectsWithOptions:usingBlock:]
-[ABI40_0_0RCTComponentData setProps:forView:]
__53-[ABI40_0_0RCTUIManager flushUIBlocksWithCompletion:]_block_invoke
__53-[ABI40_0_0RCTUIManager flushUIBlocksWithCompletion:]_block_invoke.422
_dispatch_call_block_and_release
_dispatch_client_callout
_dispatch_main_queue_callback_4CF
__CFRUNLOOP_IS_SERVICING_THE_MAIN_DISPATCH_QUEUE__
__CFRunLoopRun
CFRunLoopRunSpecific
GSEventRunModal
-[UIApplication _run]
UIApplicationMain
main
start
0x0
いつも忘れるけど、Xcode が更新されたら OS も更新して Command Line Tools を更新しないといけない。これで expo-cli が動かなくてハマった...
React Native の ScrollView
- 全ての子コンポーネントを一度レンダリングするのでパフォーマンスは良くない
- FlatList なら Lazy
Shadow は以下の style で指定する。iOS/Android で別になる
- React Native Shadow Generator
- Shadow Props · React Native
- tailwind-rn だと
shadowはサポートされていない
なので、こんな感じで指定
<View style={[tailwind('overflow-hidden rounded-lg h-80 w-60 mr-3'), styles.cardShadow]}>
TailwindCSS 2.0
.shadow-lg {
	--tw-shadow: 0 10px 15px -3px rgba(0, 0, 0, 0.1), 0 4px 6px -2px rgba(0, 0, 0, 0.05);
  box-shadow: var(--tw-ring-offset-shadow, 0 0 #0000), var(--tw-ring-shadow, 0 0 #0000), var(--tw-shadow);
}
カレンダーの実装 wix/react-native-calendars: React Native Calendar Components 🗓️ 📆
npm i react-native-calendars
npm i --save-dev @types/react-native-calendars
- 選択時に日付を丸く塗り潰すには
markedDates={{'2021-02-02': { selected: true }}を設定する - 選択時にテキストを太くしたいが customStyles は効かなかった
-
themeはリロードしないと反映されない。
Expo アプリで秘匿情報を保存する
iOS で言うところの Keychain. 暗号化して保存。Expo では SecureStore - Expo Documentation を使う。
- options
- keychainService 他アプリと共有のための設定なので一旦無視
-
keychainAccessible iOS で「いつ」Keychain にアクセス可能か。デフォルトはアンロック時のみ
- バックグラウンドで認証情報が必要な場合は、スコープを絞ったトークンを使うのが良さそう
フォームをどうするか?
- gcanti/tcomb-form-native: Forms library for react-native React Native 用だがメンテナンスされていない
-
Blitz.jsの議論から学ぶ,formik vs react-final-form vs react-hook-form - Qiita
- React Hook Form 試してみる
- Home | React Hook Form - Simple React forms validation には React Native の例も載っているし良さそう。
React Navigation: StackNavigator の headerStyle で指定できるプロパティ
    height = defaultHeight,
    minHeight,
    maxHeight,
    backgroundColor,
    borderBottomColor,
    borderBottomEndRadius,
    borderBottomLeftRadius,
    borderBottomRightRadius,
    borderBottomStartRadius,
    borderBottomWidth,
    borderColor,
    borderEndColor,
    borderEndWidth,
    borderLeftColor,
    borderLeftWidth,
    borderRadius,
    borderRightColor,
    borderRightWidth,
    borderStartColor,
    borderStartWidth,
    borderStyle,
    borderTopColor,
    borderTopEndRadius,
    borderTopLeftRadius,
    borderTopRightRadius,
    borderTopStartRadius,
    borderTopWidth,
    borderWidth,
    // @ts-expect-error: web support for shadow
    boxShadow,
    elevation,
    shadowColor,
    shadowOffset,
    shadowOpacity,
    shadowRadius,
    opacity,
    transform,
React Navigation の Stack Navigator で iOS 13 の奥行きのあるモーダル [1] を実現する方法
まずは次のオプションを指定する
{
  cardOverlayEnabled: true,
  cardStyleInterpolator: CardStyleInterpolators.forModalPresentationIOS,
  headerStatusBarHeight: 0
}
ヘッダーが SafeArea を考慮して top inset を持っているので、headerStatusBarHeight で調整してやる。ただ、これだけだと、
- ヘッダーの高さが狭すぎる
- 奥の画面を引っ込めるようなアニメーションがない
ので何とかしたい。
ヘッダーの高さを調整する
React Navigation がヘッダーの高さを計算しているコードを参考に、以下のように指定した。
const getDefaultHeaderHeight = (layout: ScaledSize): number => {
  const isLandscape = layout.width > layout.height;

  if (Platform.OS === 'ios') {
    if (isLandscape && !Platform.isPad) {
      return 32;
    } else {
      return 56;
    }
  } else if (Platform.OS === 'android') {
    return 56;
  } else {
    return 64;
  }
};
これを使って、headerStyle.height を上書きする。
const windowDimensions = useWindowDimensions();
const headerHeight = getDefaultHeaderHeight(windowDimensions);

<Stack.Screen
  ...
  options={{
    ...
    cardOverlayEnabled: true,
    cardStyleInterpolator: CardStyleInterpolators.forModalPresentationIOS,
    headerStatusBarHeight: 0,
    headerStyle: {
      height: headerHeight
    }
  }}
/>
-
[iOS13の半モーダル/モーダルUIの特徴|Masashige Obana|note]( ↩︎
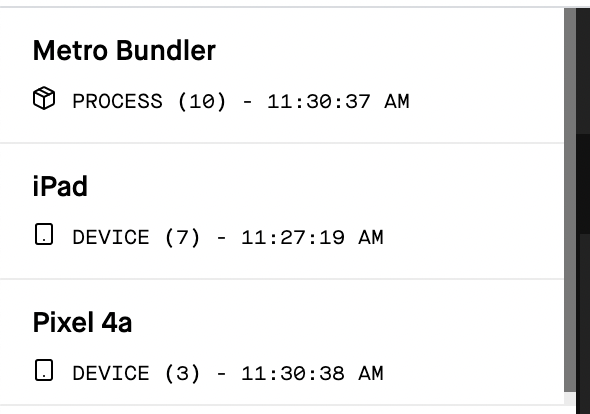
QR コードからデバイスで実行していると console.log の出力が出ない。ログインしていないと駄目?
- iPhone の Expo Go だと出ない
- Android/iPad なら出る
Metro のデバイス一覧にも出ていない
Android の Expo Go だと numeric separator が動かない(クラッシュする)ので、no-numeric-separators を導入した。