🔰
GitHub Actionsを利用して ECS(Fargate)へ自動デプロイしたい


大まかな手順
- Amazon ECRリポジトリの作成
- ECSの作成
- GitHubにAWS CLIのシークレットを登録
- GitHub Actions yamlファイルの作成
ECRリポジトリの作成
管理コンソールでポチポチ作成する。またはCLIを利用する。
aws cli
aws ecr create-repository \
    --repository-name [リポジトリ名] \
    --image-scanning-configuration scanOnPush=true \
    --region [リージョン名]
ECSの作成
管理コンソールでポチポチ作成する。
- クラスターを作成する
- タスク定義を作成する
- サービスを作成する
Secrets Manager
もしECSのアプリからDB接続情報などを連携したい場合はこちらのSecrets Managerを利用するのがよい。
ただし、ハマりポイントがあるので要注意。
GitHubにAWS CLIのシークレットを登録
GitHubリポジトリのSecrets and variables > Actions にて
- AWS_ACCESS_KEY_ID
- AWS_SECRET_ACCESS_KEY
を登録しておきましょう。

GitHub Actions yamlファイルの作成
GitHubのActionsタブからNew workflowを選択して、Fargateと検索。
みつかったこちらのテンプレートを利用しましょう。
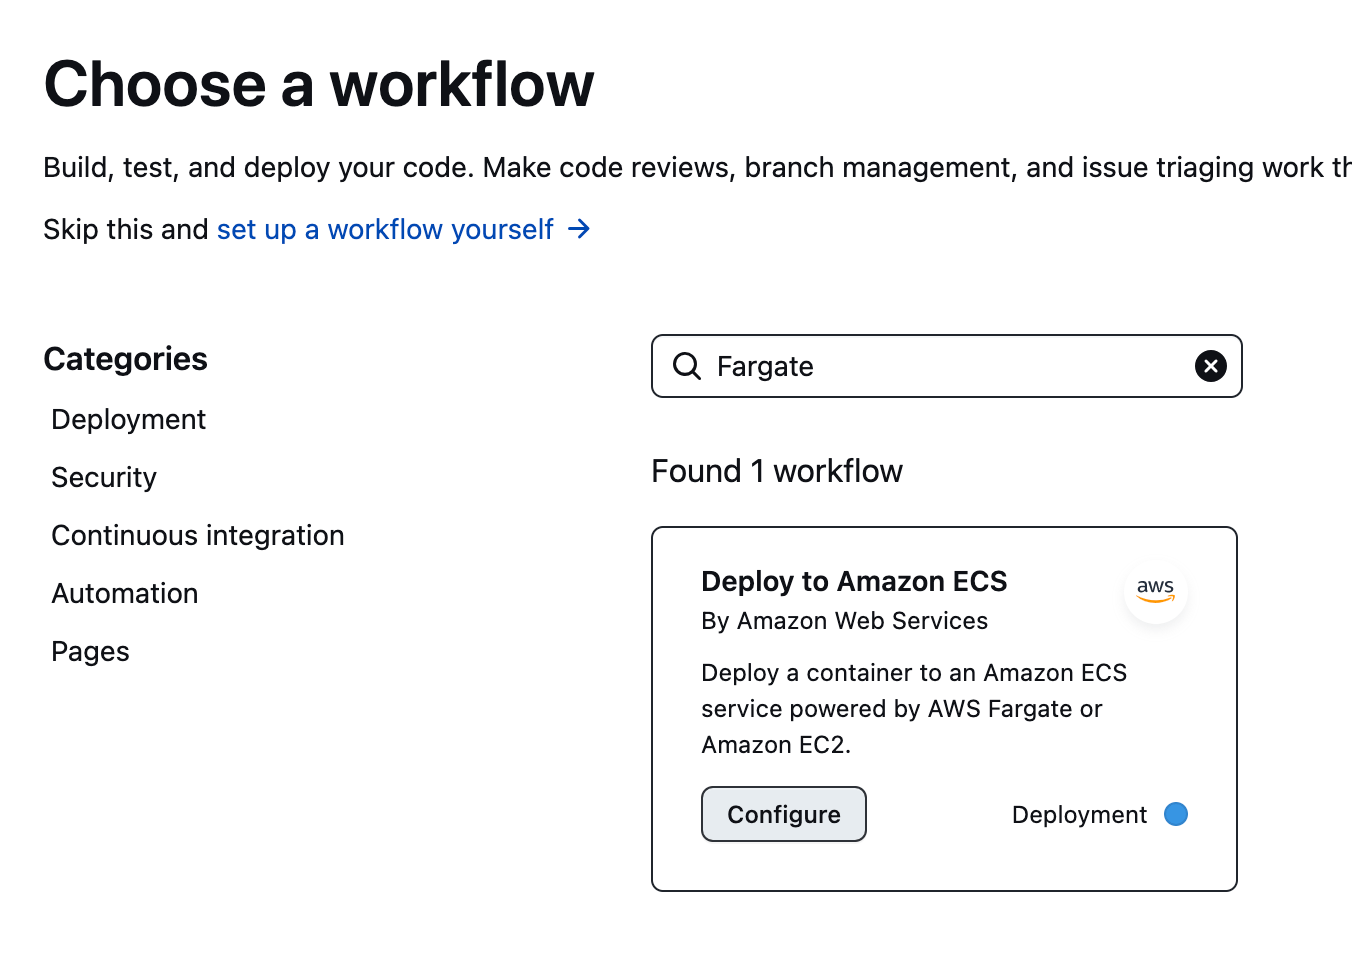
前の手順で作成した、リポジトリやクラスター、サービス、タスク定義の情報に差し替えましょう。
aws.yml
name: Deploy to Amazon ECS

on:
  push:
    branches: [ "main" ]

env:
  AWS_REGION: MY_AWS_REGION                   # set this to your preferred AWS region, e.g. us-west-1
  ECR_REPOSITORY: MY_ECR_REPOSITORY           # set this to your Amazon ECR repository name
  ECS_SERVICE: MY_ECS_SERVICE                 # set this to your Amazon ECS service name
  ECS_CLUSTER: MY_ECS_CLUSTER                 # set this to your Amazon ECS cluster name
  ECS_TASK_DEFINITION: MY_ECS_TASK_DEFINITION # set this to the path to your Amazon ECS task definition
                                               # file, e.g. .aws/task-definition.json
  CONTAINER_NAME: MY_CONTAINER_NAME           # set this to the name of the container in the
                                               # containerDefinitions section of your task definition

permissions:
  contents: read

jobs:
  deploy:
    name: Deploy
    runs-on: ubuntu-latest
    environment: production

    steps:
    - name: Checkout
      uses: actions/checkout@v3

    - name: Configure AWS credentials
      uses: aws-actions/configure-aws-credentials@v1
      with:
        aws-access-key-id: ${{ secrets.AWS_ACCESS_KEY_ID }}
        aws-secret-access-key: ${{ secrets.AWS_SECRET_ACCESS_KEY }}
        aws-region: ${{ env.AWS_REGION }}

    - name: Login to Amazon ECR
      id: login-ecr
      uses: aws-actions/amazon-ecr-login@v1

    - name: Build, tag, and push image to Amazon ECR
      id: build-image
      env:
        ECR_REGISTRY: ${{ steps.login-ecr.outputs.registry }}
        IMAGE_TAG: ${{ github.sha }}
      run: |
        # Build a docker container and
        # push it to ECR so that it can
        # be deployed to ECS.
        docker build -t $ECR_REGISTRY/$ECR_REPOSITORY:$IMAGE_TAG .
        docker push $ECR_REGISTRY/$ECR_REPOSITORY:$IMAGE_TAG
        echo "image=$ECR_REGISTRY/$ECR_REPOSITORY:$IMAGE_TAG" >> $GITHUB_OUTPUT

    - name: Fill in the new image ID in the Amazon ECS task definition
      id: task-def
      uses: aws-actions/amazon-ecs-render-task-definition@v1
      with:
        task-definition: ${{ env.ECS_TASK_DEFINITION }}
        container-name: ${{ env.CONTAINER_NAME }}
        image: ${{ steps.build-image.outputs.image }}

    - name: Deploy Amazon ECS task definition
      uses: aws-actions/amazon-ecs-deploy-task-definition@v1
      with:
        task-definition: ${{ steps.task-def.outputs.task-definition }}
        service: ${{ env.ECS_SERVICE }}
        cluster: ${{ env.ECS_CLUSTER }}
        wait-for-service-stability: true
以上です。
最後に
ECS FargateよかAppRunnerを使うのが一番ラクに環境構築できます。
Discussion