【Spring Boot】カテゴリCRUDを作ってみた(Controller + 画面編)
はじめに
最近、SkillLogアプリという簡単なログ管理Webアプリを作っています。
その中で「カテゴリ別にログを管理したい」という機能を作成した際の、**Controller層と画面(Thymeleaf)**の実装メモを残します。
「@Controller」「@RequestMapping」「@GetMapping」や
「@ModelAttribute」「@Valid」など、実務でよく使うアノテーションの基本的な使い方がわかる記事にしたいと思います。
実現すること
- カテゴリの新規作成/編集/一覧/削除(CRUD)
Controllerの実装
1️⃣ URLとControllerの流れ
@Controller
@RequestMapping("/categories")
public class CategoryController {
    ...
    @GetMapping("/new")
    public String createForm(Model model) {
        model.addAttribute("category", new Category());
        return "category/form";
    }
}
@Controller / @RequestMapping / @GetMapping とは?
@Controller を付けたクラスは、Webから送られてきたリクエスト(例:URLアクセス)を受け取る役割としてSpring Bootに認識されます。
@RequestMapping("/categories") により、このクラスが /categories 配下のURLを担当するというルールが定義されます。
(例: /categories や /categories/new などのリクエストがこのクラスで処理されるようになる)
@GetMapping("/new") により、ブラウザからGET /categories/new にアクセスがあった時に、このメソッドを呼ぶというルーティングが定義されます。
📚 どんな流れで動く?
下記の図のような流れで動きます。

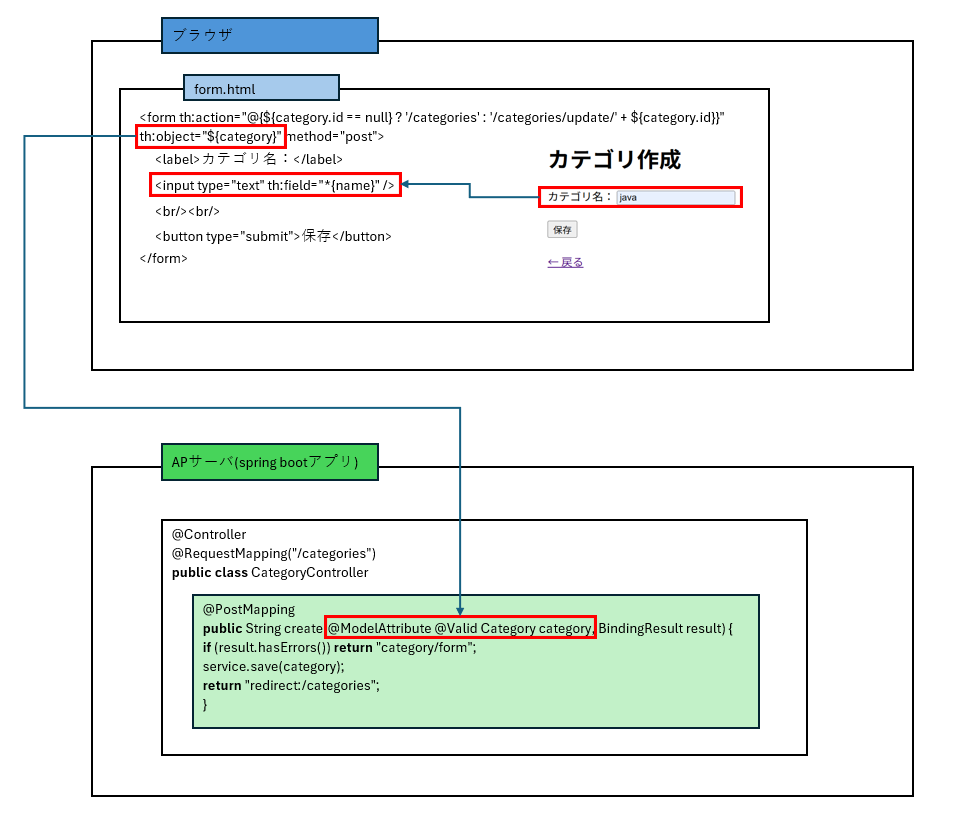
2️⃣ フォームとバインディング
form.html
<form th:action="@{${category.id == null} ? '/categories' : '/categories/update/' + ${category.id}}"
      th:object="${category}" method="post">
    <label>カテゴリ名:</label>
    <input type="text" th:field="*{name}" />
    <br/><br/>
    <button type="submit">保存</button>
</form>
CategoryController.java
@PostMapping
public String create(@ModelAttribute @Valid Category category, BindingResult result) { ... }
-
@ModelAttribute
HTMLの<form>の各入力項目と、Javaのフィールド(たとえばcategory.name)を自動でマッピングしてくれる。
(Spring MVCでは引数にオブジェクトがあれば、自動的に @ModelAttribute を付与したのと同じ動作をする。) -
th:object="${category}"
フォーム全体をCategoryオブジェクトと結びつける。 -
th:field="*{name}"
画面の入力値を、th:object で指定したオブジェクトのフィールドとバインドさせる。
📚 どのようなイメージ?
下記の図のようなイメージです。
📝補足
-
@ModelAttributeは省略可能です。(引数が1つの場合、Spring MVCが自動的に付与と同等の扱いをします。) -
th:object="${category}"によってフォーム全体のデータがCategoryオブジェクトと結びつきます。 -
th:field="*{name}"はcategory.nameを指し、対応するフィールドに値がバインドされます。
3️⃣ バリデーションの流れ(補足)
CategoryController.java
@PostMapping
public String create(@ModelAttribute @Valid Category category, BindingResult result) { ... }
-
@Valid:Categoryクラスに定義されたバリデーションを実行。 -
BindingResult:エラー情報を保持。これがないと@Validが機能しない。
ポイント補足:
- @Validの後にBindingResultをすぐ書く必要がある。(順番注意)
- th:errors="*{name}"などでエラーメッセージを画面に表示できる。
一覧画面とform画面のコード紹介
list.html(一覧画面)

<table class="table table-bordered">
  <thead>
    <tr>
      <th>ID</th>
      <th>カテゴリ名</th>
      <th>操作</th>
    </tr>
  </thead>
  <tbody>
    <tr th:each="category : ${categories}">
      <td th:text="${category.id}">1</td>
      <td th:text="${category.name}">開発</td>
      <td>
        <a th:href="@{'/categories/edit/' + ${category.id}}">編集</a>
      </td>
    </tr>
  </tbody>
</table>
form.html(新規/編集共通フォーム)
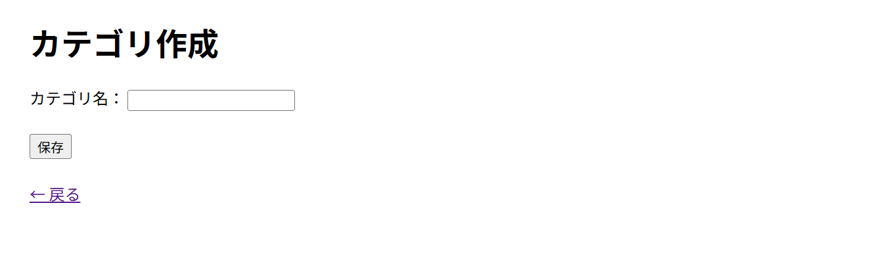
<form th:action="@{${category.id == null} ? '/categories' : '/categories/update/' + ${category.id}}"
      th:object="${category}" method="post">

  <div class="mb-3">
    <label class="form-label">カテゴリ名:</label>
    <input type="text" th:field="*{name}" class="form-control" />

    <div th:if="${#fields.hasErrors('name')}" class="text-danger">
      <p th:errors="*{name}">カテゴリ名のエラー</p>
    </div>
  </div>

  <button type="submit" class="btn btn-primary">保存</button>
</form>
まとめ
今回は、「Controller + 画面」側の基本的な作り方を整理してみました。
特に:
- @Controller / @RequestMapping の役割
- フォームバインディング(@ModelAttribute)
- バリデーションとエラーメッセージ
などは実務でもかなり使う頻度が高いので、「なるほど!」と思った部分は今後も意識して活かしていきたいです。
次回は 「バリデーション付きのカテゴリ作成処理(POST)」 を投稿予定です 👏
Discussion